ESP32 C3 Super Mini 버튼 디바운스
ESP32 C3 Super Mini에서 적절한 디바운스 기술로 버튼 채터링을 제거하는 방법을 배웁니다. 이 튜토리얼은 버튼 누르기를 정확하게 처리하는 간단한 방법을 보여줍니다.
이 튜토리얼에서 배울 내용:
- 버튼 디바운스가 무엇이며 왜 중요한지
- ESP32 C3 Super Mini에서 코드를 사용하여 버튼을 디바운스하는 방법
- 더 쉬운 디바운싱을 위해 ezButton 라이브러리를 사용하는 방법
- 여러 버튼을 동시에 디바운스하는 방법
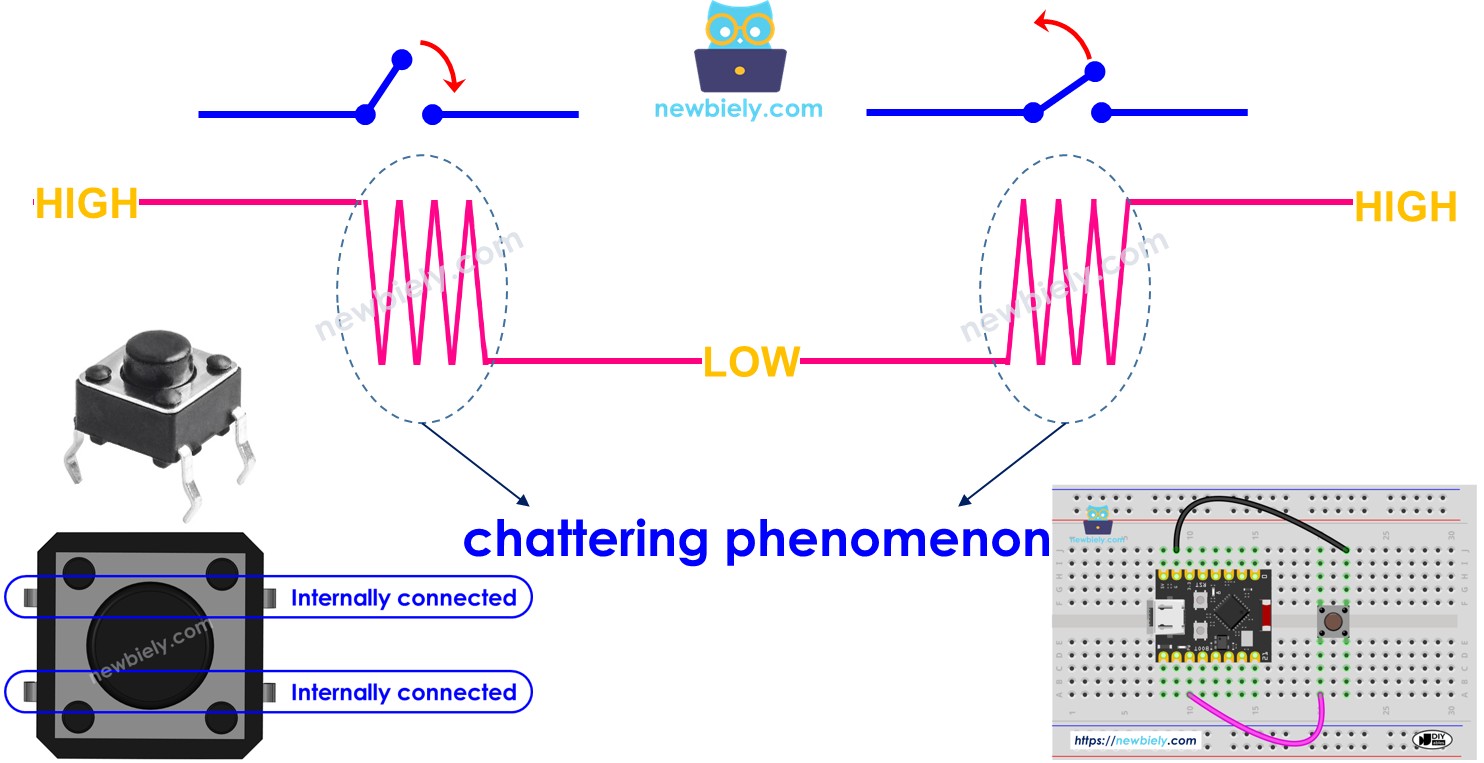
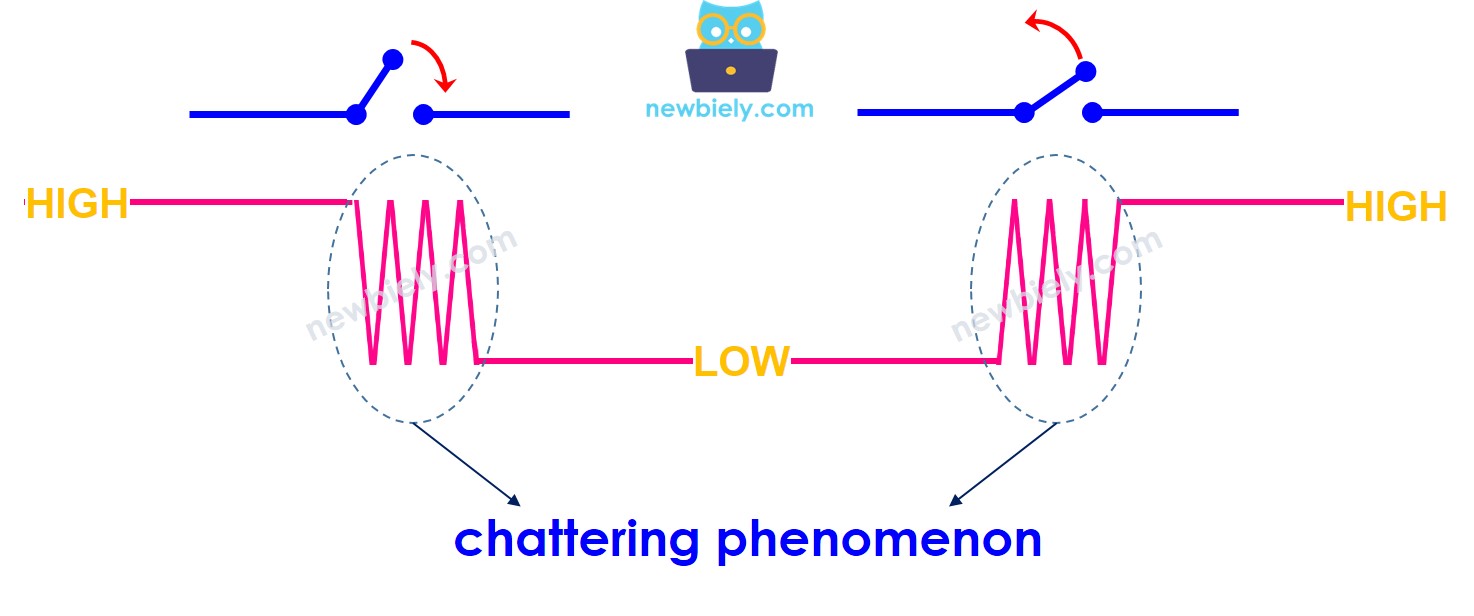
버튼을 누르면 상태가 LOW에서 HIGH로 (또는 HIGH에서 LOW로) 한 번에 변경됩니까? 아닙니다! 실제로 버튼을 누르면 상태가 LOW와 HIGH 사이에서 매우 빠르게 여러 번 토글됩니다. 이것은 채터링이라고 불리는 기계식 버튼의 물리적 특성입니다. 채터링 현상으로 인해 ESP32 C3 Super Mini가 한 번만 누른 것을 여러 번 감지하여 프로젝트에서 오류가 발생합니다. 이 문제를 제거하는 솔루션을 버튼 디바운스라고 합니다.
이 튜토리얼은 다음을 포함합니다:
- ESP32 내장 코드로 단일 버튼 디바운싱
- 간단한 디바운스 구현을 위해 ezButton 라이브러리 사용
- ESP32 C3 Super Mini에서 여러 버튼의 디바운스 처리
- 디바운스가 있는 경우와 없는 경우의 결과 비교
필요한 하드웨어
| 1 | × | ESP32 C3 Super Mini | 아마존 | |
| 1 | × | USB 케이블 타입-A to 타입-C (USB-A PC용) | 쿠팡 | 아마존 | |
| 1 | × | USB 케이블 타입-C to 타입-C (USB-C PC용) | 아마존 | |
| 1 | × | 캡이 있는 버튼 | 쿠팡 | 아마존 | |
| 1 | × | 버튼 키트 | 쿠팡 | 아마존 | |
| 1 | × | 패널 장착 푸시 버튼 | 아마존 | |
| 1 | × | 푸시 버튼 모듈 | 아마존 | |
| 1 | × | 브레드보드 | 쿠팡 | 아마존 | |
| 1 | × | 점퍼케이블 | 쿠팡 | 아마존 | |
| 1 | × | (옵션) DC 커넥터 전원 연결 잭 플러그 소켓 | 쿠팡 | 아마존 |
버튼 정보
버튼은 눌리거나 놓이는 시점을 감지하는 입력 장치입니다.
ESP32 C3 Super Mini의 버튼에 대한 모든 것을 다루는 전용 튜토리얼이 있습니다:
- 완전한 핀아웃 세부 사항
- 버튼의 작동 원리
- 배선 연결
- 샘플 코드 예제
- 단계별 지침
더 알아보기: ESP32 C3 Super Mini - 버튼
배선 다이어그램
아래 배선 다이어그램은 버튼을 ESP32 C3 Super Mini에 연결하는 방법을 보여줍니다.
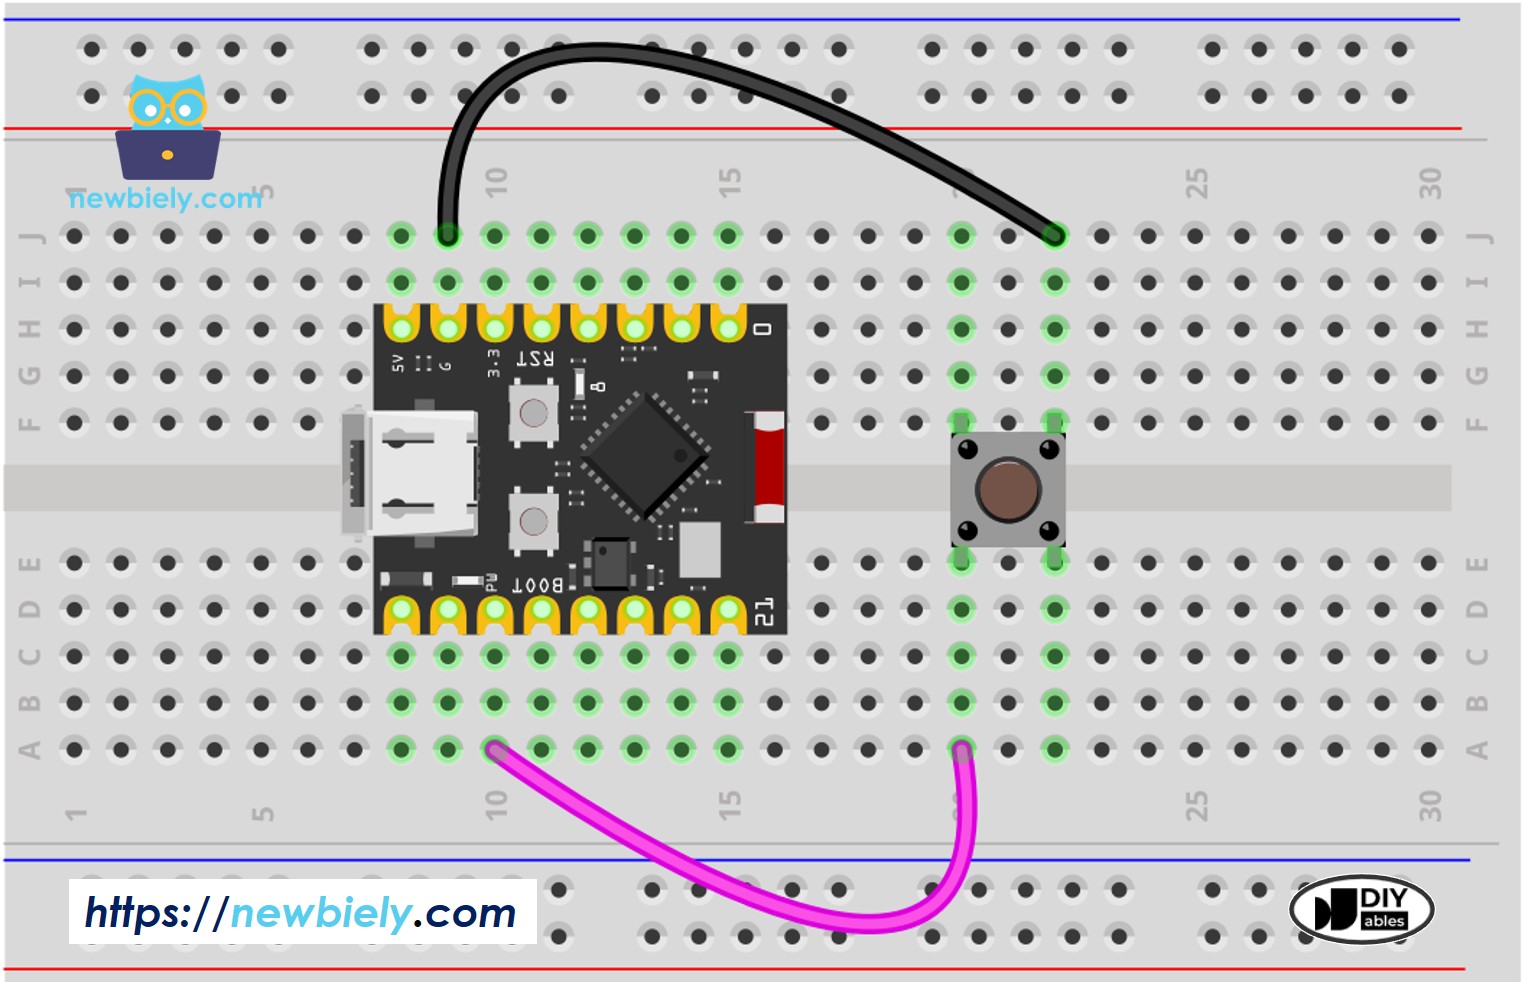
이 이미지는 Fritzing을 사용하여 만들어졌습니다. 이미지를 확대하려면 클릭하세요.
| Button Pin | ESP32 C3 Super Mini Pin |
|---|---|
| One pin | GPIO7 |
| Other pin | GND |
차이점을 명확하게 보기 위해 먼저 디바운스 없이 ESP32 C3 Super Mini 코드를 실행한 후 디바운스를 포함하여 결과를 비교합니다.
디바운스 없이 버튼 읽기
빠른 단계
- Arduino를 처음 사용하세요? 먼저 ESP32 C3 Super Mini 시작하기 가이드를 시작하세요.
- 컴포넌트 연결: 위에 표시된 배선 다이어그램을 따라 버튼을 GPIO7 핀에 연결합니다.
- 보드 연결: USB Type-C 케이블을 사용하여 ESP32 C3 Super Mini를 컴퓨터에 연결합니다.
- Arduino IDE 열기: 컴퓨터에서 Arduino IDE를 실행합니다.
- 보드 선택: Tools 메뉴에서 "ESP32 C3 Super Mini"과 올바른 COM 포트를 선택합니다.
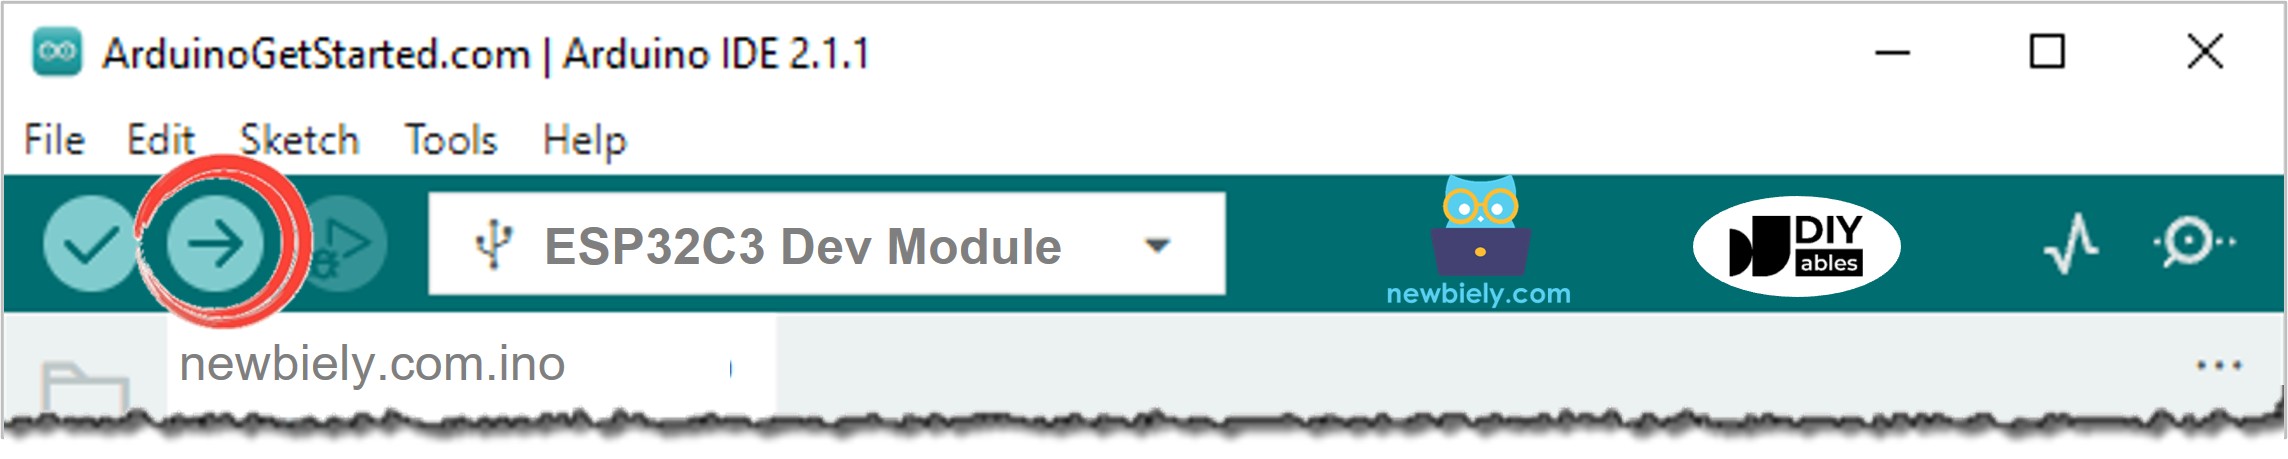
- 코드 업로드: 아래 코드를 복사하여 ESP32 C3 Super Mini 보드에 업로드합니다.
- Serial Monitor 열기: Serial Monitor 아이콘을 클릭하여 출력을 확인합니다.
- 버튼 테스트: 버튼을 한 번 누르고 몇 초 동안 누른 후 놓습니다.
- 결과 관찰: Serial Monitor 출력에서 여러 누르기/놓기 이벤트를 확인합니다.
- Pro Tip: 채터링이 즉시 보이지 않으면 버튼을 여러 번 눌러보세요 - 간헐적으로 나타나는 임의 현상입니다.
Serial Monitor 출력:
⇒ 보시다시피 버튼을 한 번만 눌렀고 한 번 놓았지만 채터링 때문에 ESP32 C3 Super Mini가 여러 번의 누르기와 놓기를 감지했습니다.
※ 주의:
채터링 현상은 항상 발생하지는 않습니다. 발생하지 않으면 위의 테스트를 여러 번 시도하여 관찰합니다.
디바운스를 포함하여 버튼 읽기
이 코드는 ESP32 C3 Super Mini에서 버튼 디바운스를 구현하여 채터링을 제거합니다.
이 디바운스 코드가 하는 일:
- 버튼 상태 변경 시간 기록
- 변경을 확인하기 전에 짧은 지연 (디바운스 시간) 대기
- 디바운스 기간 동안 빠른 상태 변경 무시
- 안정적인 버튼 누르기 및 놓기만 보고
빠른 단계
- Arduino를 처음 사용하세요? 먼저 ESP32 C3 Super Mini 시작하기 가이드를 시작하세요.
- 코드 복사: 아래 디바운스 코드를 Arduino IDE에 복사합니다.
- 코드 업로드: Upload 버튼을 클릭하여 ESP32 C3 Super Mini를 프로그래밍합니다.
- Serial Monitor 열기: Serial Monitor 아이콘을 클릭하여 출력을 확인합니다.
- 버튼 테스트: 버튼을 누르고 몇 초 동안 누른 후 놓습니다.
- 결과 관찰: 이제 버튼 누르기 한 개와 놓기 한 개만 표시되는 것을 알 수 있습니다.
- Pro Tip: 여전히 채터링이 보이면 DEBOUNCE_TIME 값을 50에서 100 밀리초로 증가해 보세요.
Serial Monitor 출력:
⇒ 완벽합니다! 한 번 눌렀고 한 번 놓았고 ESP32 C3 Super Mini가 올바르게 한 번의 누르기와 한 번의 놓기를 읽었습니다. 적절한 버튼 디바운스로 채터링이 제거되었습니다.
간단하게 만들었습니다 - 라이브러리를 사용한 ESP32 C3 Super Mini 버튼 디바운스 코드
특히 ESP32 C3 Super Mini에서 여러 버튼을 작업할 때 버튼 디바운싱을 훨씬 더 쉽게 만드는 ezButton 라이브러리를 만들었습니다.
ezButton 라이브러리 사용의 이점:
- 버튼 디바운스를 위한 간단한 한 줄 설정
- 깔끔하고 읽기 쉬운 코드
- 여러 버튼을 쉽게 관리
- 누르기 및 놓기 감지를 위한 내장 함수
- 복잡한 타이밍 코드 필요 없음
더 알아보기: ezButton 라이브러리 문서
단일 버튼을 위한 ESP32 C3 Super Mini 버튼 디바운스 코드
이 예제는 ESP32 C3 Super Mini에서 ezButton 라이브러리를 사용하여 단일 버튼을 디바운스하는 방법을 보여줍니다.
여러 버튼을 위한 ESP32 C3 Super Mini 버튼 디바운스 코드
이 예제는 ezButton 라이브러리를 사용하여 ESP32 C3 Super Mini에서 동시에 3개의 버튼을 디바운스하는 방법을 보여줍니다.
배선 다이어그램
아래와 같이 3개의 버튼을 ESP32 C3 Super Mini에 연결합니다.
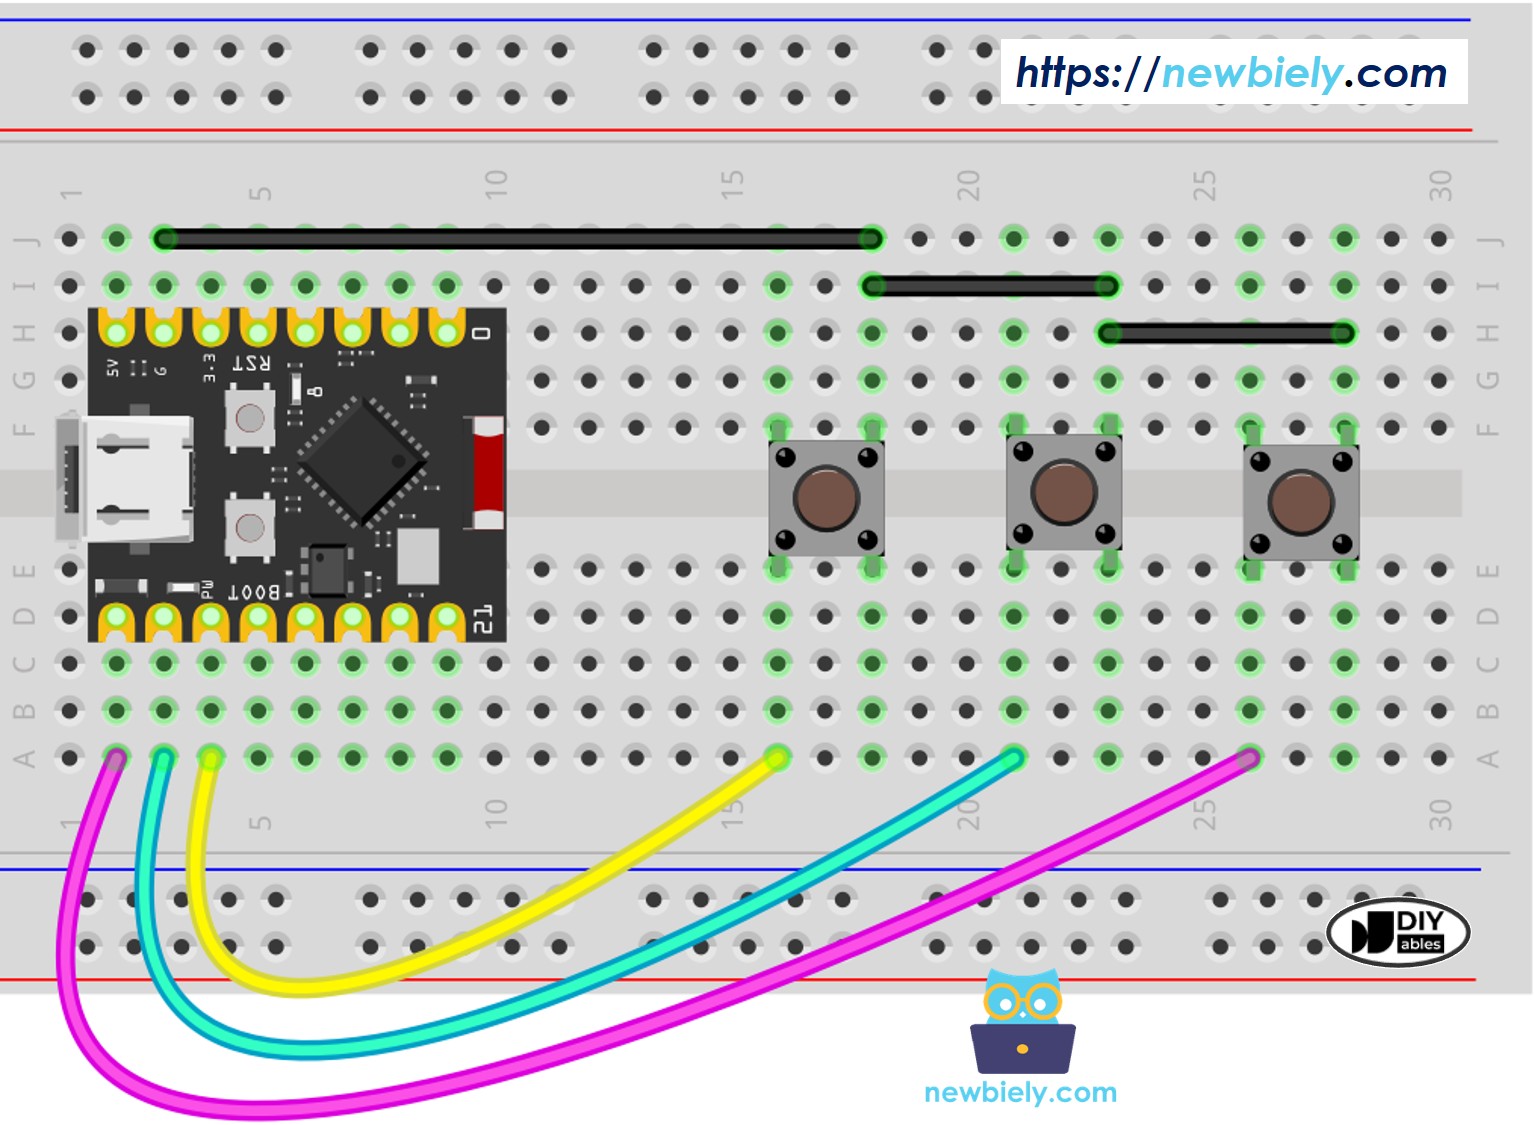
이 이미지는 Fritzing을 사용하여 만들어졌습니다. 이미지를 확대하려면 클릭하세요.
| Button | ESP32 C3 Super Mini Pin |
|---|---|
| Button 1 | D5 and GND |
| Button 2 | D6 and GND |
| Button 3 | D7 and GND |
Serial Monitor 출력:
응용 프로그램 아이디어
ESP32 C3 Super Mini에서 버튼 디바운스가 필수적인 일부 실용적인 프로젝트는 다음과 같습니다:
- 키패드 입력이 있는 도어 잠금 장치
- 반응형 버튼 입력이 있는 게임 컨트롤러
- 홈 자동화를 위한 원격 제어 장치
- 여러 버튼이 있는 메뉴 네비게이션 시스템
- 정확한 누르기 감지가 필요한 카운터 회로
- 신뢰할 수 있는 입력이 있는 보안 경보 키패드
자신을 시도해보기
이러한 과제를 시도하여 ESP32 C3 Super Mini 버튼 디바운스 기술을 향상합니다:
- 쉬움: 디바운스 시간을 다양한 값으로 변경하고 버튼 응답에 어떻게 영향을 미치는지 관찰
- 중간: 디바운스된 입력을 사용하여 각 버튼 누르기로 켜지고 꺼지는 LED 추가
- 중간: 버튼 누르기당 한 번만 증가하고 Serial Monitor에 개수를 표시하는 카운터 생성
- 고급: 각 버튼이 다른 작업을 수행하는 디바운스가 있는 4버튼 메뉴 시스템 구축
- 고급: 짧은 누르기와 긴 누르기에 대해 다른 작업을 트리거하는 긴 누르기 감지 구현
추가 지식
ESP32 C3 Super Mini를 위한 중요한 디바운스 팁:
- DEBOUNCE_TIME 값은 특정 버튼 하드웨어에 따라 다름
- 다양한 버튼은 다양한 디바운스 시간이 필요할 수 있습니다 (일반적으로 20-100ms)
- 50ms로 시작하고 여전히 채터링이 보이면 조정합니다
- 디바운스 기술은 또한 스위치, 리미트 스위치, 리드 스위치 및 터치 센서에도 작동합니다
- 하드웨어 디바운스 (캐패시터 사용)는 중요한 응용 프로그램의 소프트웨어 디바운스를 보완할 수 있습니다


