ESP32 C3 Super Mini SSD1309 OLED 디스플레이 128x64 | 2.42인치 I2C OLED 튜토리얼
SSD1309 OLED 128×64 디스플레이(2.42인치)를 ESP32 C3 Super Mini와 I2C 인터페이스를 사용하여 사용하는 방법을 배웁니다. 이 초보자 친화적인 가이드는 기본 배선에서 비트맵 이미지 및 사용자 정의 글꼴과 같은 고급 기능까지 모든 것을 다룹니다.
이 튜토리얼에서 배울 내용:
- SSD1309 OLED 디스플레이가 무엇이고 ESP32 C3 Super Mini에서 어떻게 작동하는지
- 2.42인치 I2C OLED를 ESP32 C3 Super Mini에 배선하는 방법
- SSD1309 OLED에서 텍스트, 숫자 및 그래픽을 표시하는 방법
- 텍스트를 가운데 정렬하고 모양을 그리고 비트맵 이미지를 표시하는 방법
- 하드웨어 스크롤을 사용하고 명암도를 조정하는 방법
- Adafruit GFX 라이브러리의 사용자 정의 글꼴을 구현하는 방법
필요한 하드웨어
| 1 | × | ESP32 C3 Super Mini | 아마존 | |
| 1 | × | USB 케이블 타입-A to 타입-C (USB-A PC용) | 쿠팡 | 아마존 | |
| 1 | × | USB 케이블 타입-C to 타입-C (USB-C PC용) | 아마존 | |
| 1 | × | SSD1309 I2C OLED Display 128x64 (2.42 inch) | 아마존 | |
| 1 | × | 점퍼케이블 | 쿠팡 | 아마존 |
SSD1309 2.42인치 OLED 디스플레이 정보
SSD1309는 I2C를 통해 통신하는 128×64 도트 매트릭스 디스플레이용 CMOS OLED 드라이버 칩입니다.
주요 특징:
- 해상도: 128×64 픽셀(2.42인치 대각선)
- 인터페이스: I2C(SDA 및 SCL 두 개의 와이어만 필요)
- 호환성: SSD1306과 레지스터 호환
- 전압 허용: 최대 16V VCC 수락(SSD1306보다 높음)
- 내장 부스트 변환기: 대부분의 모듈에는 온보드 전원 조절 포함
- 낮은 전력 소비: 최대 밝기에서 20-40mA
- 흑백: 검은 배경의 흰색 픽셀
- 초보자에게 좋은 이유: 간단한 I2C 배선, 사용하기 쉬운 라이브러리, 다른 장치와 I2C 버스 공유
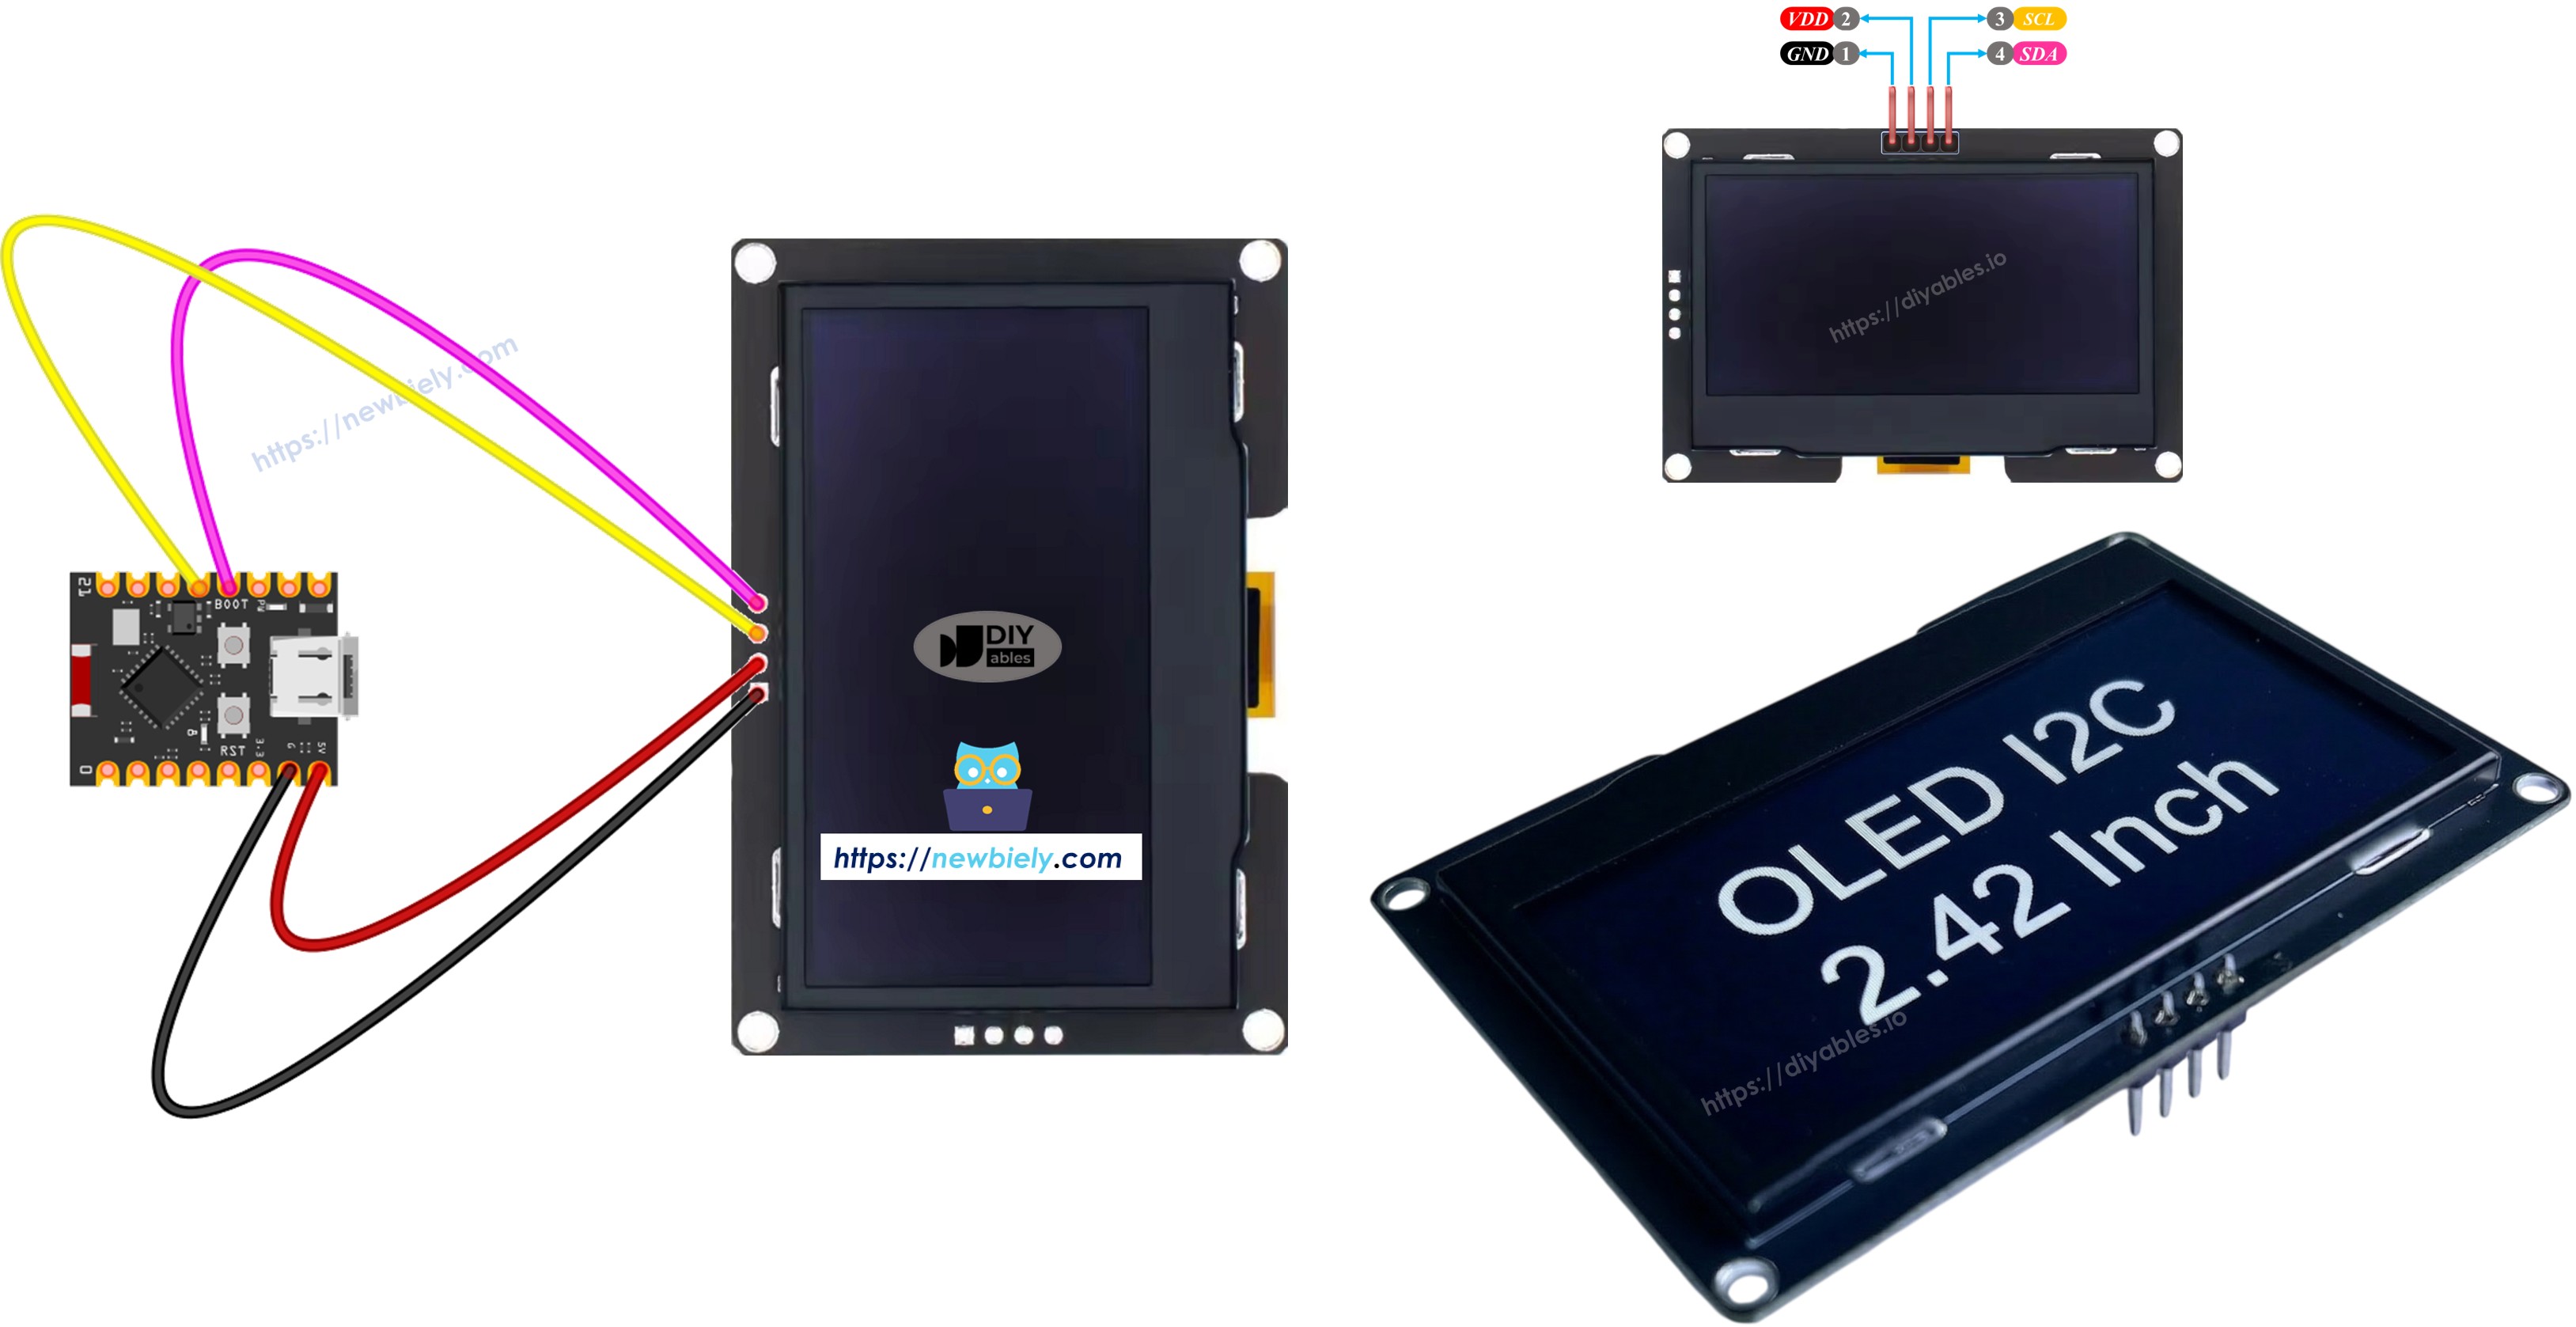
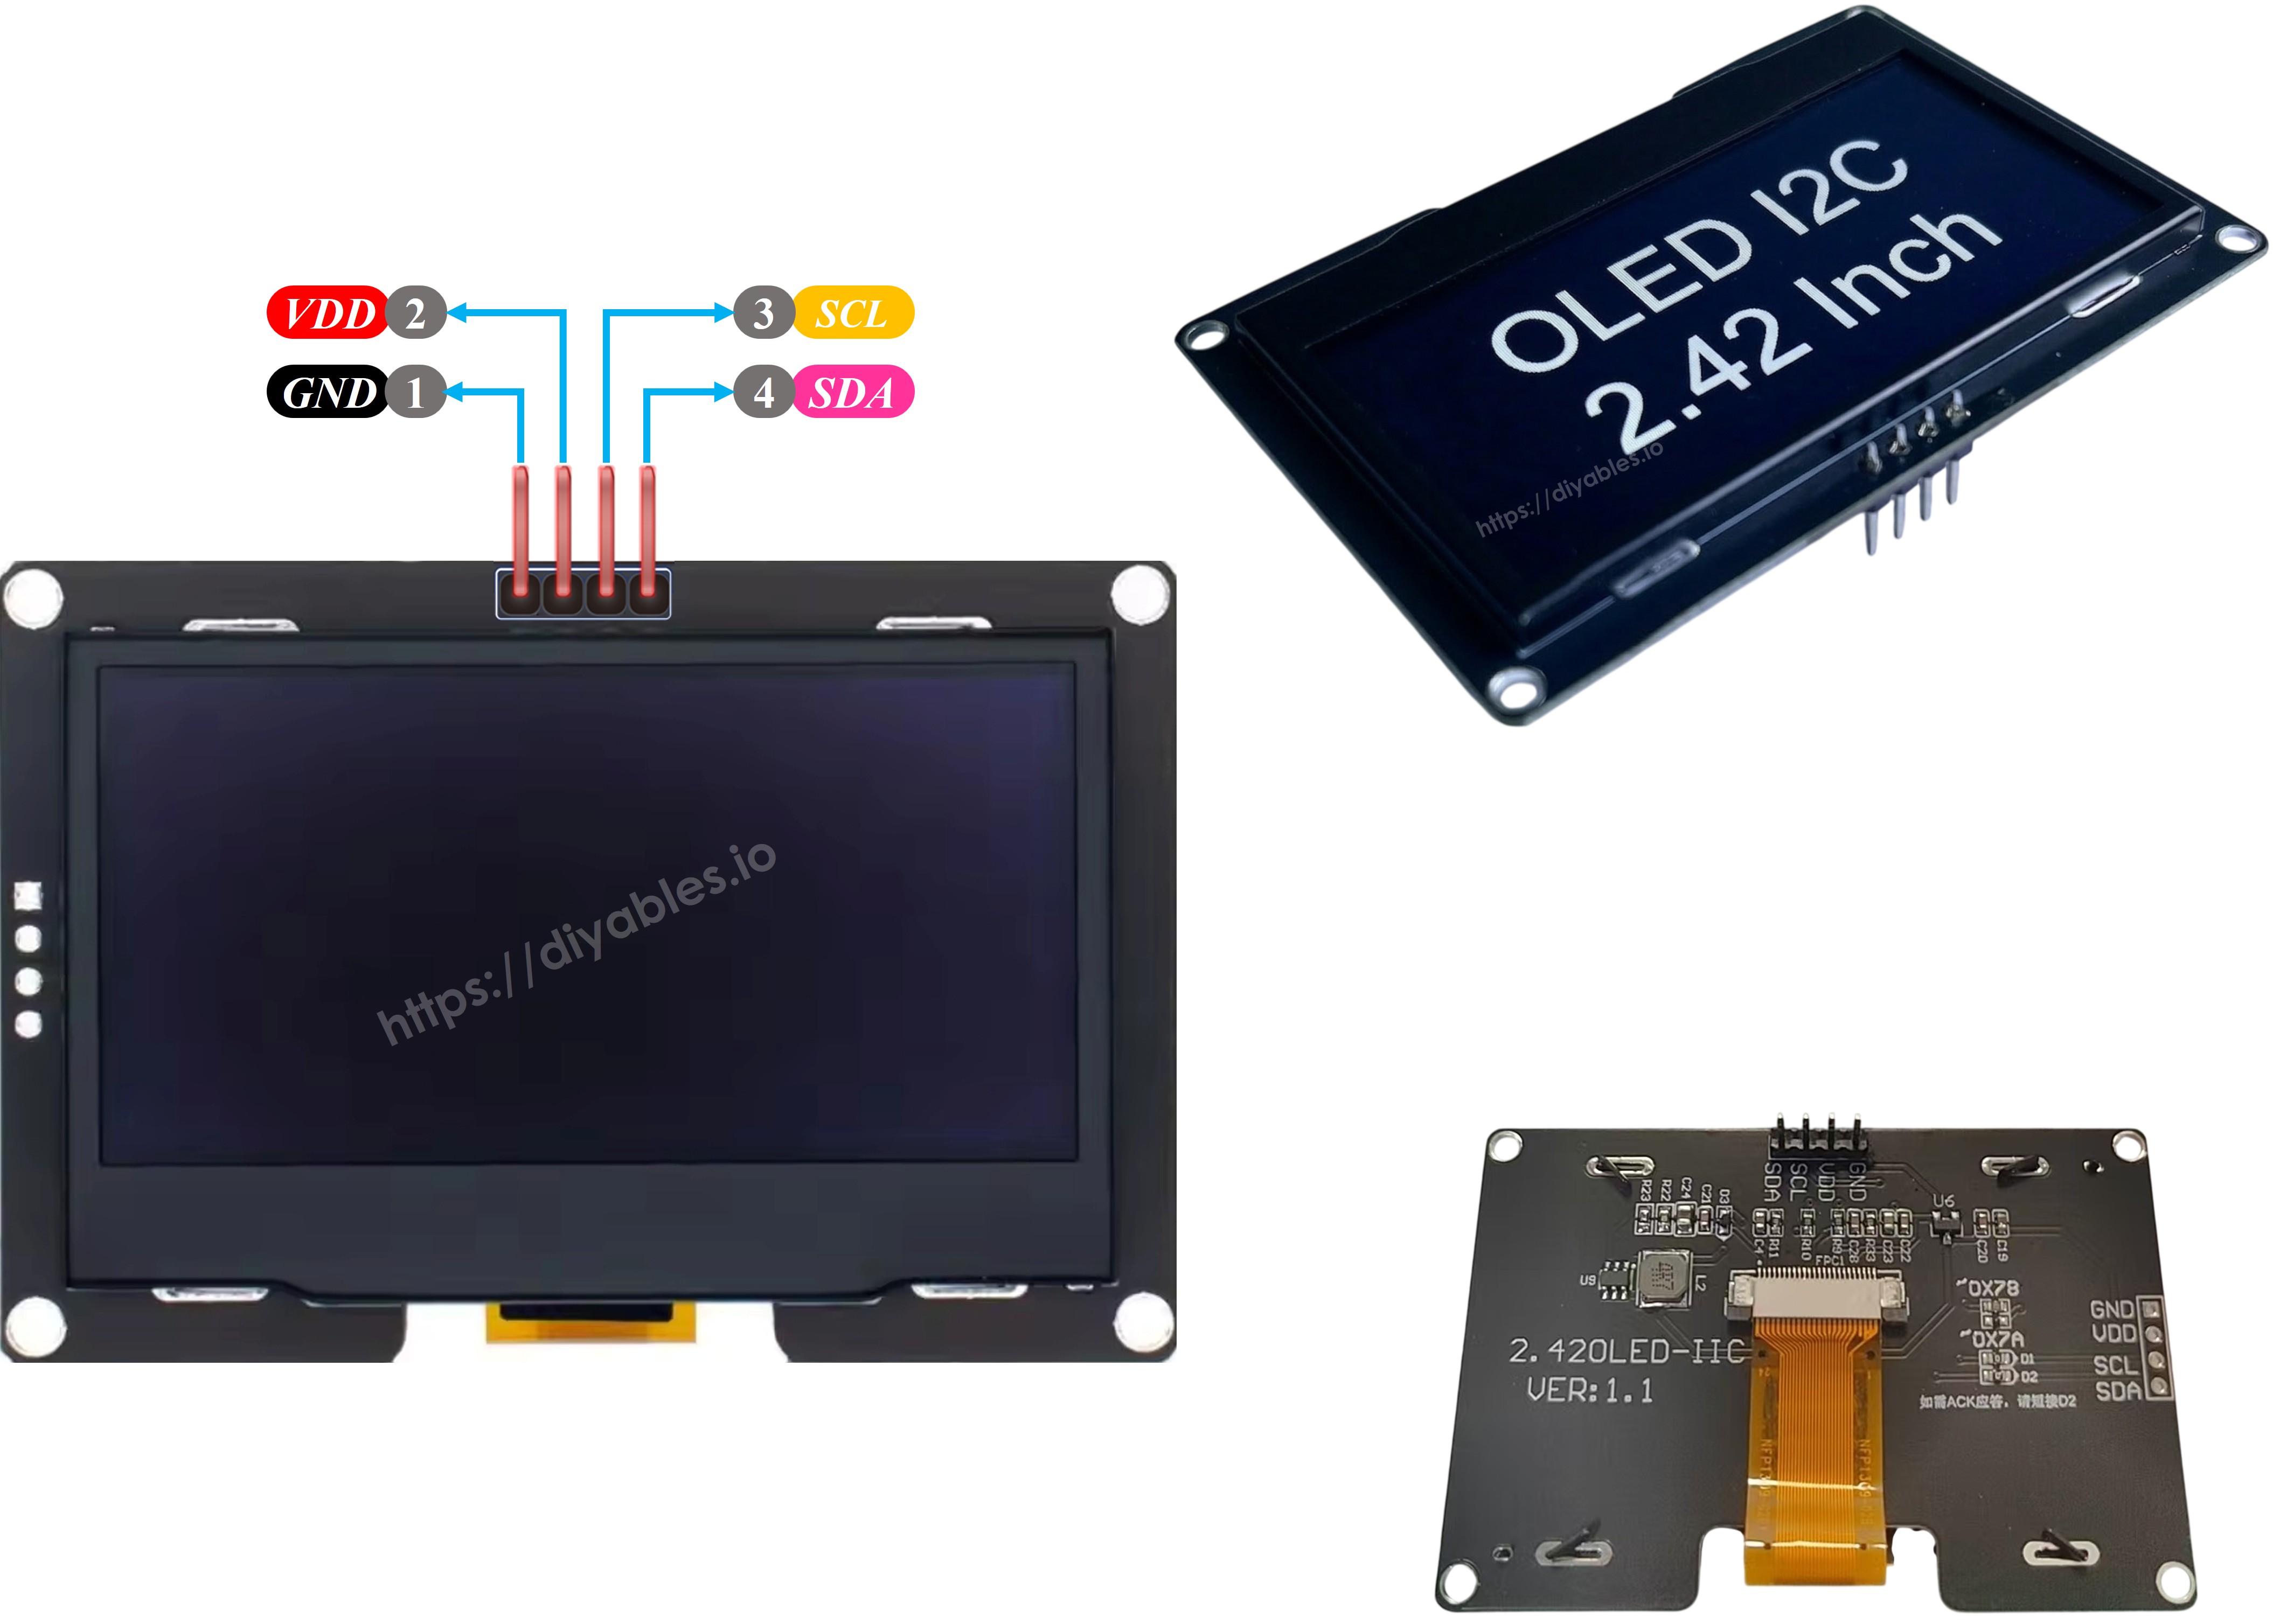
SSD1309 OLED 핀아웃(I2C 모듈)
2.42인치 SSD1309 OLED 모듈은 4개의 핀을 가지고 있습니다:
- GND: 그라운드 연결
- VCC: 전원 공급(3.3V)
- SCL: I2C 클록 라인
- SDA: I2C 데이터 라인
※ 주의:
- OLED 모듈의 핀 레이아웃은 제조업체에 따라 다를 수 있습니다. 항상 모듈 자체에 인쇄된 레이블을 사용하세요.
- 이 튜토리얼은 테스트되고 작동하는 것으로 확인된 DIYables의 SSD1309 I2C OLED를 사용합니다.
배선 다이어그램
다음 다이어그램에 따라 SSD1309 OLED 128x64 디스플레이를 ESP32 C3 Super Mini에 연결하세요:
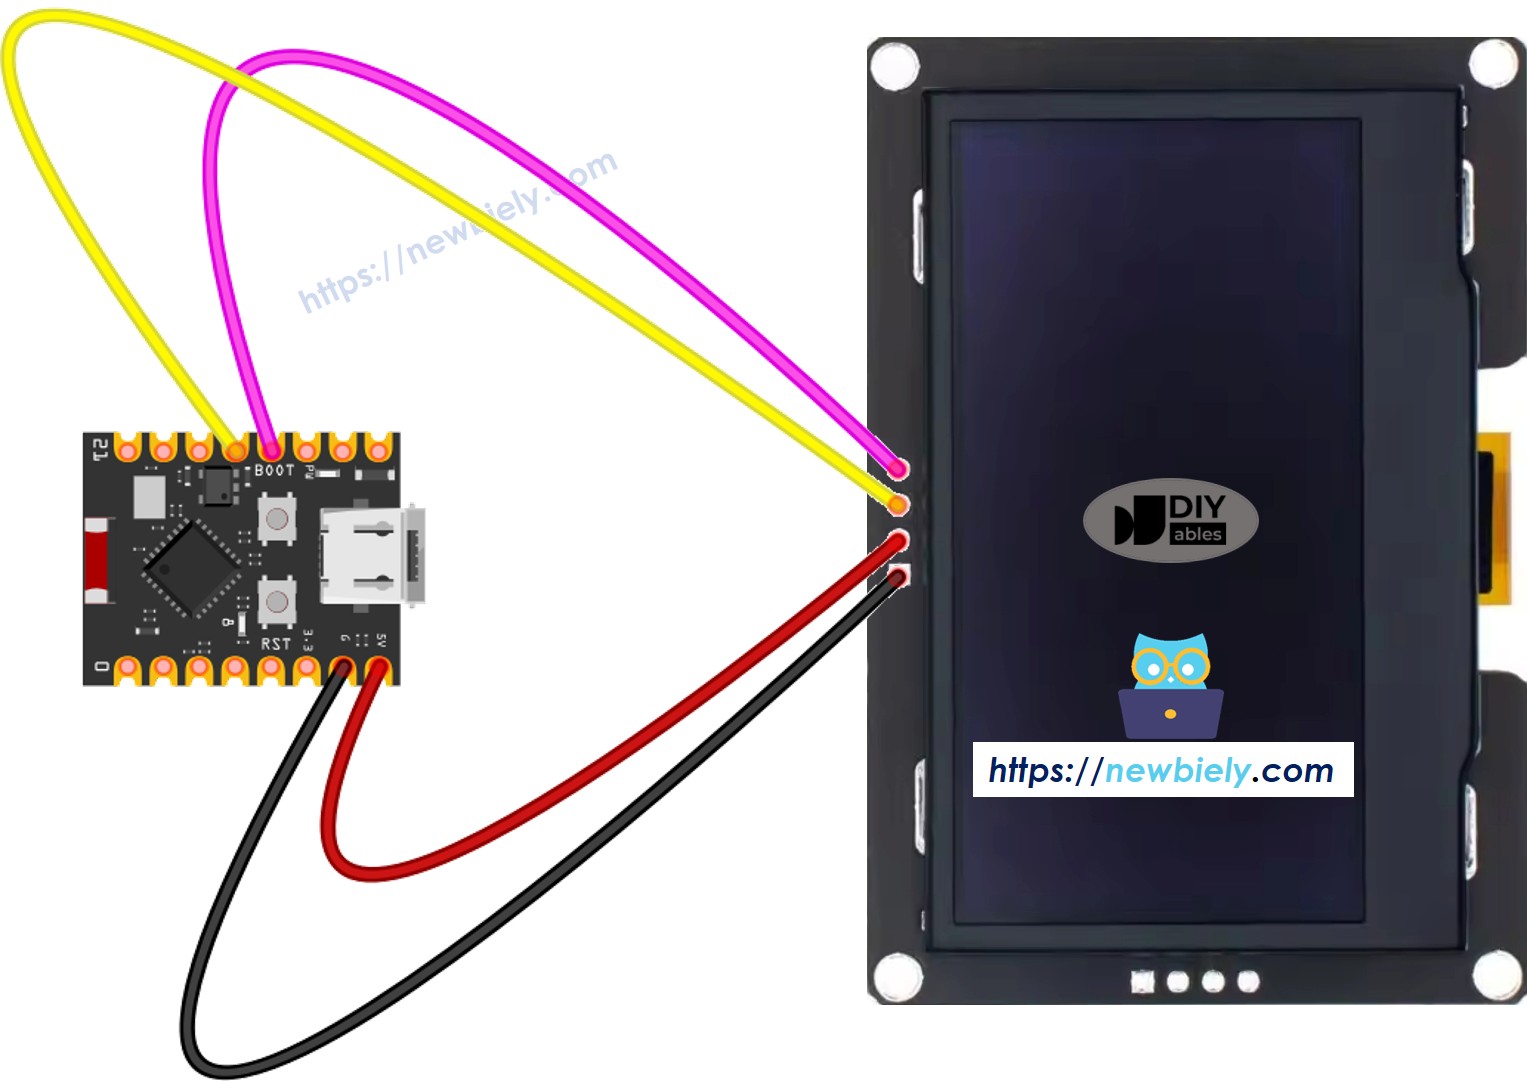
이 이미지는 Fritzing을 사용하여 만들어졌습니다. 이미지를 확대하려면 클릭하세요.
연결 테이블:
| OLED Module | ESP32 C3 Super Mini |
|---|---|
| VCC | 3.3V |
| GND | GND |
| SDA | A4 |
| SCL | A5 |
※ 주의:
- 참고: 전원을 켜기 전에 연결이 안전한지 확인하세요
- 참고: I2C 핀(A4/A5)은 다른 I2C 장치와 공유할 수 있습니다
ESP32 C3 Super Mini를 SSD1309 OLED에 대해 프로그래밍하는 방법
이 섹션은 필요한 라이브러리를 설치하고 ESP32 C3 Super Mini SSD1309 OLED 디스플레이를 위한 코드를 작성하는 방법을 보여줍니다.
수행할 작업:
- DIYables_OLED_SSD1309 라이브러리 및 종속성 설치
- 코드에서 I2C OLED 디스플레이 초기화
- 텍스트, 숫자 및 그래픽 표시
- 스크롤 및 사용자 정의 글꼴과 같은 고급 기능 사용
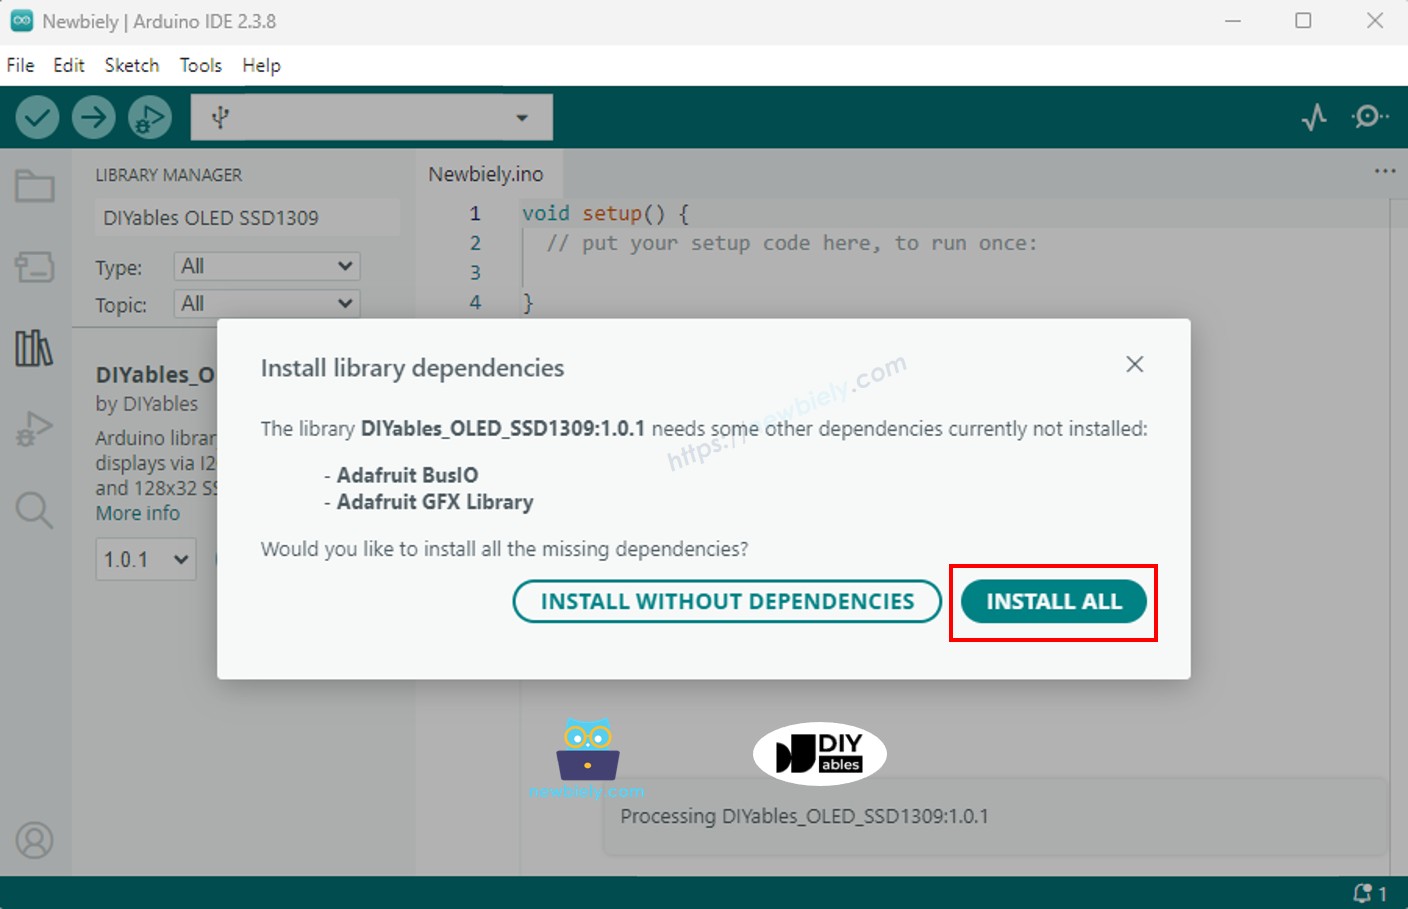
DIYables_OLED_SSD1309 라이브러리 설치
- Arduino IDE의 왼쪽 막대에서 라이브러리 아이콘을 클릭합니다.
- DIYables_OLED_SSD1309을(를) 검색한 다음 DIYables의 DIYables OLED SSD1309 라이브러리를 찾습니다.
- 설치를 클릭하여 DIYables_OLED_SSD1309 라이브러리를 설치합니다.
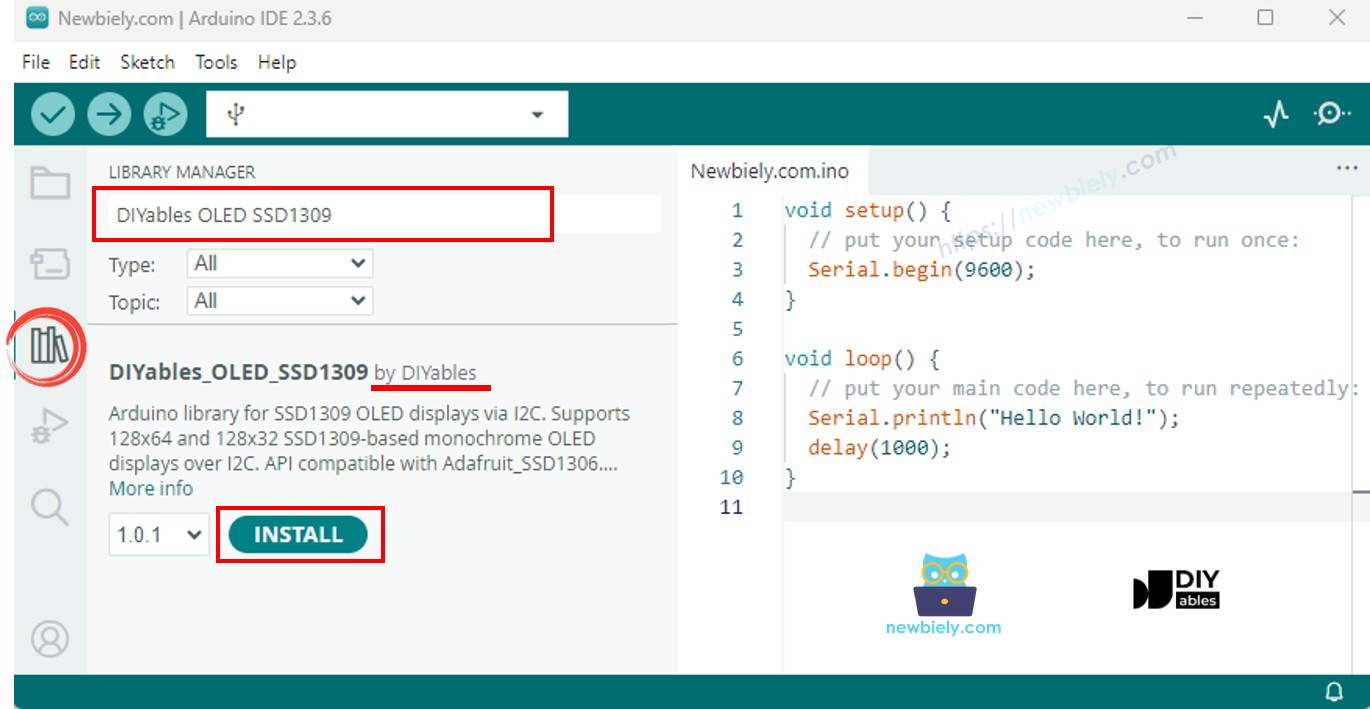
- 라이브러리의 종속성을 설치하라는 메시지가 표시됩니다.
- 모두 설치를 클릭하여 필요한 모든 종속성을 설치합니다.
프로그래밍 단계
1. 필요한 라이브러리 포함
2. 화면 치수 정의
3. 디스플레이 객체 선언
4. setup()에서 OLED 초기화
5. 콘텐츠 표시
ESP32 C3 Super Mini 코드 — SSD1309 OLED에서 Hello World
이 간단한 예제는 SSD1309 OLED 디스플레이에 "Hello World" 텍스트를 표시합니다.
이 코드가 하는 일:
- I2C OLED 디스플레이 초기화
- 화면 버퍼 지우기
- 텍스트 크기 및 위치 설정
- "Hello World" 텍스트 표시
- 버퍼를 물리 화면으로 전송
ESP32 C3 Super Mini 코드 — SSD1309 OLED에 텍스트 표시
이 예제는 여러 텍스트 크기, 숫자 형식 및 효율적인 RAM 사용을 포함한 고급 텍스트 기능을 보여줍니다.
이 코드가 하는 일:
- 다양한 크기의 텍스트 표시
- 정수 및 부동 소수점 숫자 표시
- F() 매크로를 사용하여 RAM 절약
- 10진수 및 16진수로 숫자 형식 지정
- 올바른 커서 위치 지정을 시연
유용한 디스플레이 기능 참조
기본 디스플레이 제어:
- oled.clearDisplay() — 프레임 버퍼를 지웁니다(모든 픽셀 끔)
- oled.display() — 버퍼를 OLED로 전송하여 변경이 표시되도록 합니다
- oled.drawPixel(x, y, color) — 개별 픽셀을 설정하거나 지웁니다
텍스트 기능:
- oled.setTextSize(n) — 글꼴을 인수 *n*으로 확장(1 = 6×8, 2 = 12×16 등)
- oled.setCursor(x, y) — 텍스트 커서를 픽셀 좌표 *(x, y)*로 이동
- oled.setTextColor(SSD1309_PIXEL_ON) — 텍스트 전경만(투명 배경)
- oled.setTextColor(SSD1309_PIXEL_OFF, SSD1309_PIXEL_ON) — 명시적 배경색이 있는 텍스트
- oled.println("message") — 문자열을 인쇄하고 다음 줄로 이동
- oled.println(number) — 10진수로 정수 인쇄
- oled.println(number, HEX) — 16진수로 정수 인쇄
하드웨어 스크롤:
- oled.startscrollright(start, stop) — 페이지 *start*와 *stop* 사이에서 하드웨어 스크롤 오른쪽
- oled.startscrollleft(start, stop) — 하드웨어 스크롤 왼쪽
- oled.startscrolldiagright(start, stop) — 하드웨어 스크롤 대각선 오른쪽
- oled.startscrolldiagleft(start, stop) — 하드웨어 스크롤 대각선 왼쪽
- oled.stopscroll() — 활성 하드웨어 스크롤 중지
디스플레이 설정:
- oled.setContrast(value) — 디스플레이 밝기 조정(0–255)
- oled.dim(true/false) — 신속하게 디스플레이를 어둡게 하거나 복원
- oled.invertDisplay(true/false) — 하드웨어 수준 색상 반전
SSD1309 OLED에서 텍스트를 수직 및 수평으로 가운데 정렬하는 방법
ESP32 C3 Super Mini OLED 디스플레이에서 텍스트를 가운데 정렬하면 전문적인 모양의 인터페이스를 만듭니다.
ESP32 C3 Super Mini 코드 — SSD1309 OLED에 도형 그리기
DIYables_OLED_SSD1309 라이브러리를 사용하면 128x64 OLED 디스플레이에 기하학적 모양을 그릴 수 있습니다.
이 코드가 하는 일:
- 픽셀, 선 및 직사각형 그리기
- 원 및 삼각형 만들기
- 채워진 모양 및 윤곽선 모양 표시
- 모서리가 둥근 직사각형 시연
- Adafruit GFX 그래픽 함수 사용
ESP32 C3 Super Mini 코드 — SSD1309 OLED에서 하드웨어 스크롤
SSD1309 OLED에는 CPU 리소스를 사용하지 않고 콘텐츠를 이동시키는 내장 하드웨어 스크롤이 있습니다.
이 코드가 하는 일:
- 4가지 스크롤 방향(오른쪽, 왼쪽, 대각선 오른쪽, 대각선 왼쪽)을 시연합니다
- 부드러운 스크롤을 위해 하드웨어 가속 사용
- 스크롤을 시작하고 중지하는 방법 보여주기
- 페이지 번호(8픽셀 높이 스트립의 경우 0-7)에서 작동
※ 주의:
스크롤을 시작하기 전에 display()를 호출하여 콘텐츠를 OLED로 푸시합니다. 새 콘텐츠를 그리기 전에 stopscroll()로 스크롤을 중지합니다.
ESP32 C3 Super Mini 코드 — SSD1309 OLED에 비트맵 이미지 표시
이미지를 바이트 배열로 변환하여 SSD1309 OLED에 사용자 정의 이미지를 표시합니다.
이미지를 변환하는 방법:
- image2cpp 온라인 도구로 이동
- 이미지(PNG, JPG, BMP 등) 업로드
- 캔버스 크기를 128×64(또는 더 작음)로 설정
- Arduino 코드를 출력 형식으로 선택
- 생성된 배열을 스케치에 복사
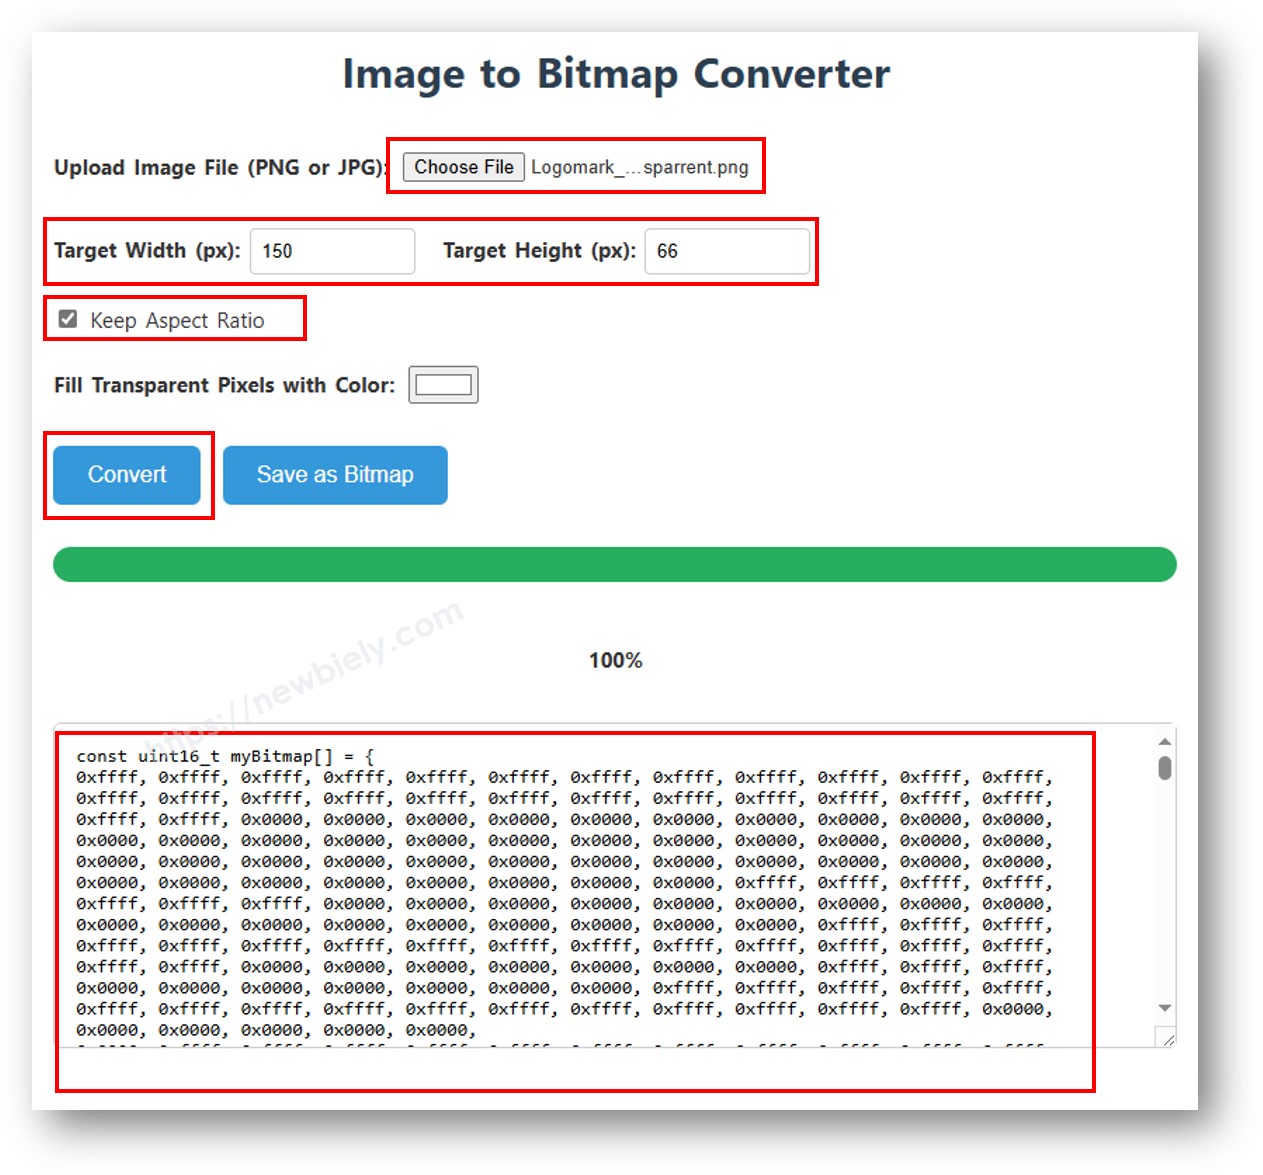
이 코드가 하는 일:
- 이미지를 흑백 비트맵으로 변환
- RAM을 절약하기 위해 비트맵 데이터를 PROGMEM에 저장
- 128x64 OLED에 비트맵 표시
- 올바른 비트맵 위치 지정 표시
※ 주의:
- 비트맵 치수는 이 모듈의 경우 128×64를 초과할 수 없습니다
- 이미지는 자동으로 흑백(검정 및 흰색)으로 변환됩니다
ESP32 C3 Super Mini 코드 — SSD1309 OLED에서 명암도 및 어두움
명암도 및 어두움 기능을 사용하여 ESP32 C3 Super Mini SSD1309 디스플레이의 밝기를 제어합니다.
이 코드가 하는 일:
- 명암도를 0(최소)에서 255(최대)로 조정합니다
- 정확한 밝기 제어를 위해 setContrast() 사용
- 빠른 밝기 토글을 위해 dim() 사용
- 부드러운 밝기 전환을 시연합니다
ESP32 C3 Super Mini 코드 — SSD1309 OLED의 사용자 정의 외부 글꼴
Adafruit GFX 라이브러리에는 SSD1309 OLED 디스플레이를 위한 수십 개의 전문적인 FreeFont 서체가 포함되어 있습니다.
사용 가능한 글꼴 모음:
- Serif 글꼴(고전적인 모양)
- Sans 글꼴(현대적이고 깨끗한)
- Mono 글꼴(고정 너비)
- 각각 정규, 굵게, 기울임꼴 스타일
- 각 글꼴마다 4가지 크기
이 코드가 하는 일:
- 사용자 정의 글꼴 헤더를 포함하는 방법 보여주기
- 글꼴 전환을 위한 setFont() 시연
- 여러 글꼴 스타일의 텍스트 표시
- 효율적인 플래시 스토리지를 위해 PROGMEM 사용
※ 주의:
- 외부 글꼴이 활성화되어 있으면 커서 Y 좌표는 텍스트 기준선을 나타내며 왼쪽 위 모서리가 아닙니다
- 외부 글꼴은 플래시(PROGMEM)에 저장됩니다. ESP32 C3 Super Mini 플래시 예산 내에 머물러야 하므로 신중하게 사용하세요
빠른 단계
- ESP32 C3 Super Mini를 처음 사용하나요? 개발 환경을 설정하기 위해 먼저 ESP32 C3 슈퍼 미니 - 시작하기 튜토리얼을 완료하세요.
- 디스플레이 배선: 위의 배선 테이블을 사용하여 SSD1309 OLED를 ESP32 C3 Super Mini에 연결
- 라이브러리 설치: Arduino IDE 라이브러리 매니저를 열고 DIYables_OLED_SSD1309 및 모든 종속성 설치
- 예제 열기: 위의 코드 섹션에서 예제 스케치 중 하나 로드
- 보드 선택: 도구 > 보드 메뉴에서 ESP32C3 Dev Module 선택
- 코드 업로드: ESP32 C3 Super Mini를 연결하고 업로드 클릭
- 디스플레이 확인: SSD1309 OLED는 즉시 예제 출력을 표시해야 합니다
- 실험: 텍스트, 색상 또는 좌표를 변경하여 디스플레이가 어떻게 반응하는지 확인
- 프로 팁: 디스플레이를 업데이트하려면 항상 그린 후 display.display()를 호출하세요. SSD1309는 물리 디스플레이에 푸시해야 하는 프레임 버퍼를 사용합니다
ESP32 C3 Super Mini를 사용한 SSD1309 OLED 문제 해결
2.42인치 SSD1309 OLED 디스플레이에 아무것도 나타나지 않으면 이 문제 해결 단계를 따르세요:
일반적인 문제 및 해결 방법:
- 배선 확인: SDA→A4, SCL→A5, VCC→3.3V, GND→GND가 모두 올바르게 연결되어 있는지 확인합니다
- 드라이버 칩 확인: 이 라이브러리는 SSD1309 컨트롤러를 대상으로 합니다. SH1106 또는 다른 칩이 있는 모듈은 작동하지 않습니다
- I2C 주소 확인: 대부분의 SSD1309 모듈은 0x3C를 사용하지만 일부는 0x3D를 사용합니다. 아래 스캐너를 실행하여 주소를 찾으세요
- display() 호출: SSD1309는 프레임 버퍼를 사용합니다. oled.display()를 호출할 때까지 아무것도 나타나지 않습니다
- 전원 공급 확인: 2.42인치 OLED는 20-40mA를 소비합니다. 3.3V가 충분한 전류를 제공할 수 있는지 확인합니다
- 연결 테스트: 느슨한 연결을 확인하기 위해 와이어를 부드럽게 흔들어 보세요
- I2C 스캐너 사용: 아래 코드를 업로드하여 OLED의 I2C 주소를 감지합니다
I2C 스캐너 코드:
SSD1309가 감지될 때 예상되는 시리얼 모니터 출력:
응용 프로그램 및 프로젝트 아이디어
ESP32 C3 Super Mini 및 SSD1309 OLED 디스플레이로 구축할 수 있는 실용적인 프로젝트는 다음과 같습니다:
- 온도, 습도 및 예보 아이콘을 표시하는 날씨 스테이션 디스플레이
- 날짜, 시간 및 사용자 정의 경보 표시기가 있는 실시간 시계
- 시각적 막대 그래프가 있는 WiFi 신호 강도 모니터
- 여러 센서 판독값을 표시하는 IoT 센서 대시보드
- 곡 제목, 아티스트 및 재생 제어가 있는 음악 플레이어 인터페이스
- CPU 사용량, 메모리 및 네트워크 상태를 표시하는 시스템 모니터
- Snake 또는 Pong과 같은 간단한 픽셀 기반 게임용 게임 콘솔
- 알림 및 경고용 스크롤 메시지 보드
비디오 튜토리얼
이 프로젝트에 대한 시각적 안내는 아래 비디오를 보세요.
...VIDEO 5yFyA1jrNuk
...VIDEO
스스로 도전해보세요
이러한 도전으로 ESP32 C3 Super Mini SSD1309 OLED 기술을 다음 단계로 가져가세요:
- 쉬움: Hello World 예제를 수정하여 이름과 즐겨찾는 이모지를 다양한 텍스트 크기로 표시하기
- 쉬움: 시간, 분, 초를 큰 텍스트로 표시하는 간단한 디지털 시계 만들기
- 중간: DHT11 센서에서의 판독값을 표시하고 그래픽 온도계가 있는 온도 디스플레이 구축
- 중간: 직사각형을 사용하여 왼쪽에서 오른쪽으로 채워지는 애니메이션 로딩 막대 설계
- 고급: 버튼을 사용하여 탐색할 수 있는 다중 페이지가 있는 메뉴 시스템 만들기
- 고급: 128x64 화면 전체에 센서 데이터를 스크롤하는 실시간 그래프 구축
- 고급: 여러 프레임을 순환하여 움직임을 만드는 비트맵 애니메이션 설계


