아두이노 우노 R4 다중 버튼
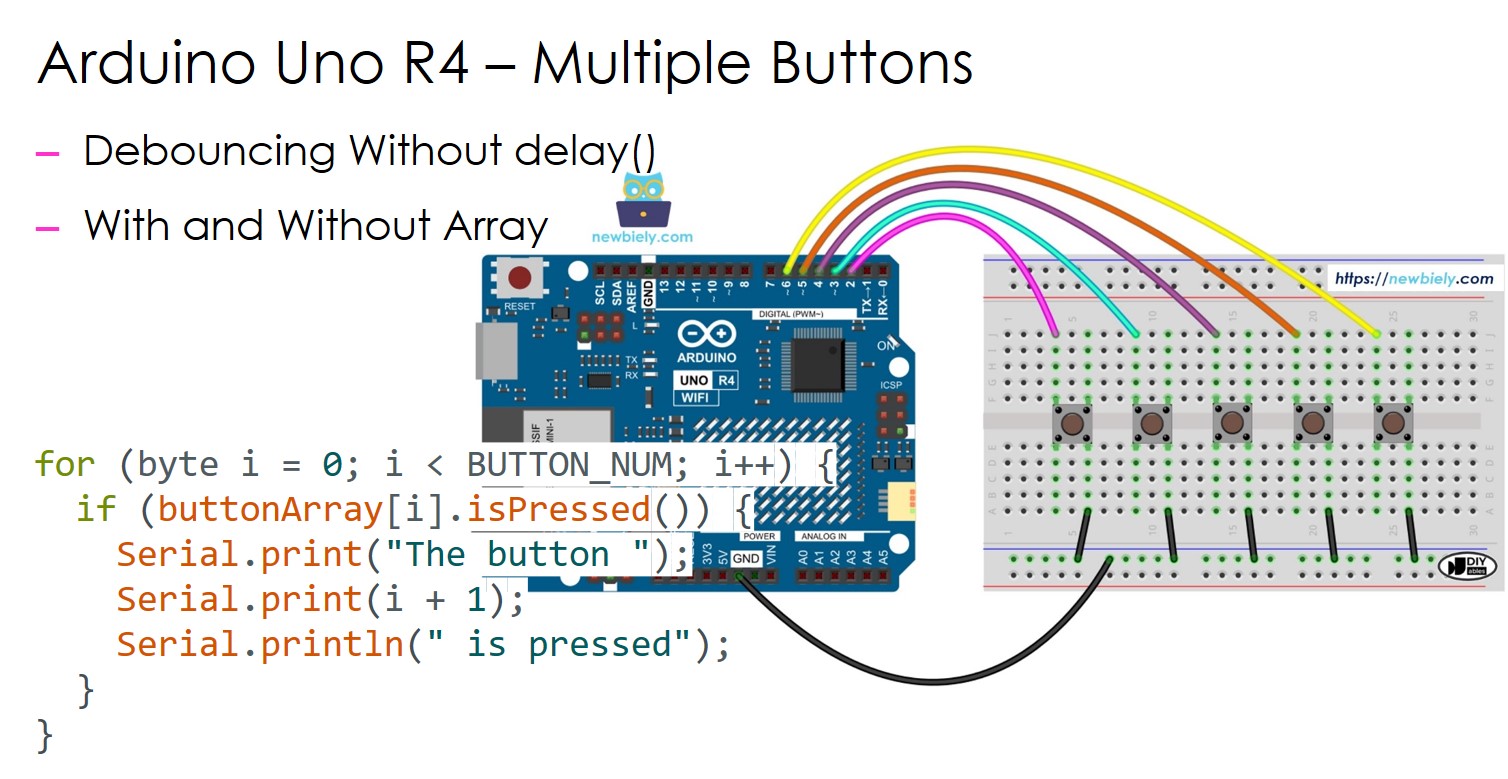
이 가이드는 delay() 함수를 사용하지 않고 여러 버튼을 동시에 처리하기 위해 Arduino UNO R4를 사용하는 방법을 보여줍니다. 가이드는 두 가지 다른 방법의 코드를 제공합니다.
- Arduino UNO R4 코드는 delay() 함수를 사용하지 않고 여러 버튼을 디바운스합니다.
- Arduino UNO R4 코드는 배열을 사용하여 delay() 함수를 사용하지 않고 여러 버튼을 디바운스합니다.
다섯 개의 버튼을 예로 사용할 것입니다. 두 개의 버튼, 네 개의 버튼 또는 더 많이 변경할 수 있습니다.
준비물
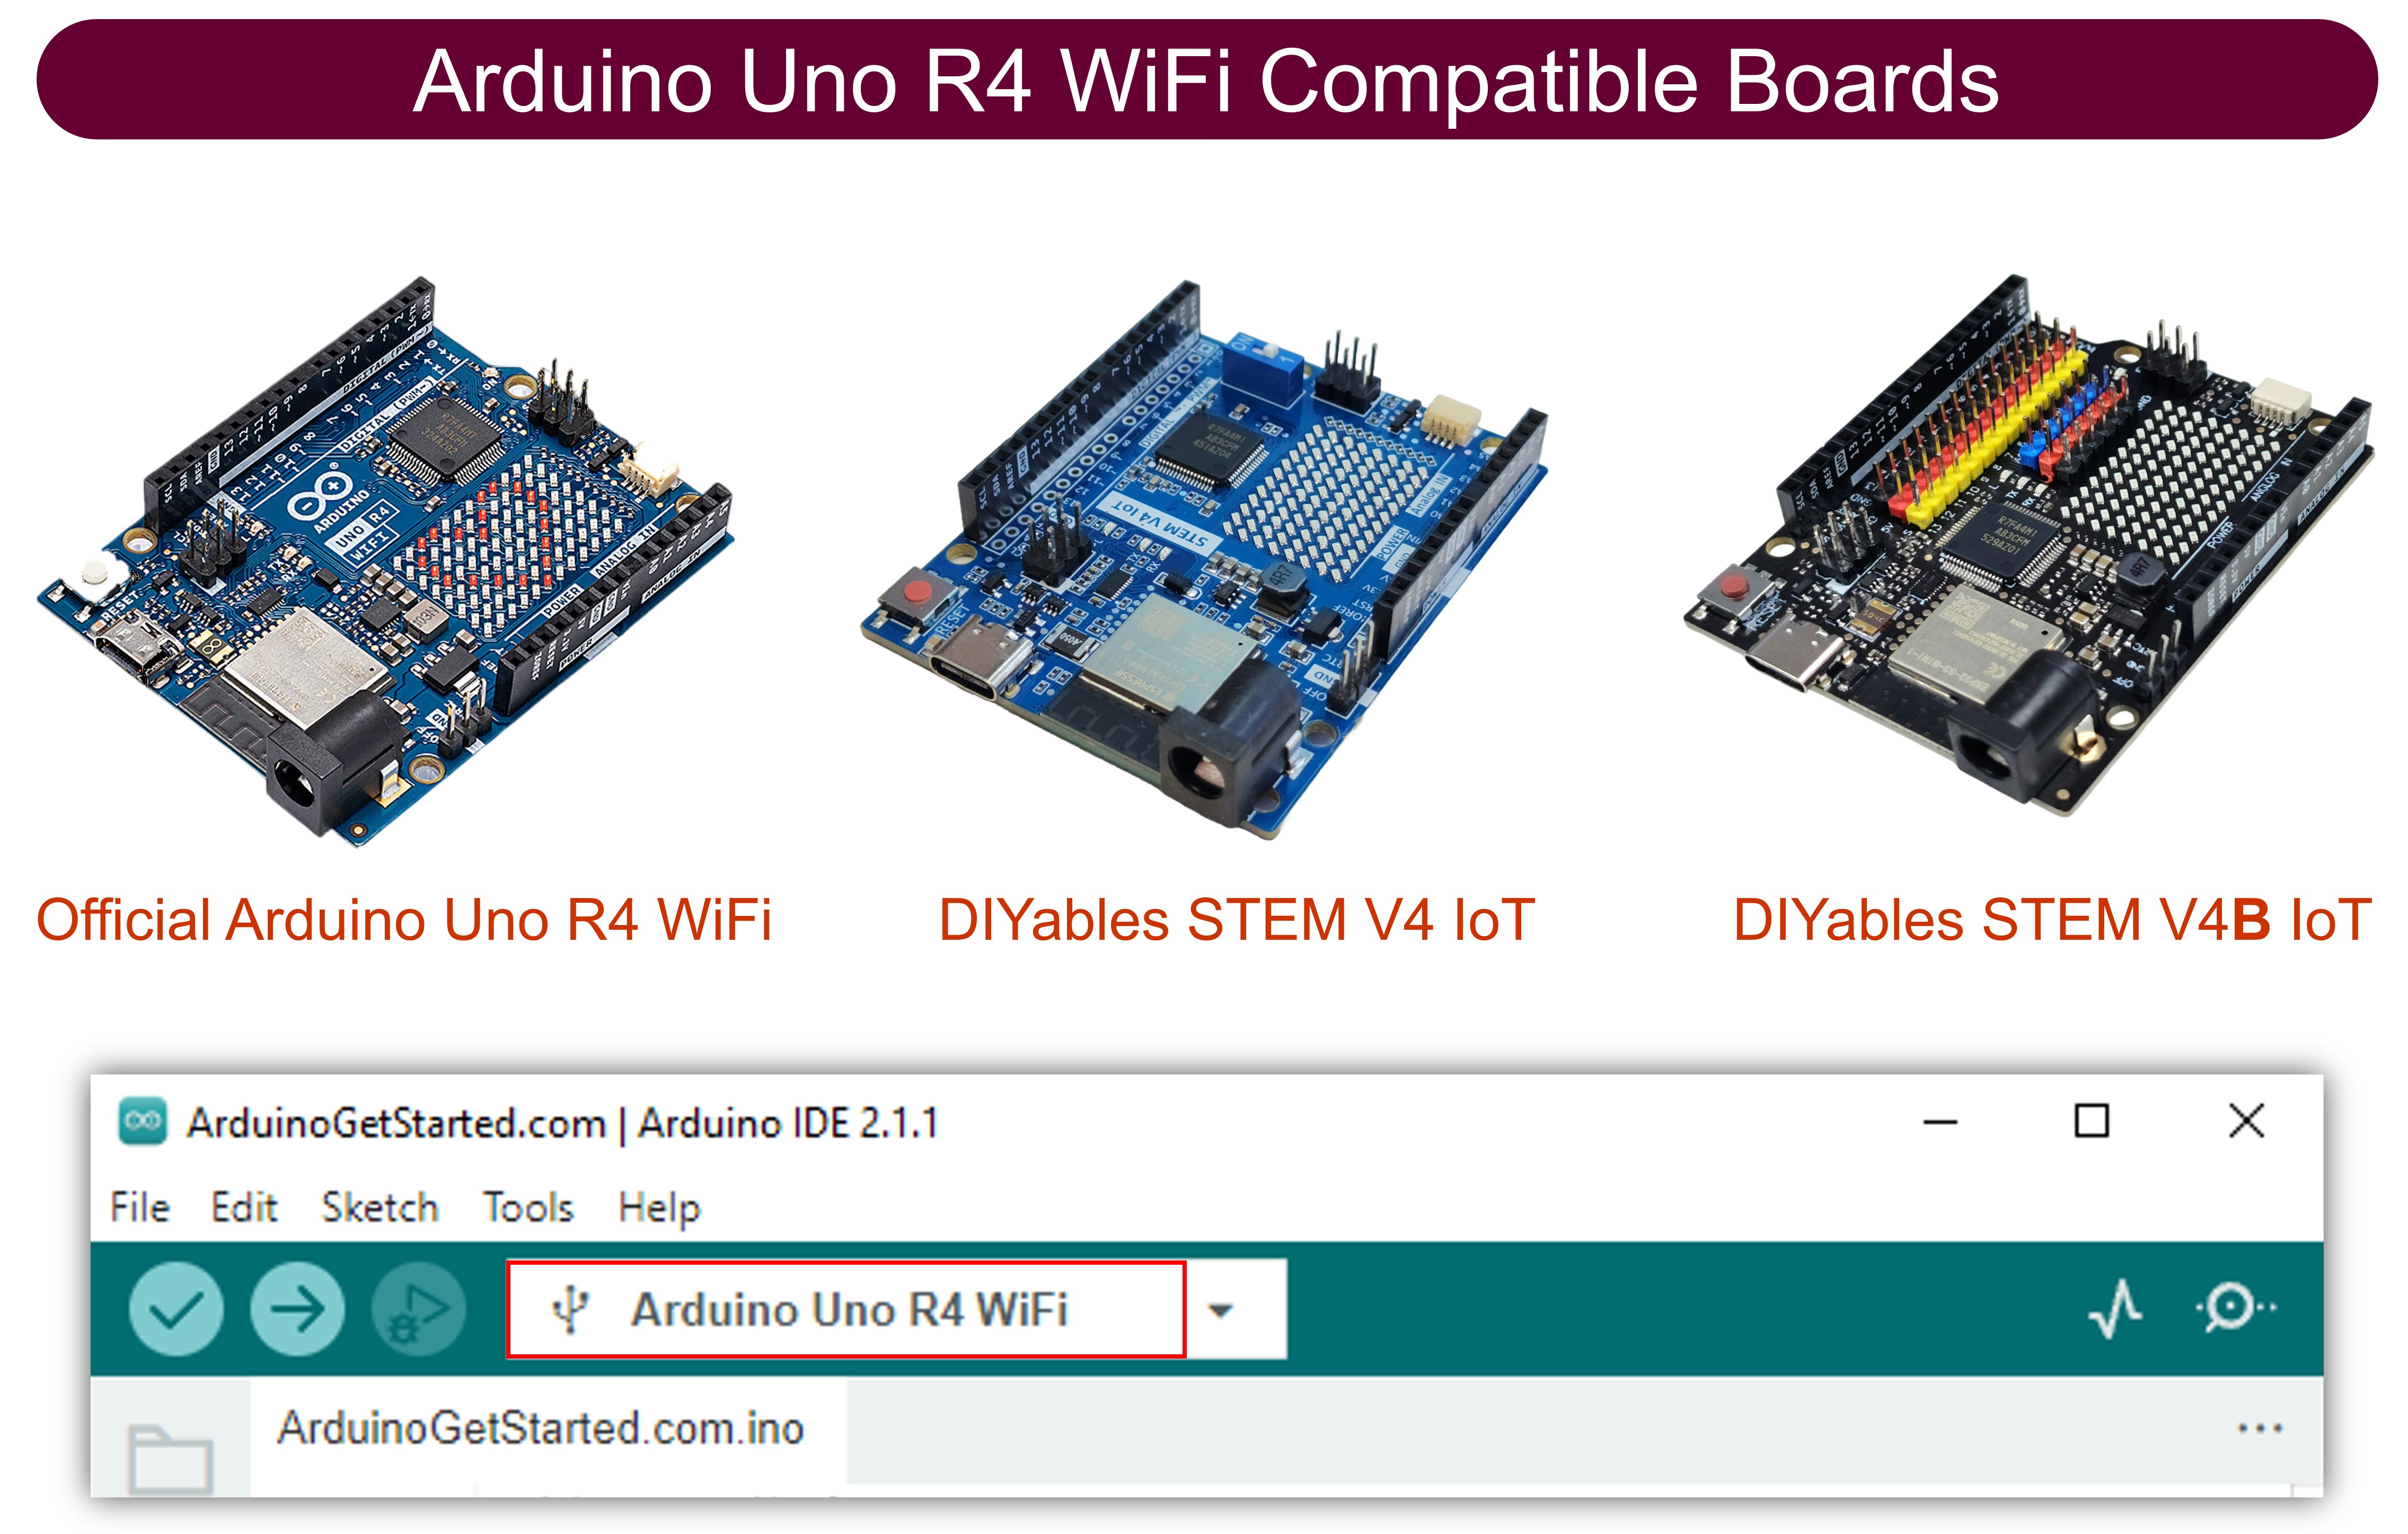
| 1 | × | Arduino UNO R4 WiFi or Arduino UNO R4 Minima | ||
| 1 | × | (또는) DIYables STEM V4 IoT, Compatible with Arduino Uno R4 WiFi | 쿠팡 | 아마존 | |
| 1 | × | USB 케이블 타입-A to 타입-C (USB-A PC용) | 쿠팡 | 아마존 | |
| 1 | × | USB 케이블 타입-C to 타입-C (USB-C PC용) | 아마존 | |
| 1 | × | 캡이 있는 버튼 | 쿠팡 | 아마존 | |
| 1 | × | 버튼 키트 | 쿠팡 | 아마존 | |
| 1 | × | Panel-mount Button | 아마존 | |
| 1 | × | 푸시 버튼 모듈 | 아마존 | |
| 1 | × | 브레드보드 | 쿠팡 | 아마존 | |
| 1 | × | 점퍼케이블 | 쿠팡 | 아마존 | |
| 1 | × | (추천) 아두이노 우노 R4용 스크루 터미널 블록 쉴드 | 쿠팡 | 아마존 | |
| 1 | × | (추천) Sensors/Servo Expansion Shield for Arduino UNO R4 | 쿠팡 | 아마존 | |
| 1 | × | (추천) 아두이노 우노 R4용 브레드보드 쉴드 | 쿠팡 | 아마존 | |
| 1 | × | (추천) 아두이노 우노 R4용 케이스 | 쿠팡 | 아마존 | |
| 1 | × | (추천) 아두이노 우노 R4용 전원 분배기 | 쿠팡 | 아마존 | |
| 1 | × | (추천) 아두이노 우노용 프로토타이핑 베이스 플레이트 & 브레드보드 키트 | 아마존 |
공개: 이 포스팅 에 제공된 일부 링크는 아마존 제휴 링크입니다. 이 포스팅은 쿠팡 파트너스 활동의 일환으로, 이에 따른 일정액의 수수료를 제공받습니다.
버튼 정보
버튼에 대한 자세한 가이드를 제공하며, 하드웨어 연결, 작동 방식, Arduino UNO R4와의 배선, 코드 작성 방법을 다룹니다. 자세한 내용은 여기에서 확인하세요:
- 아두이노 우노 R4 - 버튼 튜토리얼
선연결
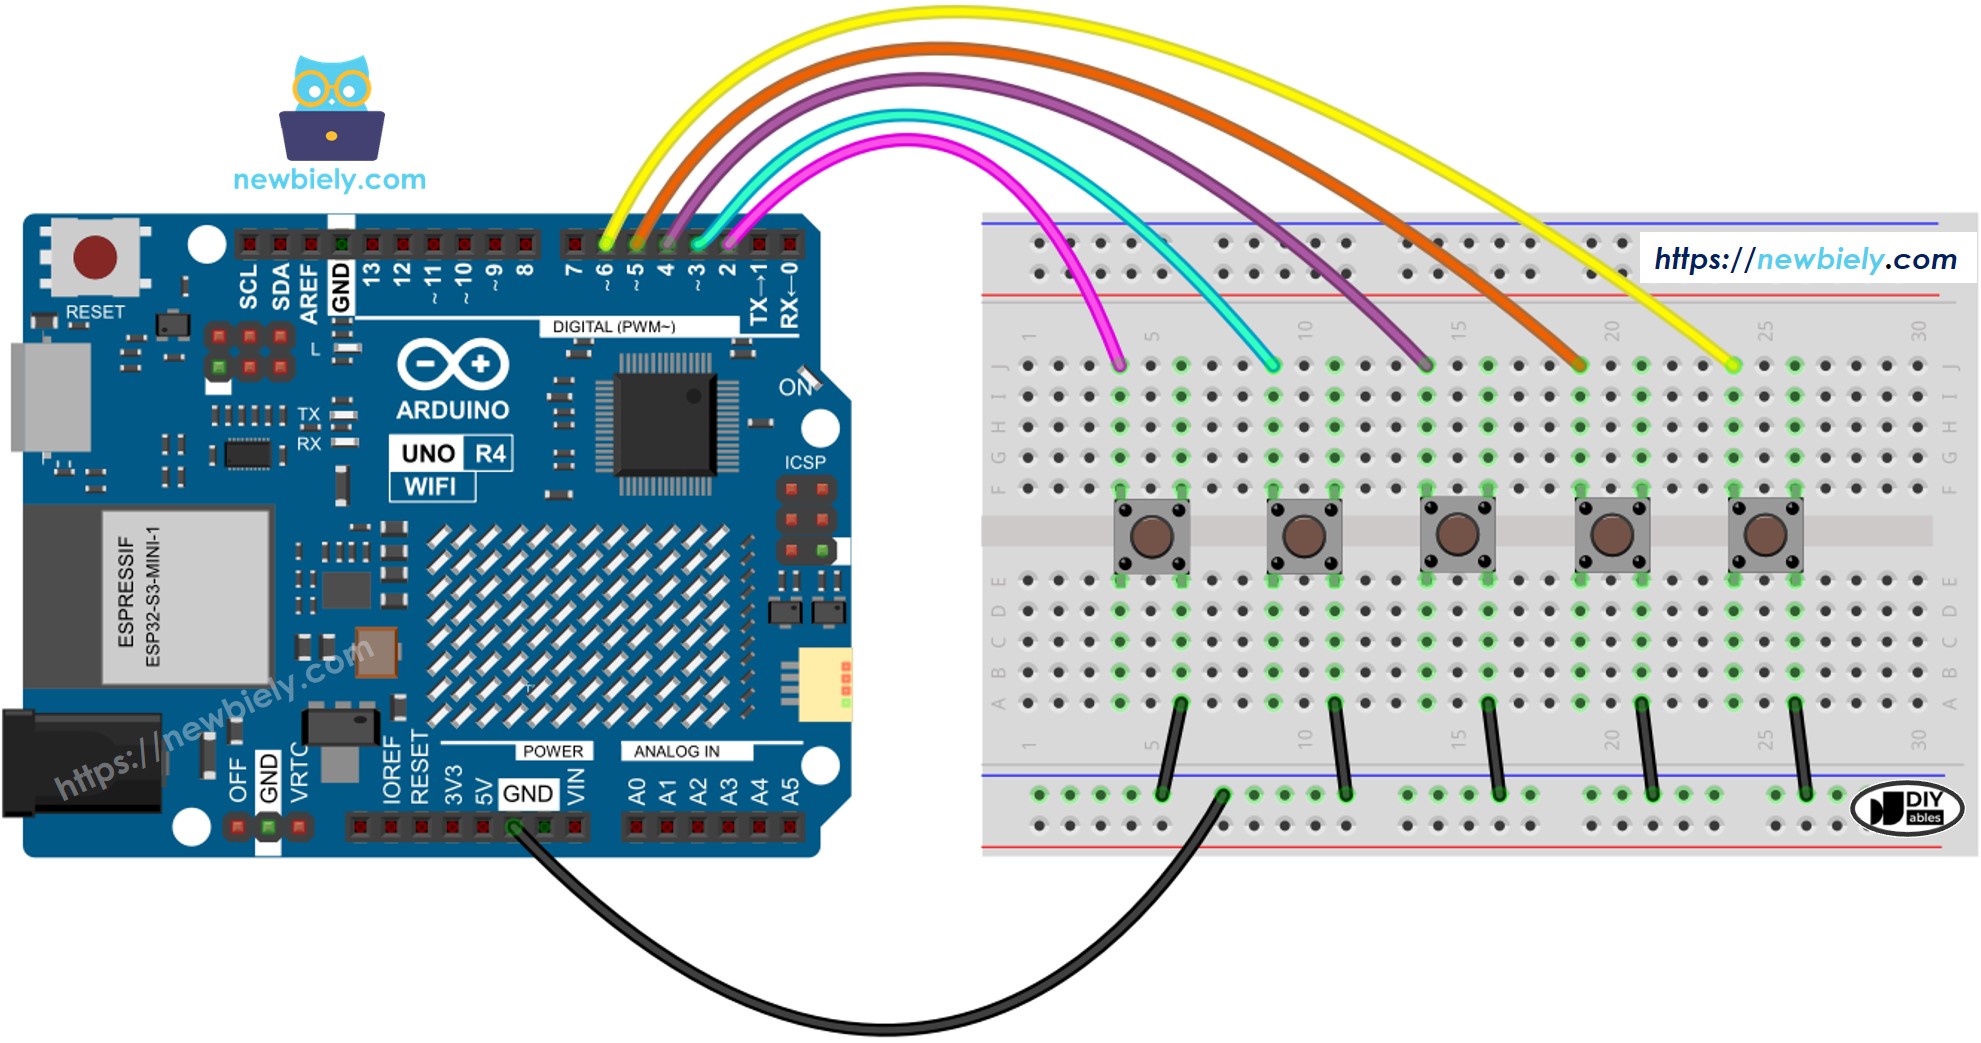
이 이미지는 Fritzing을 사용하여 만들어졌습니다. 이미지를 확대하려면 클릭하세요.
Arduino Uno R4와 기타 부품에 전원을 공급하는 가장 효과적인 방법을 확인하시려면, 아래 링크를 참조하세요: 아두이노 우노 R4 전원 공급 방법.
아두이노 UNO R4 코드 - 디바운싱이 있는 다중 버튼
여러 버튼을 사용할 때 상황이 복잡해질 수 있습니다.
- 버튼 디바운싱이 필요한 애플리케이션
- 버튼이 눌리거나 해제될 때를 식별해야 하는 애플리케이션
ezButton 라이브러리는 디바운스 처리와 버튼 이벤트를 내부적으로 처리하여 버튼 작업을 간소화합니다. 이 라이브러리를 사용하면 타임스탬프와 변수를 관리할 필요가 없습니다. 또한, 여러 버튼을 사용하면 코드가 더욱 명확하고 짧아질 수 있습니다.
/*
* 이 아두이노 우노 R4 코드는 newbiely.kr 에서 개발되었습니다
* 이 아두이노 우노 R4 코드는 어떠한 제한 없이 공개 사용을 위해 제공됩니다.
* 상세한 지침 및 연결도에 대해서는 다음을 방문하세요:
* https://newbiely.kr/tutorials/arduino-uno-r4/arduino-uno-r4-multiple-button
*/
#include <ezButton.h>
#define BUTTON_NUM 5 // the number of buttons
#define BUTTON_PIN_1 2 // The Arduino UNO R4 pin connected to the button 1
#define BUTTON_PIN_2 3 // The Arduino UNO R4 pin connected to the button 2
#define BUTTON_PIN_3 4 // The Arduino UNO R4 pin connected to the button 3
#define BUTTON_PIN_4 5 // The Arduino UNO R4 pin connected to the button 4
#define BUTTON_PIN_5 6 // The Arduino UNO R4 pin connected to the button 5
ezButton button1(BUTTON_PIN_1); // create ezButton object for button 1
ezButton button2(BUTTON_PIN_2); // create ezButton object for button 2
ezButton button3(BUTTON_PIN_3); // create ezButton object for button 3
ezButton button4(BUTTON_PIN_4); // create ezButton object for button 4
ezButton button5(BUTTON_PIN_5); // create ezButton object for button 5
void setup() {
Serial.begin(9600);
button1.setDebounceTime(100); // set debounce time to 100 milliseconds
button2.setDebounceTime(100); // set debounce time to 100 milliseconds
button3.setDebounceTime(100); // set debounce time to 100 milliseconds
button4.setDebounceTime(100); // set debounce time to 100 milliseconds
button5.setDebounceTime(100); // set debounce time to 100 milliseconds
}
void loop() {
button1.loop(); // MUST call the loop() function first
button2.loop(); // MUST call the loop() function first
button3.loop(); // MUST call the loop() function first
button4.loop(); // MUST call the loop() function first
button5.loop(); // MUST call the loop() function first
// get button state after debounce
int button1_state = button1.getState(); // the state after debounce
int button2_state = button2.getState(); // the state after debounce
int button3_state = button3.getState(); // the state after debounce
int button4_state = button4.getState(); // the state after debounce
int button5_state = button5.getState(); // the state after debounce
/*
Serial.print("The button 1 state: ");
Serial.println(button1_state);
Serial.print("The button 2 state: ");
Serial.println(button2_state);
Serial.print("The button 3 state: ");
Serial.println(button3_state);
Serial.print("The button 4 state: ");
Serial.println(button4_state);
Serial.print("The button 5 state: ");
Serial.println(button5_state);
*/
if (button1.isPressed())
Serial.println("The button 1 is pressed");
if (button1.isReleased())
Serial.println("The button 1 is released");
if (button2.isPressed())
Serial.println("The button 2 is pressed");
if (button2.isReleased())
Serial.println("The button 2 is released");
if (button3.isPressed())
Serial.println("The button 3 is pressed");
if (button3.isReleased())
Serial.println("The button 3 is released");
if (button4.isPressed())
Serial.println("The button 4 is pressed");
if (button4.isReleased())
Serial.println("The button 4 is released");
if (button5.isPressed())
Serial.println("The button 5 is pressed");
if (button5.isReleased())
Serial.println("The button 5 is released");
}
자세한 사용 방법
다음 지침을 단계별로 따르세요:
- Arduino Uno R4 WiFi/Minima를 처음 사용하는 경우, 아두이노 우노 R4 - 소프트웨어 설치 튜토리얼을 참조하세요.
- 제공된 다이어그램에 따라 Arduino Uno R4를 버튼에 연결하세요.
- USB 케이블을 사용하여 Arduino Uno R4 보드를 컴퓨터에 연결하세요.
- 컴퓨터에서 Arduino IDE를 실행하세요.
- 적절한 Arduino Uno R4 보드(예: Arduino Uno R4 WiFi)와 COM 포트를 선택하세요.
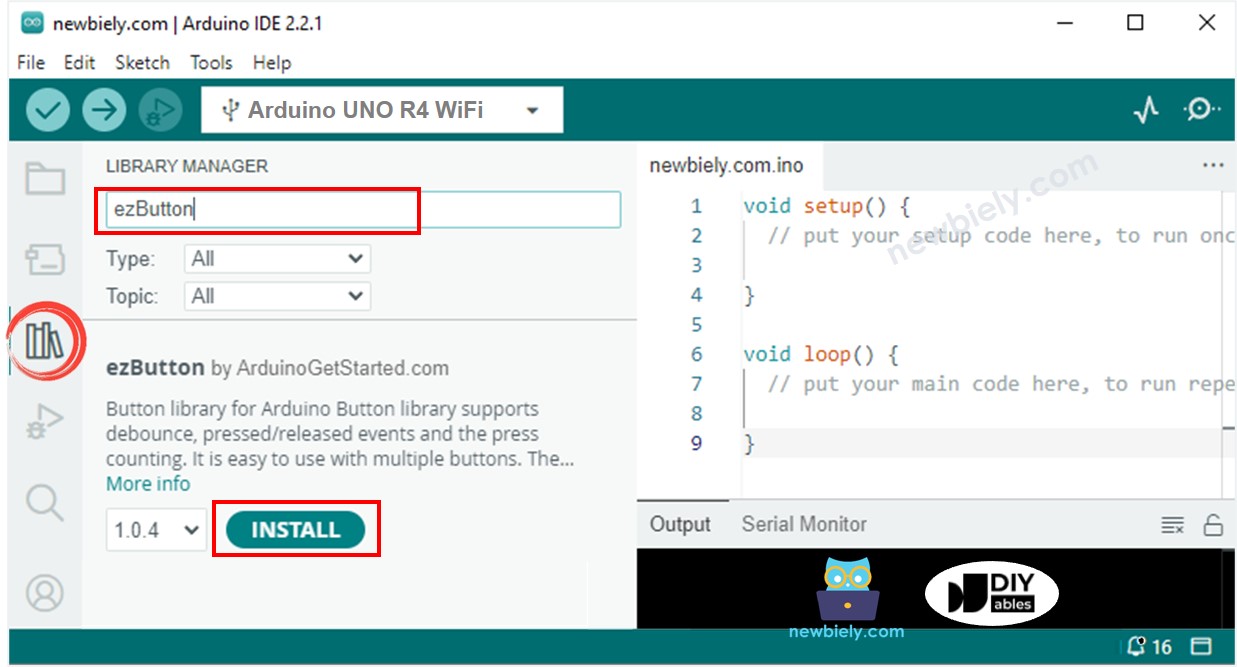
- Arduino IDE의 왼쪽에 있는 Libraries 아이콘을 클릭하세요.
- ezButton 을 검색하고 ArduinoGetStarted.com에서 만든 버튼 라이브러리를 찾으세요.
- Install 버튼을 클릭하여 ezButton 라이브러리를 설치하세요.
- 코드를 복사하여 Arduino IDE에 붙여넣으세요.
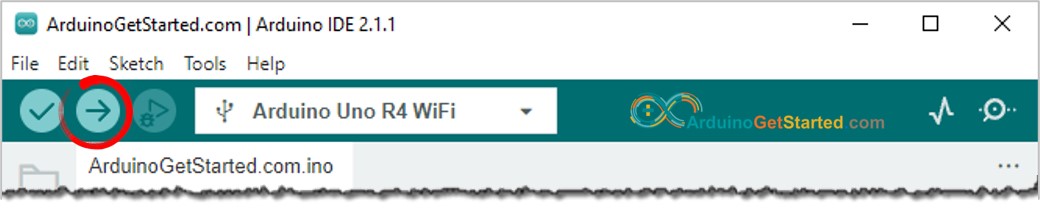
- Arduino IDE에서 Upload 버튼을 클릭하여 코드를 컴파일하고 Arduino UNO R4 보드에 업로드하세요.
- Arduino IDE에서 시리얼 모니터를 엽니다.
- 각 버튼을 한 번에 하나씩 눌렀다가 놓습니다.
8
Serial.println("Hello World!");
Message (Enter to send message to 'Arduino Uno R4 WiFi' on 'COM15')
New Line
9600 baud
The button 1 is pressed
The button 1 is released
The button 2 is pressed
The button 2 is released
The button 3 is pressed
The button 3 is released
The button 4 is pressed
The button 4 is released
The button 5 is pressed
The button 5 is released
Arduino UNO R4 코드 - 배열을 사용한 다중 버튼
위 코드를 버튼 배열을 사용하여 더 개선할 수 있습니다.
/*
* 이 아두이노 우노 R4 코드는 newbiely.kr 에서 개발되었습니다
* 이 아두이노 우노 R4 코드는 어떠한 제한 없이 공개 사용을 위해 제공됩니다.
* 상세한 지침 및 연결도에 대해서는 다음을 방문하세요:
* https://newbiely.kr/tutorials/arduino-uno-r4/arduino-uno-r4-multiple-button
*/
#include <ezButton.h>
#define BUTTON_NUM 5 // the number of buttons
#define BUTTON_PIN_1 2 // The Arduino UNO R4 pin connected to the button 1
#define BUTTON_PIN_2 3 // The Arduino UNO R4 pin connected to the button 2
#define BUTTON_PIN_3 4 // The Arduino UNO R4 pin connected to the button 3
#define BUTTON_PIN_4 5 // The Arduino UNO R4 pin connected to the button 4
#define BUTTON_PIN_5 6 // The Arduino UNO R4 pin connected to the button 5
ezButton buttonArray[] = {
ezButton(BUTTON_PIN_1),
ezButton(BUTTON_PIN_2),
ezButton(BUTTON_PIN_3),
ezButton(BUTTON_PIN_4),
ezButton(BUTTON_PIN_5)
};
void setup() {
Serial.begin(9600);
for (byte i = 0; i < BUTTON_NUM; i++) {
buttonArray[i].setDebounceTime(100); // set debounce time to 100 milliseconds
}
}
void loop() {
for (byte i = 0; i < BUTTON_NUM; i++)
buttonArray[i].loop(); // MUST call the loop() function first
for (byte i = 0; i < BUTTON_NUM; i++) {
// get button state after debounce
int button_state = buttonArray[i].getState(); // the state after debounce
/*
Serial.print("The button ");
Serial.print(i + 1);
Serial.print(": ");
Serial.println(button_state);
*/
if (buttonArray[i].isPressed()) {
Serial.print("The button ");
Serial.print(i + 1);
Serial.println(" is pressed");
}
if (buttonArray[i].isReleased()) {
Serial.print("The button ");
Serial.print(i + 1);
Serial.println(" is released");
}
}
}
동영상
비디오 제작은 시간이 많이 걸리는 작업입니다. 비디오 튜토리얼이 학습에 도움이 되었다면, YouTube 채널 을 구독하여 알려 주시기 바랍니다. 비디오에 대한 높은 수요가 있다면, 비디오를 만들기 위해 노력하겠습니다.