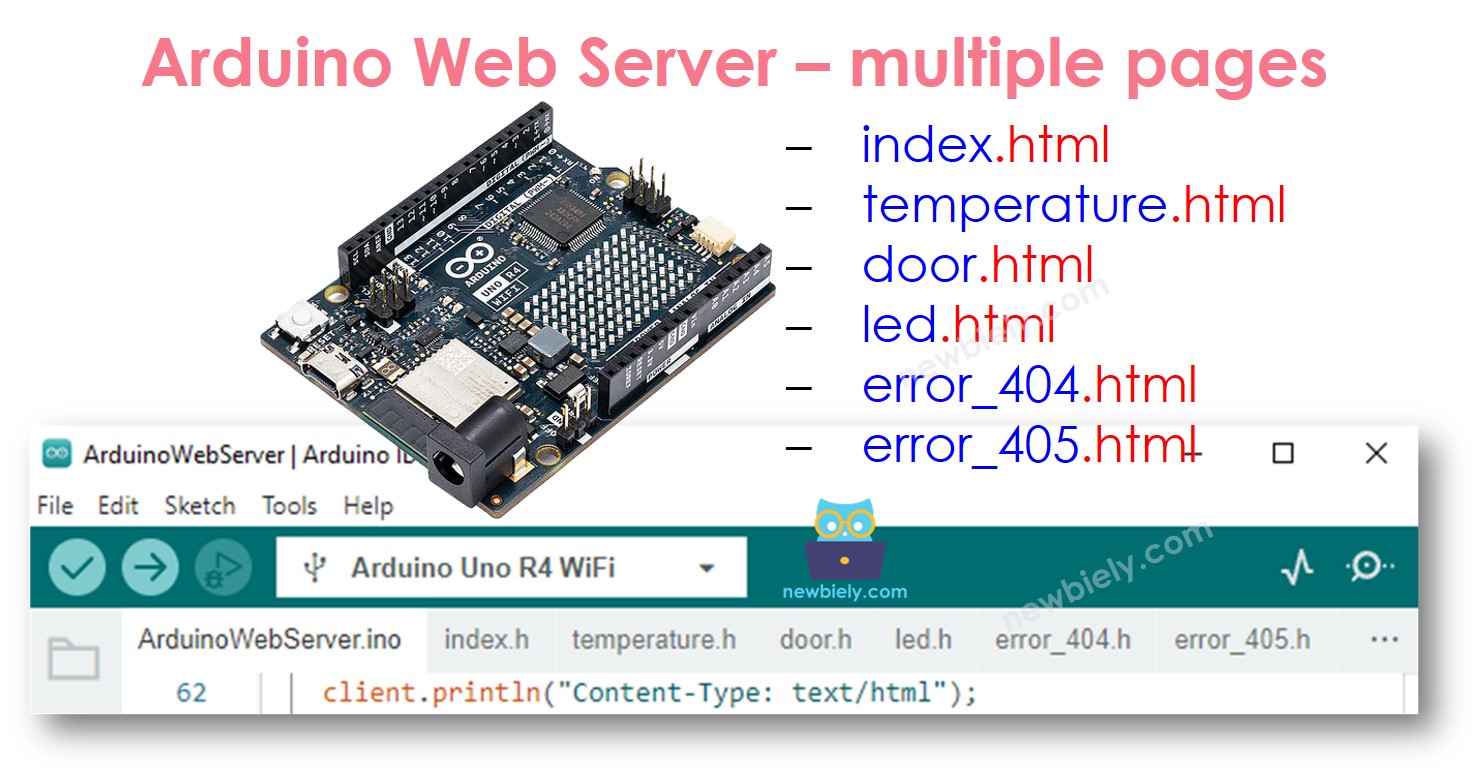
이 가이드에서는 Arduino UNO R4 WiFi를 웹 서버로 작동시키는 방법을 보여드립니다. 컴퓨터나 스마트폰의 웹 브라우저를 사용하여 Arduino UNO R4 웹 서버의 웹 페이지에 접속할 수 있습니다. 이를 통해 Arduino UNO R4의 값을 보고 변경할 수 있습니다. 이 목적을 위해 Arduino UNO R4 WiFi를 프로그래밍 하기 위한 다음 단계를 배우게 됩니다:
| 1 | × | 아두이노 우노 R4 와이파이 | 쿠팡 | 아마존 | |
| 1 | × | (또는) DIYables STEM V4 IoT | 쿠팡 | 아마존 | |
| 1 | × | USB 케이블 타입-A to 타입-C (USB-A PC용) | 쿠팡 | 아마존 | |
| 1 | × | USB 케이블 타입-C to 타입-C (USB-C PC용) | 아마존 | |
| 1 | × | (추천) 아두이노 우노 R4용 스크루 터미널 블록 쉴드 | 쿠팡 | 아마존 | |
| 1 | × | (추천) 아두이노 우노 R4용 브레드보드 쉴드 | 쿠팡 | 아마존 | |
| 1 | × | (추천) 아두이노 우노 R4용 케이스 | 쿠팡 | 아마존 | |
| 1 | × | (추천) 아두이노 우노 R4용 전원 분배기 | 쿠팡 | 아마존 | |
| 1 | × | (추천) 아두이노 우노용 프로토타이핑 베이스 플레이트 & 브레드보드 키트 | 아마존 | |
공개: 이 포스팅 에 제공된 일부 링크는 아마존 제휴 링크입니다. 이 포스팅은 쿠팡 파트너스 활동의 일환으로, 이에 따른 일정액의 수수료를 제공받습니다.
Arduino UNO R4 코드가 수행하는 작업:
웹 브라우저에서 HTTP 요청을 받는 웹 서버 구축하기.
웹 브라우저가 요청을 보내면 Arduino UNO R4는 다음과 같이 응답합니다:
다음은 위에서 언급한 작업을 수행하는 Arduino UNO R4 코드입니다:
#include <UnoR4WiFi_WebServer.h>
const char HTML_CONTENT[] PROGMEM = R"rawliteral(
<!DOCTYPE HTML>
<html>
<head>
<link rel="icon" href="data:,">
</head>
<p>
Temperature: <span style="color: red;">%TEMP_PLACE_HOLDER% °C</span>
</p>
</html>
)rawliteral";
const char WIFI_SSID[] = "YOUR_WIFI_SSID";
const char WIFI_PASSWORD[] = "YOUR_WIFI_PASSWORD";
UnoR4WiFi_WebServer server;
float getTemperature() {
return 26.9456;
float temp_x100 = random(0, 10000);
return temp_x100 / 100;
}
void handleHome(WiFiClient& client, const String& method, const String& request, const QueryParams& params, const String& jsonData) {
float tempC = getTemperature();
String response = HTML_CONTENT;
response.replace("%TEMP_PLACE_HOLDER%", String(tempC, 1));
server.sendResponse(client, response.c_str());
}
void setup() {
Serial.begin(9600);
delay(1000);
Serial.println("Arduino Uno R4 WiFi - Web Server");
Serial.print("Connecting to ");
Serial.println(WIFI_SSID);
WiFi.begin(WIFI_SSID, WIFI_PASSWORD);
while (WiFi.status() != WL_CONNECTED) {
delay(500);
Serial.print(".");
}
Serial.println("connected!");
Serial.print("IP address: ");
Serial.println(WiFi.localIP());
server.addRoute("/", handleHome);
server.begin();
Serial.println("\n=== Web Server Ready! ===");
Serial.print("Visit: http://");
Serial.println(WiFi.localIP());
}
void loop() {
server.handleClient();
}
다음 지침을 단계별로 따르세요:
USB 케이블을 사용하여 Arduino Uno R4 보드를 컴퓨터에 연결합니다.
컴퓨터에서 Arduino IDE를 실행합니다.
적절한 Arduino Uno R4 보드(예: Arduino Uno R4 WiFi)와 COM 포트를 선택하세요.
Arduino IDE의 왼쪽에 있는 Library Manager 아이콘을 클릭하여 라이브러리 관리자를 엽니다.
Web Server for Arduino Uno R4 WiFi를 검색하고 DIYables의 Web Server를 찾습니다.
Install 버튼을 클릭하여 Web Server 라이브러리를 추가합니다.
코드를 복사하여 Arduino IDE에서 엽니다.
코드에서 WiFi 세부 정보(SSID 및 비밀번호)를 자신의 것으로 교체하세요.
Arduino IDE에서 Upload 버튼을 클릭하여 코드를 Arduino UNO R4에 업로드합니다.
시리얼 모니터를 엽니다.
시리얼 모니터에서 결과를 확인하세요.
Arduino Uno R4 WiFi - Web Server
Connecting to YOUR_WIFI_SSID
connected!
IP address: 192.168.0.254
Starting web server on IP: 192.168.0.254
=== Web Server Ready! ===
Visit: http://192.168.0.254
Arduino Uno R4 WiFi - Web Server
Connecting to YOUR_WIFI_SSID
connected!
IP address: 192.168.0.254
Starting web server on IP: 192.168.0.254
=== Web Server Ready! ===
Visit: http://192.168.0.254
Method: GET
Requested path: /
Client disconnected
그래픽 사용자 인터페이스(UI)를 사용하여 멋진 웹 페이지를 만들려면 이 튜토리얼의 마지막 부분을 참조하세요.
Arduino UNO R4에 연결된 장치를 관리하는 것은 단순히 값을 확인하는 것보다 조금 더 복잡합니다. 이러한 복잡성은 웹 브라우저로부터 받은 명령을 해석하여 적절한 응답을 결정해야 하는 Arduino UNO R4 때문에 발생합니다. 다음은 Arduino UNO R4 코드가 이 상황을 처리하는 방법입니다:
웹 브라우저에서 HTTP 요청을 수신하는 웹 서버 구축.
브라우저로부터의 요청 처리:
HTTP 요청 헤더 읽기.
필요한 제어 명령어를 알아내기 위해 HTTP 요청 헤더 검토.
제어 명령어에 따라 Arduino UNO R4를 사용하여 연결된 장치나 항목 제어.
HTTP 응답 전송.
선택적으로, 제어 상태에 대한 세부 정보를 보여주기 위해 HTML 콘텐츠가 포함된 HTTP 응답 본문을 전송할 수도 있음 (필요한 경우).
더 나은 자세한 예를 위해 아래의 튜토리얼을 참조하세요.
콘텐츠가 몇 개만 포함된 기본 웹 페이지를 만들려면 이전에 언급한 대로 Arduino UNO R4 코드에 HTML을 포함할 수 있습니다.
더 복잡하고 인상적인 웹페이지를 많은 콘텐츠와 함께 만들고 싶다면, 모든 HTML, CSS, 그리고 JavaScript 코드를 Arduino UNO R4 코드에 직접 넣는 것은 쉽지 않습니다. 이 경우, 코드를 처리하는 다른 방법을 사용할 수 있습니다.
Arduino UNO R4 코드는 .ino라는 이름의 파일에 저장해야 합니다.
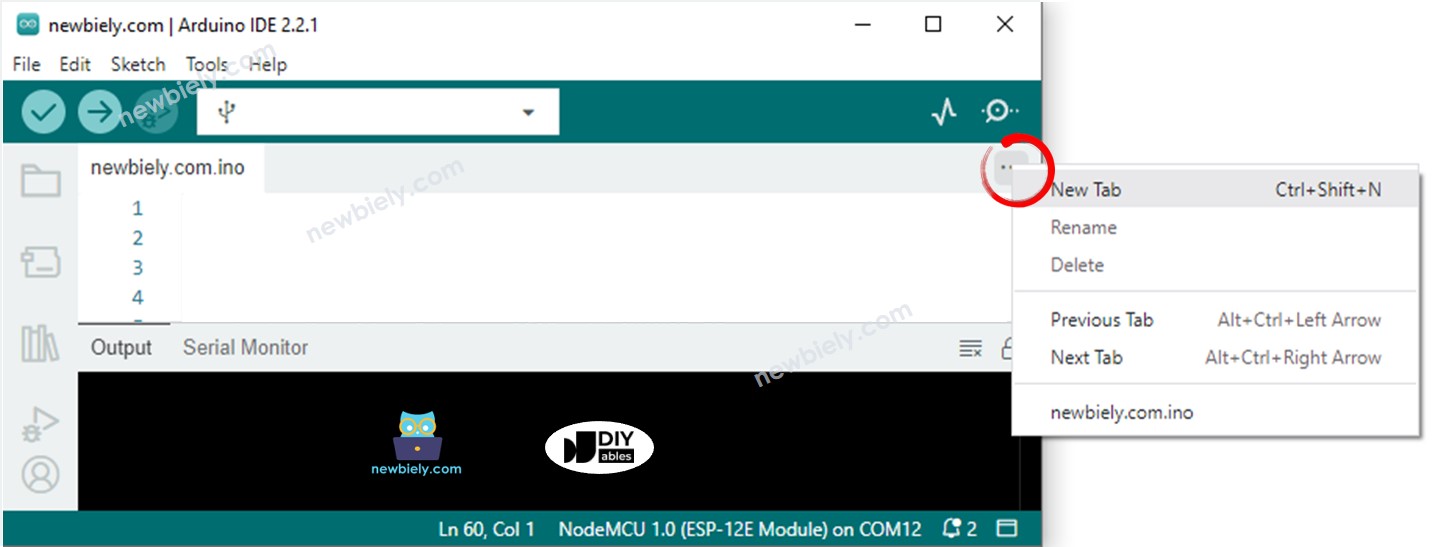
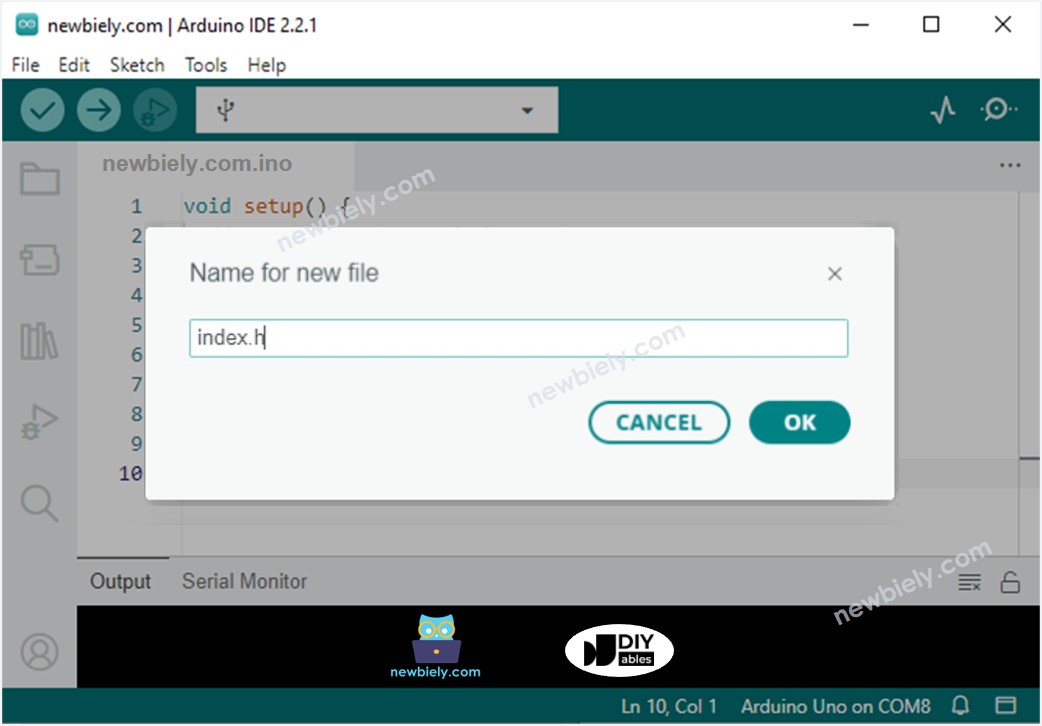
HTML, CSS, Javascript가 포함된 HTML 코드는 .h라는 다른 파일에 저장해야 합니다. 이렇게 하면 웹 페이지 콘텐츠를 Arduino UNO R4 코드와 분리하여 관리 및 변경이 더 간단해집니다.
우리는 두 가지 주요 단계를 밟아야 합니다:
HTML 콘텐츠 생성
아두이노 UNO R4 코딩
I. 컴퓨터에 HTML 파일을 만드세요. 이 파일에는 HTML, CSS, JavaScript를 사용하여 사용자 인터페이스 디자인을 포함해야 합니다.
I. HTML 파일에 Arduino UNO R4에서 받을 데이터를 표시할 자리 표시자를 넣으세요. 현재는 임의의 샘플 값을 사용하세요.
I. 파일의 디자인을 확인하고 만족할 때까지 조정하세요.
I. HTML 파일의 자리 표시자 값을 TEMPERATURE_MARKER와 같은 고유한 레이블로 교체하세요. 나중에 Arduino UNO R4 스크립트에서 String.replace("TEMPERATURE_MARKER", real_value); 명령을 사용하여 Arduino에서 실제 데이터를 표시할 것입니다.
I. 다음으로, 이 HTML 콘텐츠를 Arduino IDE 내의 .h 파일로 전송할 것입니다.
#include <UnoR4WiFi_WebServer.h>
#include "index.h"
const char WIFI_SSID[] = "YOUR_WIFI_SSID";
const char WIFI_PASSWORD[] = "YOUR_WIFI_PASSWORD";
UnoR4WiFi_WebServer server;
float getTemperature() {
return 26.9456;
float temp_x100 = random(0, 10000);
return temp_x100 / 100;
}
void handleHome(WiFiClient& client, const String& method, const String& request, const QueryParams& params, const String& jsonData) {
float tempC = getTemperature();
String response = HTML_CONTENT;
response.replace("TEMPERATURE_MARKER", String(tempC, 1));
server.sendResponse(client, response.c_str());
}
void setup() {
Serial.begin(9600);
delay(1000);
Serial.println("Arduino Uno R4 WiFi - Web Server");
Serial.print("Connecting to ");
Serial.println(WIFI_SSID);
WiFi.begin(WIFI_SSID, WIFI_PASSWORD);
while (WiFi.status() != WL_CONNECTED) {
delay(500);
Serial.print(".");
}
Serial.println("connected!");
Serial.print("IP address: ");
Serial.println(WiFi.localIP());
server.addRoute("/", handleHome);
server.begin();
Serial.println("\n=== Web Server Ready! ===");
Serial.print("Visit: http://");
Serial.println(WiFi.localIP());
}
void loop() {
server.handleClient();
}
const char *HTML_CONTENT = R""""(
REPLACE_YOUR_HTML_CONTENT_HERE
)"""";
const char *HTML_CONTENT = R""""(
<!DOCTYPE html>
<html>
<head>
<title>Arduino Uno R4 - Web Temperature</title>
<meta name="viewport" content="width=device-width, initial-scale=0.7, maximum-scale=0.7">
<meta charset="utf-8">
<link rel="icon" href="https://diyables.io/images/page/diyables.svg">
<style>
body { font-family: "Georgia"; text-align: center; font-size: width/2pt;}
h1 { font-weight: bold; font-size: width/2pt;}
h2 { font-weight: bold; font-size: width/2pt;}
button { font-weight: bold; font-size: width/2pt;}
</style>
<script>
var cvs_width = 200, cvs_height = 450;
function init() {
var canvas = document.getElementById("cvs");
canvas.width = cvs_width;
canvas.height = cvs_height + 50;
var ctx = canvas.getContext("2d");
ctx.translate(cvs_width/2, cvs_height - 80);
update_view(TEMPERATURE_MARKER);
}
function update_view(temp) {
var canvas = document.getElementById("cvs");
var ctx = canvas.getContext("2d");
var radius = 70;
var offset = 5;
var width = 45;
var height = 330;
ctx.clearRect(-cvs_width/2, -350, cvs_width, cvs_height);
ctx.strokeStyle="blue";
ctx.fillStyle="blue";
var x = -width/2;
ctx.lineWidth=2;
for (var i = 0; i <= 100; i+=5) {
var y = -(height - radius)*i/100 - radius - 5;
ctx.beginPath();
ctx.lineTo(x, y);
ctx.lineTo(x - 20, y);
ctx.stroke();
}
ctx.lineWidth=5;
for (var i = 0; i <= 100; i+=20) {
var y = -(height - radius)*i/100 - radius - 5;
ctx.beginPath();
ctx.lineTo(x, y);
ctx.lineTo(x - 25, y);
ctx.stroke();
ctx.font="20px Georgia";
ctx.textBaseline="middle";
ctx.textAlign="right";
ctx.fillText(i.toString(), x - 35, y);
}
ctx.lineWidth=16;
ctx.beginPath();
ctx.arc(0, 0, radius, 0, 2 * Math.PI);
ctx.stroke();
ctx.beginPath();
ctx.rect(-width/2, -height, width, height);
ctx.stroke();
ctx.beginPath();
ctx.arc(0, -height, width/2, 0, 2 * Math.PI);
ctx.stroke();
ctx.fillStyle="#e6e6ff";
ctx.beginPath();
ctx.arc(0, 0, radius, 0, 2 * Math.PI);
ctx.fill();
ctx.beginPath();
ctx.rect(-width/2, -height, width, height);
ctx.fill();
ctx.beginPath();
ctx.arc(0, -height, width/2, 0, 2 * Math.PI);
ctx.fill();
ctx.fillStyle="#ff1a1a";
ctx.beginPath();
ctx.arc(0, 0, radius - offset, 0, 2 * Math.PI);
ctx.fill();
temp = Math.round(temp * 100) / 100;
var y = (height - radius)*temp/100.0 + radius + 5;
ctx.beginPath();
ctx.rect(-width/2 + offset, -y, width - 2*offset, y);
ctx.fill();
ctx.fillStyle="red";
ctx.font="bold 34px Georgia";
ctx.textBaseline="middle";
ctx.textAlign="center";
ctx.fillText(temp.toString() + "°C", 0, 100);
}
window.onload = init;
</script>
</head>
<body>
<h1>Arduino - Web Temperature</h1>
<canvas id="cvs"></canvas>
</body>
</html>
)"""";
이제 코드가 두 개의 파일에 있습니다: newbiely.com.ino 및 index.h
Arduino IDE에서 Upload 버튼을 클릭하여 코드를 Arduino UNO R4로 전송하세요.
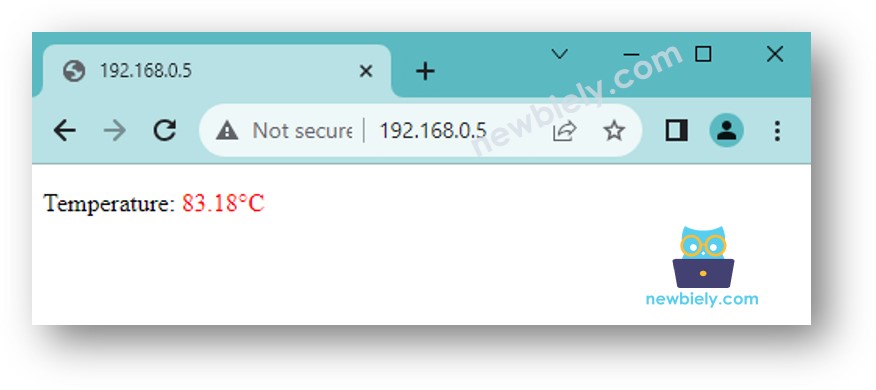
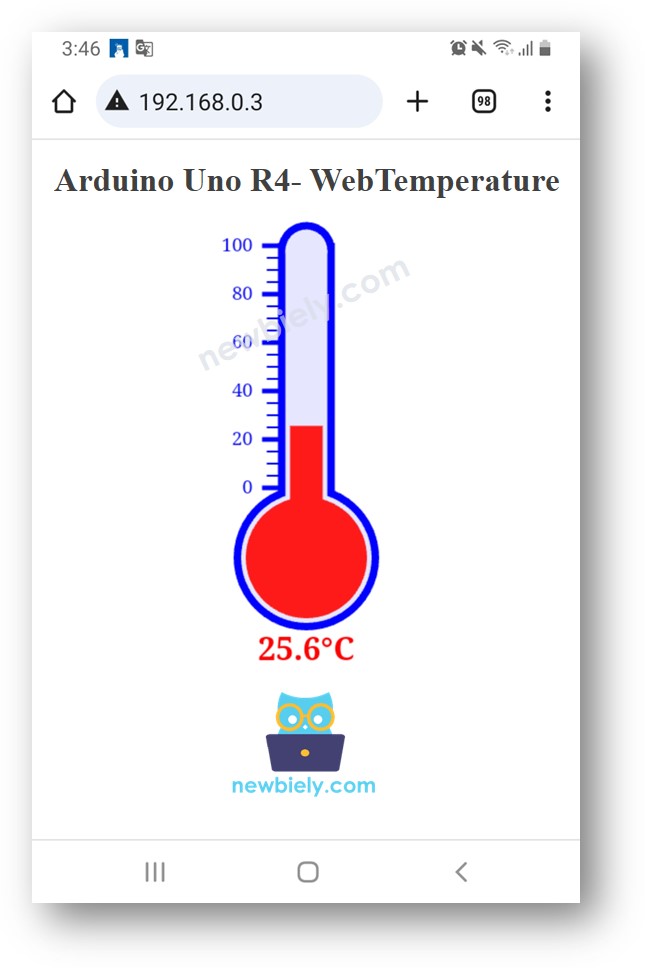
이전과 마찬가지로 웹 브라우저에서 Arduino UNO R4 보드의 웹 페이지를 엽니다. 다음과 같이 나타날 것입니다:
자세한 안내는 아두이노 우노 R4 - 웹을 통한 온도 튜토리얼을 참조하세요.
※ 주의:
"index.h"라는 파일의 HTML을 변경하더라도 "newbiely.com.ino" 파일을 변경하지 않으면, Arduino IDE는 코드를 컴파일하고 ESP32에 업로드할 때 HTML을 업데이트하지 않습니다.
Arduino IDE가 HTML을 업데이트하도록 하려면 "newbiely.com.ino" 파일에서 무언가를 변경해야 합니다. 빈 줄이나 주석을 추가할 수 있습니다. 이렇게 하면 프로젝트가 변경되었음을 IDE에 알리며, 업로드 시 새로운 HTML을 포함하게 됩니다.
