아두이노 나노 - 피에조 부저 | Arduino Nano - Piezo Buzzer

이 튜토리얼은 아두이노 나노를 사용하여 피에조 부저를 제어하는 방법을 안내합니다. 구체적으로, 우리는 다음을 학습할 것입니다:

준비물

1×Arduino Nano Amazon
1×USB A to Mini-B USB cable 쿠팡 | Amazon
1×Piezo Buzzer Amazon
1×Breadboard 쿠팡 | Amazon
1×Jumper Wires Amazon
1×(Optional) 9V Power Adapter for Arduino Nano Amazon
1×(Recommended) Screw Terminal Adapter for Arduino Nano 쿠팡 | Amazon
공개: 이 섹션에서 제공된 링크 중 일부는 제휴 링크입니다. 이 링크를 통해 구매한 경우 추가 비용없이 수수료를 받을 수 있습니다. 지원해 주셔서 감사합니다.

파이조 부저에 대하여

파이에조 부저는 소리, 비프음, 심지어 멜로디까지 만들어내는데 사용됩니다.

시장에서 구할 수 있는 다재다능한 3V-24V 액티브 부저는 3-5V 액티브 부저와 고전압 부저(12V 이상)로 모두 기능합니다.

  • 아두이노 핀에 직접 연결될 때, 부저는 표준음을 생성하여 키패드 소리와 같은 사운드 지시기와 같은 애플리케이션에 이상적입니다.
  • 반대로, 릴레이를 통해 고전압 소스에 연결될 때, 부저는 큰 소리를 내어 경고 신호에 적합합니다.

Piezo 부저 핀배열

파이조 부저는 일반적으로 두 개의 핀을 가지고 있습니다:

  • 부정(-) 핀은 GND(0V)에 연결되어야 합니다
  • 양성(+) 핀은 아두이노 나노로부터 제어 신호를 직접적으로, 또는 릴레이를 통해 간접적으로 받습니다
Piezo Buzzer pinout

파이조 부저의 작동 원리

파이조 부저 작동 방식 보기

선연결

Arduino Nano Piezo Buzzer wiring diagram

이 이미지는 Fritzing을 사용하여 만들어졌습니다. 이미지를 확대하려면 클릭하세요.

파이에조 부저를 프로그래밍하는 방법

아두이노 라이브러리 덕분에 멜로디를 연주하는 것이 간단합니다. 우리는 사각파를 생성하는 방법을 이해할 필요가 없습니다. 우리가 해야 할 일은 라이브러리에서 tone() 함수와 noTone() 함수를 사용하는 것입니다.

아두이노 나노 코드

#include "pitches.h" #define BUZZER_PIN 2 // 아두이노 나노 핀이 파이조 부저의 핀에 연결되어 있음 // notes in the melody: int melody[] = { NOTE_C4, NOTE_G3, NOTE_G3, NOTE_A3, NOTE_G3, 0, NOTE_B3, NOTE_C4 }; // note durations: 4 = quarter note, 8 = eighth note, etc.: int noteDurations[] = { 4, 8, 8, 4, 4, 4, 4, 4 }; void setup() { // iterate over the notes of the melody: for (int thisNote = 0; thisNote < 8; thisNote++) { // to calculate the note duration, take one second divided by the note type. //e.g. quarter note = 1000 / 4, eighth note = 1000/8, etc. int noteDuration = 1000 / noteDurations[thisNote]; tone(BUZZER_PIN, melody[thisNote], noteDuration); // to distinguish the notes, set a minimum time between them. // The note's duration + 30% seems to work well: int pauseBetweenNotes = noteDuration * 1.30; delay(pauseBetweenNotes); // stop the tone playing: noTone(BUZZER_PIN); } } void loop() { // no need to repeat the melody. }

사용 방법

  • 아두이노 나노를 USB 케이블을 사용하여 PC에 연결하세요.
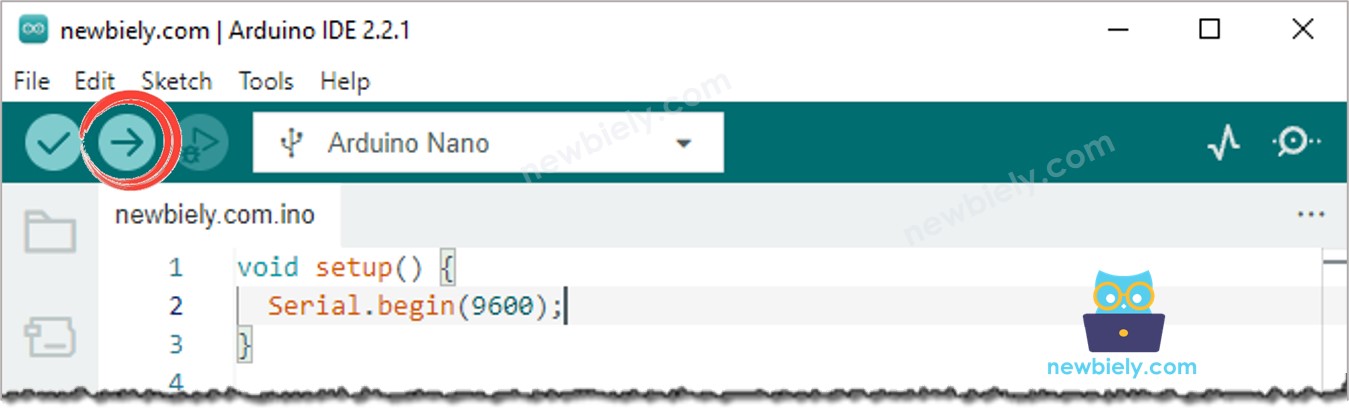
  • 아두이노 IDE를 열고, 적절한 보드와 포트를 선택하세요.
  • 코드를 복사하고 아두이노 IDE로 열어보세요.
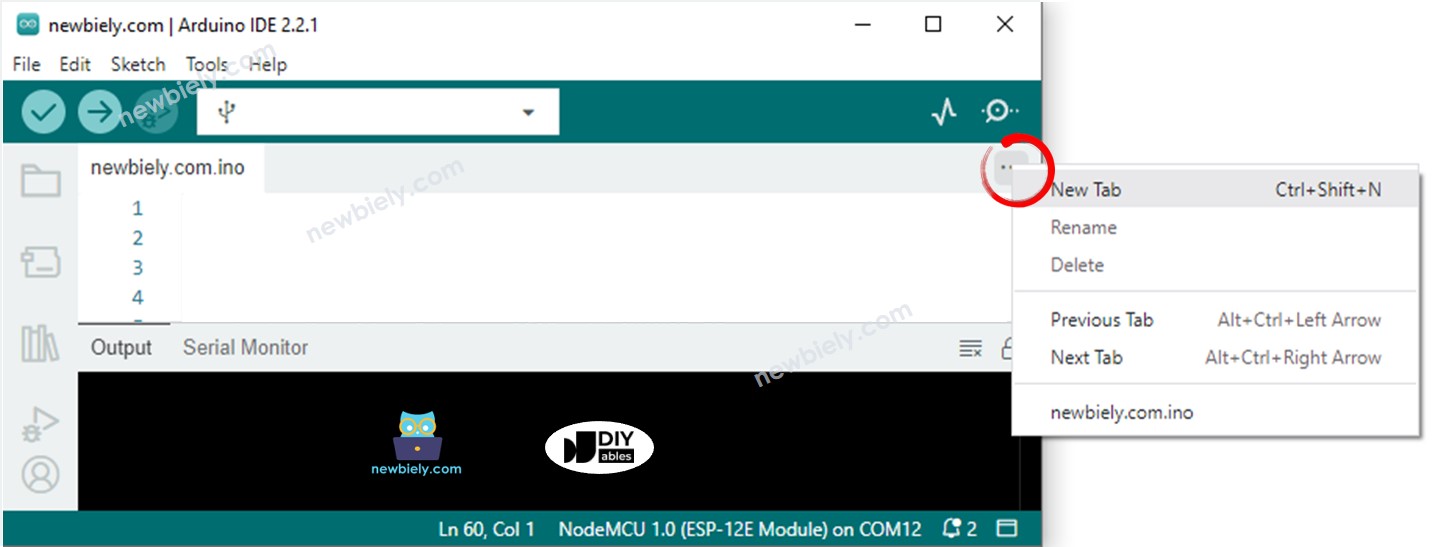
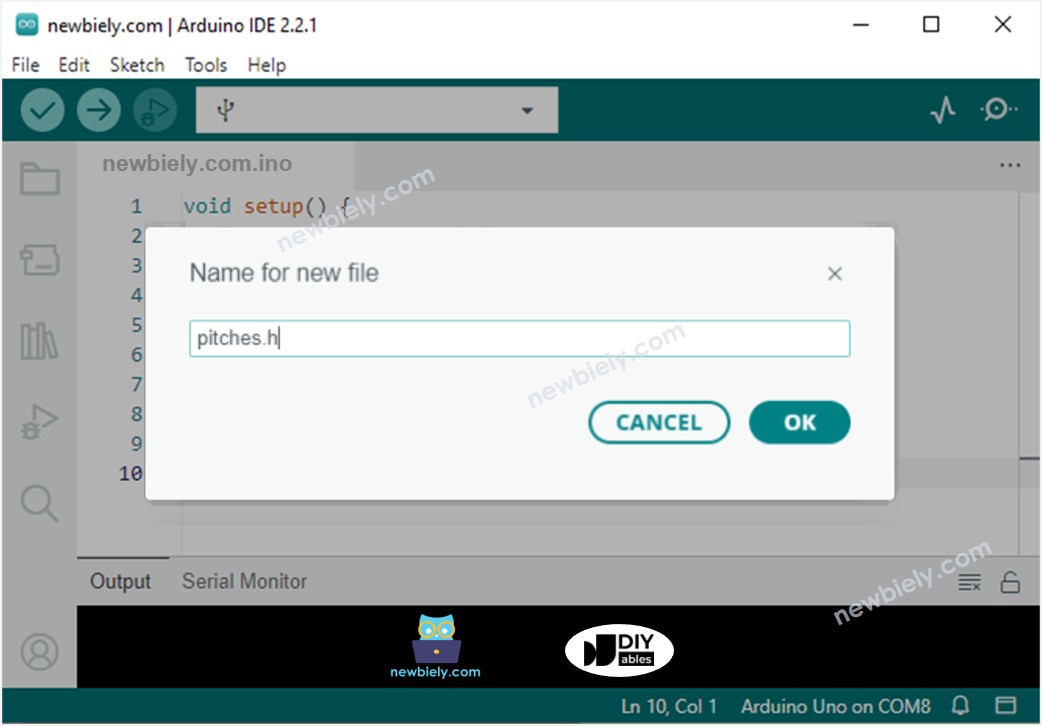
  • 아두이노 IDE에서 pitches.h 파일을 다음과 같이 생성하세요:
    • 시리얼 모니터 아이콘 바로 아래에 있는 버튼을 클릭하고 새 탭을 선택하거나, Ctrl+Shift+N 키를 사용하세요.
    Arduino IDE 2 adds file

    파일 이름을 pitches.h로 지정하고 OK 버튼을 클릭하세요.

    Arduino IDE 2 adds file pitches.h

    아래 코드를 복사하여 생성된 pitches.h 파일에 붙여넣으세요.

    /************************************************* * Public Constants *************************************************/ #define NOTE_B0 31 #define NOTE_C1 33 #define NOTE_CS1 35 #define NOTE_D1 37 #define NOTE_DS1 39 #define NOTE_E1 41 #define NOTE_F1 44 #define NOTE_FS1 46 #define NOTE_G1 49 #define NOTE_GS1 52 #define NOTE_A1 55 #define NOTE_AS1 58 #define NOTE_B1 62 #define NOTE_C2 65 #define NOTE_CS2 69 #define NOTE_D2 73 #define NOTE_DS2 78 #define NOTE_E2 82 #define NOTE_F2 87 #define NOTE_FS2 93 #define NOTE_G2 98 #define NOTE_GS2 104 #define NOTE_A2 110 #define NOTE_AS2 117 #define NOTE_B2 123 #define NOTE_C3 131 #define NOTE_CS3 139 #define NOTE_D3 147 #define NOTE_DS3 156 #define NOTE_E3 165 #define NOTE_F3 175 #define NOTE_FS3 185 #define NOTE_G3 196 #define NOTE_GS3 208 #define NOTE_A3 220 #define NOTE_AS3 233 #define NOTE_B3 247 #define NOTE_C4 262 #define NOTE_CS4 277 #define NOTE_D4 294 #define NOTE_DS4 311 #define NOTE_E4 330 #define NOTE_F4 349 #define NOTE_FS4 370 #define NOTE_G4 392 #define NOTE_GS4 415 #define NOTE_A4 440 #define NOTE_AS4 466 #define NOTE_B4 494 #define NOTE_C5 523 #define NOTE_CS5 554 #define NOTE_D5 587 #define NOTE_DS5 622 #define NOTE_E5 659 #define NOTE_F5 698 #define NOTE_FS5 740 #define NOTE_G5 784 #define NOTE_GS5 831 #define NOTE_A5 880 #define NOTE_AS5 932 #define NOTE_B5 988 #define NOTE_C6 1047 #define NOTE_CS6 1109 #define NOTE_D6 1175 #define NOTE_DS6 1245 #define NOTE_E6 1319 #define NOTE_F6 1397 #define NOTE_FS6 1480 #define NOTE_G6 1568 #define NOTE_GS6 1661 #define NOTE_A6 1760 #define NOTE_AS6 1865 #define NOTE_B6 1976 #define NOTE_C7 2093 #define NOTE_CS7 2217 #define NOTE_D7 2349 #define NOTE_DS7 2489 #define NOTE_E7 2637 #define NOTE_F7 2794 #define NOTE_FS7 2960 #define NOTE_G7 3136 #define NOTE_GS7 3322 #define NOTE_A7 3520 #define NOTE_AS7 3729 #define NOTE_B7 3951 #define NOTE_C8 4186 #define NOTE_CS8 4435 #define NOTE_D8 4699 #define NOTE_DS8 4978

    아두이노 IDE에서 Upload 버튼을 클릭하여 코드를 컴파일하고 아두이노 나노에 업로드하세요.

    Arduino IDE Upload Code

    새들의 노래를 들어보세요.

아두이노 나노 코드 수정하기

현재, 우리는 "징글 벨"이라는 노래를 연주하기 위해 코드를 변경할 예정입니다.

우리는 단지 두 배열의 값을 변경할 필요가 있습니다: int melody[]int noteDurations[].

/* * 이 Arduino Nano 코드는 newbiely.kr 에서 개발되었습니다 * 이 Arduino Nano 코드는 어떠한 제한 없이 공개 사용을 위해 제공됩니다. * 상세한 지침 및 연결도에 대해서는 다음을 방문하세요: * https://newbiely.kr/tutorials/arduino-nano/arduino-nano-piezo-buzzer */ #include "pitches.h" #define BUZZER_PIN 2 // 아두이노 나노 핀이 파이조 부저의 핀에 연결됨 // notes in the melody: int melody[] = { NOTE_E5, NOTE_E5, NOTE_E5, NOTE_E5, NOTE_E5, NOTE_E5, NOTE_E5, NOTE_G5, NOTE_C5, NOTE_D5, NOTE_E5, NOTE_F5, NOTE_F5, NOTE_F5, NOTE_F5, NOTE_F5, NOTE_E5, NOTE_E5, NOTE_E5, NOTE_E5, NOTE_E5, NOTE_D5, NOTE_D5, NOTE_E5, NOTE_D5, NOTE_G5 }; // note durations: 4 = quarter note, 8 = eighth note, etc, also called tempo: int noteDurations[] = { 8, 8, 4, 8, 8, 4, 8, 8, 8, 8, 2, 8, 8, 8, 8, 8, 8, 8, 16, 16, 8, 8, 8, 8, 4, 4 }; void setup() { // iterate over the notes of the melody: int size = sizeof(noteDurations) / sizeof(int); for (int thisNote = 0; thisNote < size; thisNote++) { // to calculate the note duration, take one second divided by the note type. //e.g. quarter note = 1000 / 4, eighth note = 1000/8, etc. int noteDuration = 1000 / noteDurations[thisNote]; tone(BUZZER_PIN, melody[thisNote], noteDuration); // to distinguish the notes, set a minimum time between them. // The note's duration + 30% seems to work well: int pauseBetweenNotes = noteDuration * 1.30; delay(pauseBetweenNotes); // stop the tone playing: noTone(BUZZER_PIN); } } void loop() { // no need to repeat the melody. }

※ NOTE THAT:

위의 코드는 delay() 함수를 사용합니다. 이것은 멜로디 재생 중 다른 코드가 차단되게 합니다. 이를 방지하기 위해, ezBuzzer 라이브러리를 대신 사용할 수 있습니다. 이 라이브러리는 부저 사용을 위해 특별히 설계되었으며 다른 코드를 차단하지 않고 비프음을 내거나 멜로디를 재생할 수 있습니다.

동영상

비디오 제작은 시간이 많이 걸리는 작업입니다. 비디오 튜토리얼이 학습에 도움이 되었다면, YouTube 채널 을 구독하여 알려 주시기 바랍니다. 비디오에 대한 높은 수요가 있다면, 비디오를 만들기 위해 노력하겠습니다.

도전하세요

  • 좋아하는 노래를 연주하기 위해 피에조 버저를 활용하세요.
  • 귀중품에 누군가 접근할 때 경보를 생성하기 위해 모션 센서를 이용하세요. 자세한 정보는 Arduino Nano - 모션 센서를 참조하세요.

함수 참조

※ OUR MESSAGES

  • Please feel free to share the link of this tutorial. However, Please do not use our content on any other websites. We invested a lot of effort and time to create the content, please respect our work!