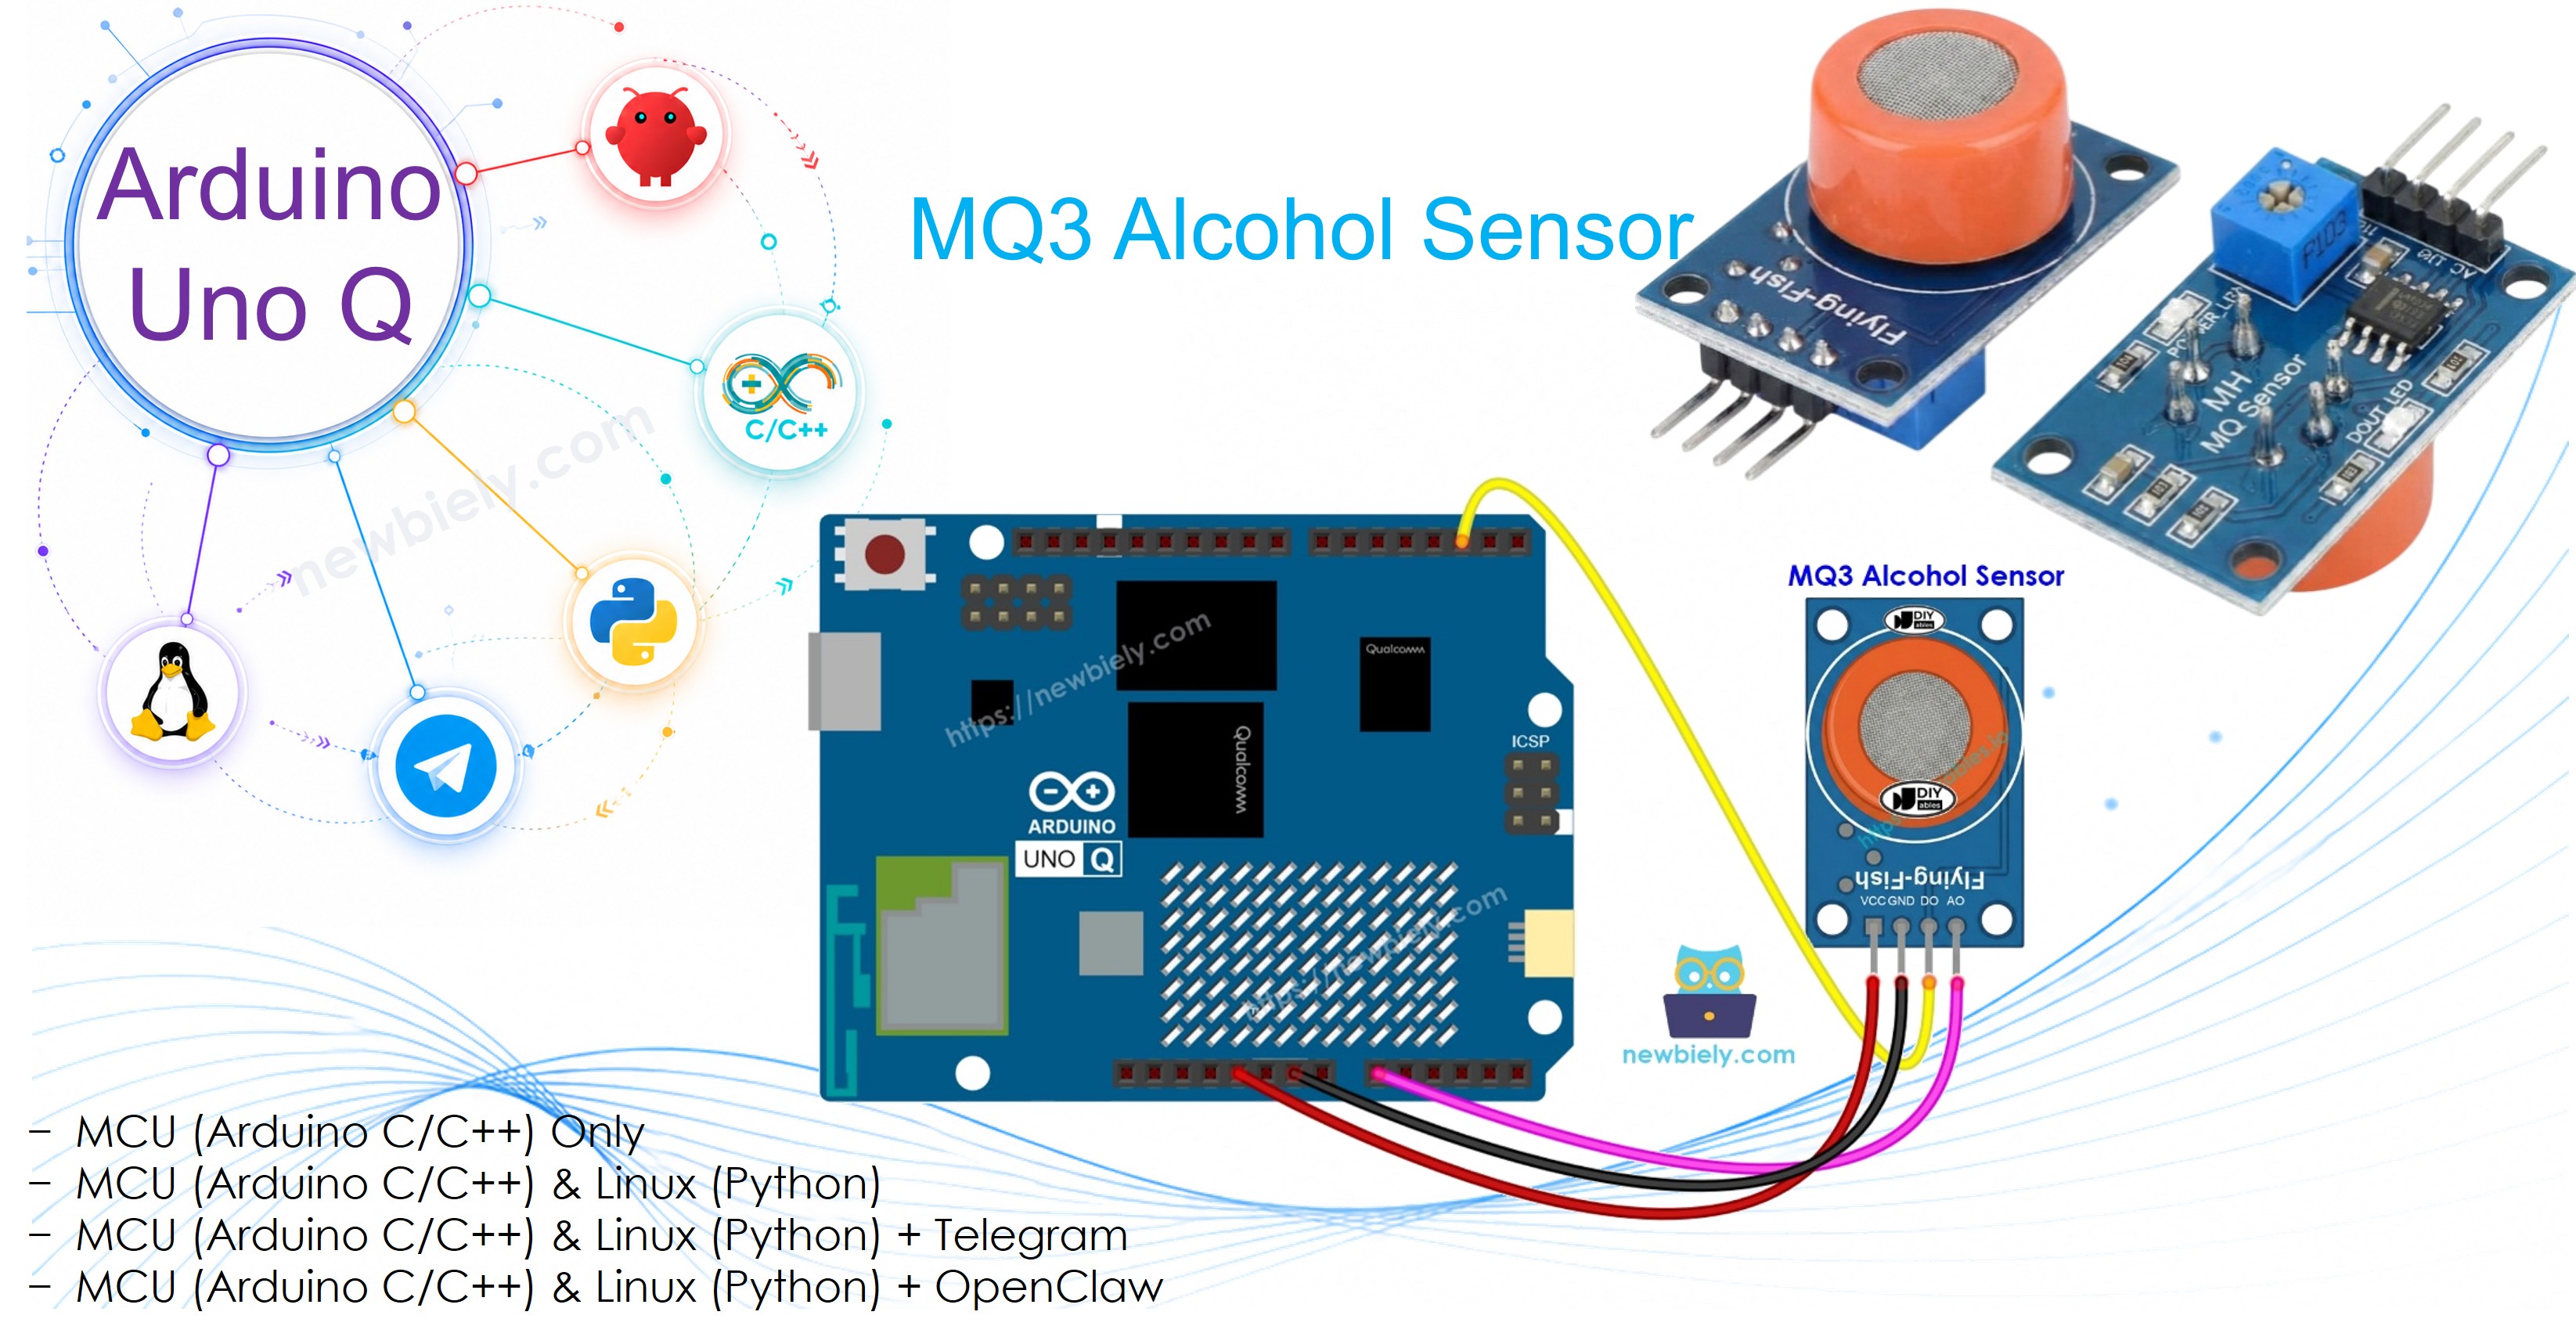
MQ3 알코올 센서는 공기 중의 에탄올 증기를 감지합니다. 디지털 출력(알코올/알코올 없음)과 아날로그 출력(알코올 농도 수준)을 모두 제공합니다. Bridge와 Telegram을 통해 Arduino UNO Q는 휴대폰으로 즉시 알코올 감지 알림을 보낼 수 있으며 음주측정기로도 작동할 수 있습니다.
이 튜토리얼에서는 다음을 배우게 됩니다:
MQ3 알코올 센서의 작동 원리 및 워밍업 시간이 필요한 이유
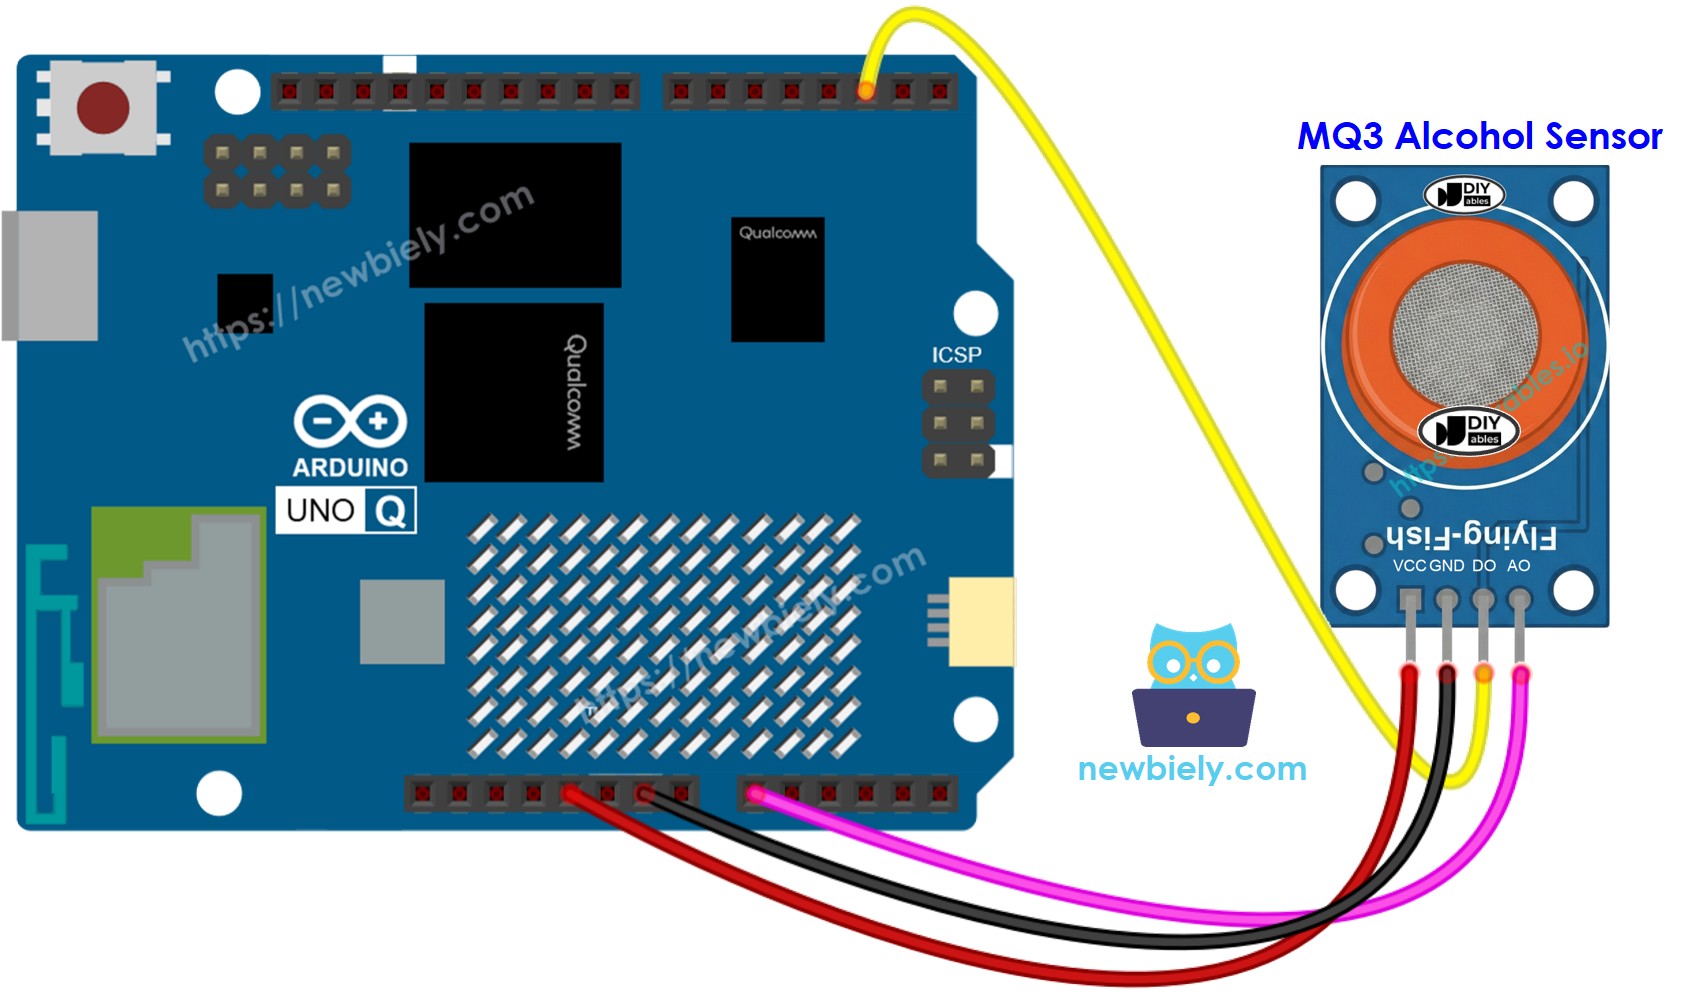
Arduino UNO Q MCU에 MQ3를 배선하는 방법
디지털(DO) 및 아날로그(AO) 출력을 읽는 방법
Arduino UNO Q에서 임계값 수준을 사용하여 간단한 음주측정기를 구축하는 방법
Bridge를 사용하여 알코올 상태 및 이벤트를 Linux 측(Python)에 노출하는 방법
공개: 이 포스팅 에 제공된 일부 링크는 아마존 제휴 링크입니다. 이 포스팅은 쿠팡 파트너스 활동의 일환으로, 이에 따른 일정액의 수수료를 제공받습니다.
MQ3 알코올 센서 정보
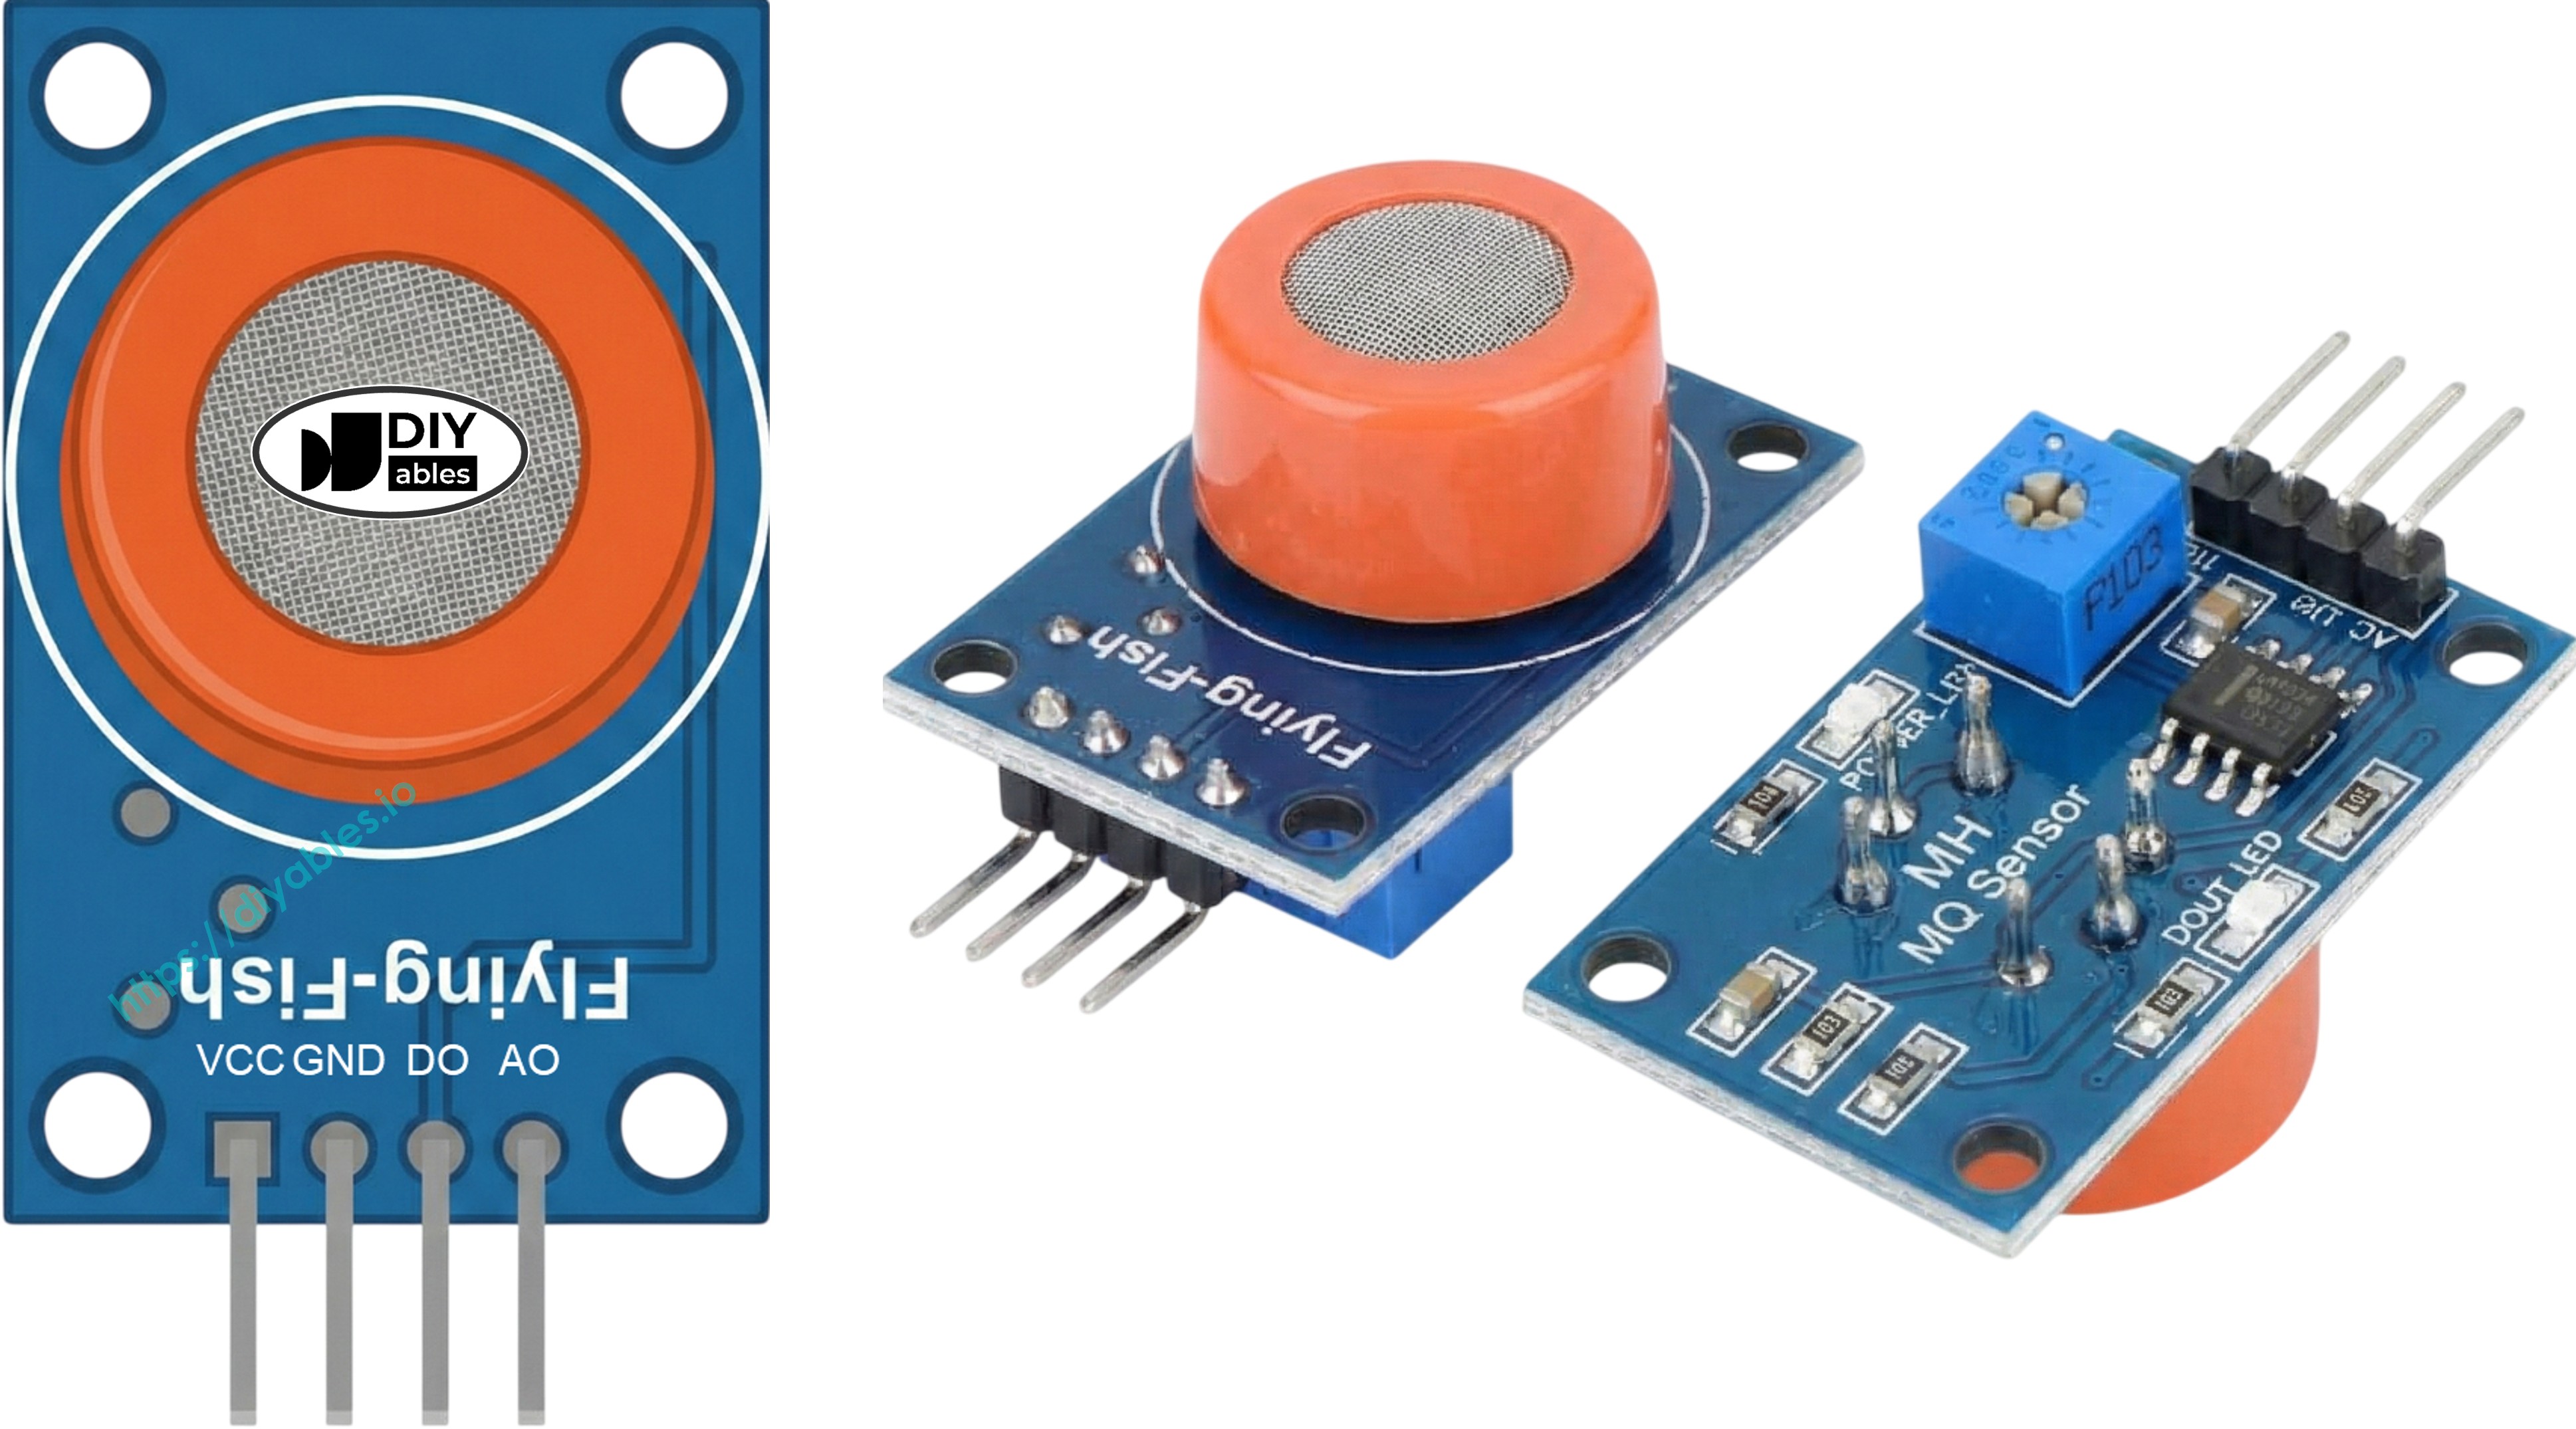
MQ3 알코올 센서는 에탄올(알코올) 증기를 감지하는 MOS(금속 산화물 반도체) 센서입니다. 내부의 이산화 주석(SnO2) 감지 소자는 알코올 증기가 존재할 때 저항을 변화시킵니다. 알코올 농도가 높을수록 저항이 낮아져 출력 전압이 높아집니다.
핀아웃
VCC 핀: 5V 전원 공급(가열 소자에는 5V 필요)
GND 핀: 접지
DO 핀: 디지털 출력 — HIGH = 알코올 없음, LOW = 알코올 감지됨. 기판의 포텐셜메이터로 감도 조정
AO 핀: 아날로그 출력 — 높은 값 = 더 높은 알코올 농도
LED 표시기
PWR-LED: 전원 표시기
DO-LED: 알코올이 감지되면 점등(DO 핀 LOW)
기술 사양
동작 전압: 5V DC
가열 저항: 33 Ω ± 5%
가열 소비 전력: < 800 mW
감지 범위: 25 – 500 ppm(백만분율)
워밍업 요구사항
첫 사용 또는 장기 보관 후(1개월 이상): 24–48시간 워밍업
일반 사용: 5–10분; 초기 판독값은 상승된 상태이며 안정화됩니다.
코드에는 setup()에서 최소 작동 지연으로 20초 워밍업 지연이 포함되어 있습니다.
※ 주의:
MQ3 AO 핀은 5V에서 전원 공급할 때 최대 ~5V를 출력할 수 있습니다. Arduino UNO Q MCU ADC 기준은 3.3V이므로, 3.3V 이상의 AO 값은 4095에서 포화됩니다. DO 핀을 주요 감지 방법으로 사용하세요. AO 판독값은 상대적 강도 표시기로만 사용됩니다.
음주측정기 임계값 보정
음주측정기 임계값은 특정 센서와 환경에 따라 다릅니다. 보정하려면:
깨끗한 공기 기준: 깨끗한 공기에서 센서를 실행하고 AO 값을 기록합니다(워밍업 후 12비트 범위에서 일반적으로 300–600).
알코올 증기로 테스트: 이소프로필 알코올 또는 손 소독제(증기만 사용 - 액체가 센서에 닿지 않도록)를 사용하고 AO 값을 기록합니다.
임계값 설정:SOBER_THRESHOLD를 깨끗한 공기 기준 바로 위에 정의하고; DRUNK_THRESHOLD를 알코올 감지 판독값을 기반으로 설정합니다.
예제 코드는 SOBER_THRESHOLD = 480 및 DRUNK_THRESHOLD = 1600을 사용합니다 — 이를 보정된 값으로 바꾸세요.
int do_state = digitalRead(DO_PIN); // HIGH = no alcohol, LOW = detectedint ao_value = analogRead(AO_PIN); // 0-4095, higher = more alcohol
디지털 출력에서 알코올을 확인합니다:
if (do_state == LOW) {Serial.print("Alcohol DETECTED! Intensity (AO): ");Serial.println(ao_value);}
Arduino UNO Q 코드
Arduino UNO Q에는 함께 작동하는 두 개의 프로세서가 있습니다:
STM32 MCU는 센서를 20초 동안 워밍업한 후 500ms마다 DO와 AO를 모두 읽습니다.
Qualcomm MPU는 Wi-Fi와 함께 Debian Linux를 실행합니다 — 이 섹션에서는 MCU만 프로그래밍합니다. 나중에 섹션에서는 Bridge를 통해 두 프로세서가 함께 작동하는 방법을 보여줍니다.
/* * 이 Arduino UNO Q 코드는 newbiely.kr 에서 개발되었습니다 * 이 Arduino UNO Q 코드는 어떠한 제한 없이 공개 사용을 위해 제공됩니다. * 상세한 지침 및 연결도에 대해서는 다음을 방문하세요: * https://newbiely.kr/tutorials/arduino-uno-q/arduino-uno-q-mq3-alcohol-sensor */// MQ3 Alcohol Sensor:// DO pin: HIGH = no alcohol, LOW = alcohol detected// AO pin: analog — higher value = more alcohol (12-bit ADC: 0-4095)// VCC = 5V (heating element requires 5V)// The MCU ADC reference is 3.3V. AO readings above 3.3V saturate at 4095.// Use the DO pin as the primary alcohol detection method.#define DO_PIN 2 // The Arduino UNO Q MCU pin connected to DO of the MQ3 sensor#define AO_PIN A0 // The Arduino UNO Q MCU pin connected to AO of the MQ3 sensorvoidsetup() {Serial.begin(9600);pinMode(DO_PIN, INPUT);Serial.println("Warming up the MQ3 alcohol sensor...");delay(20000); // allow sensor to warm upSerial.println("Arduino UNO Q MQ3 Alcohol Sensor ready");}voidloop() {int do_state = digitalRead(DO_PIN); // HIGH = no alcohol, LOW = detectedint ao_value = analogRead(AO_PIN); // 0-4095, higher = more alcoholif (do_state == LOW) {Serial.print("Alcohol DETECTED! Intensity (AO): ");Serial.println(ao_value); } else {Serial.print("No alcohol. AO value: ");Serial.println(ao_value); }delay(500);}
빠른 단계
Arduino UNO Q를 처음 사용하나요? 진행하기 전에 아두이노 우노 Q 시작하기 튜토리얼을 따르세요.
연결: 배선 다이어그램에 표시된 대로 MQ3 알코올 센서를 Arduino UNO Q MCU에 배선합니다.
Arduino App Lab 열기: Arduino App Lab을 실행하고 Arduino UNO Q를 감지할 때까지 기다립니다.
새 앱 만들기:Create New App 버튼을 클릭합니다.
앱에 이름을 지정합니다(예: AlcoholSensor).
Create를 클릭하여 확인합니다.
스케치 붙여넣기: 위의 MCU 코드를 복사하여 sketch/sketch.ino에 붙여넣습니다.
업로드: Arduino App Lab의 실행 버튼을 클릭합니다.
직렬 모니터에서 20초 워밍업 메시지를 기다립니다.
조심스럽게 센서 근처에 이소프로필 알코올 증기를 가져가고(액체를 센서에 흘리지 마세요) 직렬 모니터 출력을 관찰합니다.
DO LED가 예상대로 응답하지 않으면 포텐셜메이터를 조정합니다.
App Lab 콘솔 출력
DIYables_Apps
Stop
sketch.ino
1#include"Arduino_RouterBridge.h"
Serial Monitor
Python
Message (Enter to send a message to "Newbiely" on usb(2820070321))
New Line
9600 baud
[2026-04-29 09:00:01] Warming up the MQ3 alcohol sensor...
[2026-04-29 09:00:21] Arduino UNO Q MQ3 Alcohol Sensor ready
[2026-04-29 09:00:22] No alcohol. AO value: 385
[2026-04-29 09:00:23] No alcohol. AO value: 382
[2026-04-29 09:00:24] Alcohol DETECTED! Intensity (AO): 1564
[2026-04-29 09:00:25] Alcohol DETECTED! Intensity (AO): 2418
[2026-04-29 09:00:26] No alcohol. AO value: 390
Arduino UNO Q 코드 — 음주측정기
아날로그 출력(AO)을 사용하여 알코올 강도를 측정하고 결과를 정상, 기준 이내, 또는 높음로 분류합니다.
※ 주의:
특정 센서에 대한 임계값을 보정합니다. SOBER_THRESHOLD 및 DRUNK_THRESHOLD를 자신의 센서에서 깨끗한 공기 및 알코올 노출 중에 측정한 값으로 바꾸세요.
/* * 이 Arduino UNO Q 코드는 newbiely.kr 에서 개발되었습니다 * 이 Arduino UNO Q 코드는 어떠한 제한 없이 공개 사용을 위해 제공됩니다. * 상세한 지침 및 연결도에 대해서는 다음을 방문하세요: * https://newbiely.kr/tutorials/arduino-uno-q/arduino-uno-q-mq3-alcohol-sensor */// Breathalyzer mode using AO pin// Thresholds are approximate for 12-bit ADC (0-4095) — calibrate for your sensor!// Run the sensor in clean air to find the baseline AO value, then blow near the sensor// after drinking to find an appropriate DRINKING_THRESHOLD.#define AO_PIN A0 // The Arduino UNO Q MCU pin connected to AO of the MQ3 sensor// REPLACE THESE with your calibrated values!#define SOBER_THRESHOLD 480 // Below this = sober (≈ 120 × 4 for 12-bit)#define DRUNK_THRESHOLD 1600 // Above this = over limit (≈ 400 × 4 for 12-bit)voidsetup() {Serial.begin(9600);Serial.println("MQ3 Alcohol Sensor - Breathalyzer Mode");Serial.println("Warming up sensor...");delay(20000);Serial.println("Sensor ready! Blow near the sensor to measure.");}voidloop() {int ao_value = analogRead(AO_PIN);Serial.print("AO value: ");Serial.print(ao_value);Serial.print(" | Status: ");if (ao_value < SOBER_THRESHOLD) {Serial.println("Sober"); } elseif (ao_value < DRUNK_THRESHOLD) {Serial.println("Alcohol detected — within limits"); } else {Serial.println("HIGH alcohol level detected!"); }delay(1000);}
App Lab 콘솔 출력
DIYables_Apps
Stop
sketch.ino
1#include"Arduino_RouterBridge.h"
Serial Monitor
Python
Message (Enter to send a message to "Newbiely" on usb(2820070321))
New Line
9600 baud
[2026-04-29 09:05:21] MQ3 Alcohol Sensor - Breathalyzer Mode
[2026-04-29 09:05:21] Warming up sensor...
[2026-04-29 09:05:41] Sensor ready! Blow near the sensor to measure.
[2026-04-29 09:05:42] AO value: 382 | Status: Sober
[2026-04-29 09:05:43] AO value: 385 | Status: Sober
[2026-04-29 09:05:44] AO value: 1321 | Status: Alcohol detected — within limits
[2026-04-29 09:05:45] AO value: 2865 | Status: HIGH alcohol level detected!
[2026-04-29 09:05:46] AO value: 480 | Status: Sober
Bridge: Linux + MCU
이 섹션에서는 Arduino UNO Q의 두 프로세서를 프로그래밍하여 Linux 측에서 Bridge를 통해 알코올 상태, 강도 값, 음주측정기 수준 및 이벤트를 읽을 수 있는 방법을 보여줍니다:
알코올 센서는 MCU에 연결됩니다 — MCU는 20초 동안 워밍업한 후 500ms마다 DO와 AO를 읽습니다.
MPU는 센서 핀을 직접 읽을 수 없습니다 — Bridge 함수를 호출하여 상태, 값, 수준 또는 이벤트를 얻습니다.
MPU는 Wi-Fi를 가지고 있습니다 — 전체 Debian Linux를 실행하며, 알코올이 감지될 때 즉시 Telegram 알림을 보낼 수 있습니다.
Arduino_RouterBridge는 두 프로세서 간의 RPC 통신을 활성화합니다.
⚠️ /dev/ttyHS1(Linux) 및 Serial1(MCU)은 라우터에 의해 예약됨 — 사용자 코드에서 절대 열지 마세요.
MCU 코드(Bridge)
/* * 이 Arduino UNO Q 코드는 newbiely.kr 에서 개발되었습니다 * 이 Arduino UNO Q 코드는 어떠한 제한 없이 공개 사용을 위해 제공됩니다. * 상세한 지침 및 연결도에 대해서는 다음을 방문하세요: * https://newbiely.kr/tutorials/arduino-uno-q/arduino-uno-q-mq3-alcohol-sensor */#include"Arduino_RouterBridge.h"#define DO_PIN 2 // The Arduino UNO Q MCU pin connected to DO of the MQ3 sensor#define AO_PIN A0 // The Arduino UNO Q MCU pin connected to AO of the MQ3 sensor// Breathalyzer thresholds (12-bit ADC) — calibrate for your sensor!#define SOBER_THRESHOLD 480#define DRUNK_THRESHOLD 1600bool cached_alcohol = false;int cached_ao = 0;bool alcohol_event = false;bool prev_alcohol = false;unsignedlong last_read_ms = 0;constunsignedlong READ_INTERVAL = 500;String get_state(String arg) {return cached_alcohol ? "alcohol" : "no_alcohol";}String get_value(String arg) {returnString(cached_ao);}String get_level(String arg) {if (cached_ao < SOBER_THRESHOLD) return"sober";if (cached_ao < DRUNK_THRESHOLD) return"within_limits";return"high";}String get_event(String arg) {if (alcohol_event) { alcohol_event = false;return"alcohol_detected"; }return"none";}voidsetup() {Bridge.begin(); Monitor.begin();pinMode(DO_PIN, INPUT); Monitor.println("Warming up the MQ3 alcohol sensor...");delay(20000);Bridge.provide("get_state", get_state);Bridge.provide("get_value", get_value);Bridge.provide("get_level", get_level);Bridge.provide("get_event", get_event); Monitor.println("Arduino UNO Q MQ3 Alcohol Sensor Bridge ready");}voidloop() {unsignedlongnow = millis();if (now - last_read_ms >= READ_INTERVAL) { last_read_ms = now;int do_state = digitalRead(DO_PIN); // LOW = alcohol detected cached_ao = analogRead(AO_PIN); cached_alcohol = (do_state == LOW);if (cached_alcohol && !prev_alcohol) { alcohol_event = true; Monitor.print("ALCOHOL DETECTED! AO value: "); Monitor.println(cached_ao); } elseif (!cached_alcohol && prev_alcohol) { Monitor.println("Alcohol cleared."); } prev_alcohol = cached_alcohol; }}
Python 코드(Bridge)
/* * 이 Arduino UNO Q 코드는 newbiely.kr 에서 개발되었습니다 * 이 Arduino UNO Q 코드는 어떠한 제한 없이 공개 사용을 위해 제공됩니다. * 상세한 지침 및 연결도에 대해서는 다음을 방문하세요: * https://newbiely.kr/tutorials/arduino-uno-q/arduino-uno-q-mq3-alcohol-sensor */from arduino.app_utils import *import timedef loop(): state = Bridge.call("get_state") value = Bridge.call("get_value") level = Bridge.call("get_level")print(f"Alcohol state: {state} AO value: {value} Level: {level}") time.sleep(0.5)App.run(user_loop=loop)
빠른 단계
연결: 배선 다이어그램에 표시된 대로 MQ3 알코올 센서를 Arduino UNO Q에 배선합니다.
Arduino App Lab 열기 및 AlcoholSensorBridge라는 새 앱을 만듭니다.
MCU 스케치를sketch/sketch.ino에 붙여넣습니다.
Python 코드를 Python 파일에 붙여넣습니다.
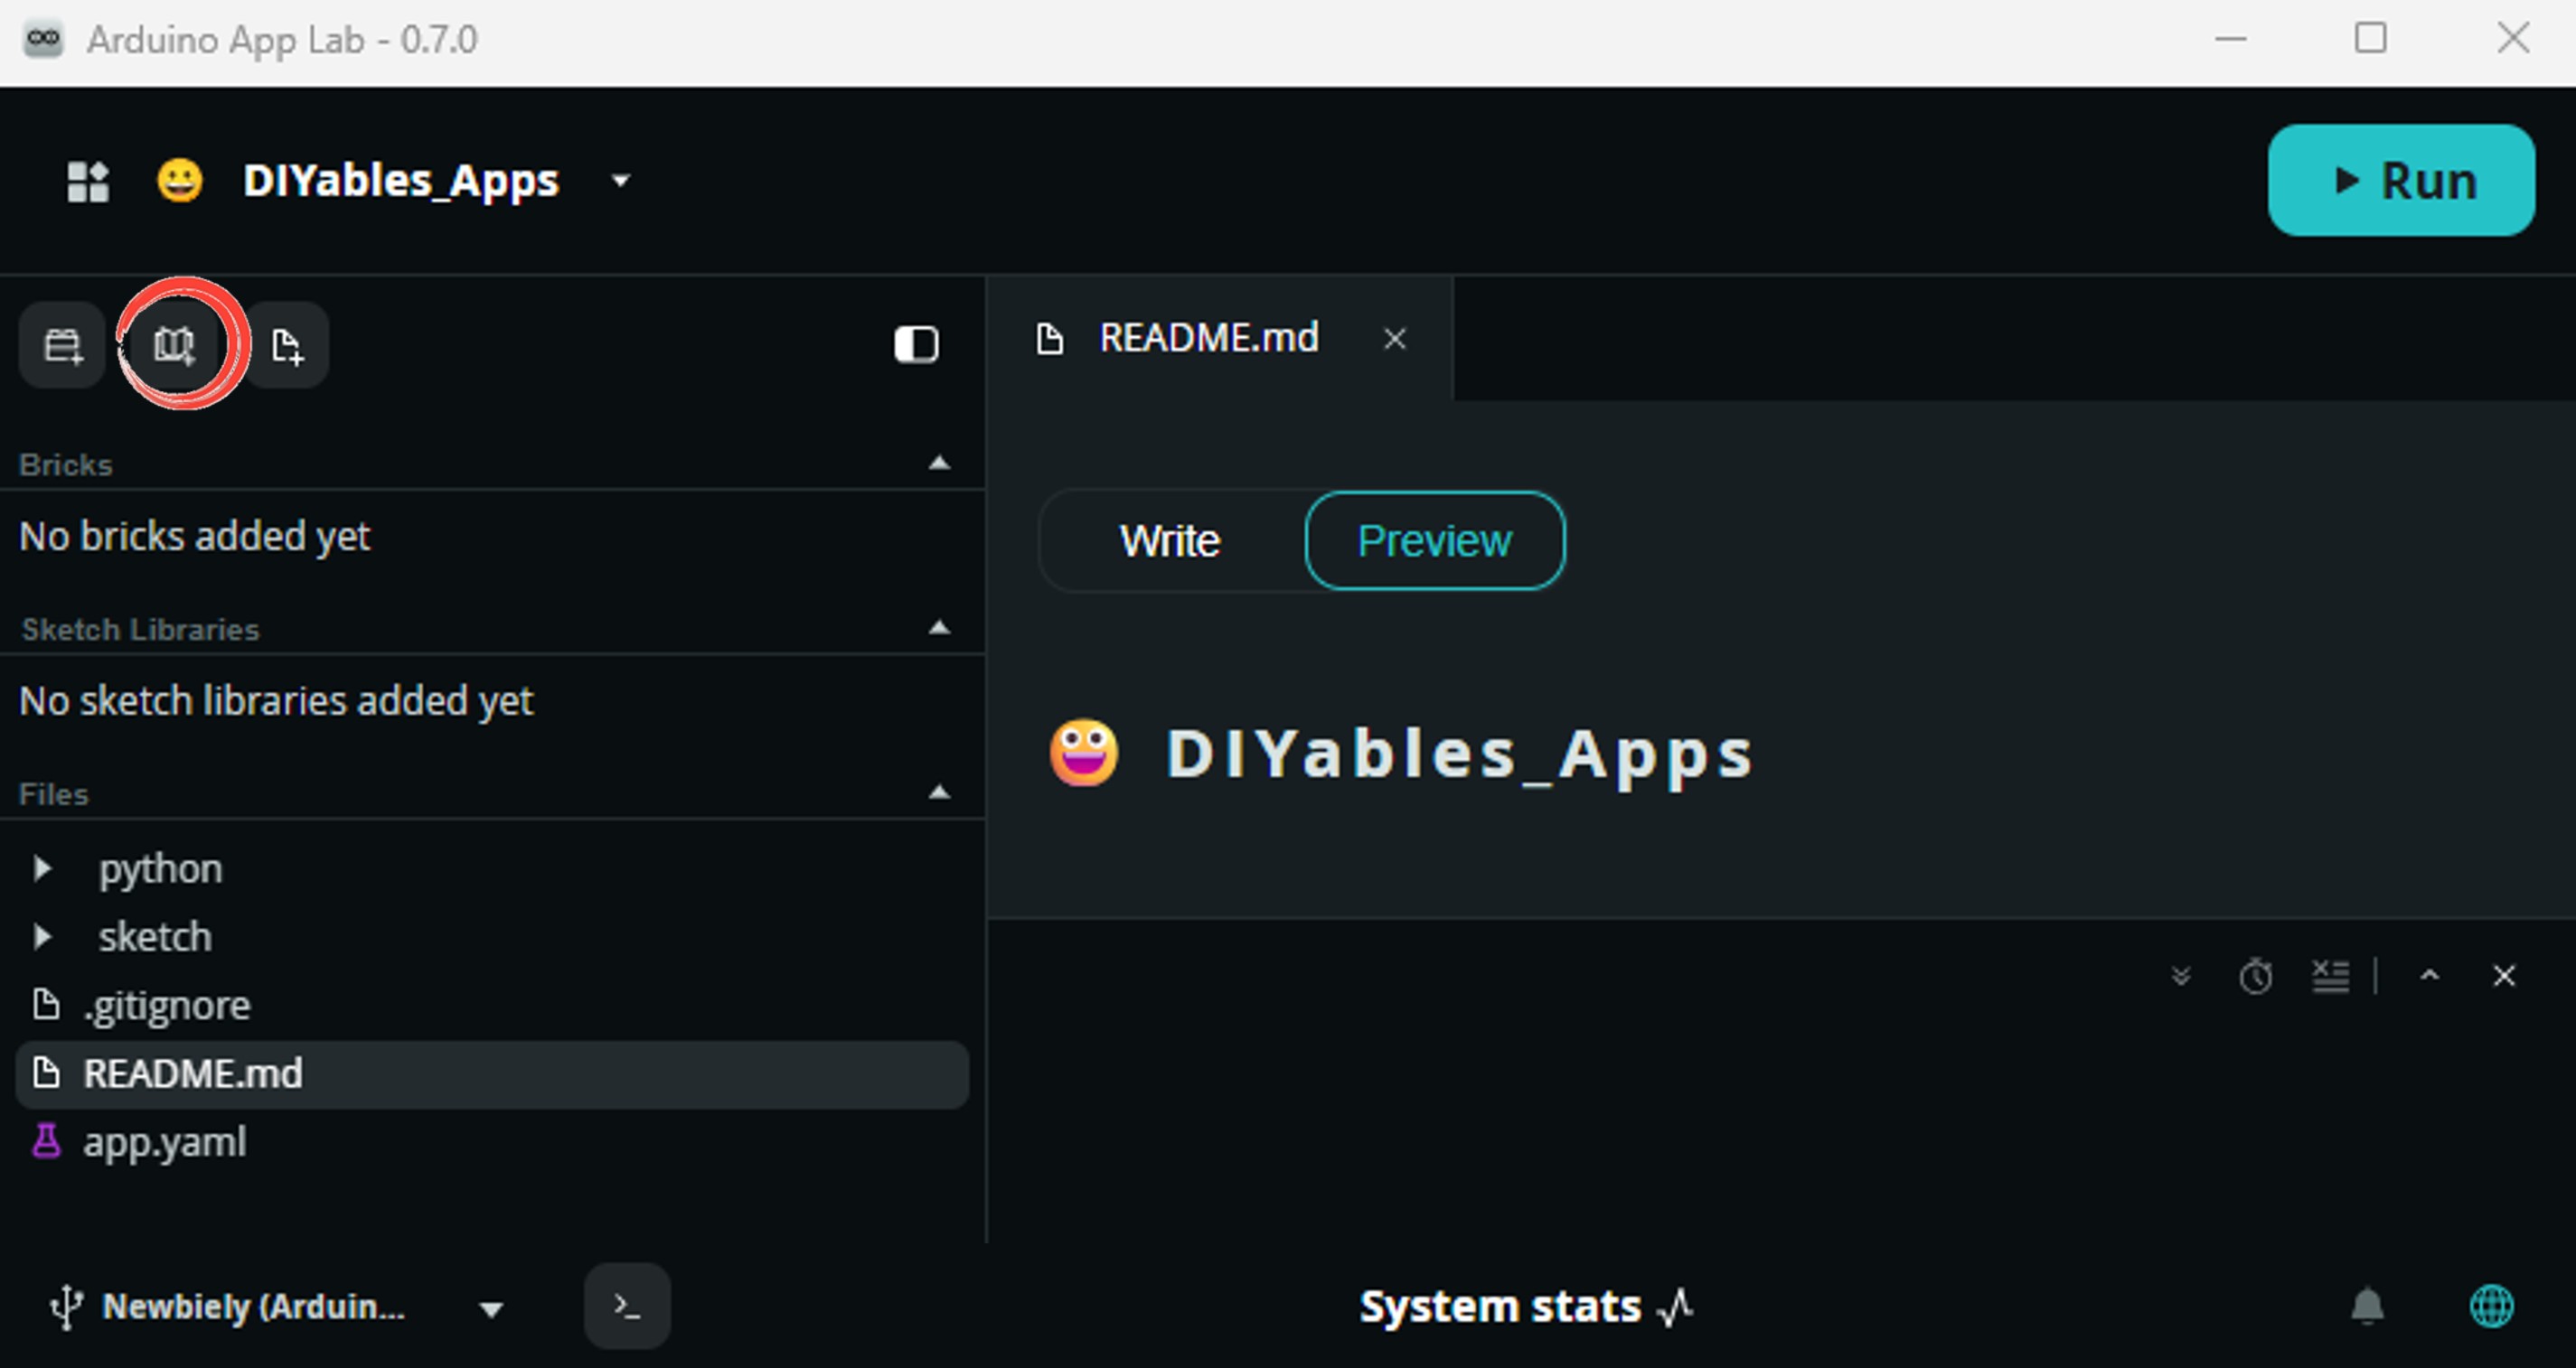
Install the library: Click the Add sketch library button (the open book icon with a + sign) in the left sidebar.
Search for Arduino_RouterBridge created by Arduino and click the Install button.
My Apps/DIYables Apps
Run
Bricks
No bricks added...
Sketch Libraries
No sketch libra...
Files
python
sketch
.gitignore
README.md
app.yaml
sketch.ino
Add sketch library
Arduino_RouterBridge
Arduino_RouterBridgeArduino
This library provides a simple RPC bridge for Arduino UNO Q boards, allowing communication between the board and other devices using MsgPack serialization.
0.4.1
Install
More Info
업로드: 실행 버튼을 클릭합니다. 워밍업 기간이 끝날 때까지 기다립니다.
센서를 알코올 증기에 노출하고 두 콘솔 모두에서 나타나는 이벤트를 관찰합니다.
App Lab 콘솔 출력
DIYables_Apps
Stop
sketch.ino
1#include"Arduino_RouterBridge.h"
Serial Monitor
Python
Message (Enter to send a message to "Newbiely" on usb(2820070321))
New Line
9600 baud
[2026-04-29 09:00:01] Warming up the MQ3 alcohol sensor...
[2026-04-29 09:00:21] Arduino UNO Q MQ3 Alcohol Sensor Bridge ready
[2026-04-29 09:00:26] ALCOHOL DETECTED! AO value: 1564
[2026-04-29 09:00:30] Alcohol cleared.
DIYables_Apps
Stop
sketch.ino
1#include"Arduino_RouterBridge.h"
Serial Monitor
Python
[2026-04-29 09:00:22] Alcohol state: no_alcohol AO value: 385 Level: sober
[2026-04-29 09:00:23] Alcohol state: no_alcohol AO value: 382 Level: sober
[2026-04-29 09:00:26] Alcohol state: alcohol AO value: 1564 Level: within_limits
[2026-04-29 09:00:28] Alcohol state: alcohol AO value: 2418 Level: high
[2026-04-29 09:00:30] Alcohol state: no_alcohol AO value: 390 Level: sober
Telegram
Arduino UNO Q에서 즉시 Telegram 알코올 감지 알림을 받고 원격으로 센서의 상태, 강도 또는 음주측정기 수준을 쿼리합니다.
MCU 스케치: 이전 Bridge 섹션의 동일한 MCU 스케치를 유지합니다.
Python 코드(Telegram)
/* * 이 Arduino UNO Q 코드는 newbiely.kr 에서 개발되었습니다 * 이 Arduino UNO Q 코드는 어떠한 제한 없이 공개 사용을 위해 제공됩니다. * 상세한 지침 및 연결도에 대해서는 다음을 방문하세요: * https://newbiely.kr/tutorials/arduino-uno-q/arduino-uno-q-mq3-alcohol-sensor */from arduino.app_utils import *import requestsimport timeTELEGRAM_BOT_TOKEN = "YOUR_TELEGRAM_BOT_TOKEN"CHAT_ID = "YOUR_CHAT_ID"last_update_id = 0def get_updates():global last_update_id url = f"https://api.telegram.org/bot{TELEGRAM_BOT_TOKEN}/getUpdates" params = {"offset": last_update_id + 1, "timeout": 5}try: response = requests.get(url, params=params, timeout=10) data = response.json()if data["ok"]:return data["result"]exceptExceptionas e:print(f"Error getting updates: {e}")return []def send_message(chat_id, text): url = f"https://api.telegram.org/bot{TELEGRAM_BOT_TOKEN}/sendMessage" payload = {"chat_id": chat_id, "text": text}try: requests.post(url, data=payload, timeout=10)exceptExceptionas e:print(f"Error sending message: {e}")def loop():# Auto-alert on alcohol detection event = Bridge.call("get_event")if event == "alcohol_detected": value = Bridge.call("get_value") level = Bridge.call("get_level")print(f"ALCOHOL DETECTED! AO value: {value} Level: {level}") send_message(CHAT_ID, f"🍺 ALCOHOL DETECTED! AO intensity: {value}, Level: {level}")# Handle Telegram commands updates = get_updates()for update in updates: last_update_id = update["update_id"]if"message"notin update:continue message = update["message"] chat_id = message["chat"]["id"] text = message.get("text", "").strip()print(f"Received: {text}")if text == "/start": send_message(chat_id,"Arduino UNO Q Alcohol Sensor Bot\n""/state - Alcohol state (alcohol / no_alcohol)\n""/value - AO intensity value (0-4095)\n""/level - Breathalyzer level (sober / within_limits / high)\n""Automatic alert when alcohol is detected!")elif text == "/state": result = Bridge.call("get_state") send_message(chat_id, f"Alcohol state: {result}")elif text == "/value": result = Bridge.call("get_value") send_message(chat_id, f"AO intensity value: {result}")elif text == "/level": result = Bridge.call("get_level") send_message(chat_id, f"Breathalyzer level: {result}")else: send_message(chat_id, "Unknown command. Send /start for help.") time.sleep(0.3)App.run(user_loop=loop)
빠른 단계
YOUR_TELEGRAM_BOT_TOKEN을 BotFather의 실제 봇 토큰으로 바꿉니다.
YOUR_CHAT_ID를 Telegram 채팅 ID로 바꿉니다.
이 Python 코드를 앱의 Python 파일에 붙여넣습니다(동일한 MCU 스케치 유지).
실행 버튼을 클릭합니다 — 워밍업을 기다린 후 센서를 알코올 증기에 노출하여 Telegram 알림을 트리거합니다.