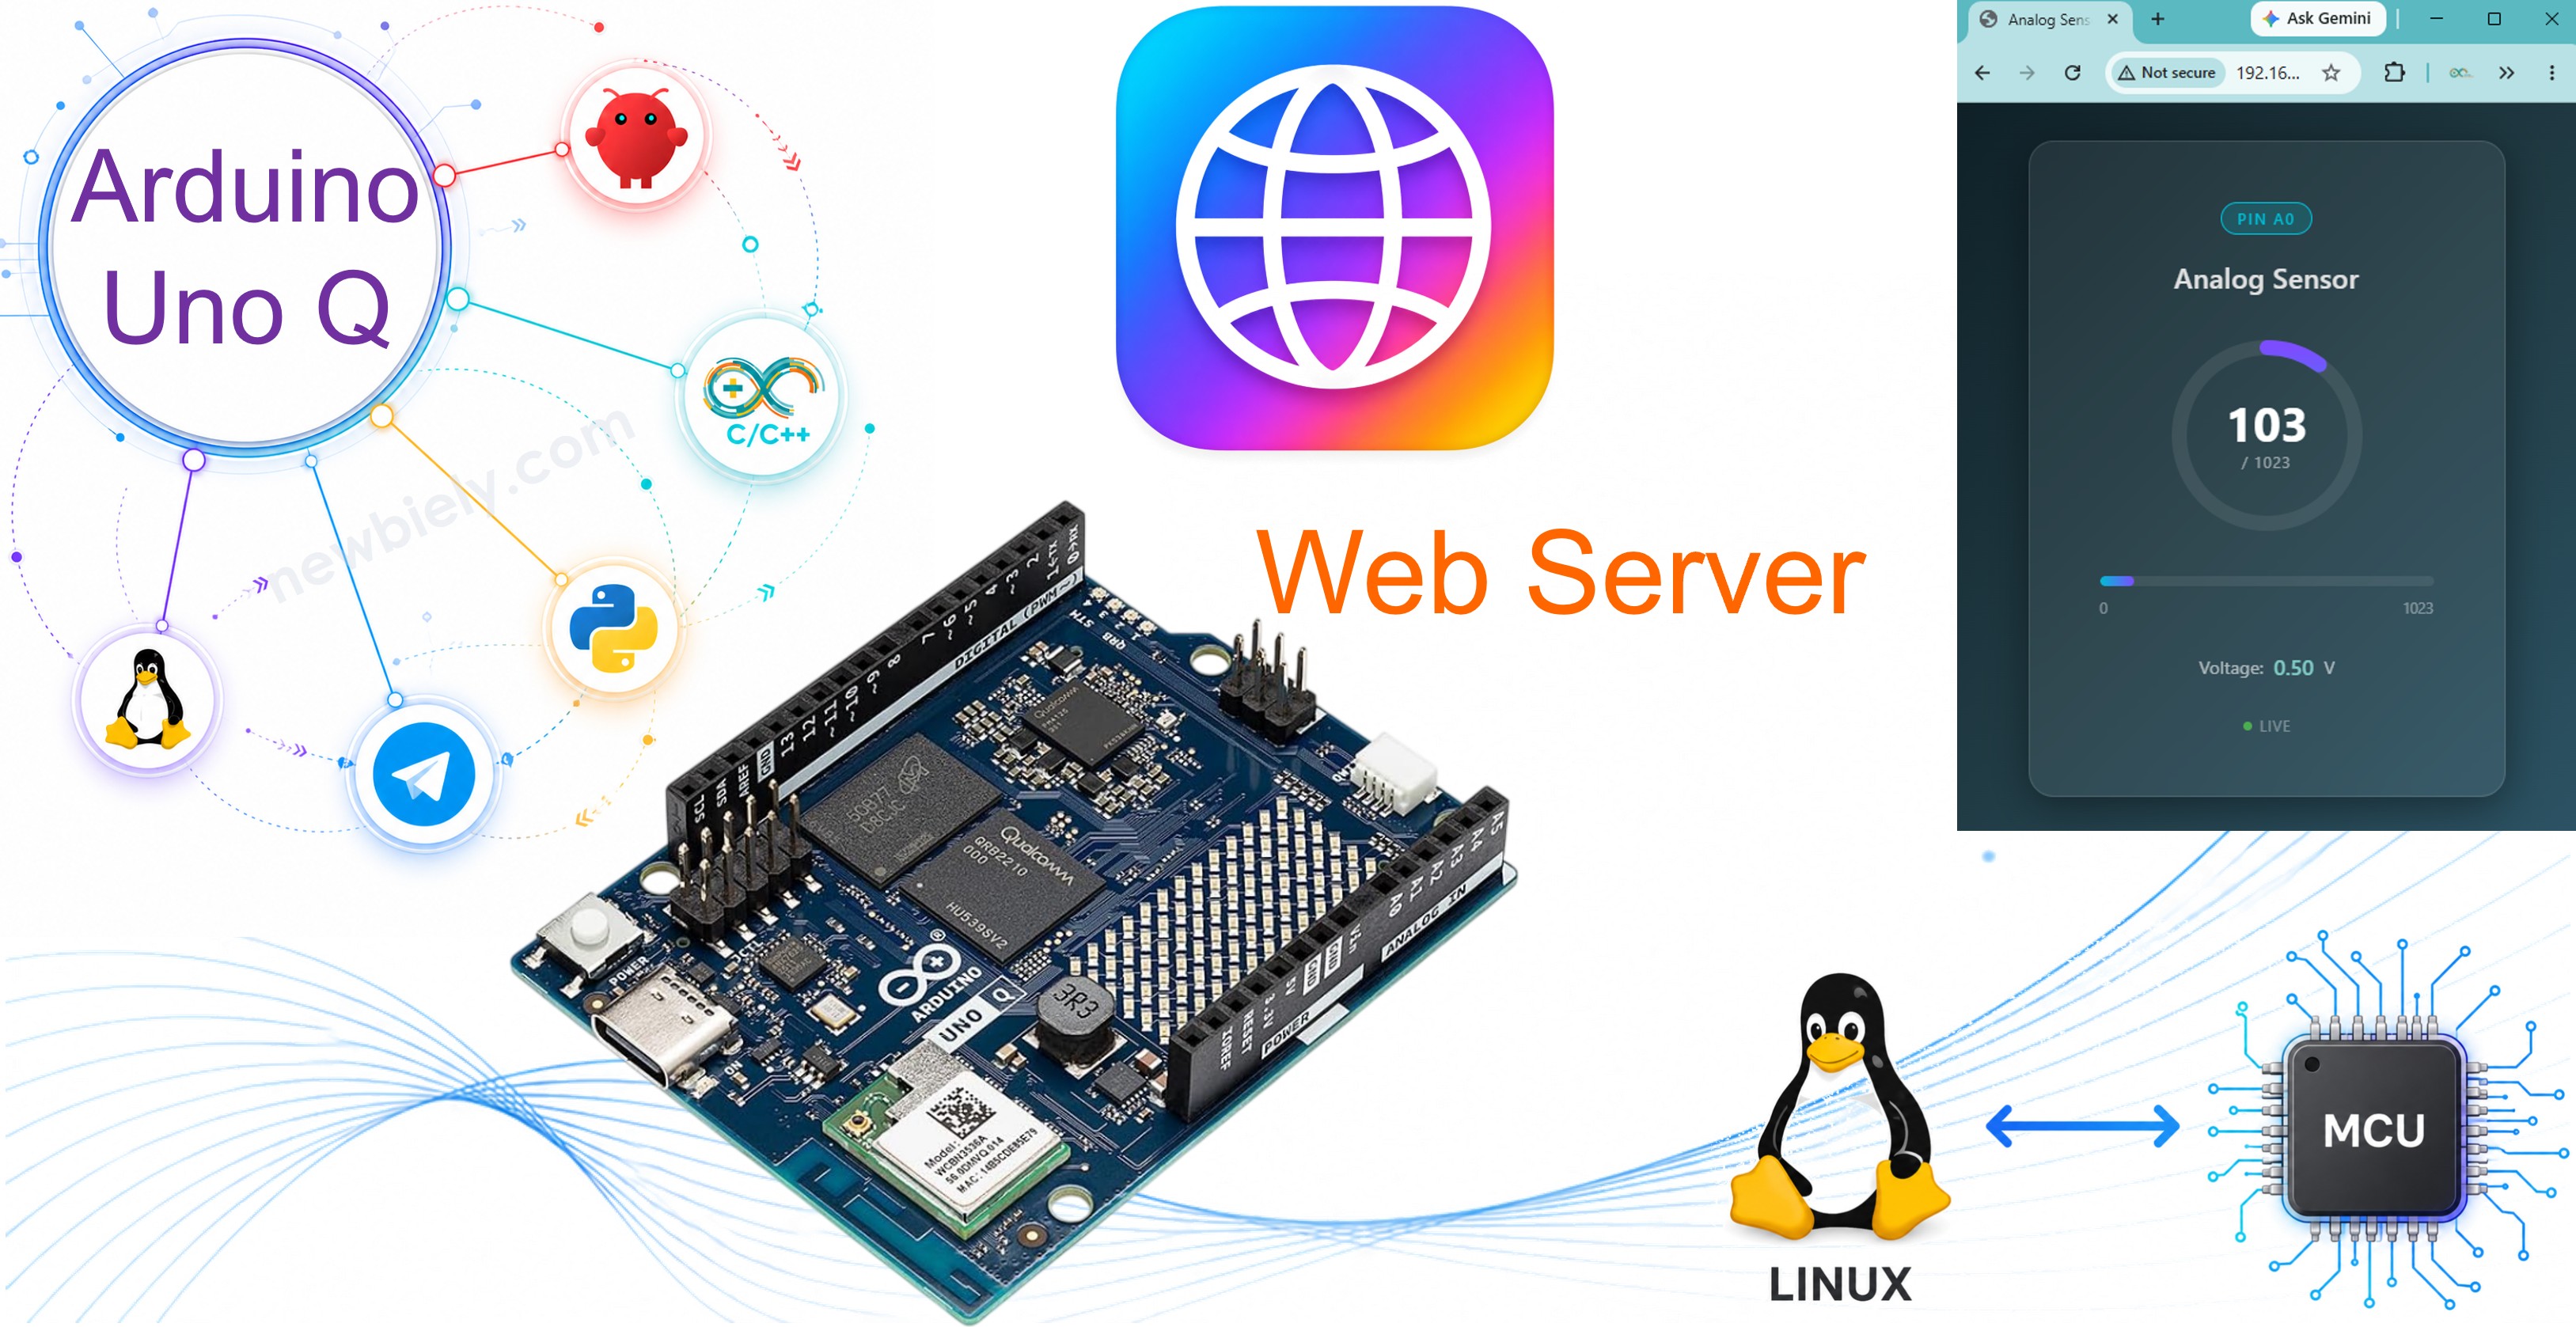
Arduino UNO Q에는 내장 Debian Linux MPU가 있으므로 전체 웹 서버를 실행할 수 있습니다 - 추가 Wi-Fi 쉴드나 클라우드 서비스가 필요하지 않습니다. 이 튜토리얼에서는 세 개의 점진적인 예제를 통해 Arduino UNO Q에서 Python WebUI 웹 서버를 실행하는 방법을 보여줍니다. 가장 간단한 페이지부터 시작하여 깔끔한 API를 구축합니다.
이 튜토리얼에서 배우게 될 내용:
최소 HTML 페이지(CSS, JavaScript 없음)에서 원시 센서 판독값을 표시하는 방법
자산 폴더에서 전체 웹 페이지를 제공하는 방법 (HTML + CSS + JavaScript)
MCU 센서 데이터를 순수 JSON API 끝점으로 노출하는 방법
Bridge가 MCU 스케치와 Python 웹 서버를 연결하는 방법
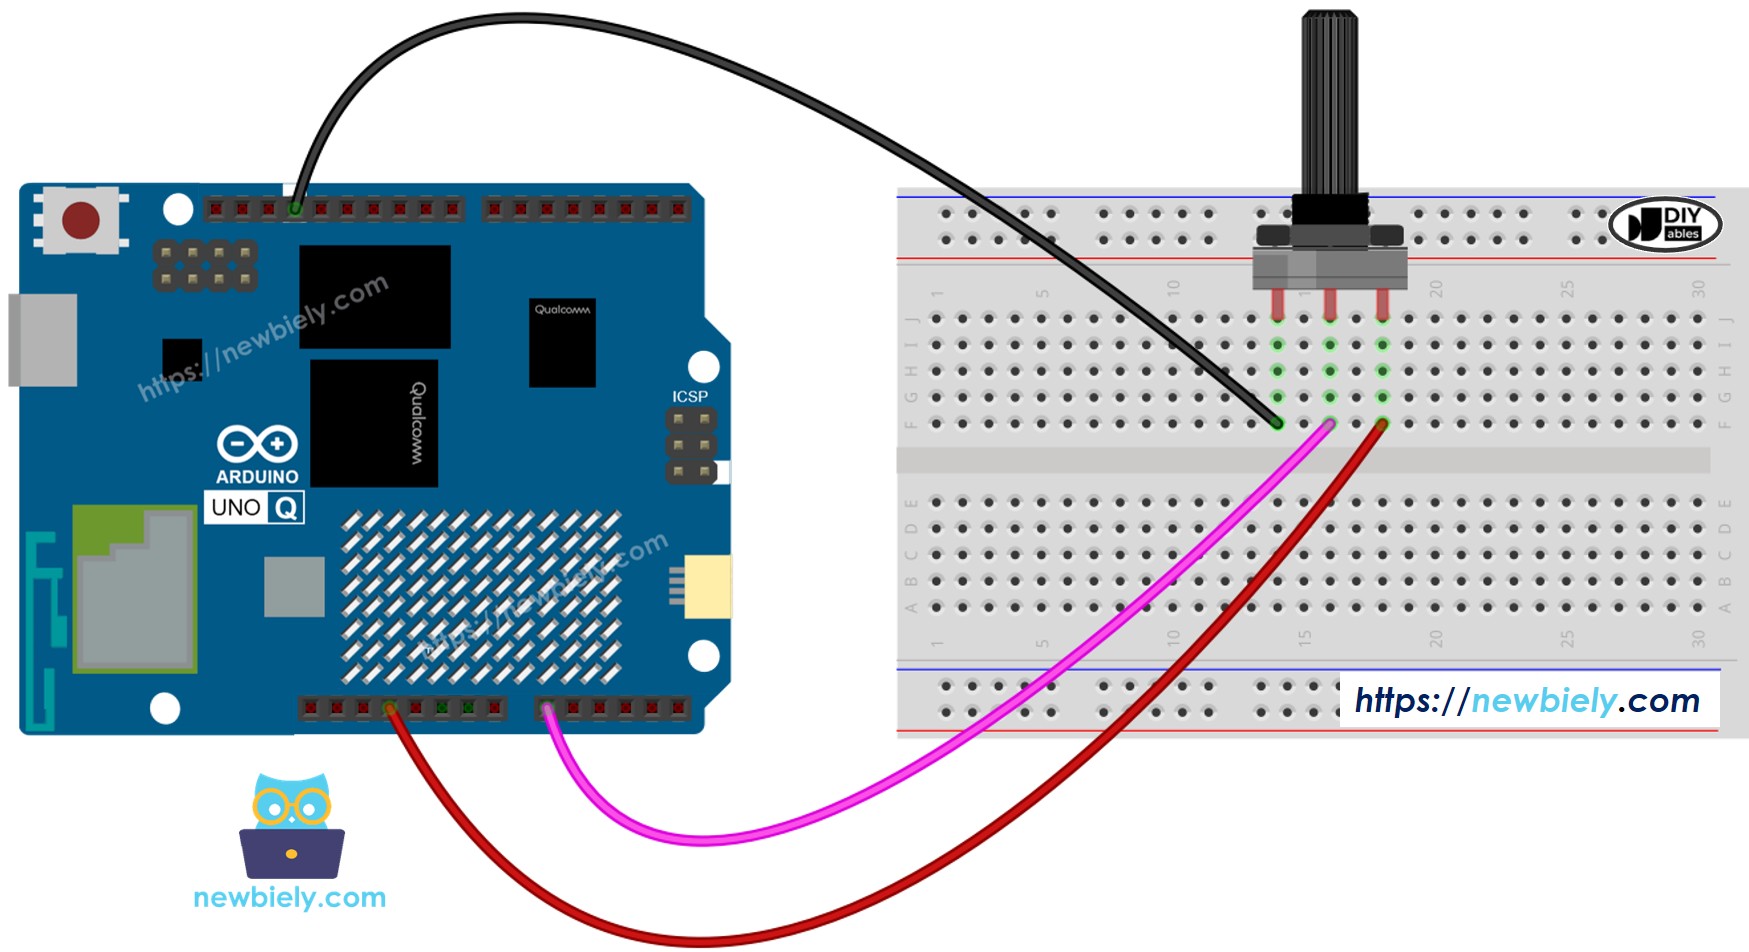
포텐셔미터를 Arduino UNO Q의 아날로그 핀 A0에 배선하는 방법
Arduino App Lab에서 WebUI Brick을 추가하여 자동으로 HTTP 서빙을 처리하는 방법
공개: 이 포스팅 에 제공된 일부 링크는 아마존 제휴 링크입니다. 이 포스팅은 쿠팡 파트너스 활동의 일환으로, 이에 따른 일정액의 수수료를 제공받습니다.
Arduino UNO Q 웹 서버 작동 방식
Arduino UNO Q는 두 개의 프로세서를 결합합니다:
STM32 MCU — Arduino 스케치(C/C++)를 실시간으로 실행합니다. 센서를 읽고, 릴레이를 제어하며, 모터를 구동하는 등의 작업을 합니다.
Qualcomm MPU — 전체 Debian Linux를 실행합니다. Wi-Fi에 연결되고 Python WebUI 웹 서버를 실행할 수 있으므로 네트워크의 모든 브라우저에서 액세스할 수 있습니다.
두 프로세서는 Bridge를 통해 통신합니다. MCU는 Bridge를 통해 하드웨어 함수를 노출하고, MPU의 Python 웹 서버는 이러한 함수를 호출하여 센서 판독값을 얻습니다. 그런 다음 브라우저는 데이터를 가져옵니다 - 순수 HTML 페이지, 스타일이 지정된 웹 페이지 또는 JSON API 응답으로.
※ 주의:
외부 Wi-Fi 쉴드가 필요하지 않습니다. Arduino UNO Q에는 Linux 측에 내장 Wi-Fi가 있습니다.
Arduino UNO Q에는 두 개의 프로세서가 있습니다. 웹 서버의 경우 다음을 작성합니다:
아날로그 핀을 읽고 Bridge를 통해 값을 노출하는 MCU 스케치.
Linux MPU에서 HTTP를 통해 값을 제공하는 Python WebUI 스크립트.
아래의 세 예제 모두 동일한 MCU 스케치를 사용합니다. Python 코드(및 선택적 HTML 자산)만 다릅니다.
예제 1 — 간단한 웹 페이지 (CSS, JavaScript 없음)
가장 간단한 웹 서버: 브라우저를 열고, 보드의 IP를 방문하고, 순수 HTML로 원시 아날로그 판독값을 표시합니다. 스타일 없음, 자동 새로고침 없음 — 숫자만 표시됩니다.
MCU 스케치는 핀 A0을 읽고 get_analog라는 Bridge 함수를 통해 값을 노출합니다. Python 서버는 브라우저가 /을 요청할 때 해당 함수를 호출하고 순수 HTML 응답을 반환합니다.
MCU 코드
/* * 이 Arduino UNO Q 코드는 newbiely.kr 에서 개발되었습니다 * 이 Arduino UNO Q 코드는 어떠한 제한 없이 공개 사용을 위해 제공됩니다. * 상세한 지침 및 연결도에 대해서는 다음을 방문하세요: * https://newbiely.kr/tutorials/arduino-uno-q/arduino-uno-q-web-server */#include"Arduino_RouterBridge.h"String get_analog(String arg) {int value = analogRead(A0);returnString(value);}voidsetup() { Monitor.begin();Bridge.begin();Bridge.provide_safe("get_analog", get_analog); Monitor.println("Bridge ready");}voidloop() {}
Python 코드
/* * 이 Arduino UNO Q 코드는 newbiely.kr 에서 개발되었습니다 * 이 Arduino UNO Q 코드는 어떠한 제한 없이 공개 사용을 위해 제공됩니다. * 상세한 지침 및 연결도에 대해서는 다음을 방문하세요: * https://newbiely.kr/tutorials/arduino-uno-q/arduino-uno-q-web-server */from arduino.app_utils import *from arduino.app_bricks.web_ui import WebUIfrom fastapi.responses import HTMLResponsedef index(): value = Bridge.call("get_analog", "") html = "<!DOCTYPE html><html><body><p>Analog A0: " + value + "</p></body></html>"return HTMLResponse(content=html)web_ui = WebUI()web_ui.expose_api("GET", "/", index)App.run()
빠른 단계
연결: Arduino UNO Q를 USB-C 케이블로 컴퓨터에 연결하고 배선도 섹션에 설명된 대로 포텐셔미터를 A0에 배선합니다.
Wi-Fi 연결: Arduino UNO Q가 Wi-Fi 네트워크에 연결되어 있는지 확인합니다. Arduino App Lab의 네트워크 아이콘을 사용하여 먼저 연결합니다.
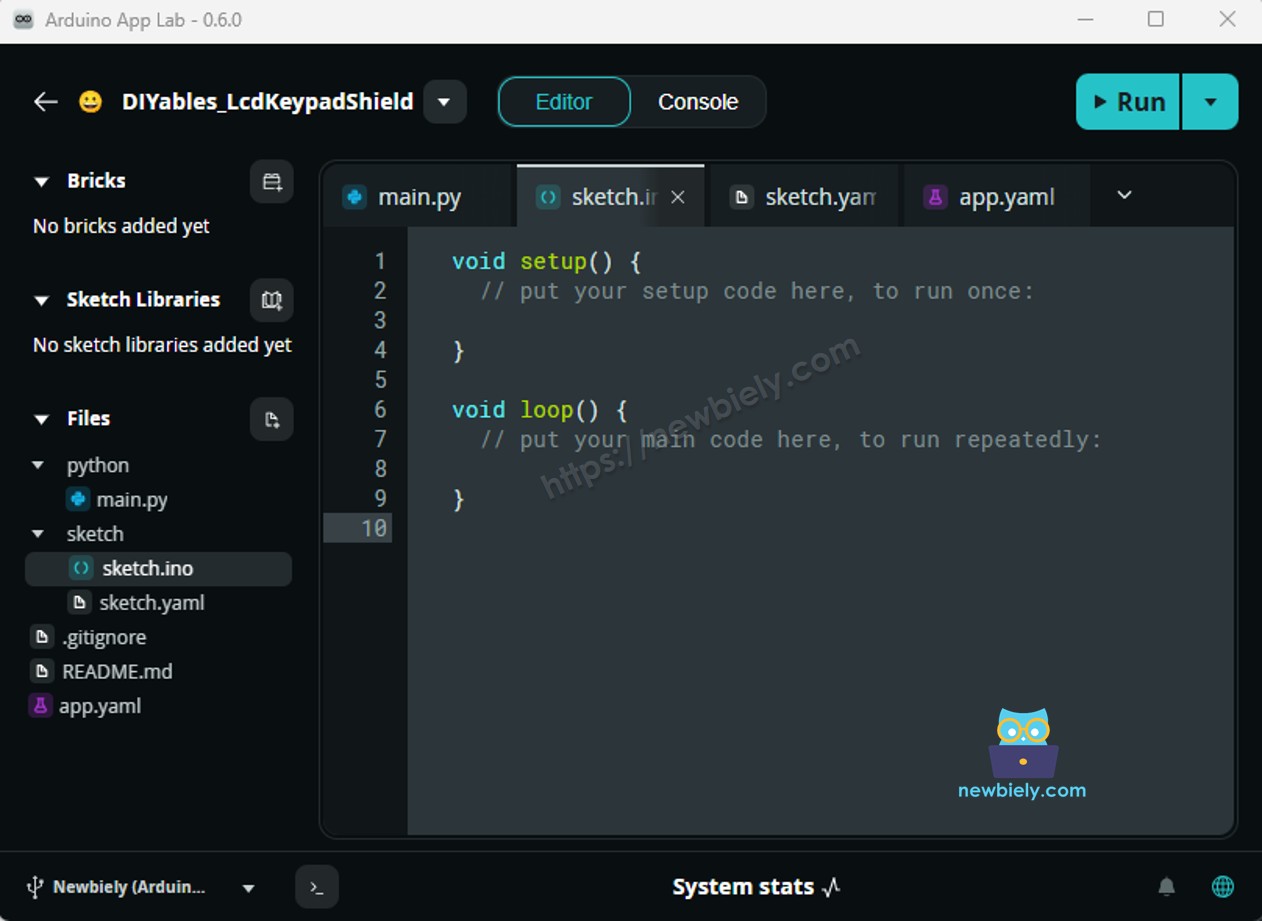
Arduino App Lab 열기: Arduino App Lab을 시작하고 Arduino UNO Q가 감지될 때까지 기다립니다.
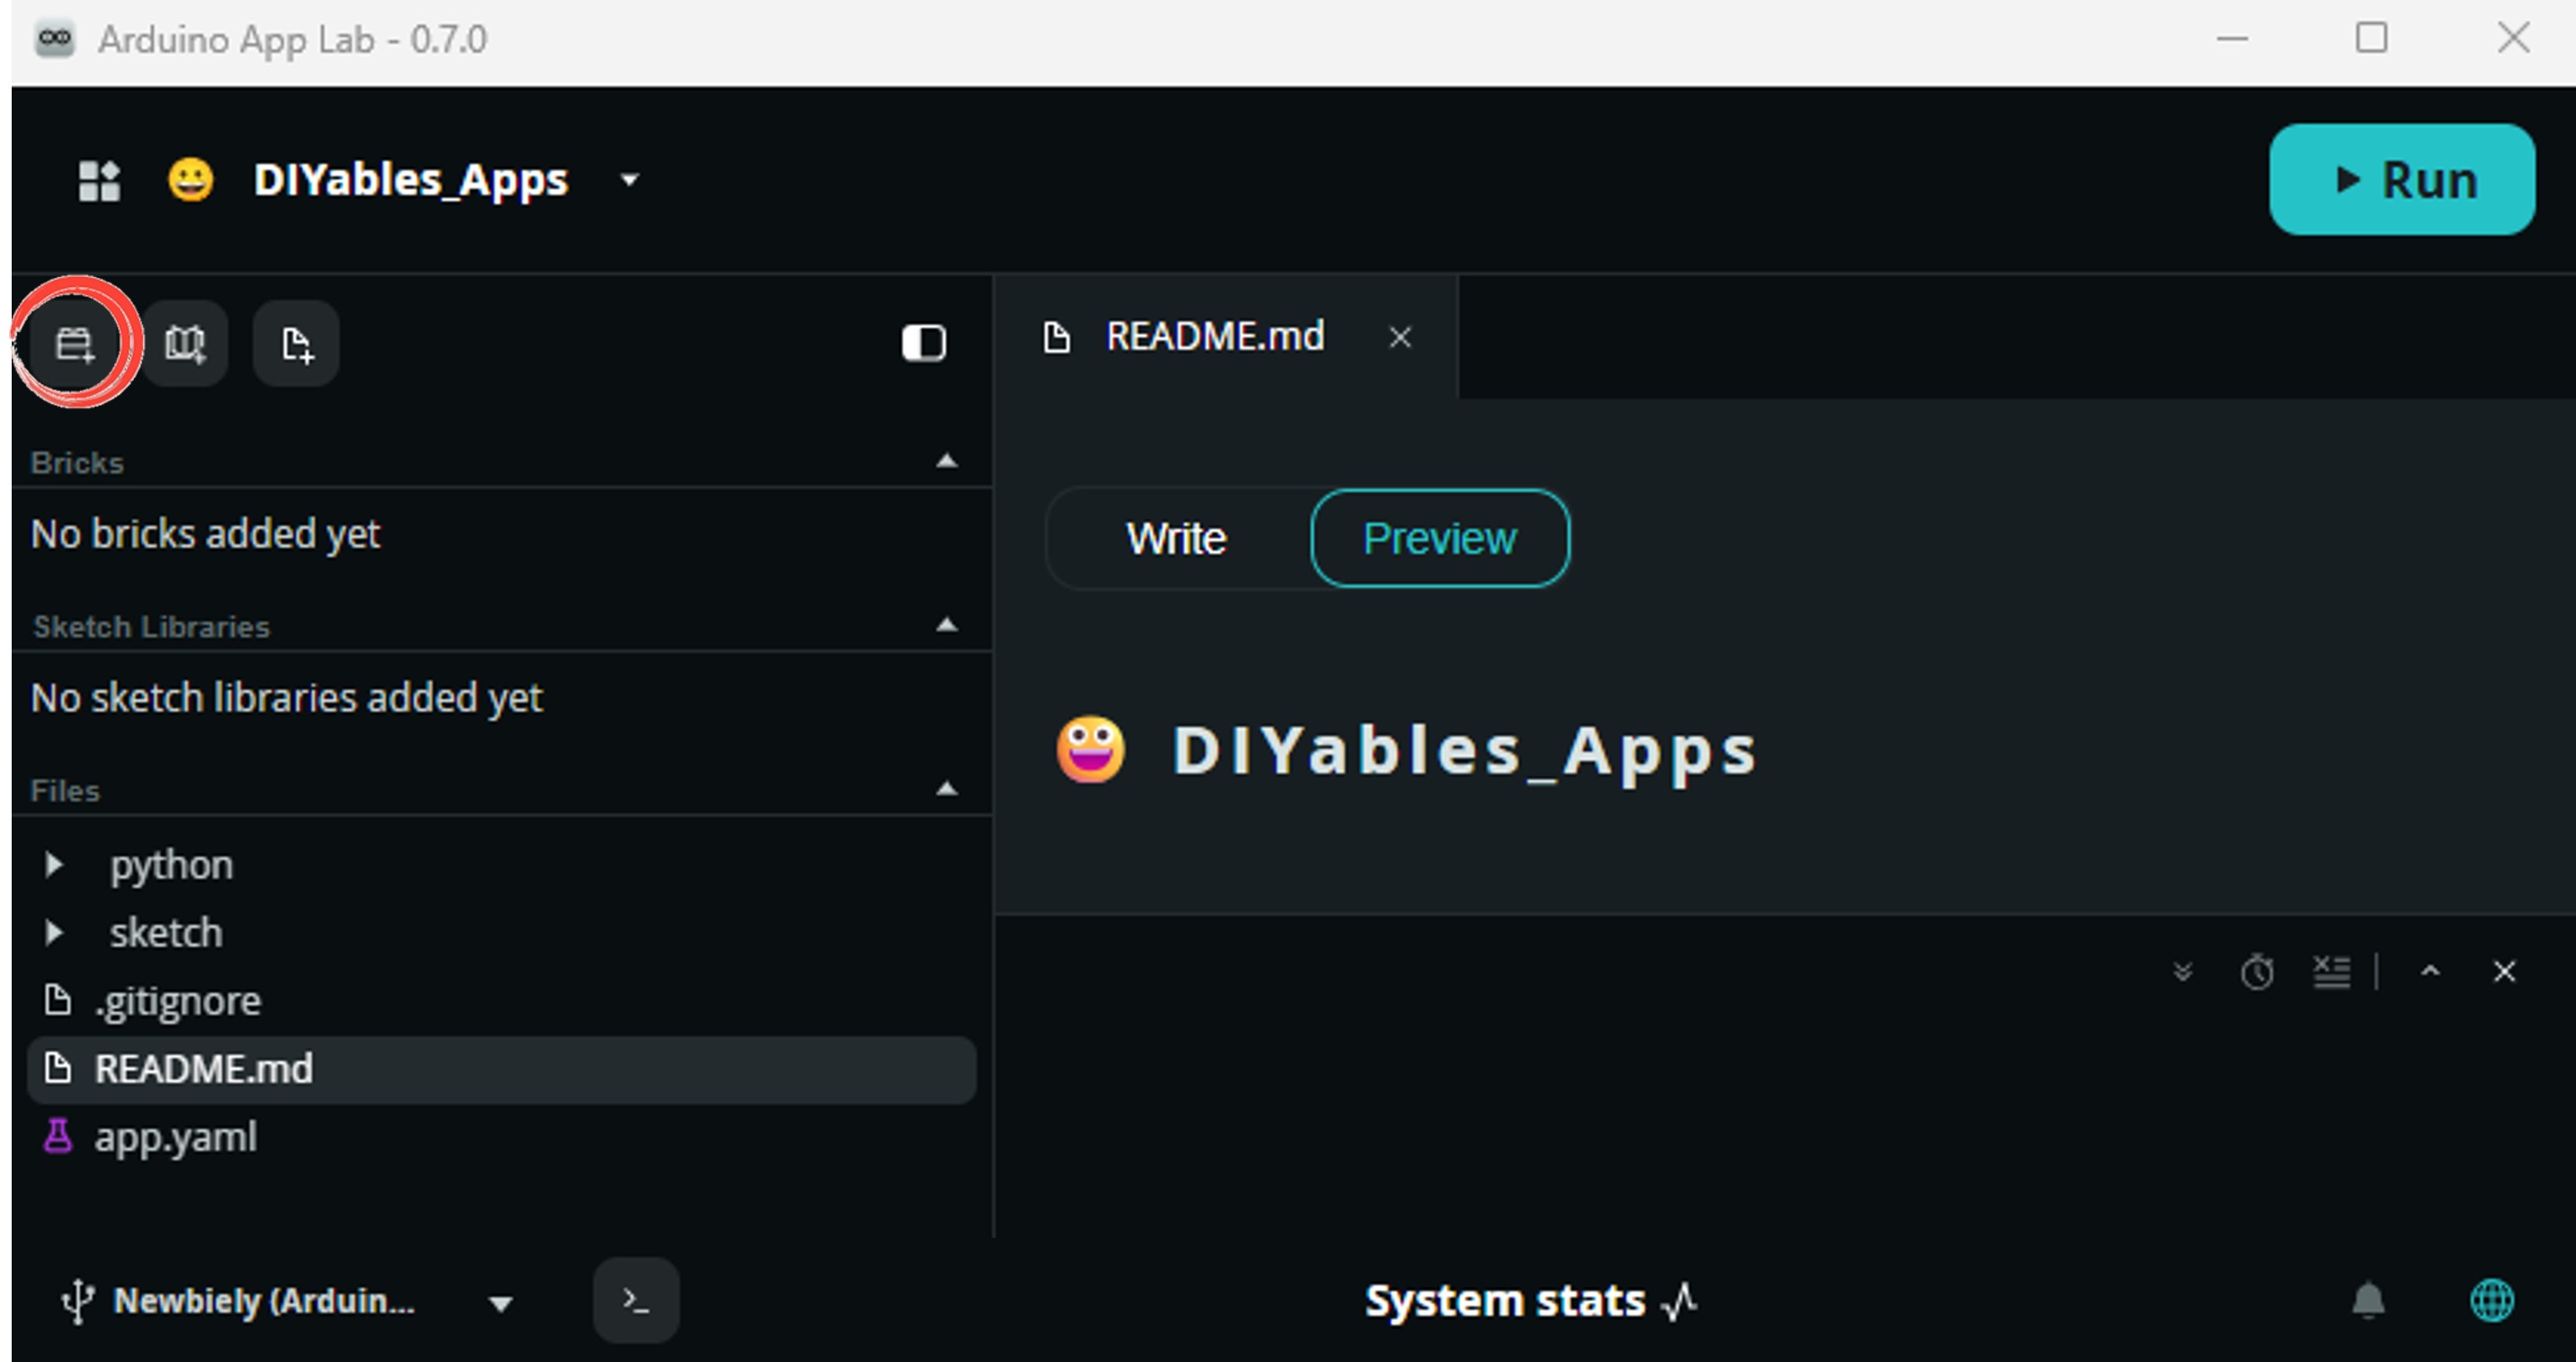
새 App 만들기:Create New App 버튼을 클릭합니다.
App에 이름을 지정합니다(예: WebServerSimple).
Create를 클릭하여 확인합니다.
MCU 스케치 붙여넣기: 위의 MCU 코드를 복사하여 sketch/sketch.ino에 붙여넣습니다.
Python 코드 붙여넣기: App의 python/main.py를 엽니다. 기존 내용을 모두 선택하고 삭제한 다음 위의 Python 웹 서버 코드를 붙여넣습니다.
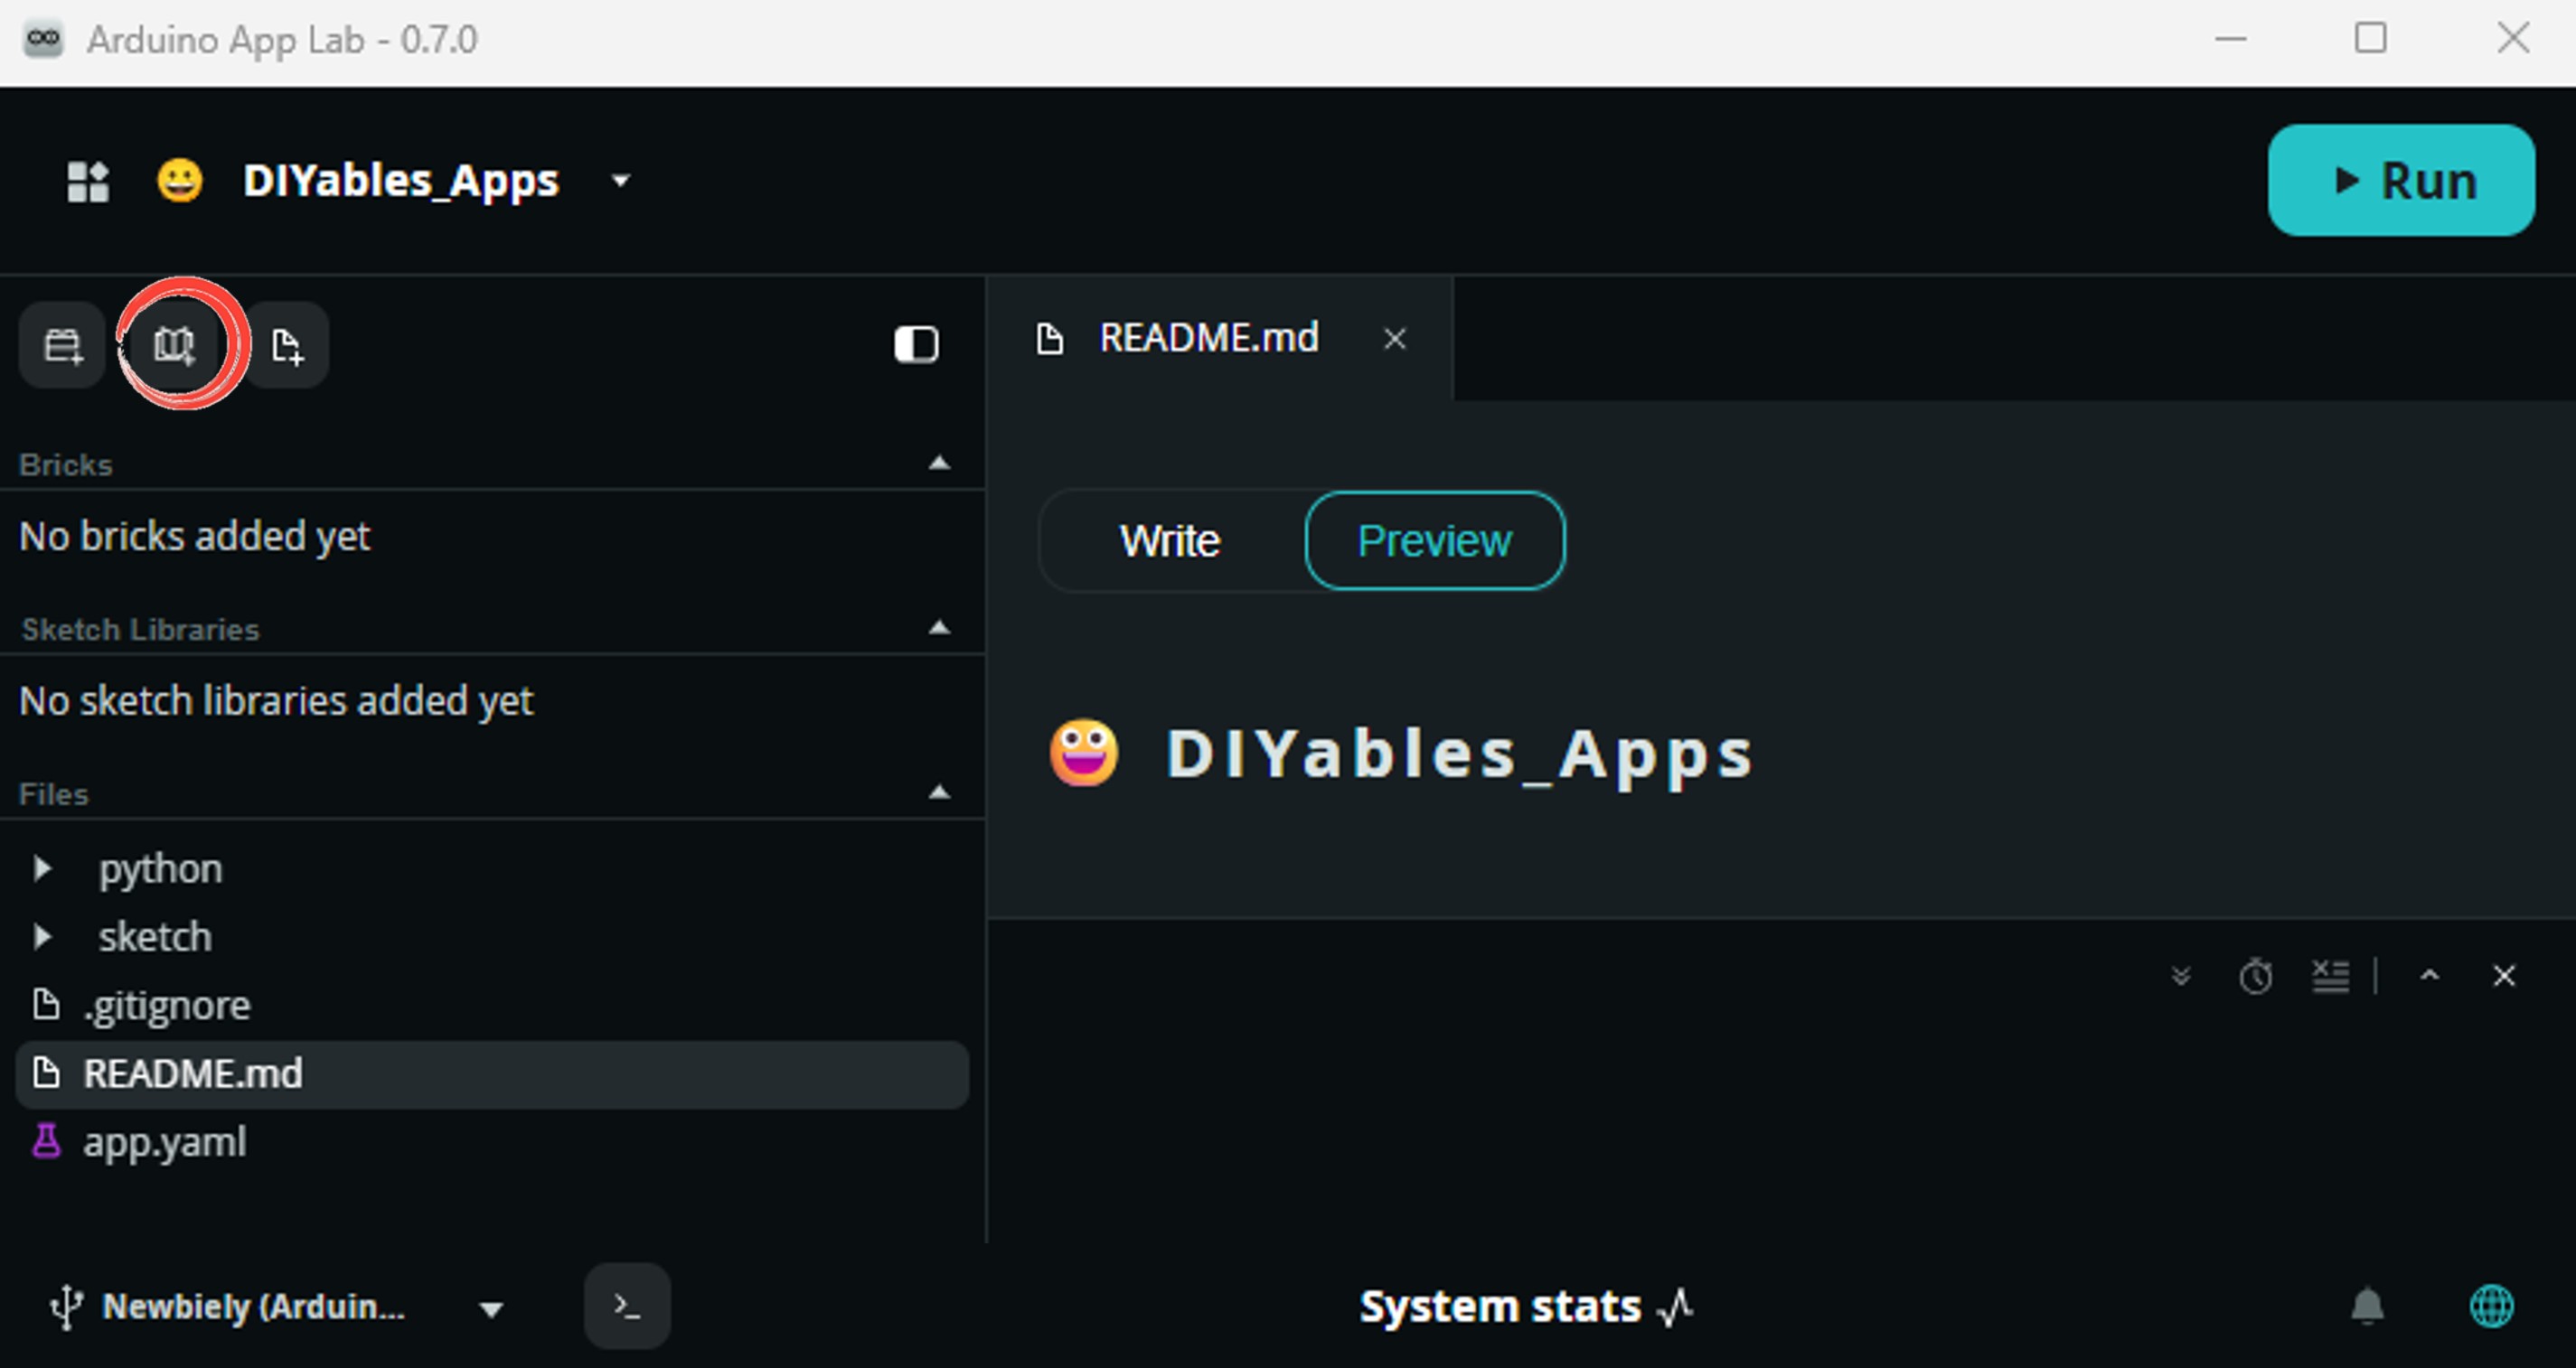
Install the library: Click the Add sketch library button (the open book icon with a + sign) in the left sidebar.
Search for Arduino_RouterBridge created by Arduino and click the Install button.
My Apps/DIYables Apps
Run
Bricks
No bricks added...
Sketch Libraries
No sketch libra...
Files
python
sketch
.gitignore
README.md
app.yaml
sketch.ino
Add sketch library
Arduino_RouterBridge
Arduino_RouterBridgeArduino
This library provides a simple RPC bridge for Arduino UNO Q boards, allowing communication between the board and other devices using MsgPack serialization.
Arduino App Lab이 자동으로 app.yaml 파일에 Brick 항목을 추가합니다 - 그 항목을 수동으로 편집하지 마세요.
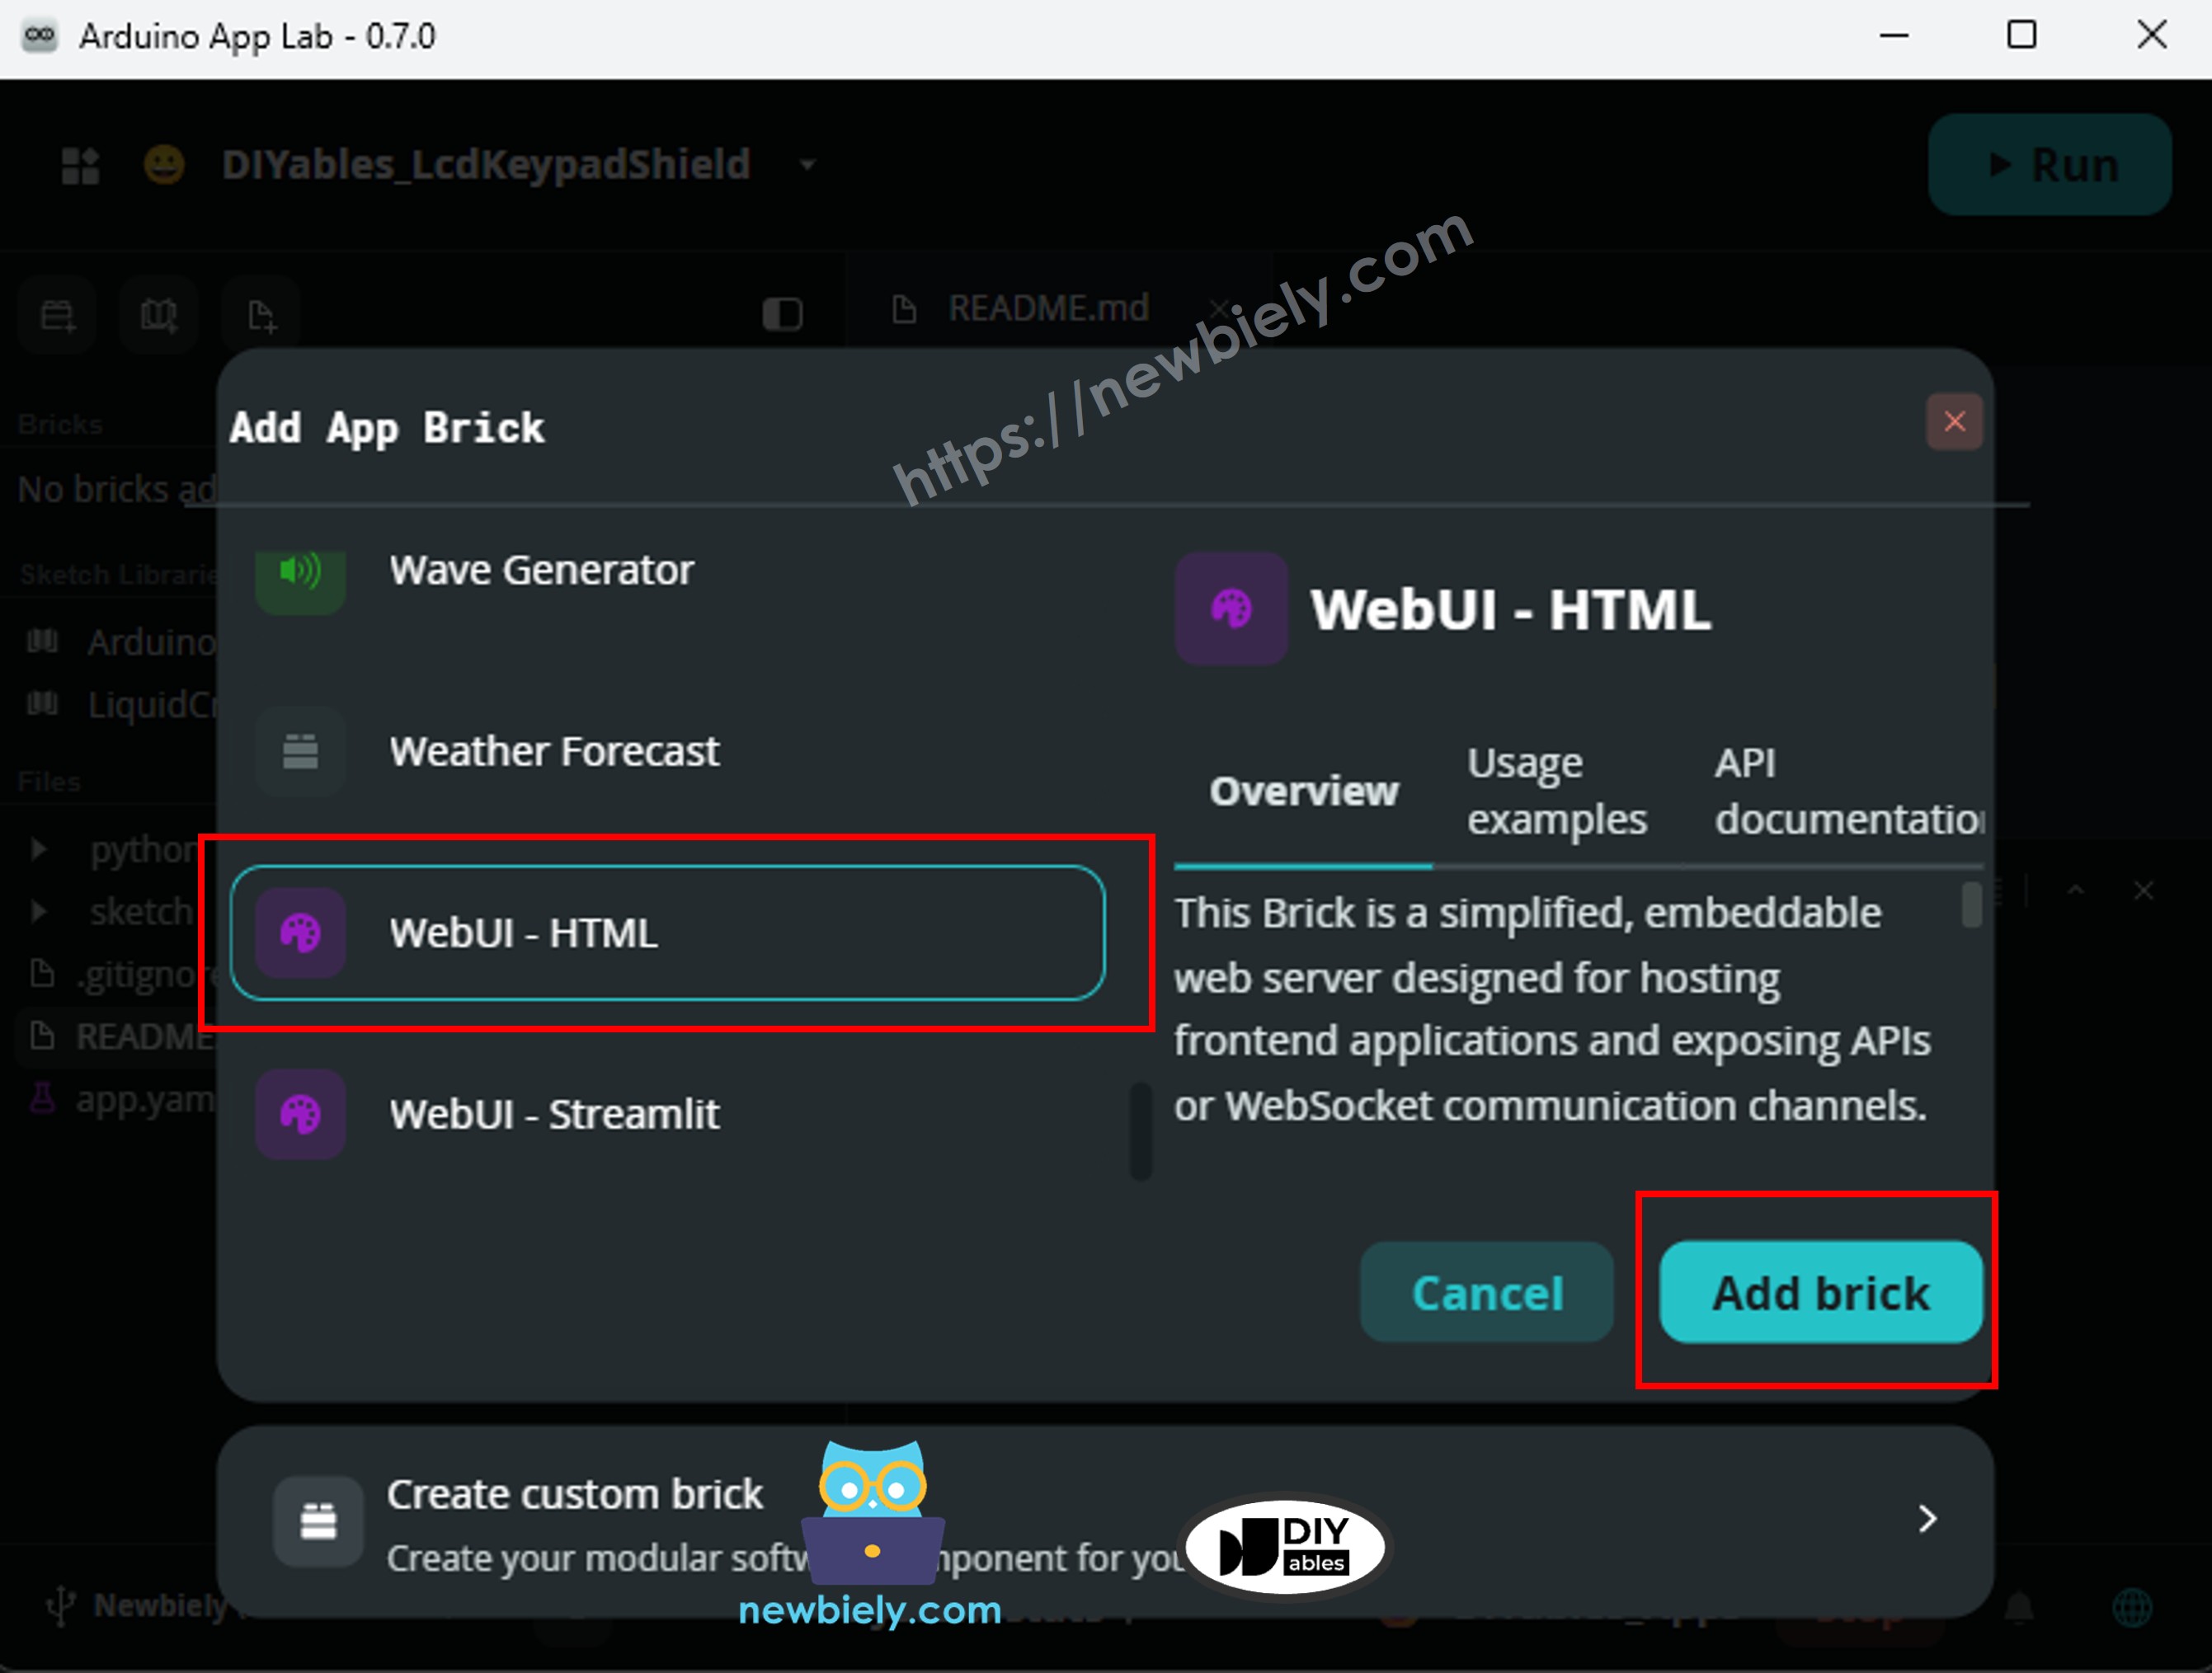
※ 주의:
Brick은 Arduino UNO Q Linux 측에서 실행되는 사전 구축된 플러그 앤 플레이 서비스입니다. WebUI - HTML Brick은 HTTP 서버를 처리하므로 Flask 또는 다른 웹 프레임워크를 수동으로 설치할 필요가 없습니다. 자세한 내용은 About Bricks를 참조하세요.
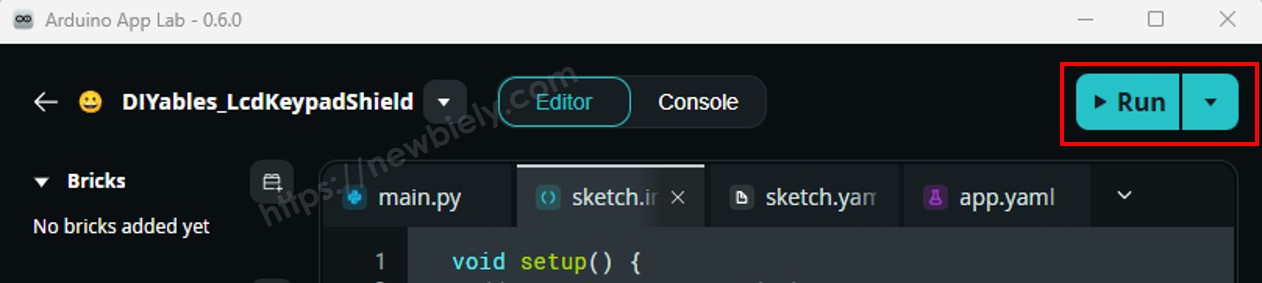
업로드: Arduino App Lab에서 Run 버튼을 클릭합니다.
휴대폰 또는 PC의 웹 브라우저를 열고 다음으로 이동합니다: http://:7000/
를 Arduino UNO Q의 IP 주소로 바꿉니다.
A0의 현재 원시 ADC 값을 표시하는 순수 HTML 페이지가 표시됩니다.
포텐셔미터 노브를 회전하고 브라우저 페이지를 새로고침합니다 - 숫자가 변경됩니다.
App Lab 콘솔 출력
DIYables_Apps
Stop
sketch.ino
1#include"Arduino_RouterBridge.h"
Serial Monitor
Python
Message (Enter to send a message to "Newbiely" on usb(2820070321))
New Line
9600 baud
[2026-05-08 09:00:01] Bridge ready
DIYables_Apps
Stop
sketch.ino
1#include"Arduino_RouterBridge.h"
Serial Monitor
Python
[2026-05-08 09:00:02] WebUI started on http://0.0.0.0:7000
[2026-05-08 09:00:02] WebUI started on http://192.168.0.45:7000
브라우저 출력
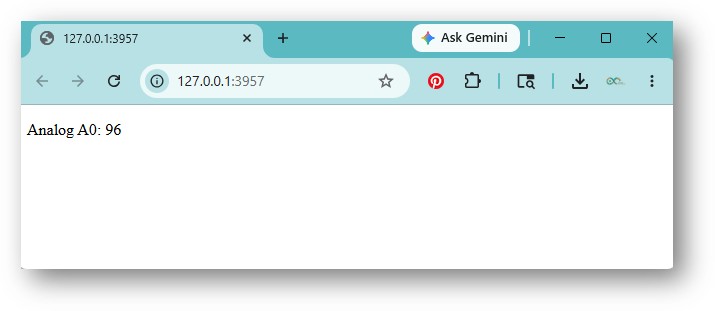
브라우저에서 http://<ARDUINO_UNO_Q_IP>:7000/을 엽니다. 다음과 같은 순수 HTML 페이지가 표시됩니다:
Analog A0: 512
_RENDER
자산 폴더가 있는 웹 서버 (HTML + CSS + JavaScript)
이 예제는 blink-with-ui 예제처럼 프런트 엔드 파일을 assets/ 폴더로 분리합니다. Python 서버는 /api/analog 끝점을 노출합니다. 자산 폴더의 index.html은 JavaScript를 사용하여 매초 해당 끝점을 호출하고 표시된 값을 업데이트합니다 - 페이지 새로고침이 필요하지 않습니다.
MCU 스케치는 예제 1과 동일합니다. 차이점은:
Python 코드가 순수 HTML 경로 대신 /api/analog을 노출합니다.
assets/index.html 파일에는 HTML, CSS 및 JavaScript가 포함됩니다.
WebUI Brick은 assets/ 폴더의 모든 파일을 루트 URL(/)에서 자동으로 제공합니다.
MCU 코드
/* * 이 Arduino UNO Q 코드는 newbiely.kr 에서 개발되었습니다 * 이 Arduino UNO Q 코드는 어떠한 제한 없이 공개 사용을 위해 제공됩니다. * 상세한 지침 및 연결도에 대해서는 다음을 방문하세요: * https://newbiely.kr/tutorials/arduino-uno-q/arduino-uno-q-web-server */#include"Arduino_RouterBridge.h"String get_analog(String arg) {int value = analogRead(A0);returnString(value);}voidsetup() { Monitor.begin();Bridge.begin();Bridge.provide_safe("get_analog", get_analog); Monitor.println("Bridge ready");}voidloop() {}
Python 코드
/* * 이 Arduino UNO Q 코드는 newbiely.kr 에서 개발되었습니다 * 이 Arduino UNO Q 코드는 어떠한 제한 없이 공개 사용을 위해 제공됩니다. * 상세한 지침 및 연결도에 대해서는 다음을 방문하세요: * https://newbiely.kr/tutorials/arduino-uno-q/arduino-uno-q-web-server */from arduino.app_utils import *from arduino.app_bricks.web_ui import WebUIdef get_analog(): value = Bridge.call("get_analog", "")return {"pin": "A0", "value": int(value)}web_ui = WebUI()web_ui.expose_api("GET", "/api/analog", get_analog)App.run()
예제 1과 동일한 App 생성 단계를 따르되 App 이름을 WebServerAssets로 지정합니다.
MCU 코드를 sketch/sketch.ino에 붙여넣습니다.
Python 코드를 python/main.py에 붙여넣습니다 (기존 내용 모두 바꾸기).
assets/ 폴더에서 index.html을 열고(또는 생성하고) 위의 HTML 코드를 붙여넣습니다.
예제 1처럼 WebUI - HTML Brick을 추가합니다.
Run을 클릭하여 업로드합니다.
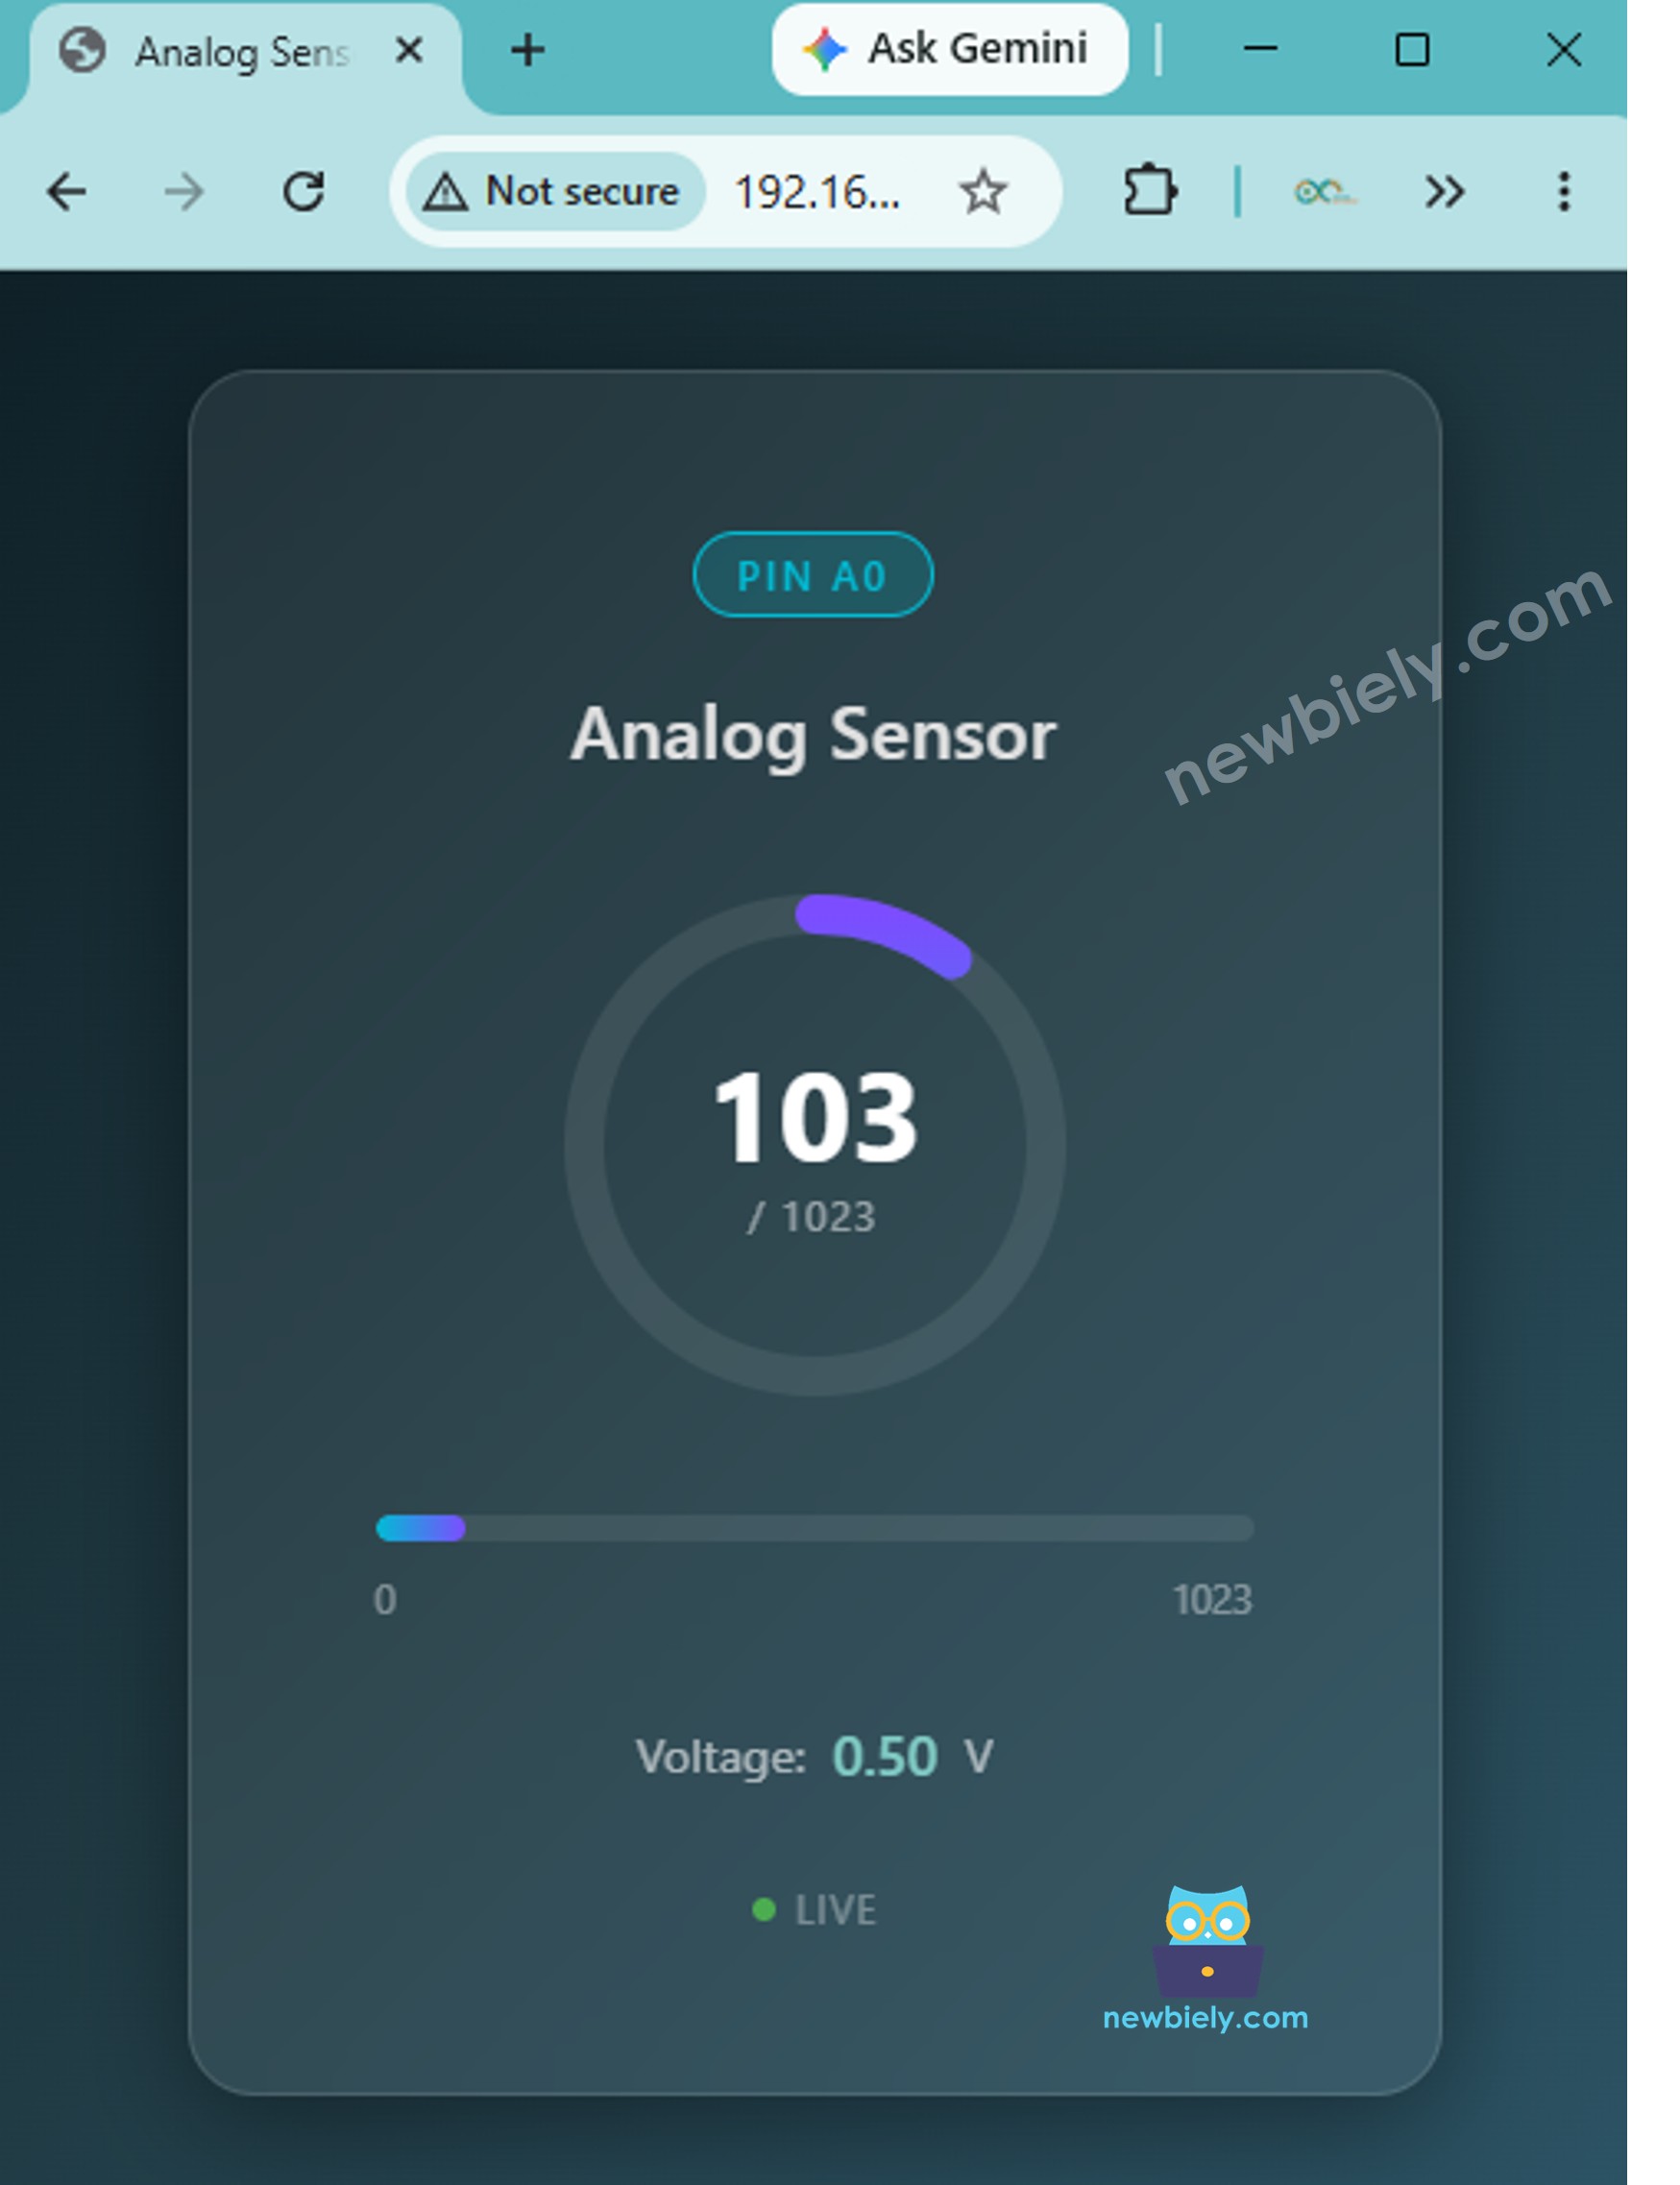
브라우저에서 http://<ARDUINO_UNO_Q_IP>:7000/을 엽니다.
페이지는 자산 폴더에서 스타일이 지정된 웹 페이지를 로드하고 아날로그 값을 매초 자동으로 업데이트합니다.
포텐셔미터를 회전합니다 — 페이지의 값이 새로고침 없이 변경됩니다.
App Lab 콘솔 출력
DIYables_Apps
Stop
sketch.ino
1#include"Arduino_RouterBridge.h"
Serial Monitor
Python
Message (Enter to send a message to "Newbiely" on usb(2820070321))
New Line
9600 baud
[2026-05-08 09:00:01] Bridge ready
DIYables_Apps
Stop
sketch.ino
1#include"Arduino_RouterBridge.h"
Serial Monitor
Python
[2026-05-08 09:00:02] WebUI started on http://0.0.0.0:7000
[2026-05-08 09:00:02] WebUI started on http://192.168.0.45:7000
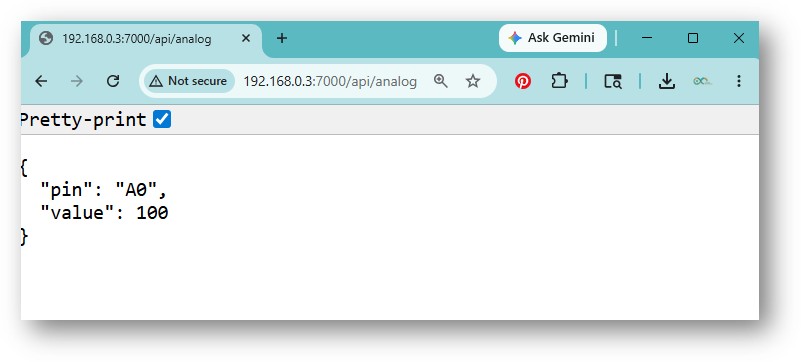
API 응답
index.html의 JavaScript는 GET /api/analog을 호출합니다. 이 끝점을 직접 테스트할 수도 있습니다:
{"pin": "A0", "value": 512}
API로서의 웹 서버 (순수 JSON)
이 예제는 모든 HTML을 제거하고 JSON API 끝점만 제공합니다. 모든 클라이언트(브라우저, 모바일 앱, curl, Postman 또는 다른 마이크로컨트롤러)는 GET /api/analog을 호출하여 현재 아날로그 판독값을 구조화된 데이터로 수신할 수 있습니다.
다음을 수행하려는 경우 이 패턴을 사용하세요:
Arduino UNO Q 데이터를 기존 웹 앱 또는 대시보드에 통합
모바일 앱 또는 백엔드 서비스에서 보드 쿼리
명령줄에서 센서 값 테스트 또는 기록
MCU 코드
/* * 이 Arduino UNO Q 코드는 newbiely.kr 에서 개발되었습니다 * 이 Arduino UNO Q 코드는 어떠한 제한 없이 공개 사용을 위해 제공됩니다. * 상세한 지침 및 연결도에 대해서는 다음을 방문하세요: * https://newbiely.kr/tutorials/arduino-uno-q/arduino-uno-q-web-server */#include"Arduino_RouterBridge.h"String get_analog(String arg) {int value = analogRead(A0);returnString(value);}voidsetup() { Monitor.begin();Bridge.begin();Bridge.provide_safe("get_analog", get_analog); Monitor.println("Bridge ready");}voidloop() {}
Python 코드
/* * 이 Arduino UNO Q 코드는 newbiely.kr 에서 개발되었습니다 * 이 Arduino UNO Q 코드는 어떠한 제한 없이 공개 사용을 위해 제공됩니다. * 상세한 지침 및 연결도에 대해서는 다음을 방문하세요: * https://newbiely.kr/tutorials/arduino-uno-q/arduino-uno-q-web-server */from arduino.app_utils import *from arduino.app_bricks.web_ui import WebUIdef get_analog(): value = Bridge.call("get_analog", "")return {"pin": "A0", "value": int(value)}web_ui = WebUI()web_ui.expose_api("GET", "/api/analog", get_analog)App.run()
빠른 단계
예제 1과 동일한 App 생성 단계를 따르되 App 이름을 WebServerAPI로 지정합니다.
MCU 코드를 sketch/sketch.ino에 붙여넣습니다.
Python 코드를 python/main.py에 붙여넣습니다 (기존 내용 모두 바꾸기).
예제 1처럼 WebUI - HTML Brick을 추가합니다.
Run을 클릭하여 업로드합니다.
브라우저에서 끝점을 테스트합니다.
터미널에서 끝점을 테스트합니다:
GET http://ARDUINO_UNO_Q_IP:7000/api/analog
모든 클라이언트에서 끝점을 테스트합니다. 예를 들어 curl 사용:
curl http://:7000/api/analog
API 응답
{"pin": "A0", "value": 512}
App Lab 콘솔 출력
DIYables_Apps
Stop
sketch.ino
1#include"Arduino_RouterBridge.h"
Serial Monitor
Python
Message (Enter to send a message to "Newbiely" on usb(2820070321))
New Line
9600 baud
[2026-05-08 09:00:01] Bridge ready
DIYables_Apps
Stop
sketch.ino
1#include"Arduino_RouterBridge.h"
Serial Monitor
Python
[2026-05-08 09:00:02] WebUI started on http://0.0.0.0:7000
[2026-05-08 09:00:02] WebUI started on http://192.168.0.45:7000
Python 코드에서 HTML 분리
WebUI 접근 방식을 사용하면 Python 코드는 API 끝점만 노출합니다 — HTML을 제공하지 않습니다. 이는 설계상 깔끔한 분리입니다:
HTML 파일 — 브라우저에서 열 수 있는 독립 실행형 파일입니다. 내부 JavaScript는 API에서 데이터를 가져옵니다.
Python 스크립트는 다음과 같습니다 (예제 1과 동일 - 변경 필요 없음):
/* * 이 Arduino UNO Q 코드는 newbiely.kr 에서 개발되었습니다 * 이 Arduino UNO Q 코드는 어떠한 제한 없이 공개 사용을 위해 제공됩니다. * 상세한 지침 및 연결도에 대해서는 다음을 방문하세요: * https://newbiely.kr/tutorials/arduino-uno-q/arduino-uno-q-web-server */from arduino.app_utils import *from arduino.app_bricks.web_ui import WebUIdef get_status(): uptime = Bridge.call("get_uptime", "") led = Bridge.call("get_led_state", "")return {"uptime": uptime, "led": led}web_ui = WebUI()web_ui.expose_api("GET", "/api/status", get_status)App.run()
다음은 API에서 가져오는 독립 실행형 HTML 페이지(index.html)입니다:
/* * 이 Arduino UNO Q 코드는 newbiely.kr 에서 개발되었습니다 * 이 Arduino UNO Q 코드는 어떠한 제한 없이 공개 사용을 위해 제공됩니다. * 상세한 지침 및 연결도에 대해서는 다음을 방문하세요: * https://newbiely.kr/tutorials/arduino-uno-q/arduino-uno-q-web-server */<!DOCTYPE html><html lang="en"><head> <meta charset="UTF-8" /> <meta name="viewport" content="width=device-width, initial-scale=1.0" /> <title>Arduino UNO Q Web Server</title> <style> body { font-family: Arial, sans-serif; display: flex; flex-direction: column; align-items: center; justify-content: center; min-height: 100vh; margin: 0; background: #1a1a2e; color: #eee; } h1 { font-size: 1.8rem; margin-bottom: 32px; } .card { background: #16213e; border-radius: 12px; padding: 32px 48px; box-shadow: 0 4px 24px rgba(0,0,0,0.4); text-align: center; min-width: 280px; } .label { font-size: 0.9rem; color: #aaa; margin-bottom: 4px; } .value { font-size: 2rem; font-weight: bold; color: #e94560; margin-bottom: 24px; } .led-on { color: #4caf50; } .led-off { color: #aaa; } </style></head><body> <h1>Arduino UNO Q Web Server</h1> <div class="card"> <p class="label">MCU Uptime (seconds)</p> <p class="value" id="uptime">--</p> <p class="label">Built-in LED</p> <p class="value" id="ledState">--</p> </div> <script> // Update this IP address to match your Arduino UNO Q const API_BASE = 'http://192.168.0.3:7000'; function update() { fetch(API_BASE + '/api/status') .then(r => r.json()) .then(data => { document.getElementById('uptime').textContent = data.uptime; const ledEl = document.getElementById('ledState'); ledEl.textContent = data.led; ledEl.className = 'value ' + (data.led === 'ON' ? 'led-on' : 'led-off'); }) .catch(e => console.error(e)); } setInterval(update, 2000); update(); </script></body></html>
※ 주의:
브라우저에서 index.html을 직접 열거나 (컴퓨터에서) 어디든지 호스팅합니다. 내부 JavaScript는 매 2초마다 http://<ARDUINO_UNO_Q_IP>:7000/api/status를 가져옵니다. HTML 파일의 IP 주소를 보드와 일치하도록 업데이트합니다.
Arduino UNO Q 웹 서버 — 여러 페이지
여러 API 끝점(예: /api/status, /api/led/on, /api/settings)이 있는 웹 서버를 구축하려면 Python WebUI 스크립트에서 끝점당 하나의 expose_api 호출을 추가합니다.
You can adapt the OpenClaw to this tutorial by refering the instruction on 아두이노 우노 Q - OpenClaw Tutorial
프로젝트 아이디어
웹 서버는 Arduino UNO Q의 많은 유용한 프로젝트를 위한 빌딩 블록입니다:
센서 대시보드: DHT22 또는 BMP280을 MCU에 연결하고 스타일이 지정된 웹 페이지에 온도, 습도 및 압력을 표시합니다. 매 몇 초마다 자동으로 새로고침됩니다.
릴레이 제어 판넬: 웹 페이지에 버튼을 추가하여 릴레이를 켜고 끕니다 — 집에 있는 동안 휴대폰에서 조명, 선풍기 또는 펌프를 제어하는 데 유용합니다.
데이터 로거 뷰어: 센서 판독값을 Linux 측의 CSV 파일에 기록하고 마지막 100개 판독값을 HTML 표로 반환하는 /history 끝점을 추가합니다.
차고 문 오프너: "trigger" Bridge 함수를 노출하여 1초 동안 릴레이를 펄스합니다 — 웹 페이지에 단일 큰 버튼을 추가하여 휴대폰에서 차고 문을 열거나 닫습니다.
식물 급수 모니터: MCU의 토양 수분 센서를 읽고 웹 페이지의 진행률 표시줄로 수분 수준을 표시하고 토양이 너무 건조할 때 경고 배너를 표시합니다.
스스로 도전해보세요
Arduino UNO Q의 웹 서버로 더 나아가고 싶으신가요? 이러한 도전 과제를 시도해보세요:
쉬움: 컴퓨터에서 http://<ARDUINO_UNO_Q_IP>:7000/api/status에서 가져오는 스타일 지정된 index.html 파일을 생성합니다. Bootstrap 또는 사용자 지정 CSS를 사용하여 깔끔한 레이아웃으로 가동 시간 및 LED 상태를 표시합니다.
중간: Python WebUI 스크립트에 메모리 내 목록에서 마지막 10개 Bridge 값을 읽고 JSON 배열로 반환하는 /api/history 끝점을 추가합니다 — HTML 페이지에 표로 표시합니다.
고급: WebUI 스크립트에 /api/led/toggle POST 끝점을 추가합니다. Bridge를 통해 현재 LED 상태를 읽고 led_on 또는 led_off를 호출하여 LED를 토글합니다 — HTML 페이지에 단일 토글 버튼을 추가합니다.