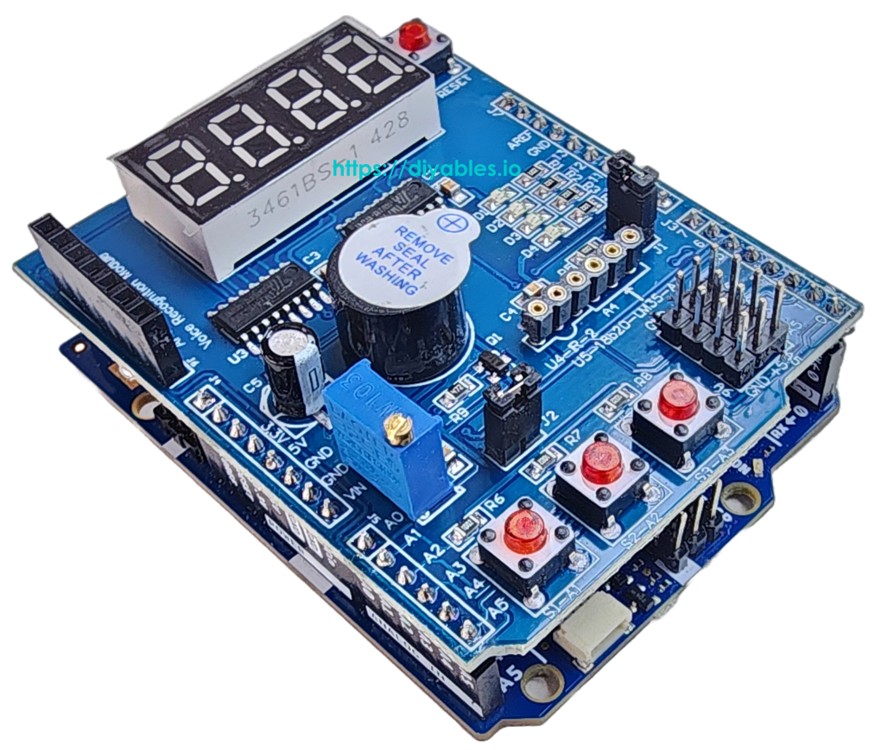
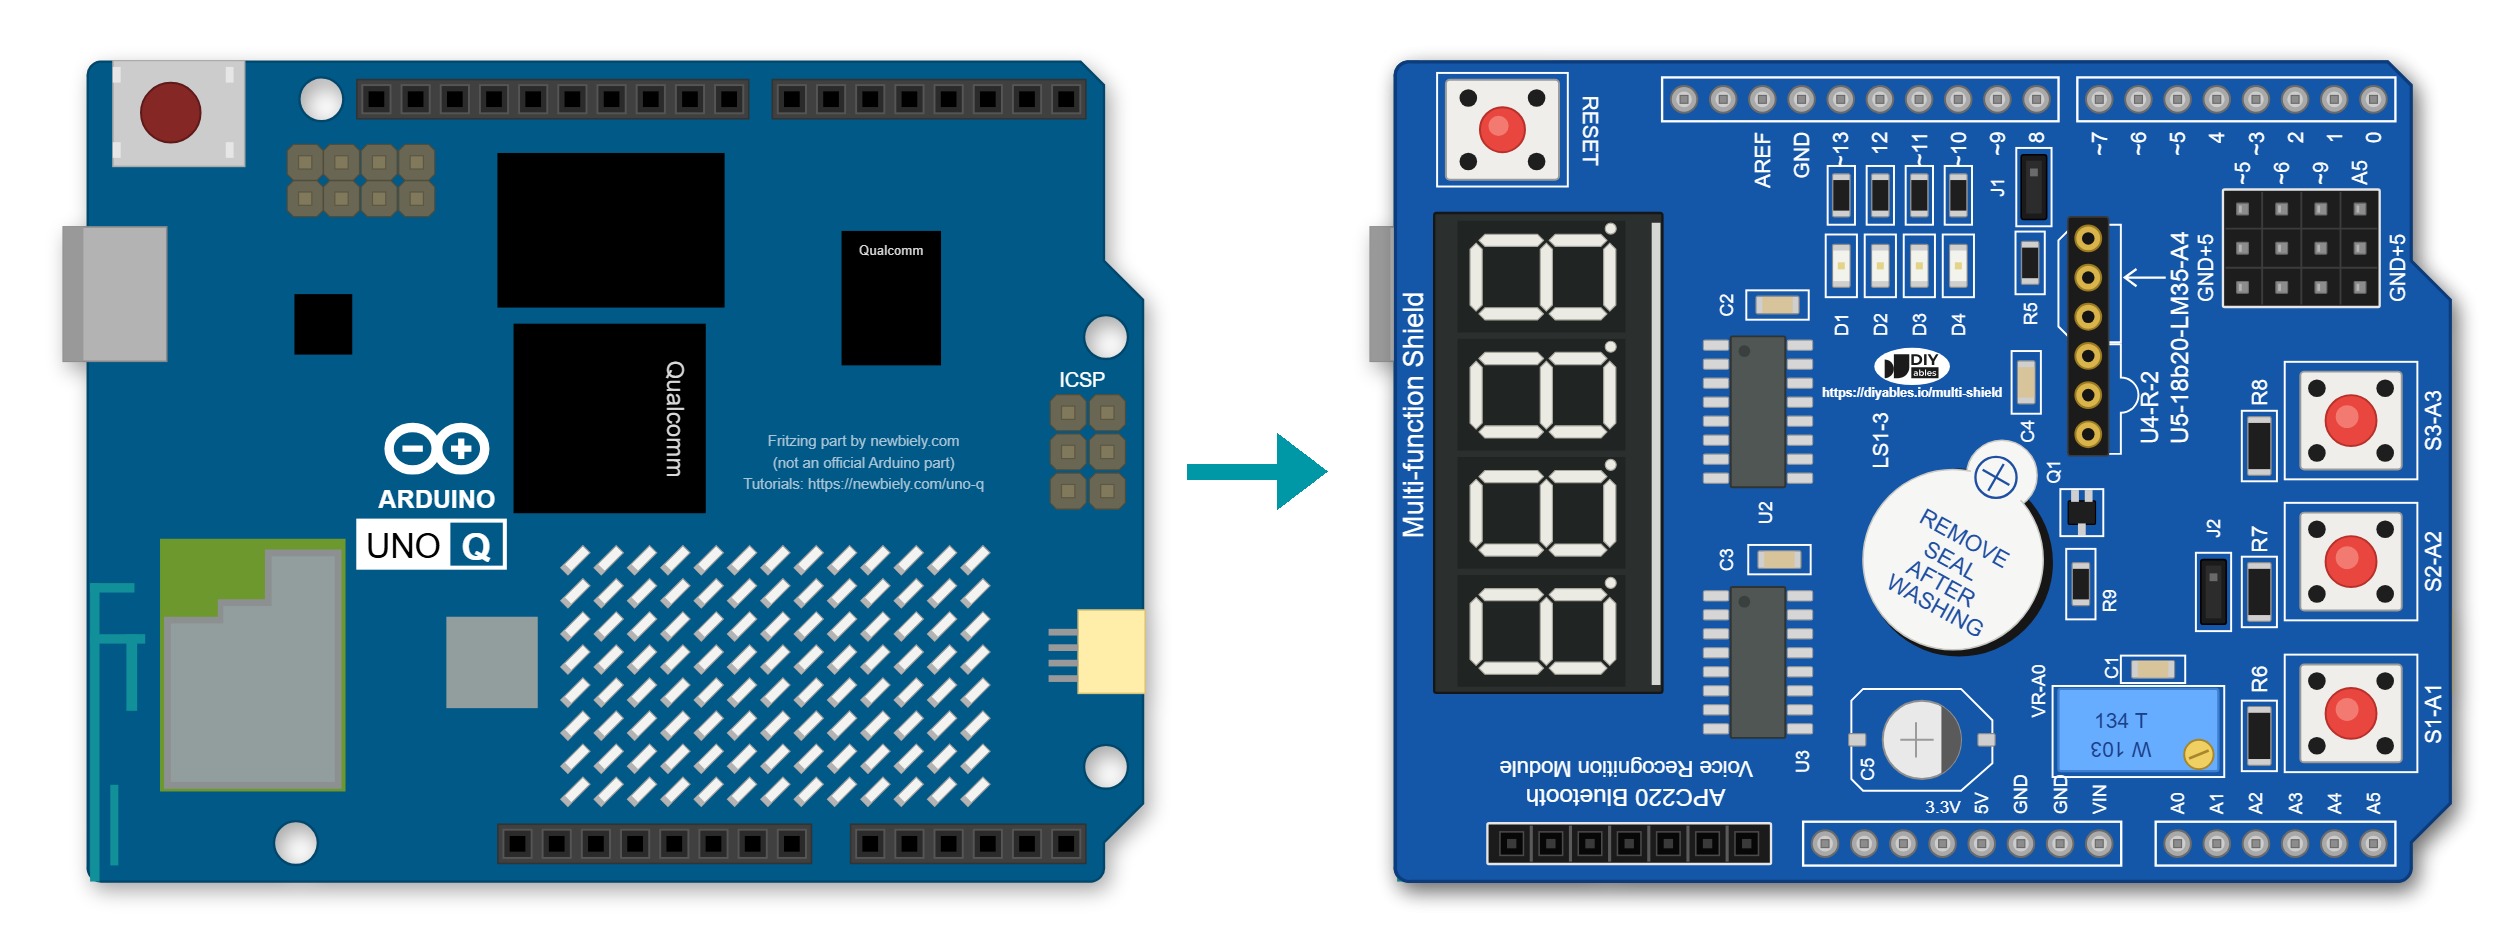
참고: LM35 온도 센서를 사용하려면 쉴드의 점퍼 J1을 제거하세요(A4는 I2C SDA와 공유됨).
Arduino UNO Q 코드
Arduino UNO Q는 두 개의 프로세서가 함께 작동합니다:
STM32 MCU는 다기능 쉴드를 직접 구동합니다 — 디지털 및 아날로그 핀을 통해 모든 컴포넌트를 제어합니다
Qualcomm MPU는 Debian Linux를 실행하고 Wi-Fi, Python 및 클라우드 연결을 처리합니다
이 섹션에서는 MCU만 프로그래밍되고 Linux 측은 유휴 상태입니다. 나중 섹션에서는 두 프로세서가 Bridge를 통해 함께 작동하는 방법을 보여줍니다.
중요: Arduino loop() 함수 내에서 항상 MFS.loop()를 호출하세요. 디스플레이를 새로 고치고 버튼을 폴링하고 LED 깜박이 타이밍과 부저 스케줄링을 관리합니다.
아래 스케치는 디스플레이 모드를 순환하고 버튼 누름에 응답합니다:
/* * 이 Arduino UNO Q 코드는 newbiely.kr 에서 개발되었습니다 * 이 Arduino UNO Q 코드는 어떠한 제한 없이 공개 사용을 위해 제공됩니다. * 상세한 지침 및 연결도에 대해서는 다음을 방문하세요: * https://newbiely.kr/tutorials/arduino-uno-q/arduino-uno-q-multi-function-shield */#include <DIYables_MultiFuncShield.h>uint8_tstep = 0;unsignedlong lastUpdate = 0;voidsetup() {MFS.begin();MFS.display.print(0);}voidloop() {MFS.loop(); // Must be called frequentlyif (millis() - lastUpdate >= 3000) { lastUpdate = millis();switch (step) {case 0:MFS.display.print(1234);break;case 1:MFS.display.print(26.5, 1);break;case 2:MFS.display.print("HELP");break;case 3:MFS.display.clear();MFS.display.setChar(1, SegChars::DEGREE);MFS.display.setChar(2, 'C');MFS.display.show();break; }step = (step + 1) % 4;// Blink LED D1MFS.led1.toggle(); }// Check buttonsif (MFS.button1.isPressed()) {MFS.display.print(1111);MFS.buzzer.beep(100); }if (MFS.button2.isPressed()) {MFS.display.print(2222);MFS.buzzer.beep(100); }if (MFS.button3.isPressed()) {MFS.display.print(3333);MFS.buzzer.beep(100); }}
빠른 단계
Arduino UNO Q 처음인가요? 계속 진행하기 전에 아두이노 우노 Q 시작하기 튜토리얼을 따라 개발 환경을 준비하세요.
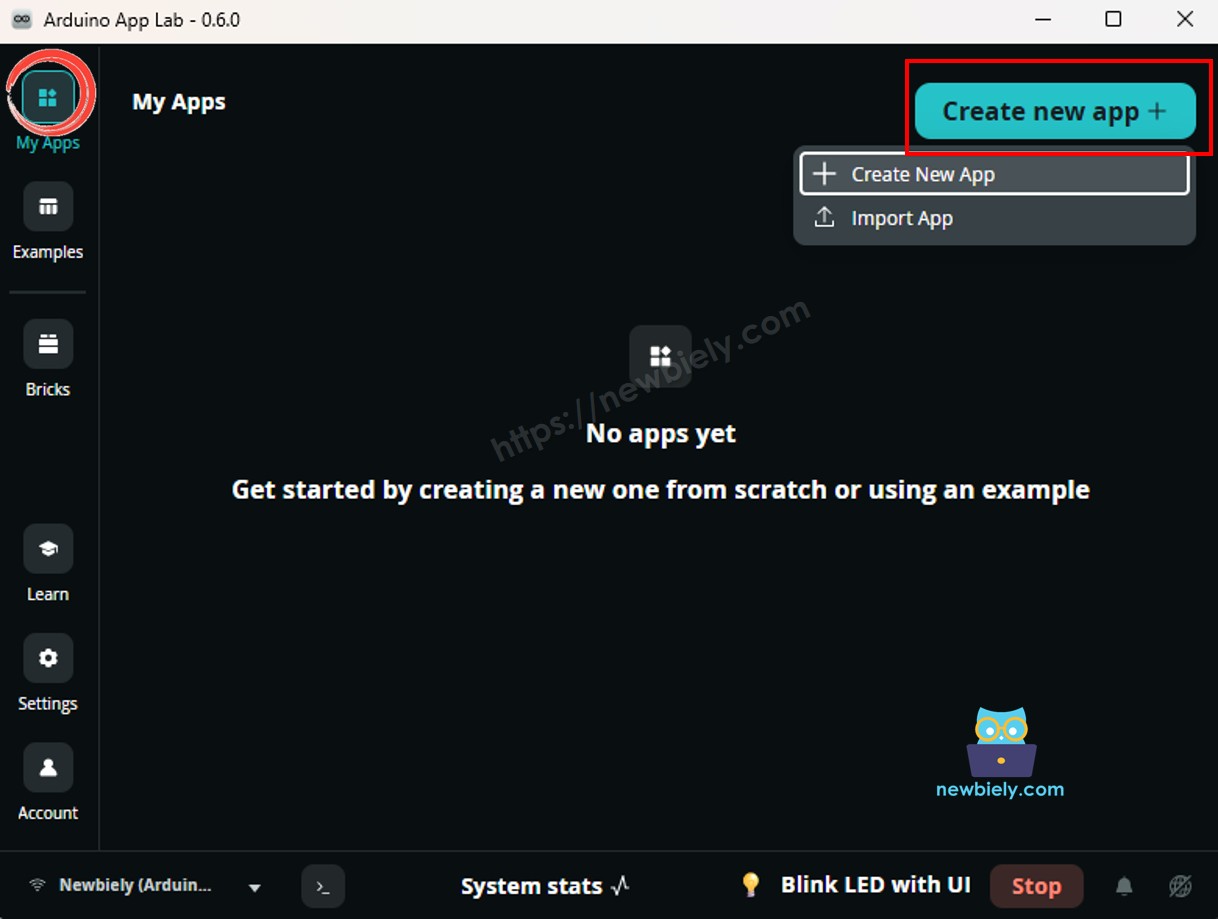
Arduino App Lab 열기: Arduino App Lab을 시작하고 보드가 감지될 때까지 기다리세요 — 첫 시작 시 몇 분이 걸릴 수 있습니다.
새 앱 만들기:새 앱 만들기 버튼을 클릭하세요.
앱의 이름을 지정하세요. 예: DIYables_MultiFuncShield
만들기를 클릭하여 확인하세요.
새 앱 내에 생성된 폴더와 파일 세트가 표시됩니다.
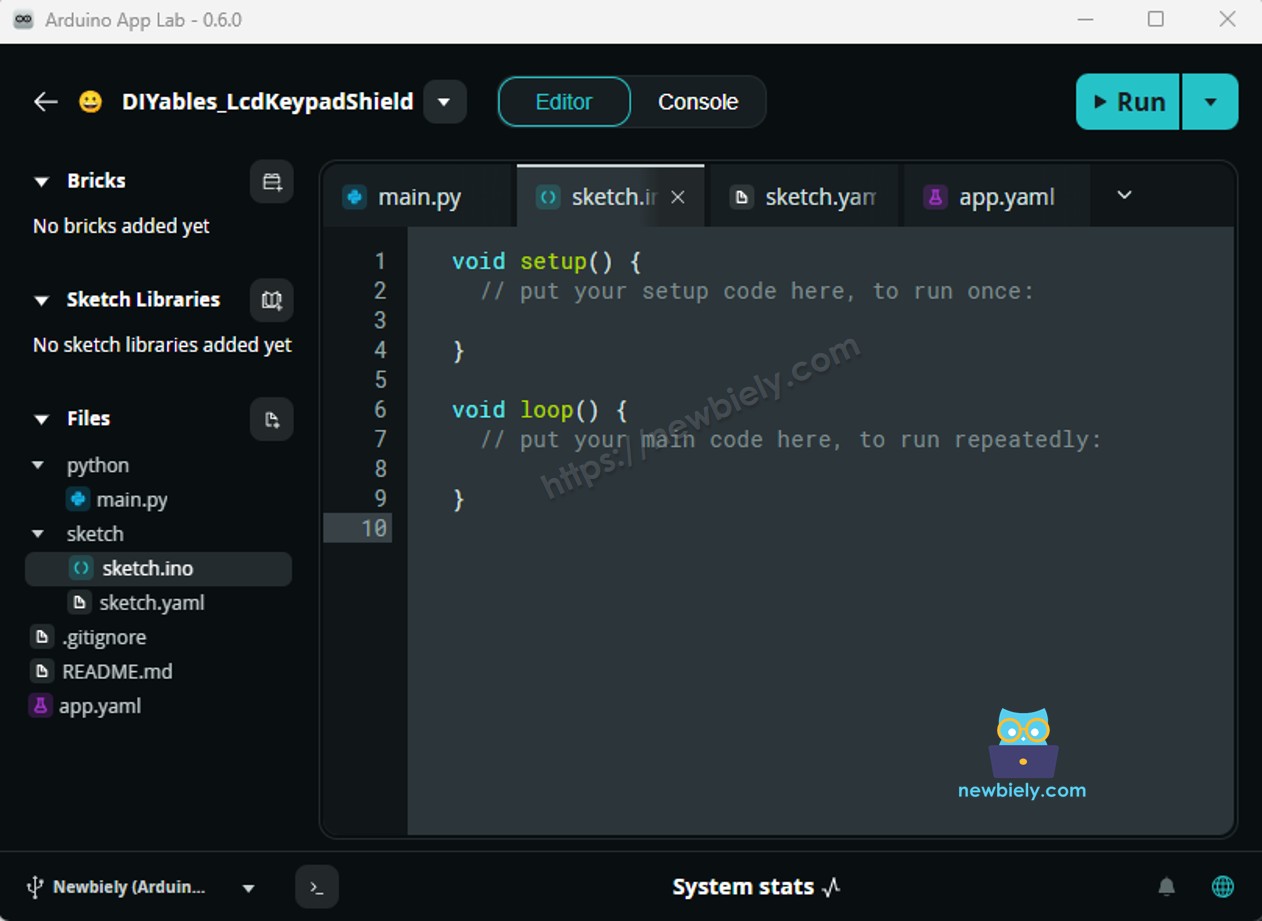
sketch/sketch.ino 파일을 찾으세요 — MCU 스케치를 붙여넣는 위치입니다.
스케치 붙여넣기: 위의 MCU 코드를 복사하여 스케치 파일에 붙여넣으세요. 다른 파일은 기본값으로 유지하세요.
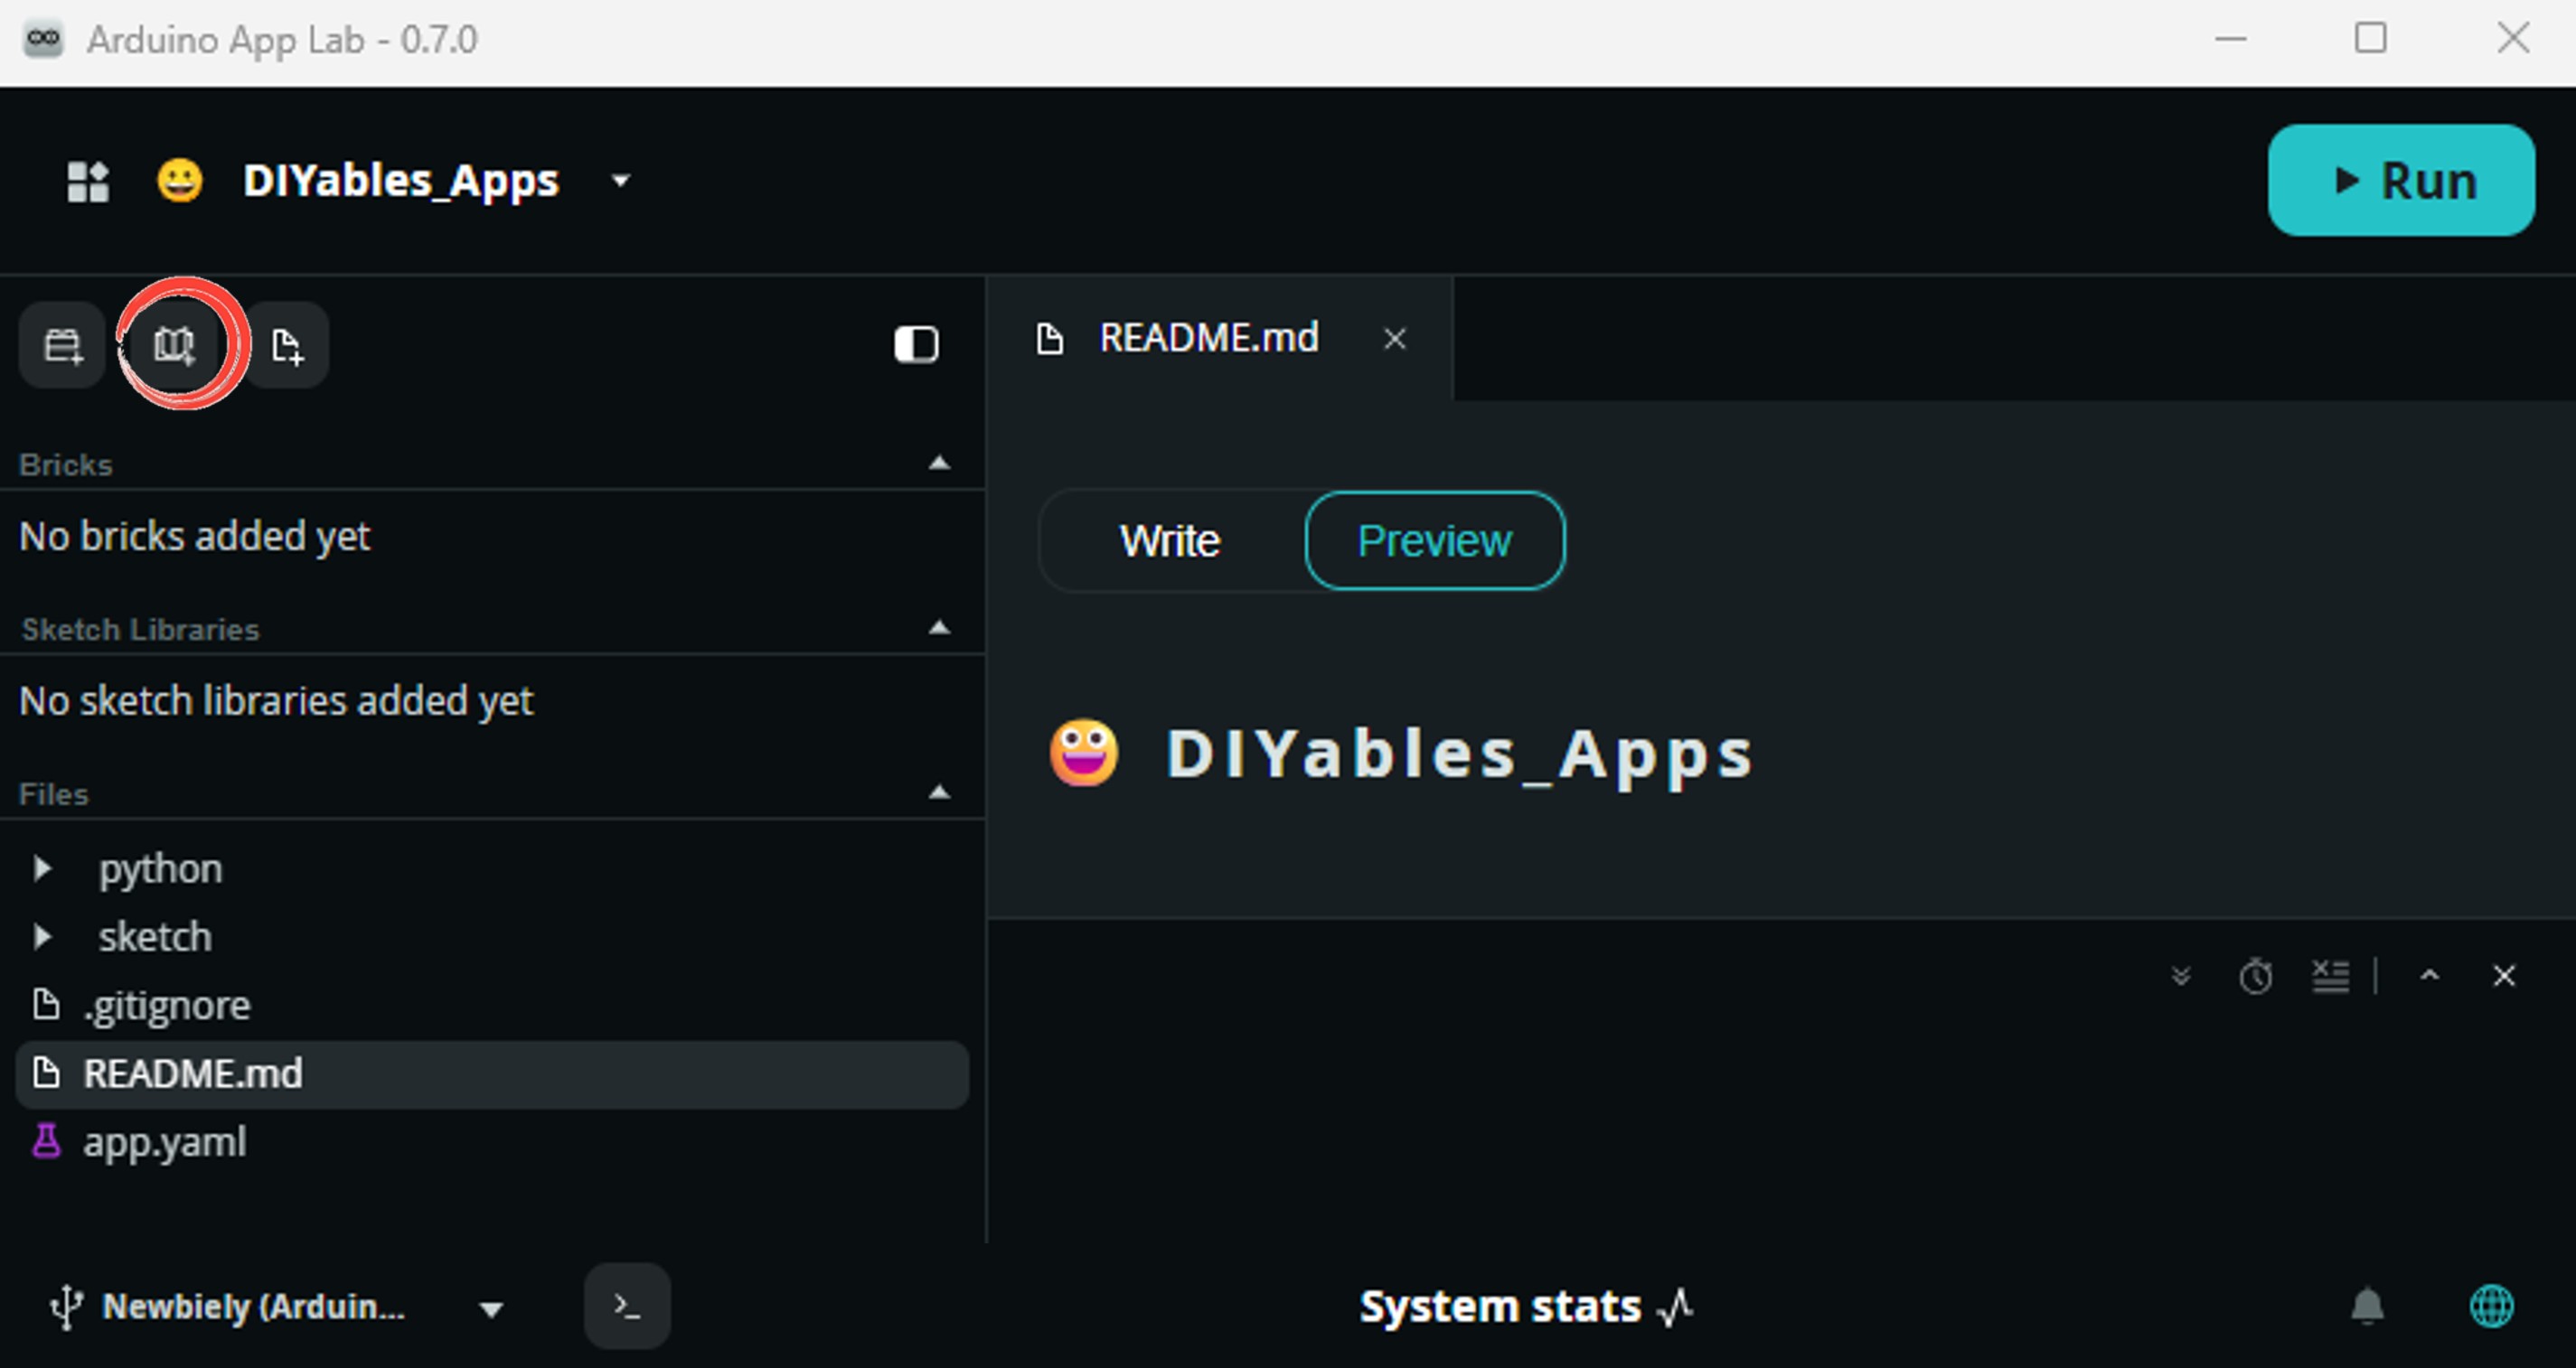
Install the library: Click the Add sketch library button (the open book icon with a + sign) in the left sidebar.
Search for Arduino_RouterBridge created by Arduino and click the Install button.
My Apps/DIYables Apps
Run
Bricks
No bricks added...
Sketch Libraries
No sketch libra...
Files
python
sketch
.gitignore
README.md
app.yaml
sketch.ino
Add sketch library
Arduino_RouterBridge
Arduino_RouterBridgeArduino
This library provides a simple RPC bridge for Arduino UNO Q boards, allowing communication between the board and other devices using MsgPack serialization.
0.4.1
Install
More Info
Search for DIYables_MultiFuncShield created by DIYables.io and click the Install button.
My Apps/DIYables Apps
Run
Bricks
No bricks added...
Sketch Libraries
No sketch libra...
Files
python
sketch
.gitignore
README.md
app.yaml
sketch.ino
Add sketch library
DIYables_MultiFuncShield
DIYables_MultiFuncShieldDIYables.io
Self-contained library for Multi-Function Shield components including 4-digit 7-segment display, buttons, LEDs, buzzer, potentiometer, and temperature sensor. No external dependencies. Uses Arduino standard APIs for compatibility across all platforms.
1.0.0
Install
More Info
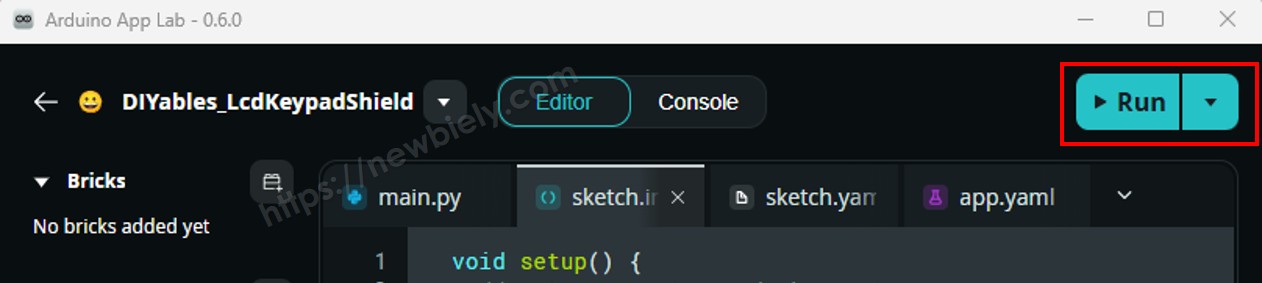
업로드: Arduino App Lab에서 실행 버튼을 클릭하여 STM32로 컴파일 및 업로드하세요.
디스플레이는 3초마다 값을 순환하고, LED D1이 깜박이고, S1/S2/S3을 누르면 1111/2222/3333을 표시하고 비프음이 울립니다!
전문 팁: Arduino UNO Q의 STM32 MCU는 12비트 ADC(값 0-4095)를 가지고 있습니다. readPotPercent() 함수는 자동으로 스케일링을 처리합니다.
Bridge: Linux + MCU
이 섹션에서는 Arduino UNO Q의 두 프로세서를 프로그래밍하여 Linux 측이 다기능 쉴드를 원격으로 제어하는 방법을 보여줍니다:
다기능 쉴드는 MCU(STM32)에 연결됩니다 — MCU는 모든 컴포넌트를 직접 제어합니다
MPU는 쉴드 컴포넌트에 직접 액세스할 수 없습니다 — Bridge.call()을 통해 MCU에서 결과를 요청해야 합니다
MPU에는 Wi-Fi가 있습니다 — 전체 Debian Linux를 실행하며 인터넷에 연결하고 쉴드 작업을 원격으로 트리거할 수 있습니다
Arduino_RouterBridge는 두 프로세서 간의 RPC 통신을 활성화합니다
⚠️ /dev/ttyHS1(Linux) 및 Serial1(MCU)은 라우터에서 예약됨 — 사용자 코드에서 열지 마세요
요컨대: MCU는 쉴드 컴포넌트를 제어합니다 → MPU는 명령을 보내고 센서 값을 읽습니다 → MPU는 인터넷을 통해 어디서나 쉴드와 상호 작용할 수 있습니다.
참고: Bridge 스케치에서 MFS.loop()는 Arduino loop() 내에서 호출되어 디스플레이를 새로 고치고 버튼을 계속 폴링합니다 — 이는 필수이며 Bridge 통신을 방해하지 않습니다.
MCU 코드(Bridge)
/* * 이 Arduino UNO Q 코드는 newbiely.kr 에서 개발되었습니다 * 이 Arduino UNO Q 코드는 어떠한 제한 없이 공개 사용을 위해 제공됩니다. * 상세한 지침 및 연결도에 대해서는 다음을 방문하세요: * https://newbiely.kr/tutorials/arduino-uno-q/arduino-uno-q-multi-function-shield */#include"Arduino_RouterBridge.h"#include <DIYables_MultiFuncShield.h>String current_display = "";void display_number(String text) {int number = text.toInt(); current_display = text;MFS.display.print(number); Monitor.println("Display: " + text);}void display_float(String text) {float value = text.toFloat(); current_display = text;MFS.display.print(value, 1); Monitor.println("Display float: " + text);}void beep_once() {MFS.buzzer.beep(200); Monitor.println("Buzzer beeped");}String get_buttons() {String s = ""; s += "S1:" + String(MFS.button1.isPressed() ? "pressed" : "released"); s += " S2:" + String(MFS.button2.isPressed() ? "pressed" : "released"); s += " S3:" + String(MFS.button3.isPressed() ? "pressed" : "released");return s;}String get_pot() {// MCU STM32 has 12-bit ADC (0-4095)int raw = MFS.readPot();float percent = MFS.readPotPercent();return"Pot: " + String(raw) + " (" + String(percent, 1) + "%)";}String get_status() {if (current_display == "")return"Display is blank";return"Display shows: " + current_display;}voidsetup() {Bridge.begin(); Monitor.begin(9600);MFS.begin();MFS.display.print(0);Bridge.provide_safe("display_number", display_number);Bridge.provide_safe("display_float", display_float);Bridge.provide_safe("beep_once", beep_once);Bridge.provide("get_buttons", get_buttons);Bridge.provide("get_pot", get_pot);Bridge.provide("get_status", get_status);}voidloop() {MFS.loop(); // Required to refresh display and poll buttons}
Python 코드(Bridge)
/* * 이 Arduino UNO Q 코드는 newbiely.kr 에서 개발되었습니다 * 이 Arduino UNO Q 코드는 어떠한 제한 없이 공개 사용을 위해 제공됩니다. * 상세한 지침 및 연결도에 대해서는 다음을 방문하세요: * https://newbiely.kr/tutorials/arduino-uno-q/arduino-uno-q-multi-function-shield */from arduino.app_utils import *import timedef loop(): result = Bridge.call("display_number", "1234")print(result) time.sleep(3) result = Bridge.call("display_float", "26.5")print(result) time.sleep(3) result = Bridge.call("get_buttons")print(result) result = Bridge.call("get_pot")print(result) result = Bridge.call("beep_once")print(result) time.sleep(2) result = Bridge.call("get_status")print(result) time.sleep(2)App.run(user_loop=loop)
빠른 단계
연결: 다기능 쉴드를 Arduino UNO Q에 스택하고 USB-C 케이블을 연결하세요.
Arduino App Lab 열기: Arduino App Lab을 시작하고 보드가 감지될 때까지 기다리세요.
새 앱 만들기:새 앱 만들기를 클릭하고, 이름을 DIYables_MultiFuncShieldBridge로 지정한 후 만들기를 클릭하세요.
MCU 스케치 붙여넣기: 위의 MCU Bridge 코드를 복사하여 sketch/sketch.ino에 붙여넣으세요.
Python 코드 붙여넣기: 위의 Python Bridge 코드를 복사하여 앱의 Python 파일에 붙여넣으세요.
업로드: Arduino App Lab에서 실행 버튼을 클릭하세요.
App Lab 콘솔 출력
DIYables_Apps
Stop
sketch.ino
1#include"Arduino_RouterBridge.h"
Serial Monitor
Python
Message (Enter to send a message to "Newbiely" on usb(2820070321))
[2026-04-29 09:00:01] OK
[2026-04-29 09:00:04] OK
[2026-04-29 09:00:07] S1:released S2:released S3:released
[2026-04-29 09:00:08] Pot: 2048 (50.0%)
[2026-04-29 09:00:09] OK
[2026-04-29 09:00:11] Display shows: 26.5
Telegram
Telegram을 사용하여 어디서나 다기능 쉴드를 제어하세요. 디스플레이에 숫자를 표시하고, 부저를 트리거하고, 휴대폰에서 센서 값을 읽으세요.
MCU 스케치: 이전 Bridge 섹션의 MCU 스케치를 유지하세요.
Python 코드(Telegram)
/* * 이 Arduino UNO Q 코드는 newbiely.kr 에서 개발되었습니다 * 이 Arduino UNO Q 코드는 어떠한 제한 없이 공개 사용을 위해 제공됩니다. * 상세한 지침 및 연결도에 대해서는 다음을 방문하세요: * https://newbiely.kr/tutorials/arduino-uno-q/arduino-uno-q-multi-function-shield */from arduino.app_utils import *import requestsimport timeTELEGRAM_TOKEN = "YOUR_TELEGRAM_BOT_TOKEN"CHAT_ID = "YOUR_CHAT_ID"last_update_id = 0def get_updates():global last_update_id url = f"https://api.telegram.org/bot{TELEGRAM_TOKEN}/getUpdates" params = {"offset": last_update_id + 1, "timeout": 5}try: response = requests.get(url, params=params, timeout=10) data = response.json()if data["ok"]:return data["result"]exceptException:passreturn []def send_message(text): url = f"https://api.telegram.org/bot{TELEGRAM_TOKEN}/sendMessage" requests.post(url, data={"chat_id": CHAT_ID, "text": text})def loop():global last_update_id updates = get_updates()for update in updates: last_update_id = update["update_id"] message = update.get("message", {}) text = message.get("text", "")if text.startswith("/number "): number = text[8:].strip() result = Bridge.call("display_number", number) send_message(result)elif text.startswith("/float "): value = text[7:].strip() result = Bridge.call("display_float", value) send_message(result)elif text == "/beep": result = Bridge.call("beep_once") send_message(result)elif text == "/buttons": result = Bridge.call("get_buttons") send_message(result)elif text == "/pot": result = Bridge.call("get_pot") send_message(result)elif text == "/status": result = Bridge.call("get_status") send_message(result)elif text == "/start": send_message("Commands:\n/number <value> - Show integer on display\n/float <value> - Show float on display\n/beep - Trigger the buzzer\n/buttons - Read button states\n/pot - Read potentiometer value\n/status - Get display status")App.run(user_loop=loop)
빠른 단계
YOUR_TELEGRAM_BOT_TOKEN을 BotFather의 실제 봇 토큰으로 바꾸세요.
YOUR_CHAT_ID를 Telegram 채팅 ID로 바꾸세요.
이 Python 코드를 앱의 Python 파일에 붙여넣으세요(MCU 스케치는 동일하게 유지).