아두이노 우노 R4 WiFi 블루투스 조이스틱 예제 BLE를 통한 2D 방향 제어 튜토리얼
개요
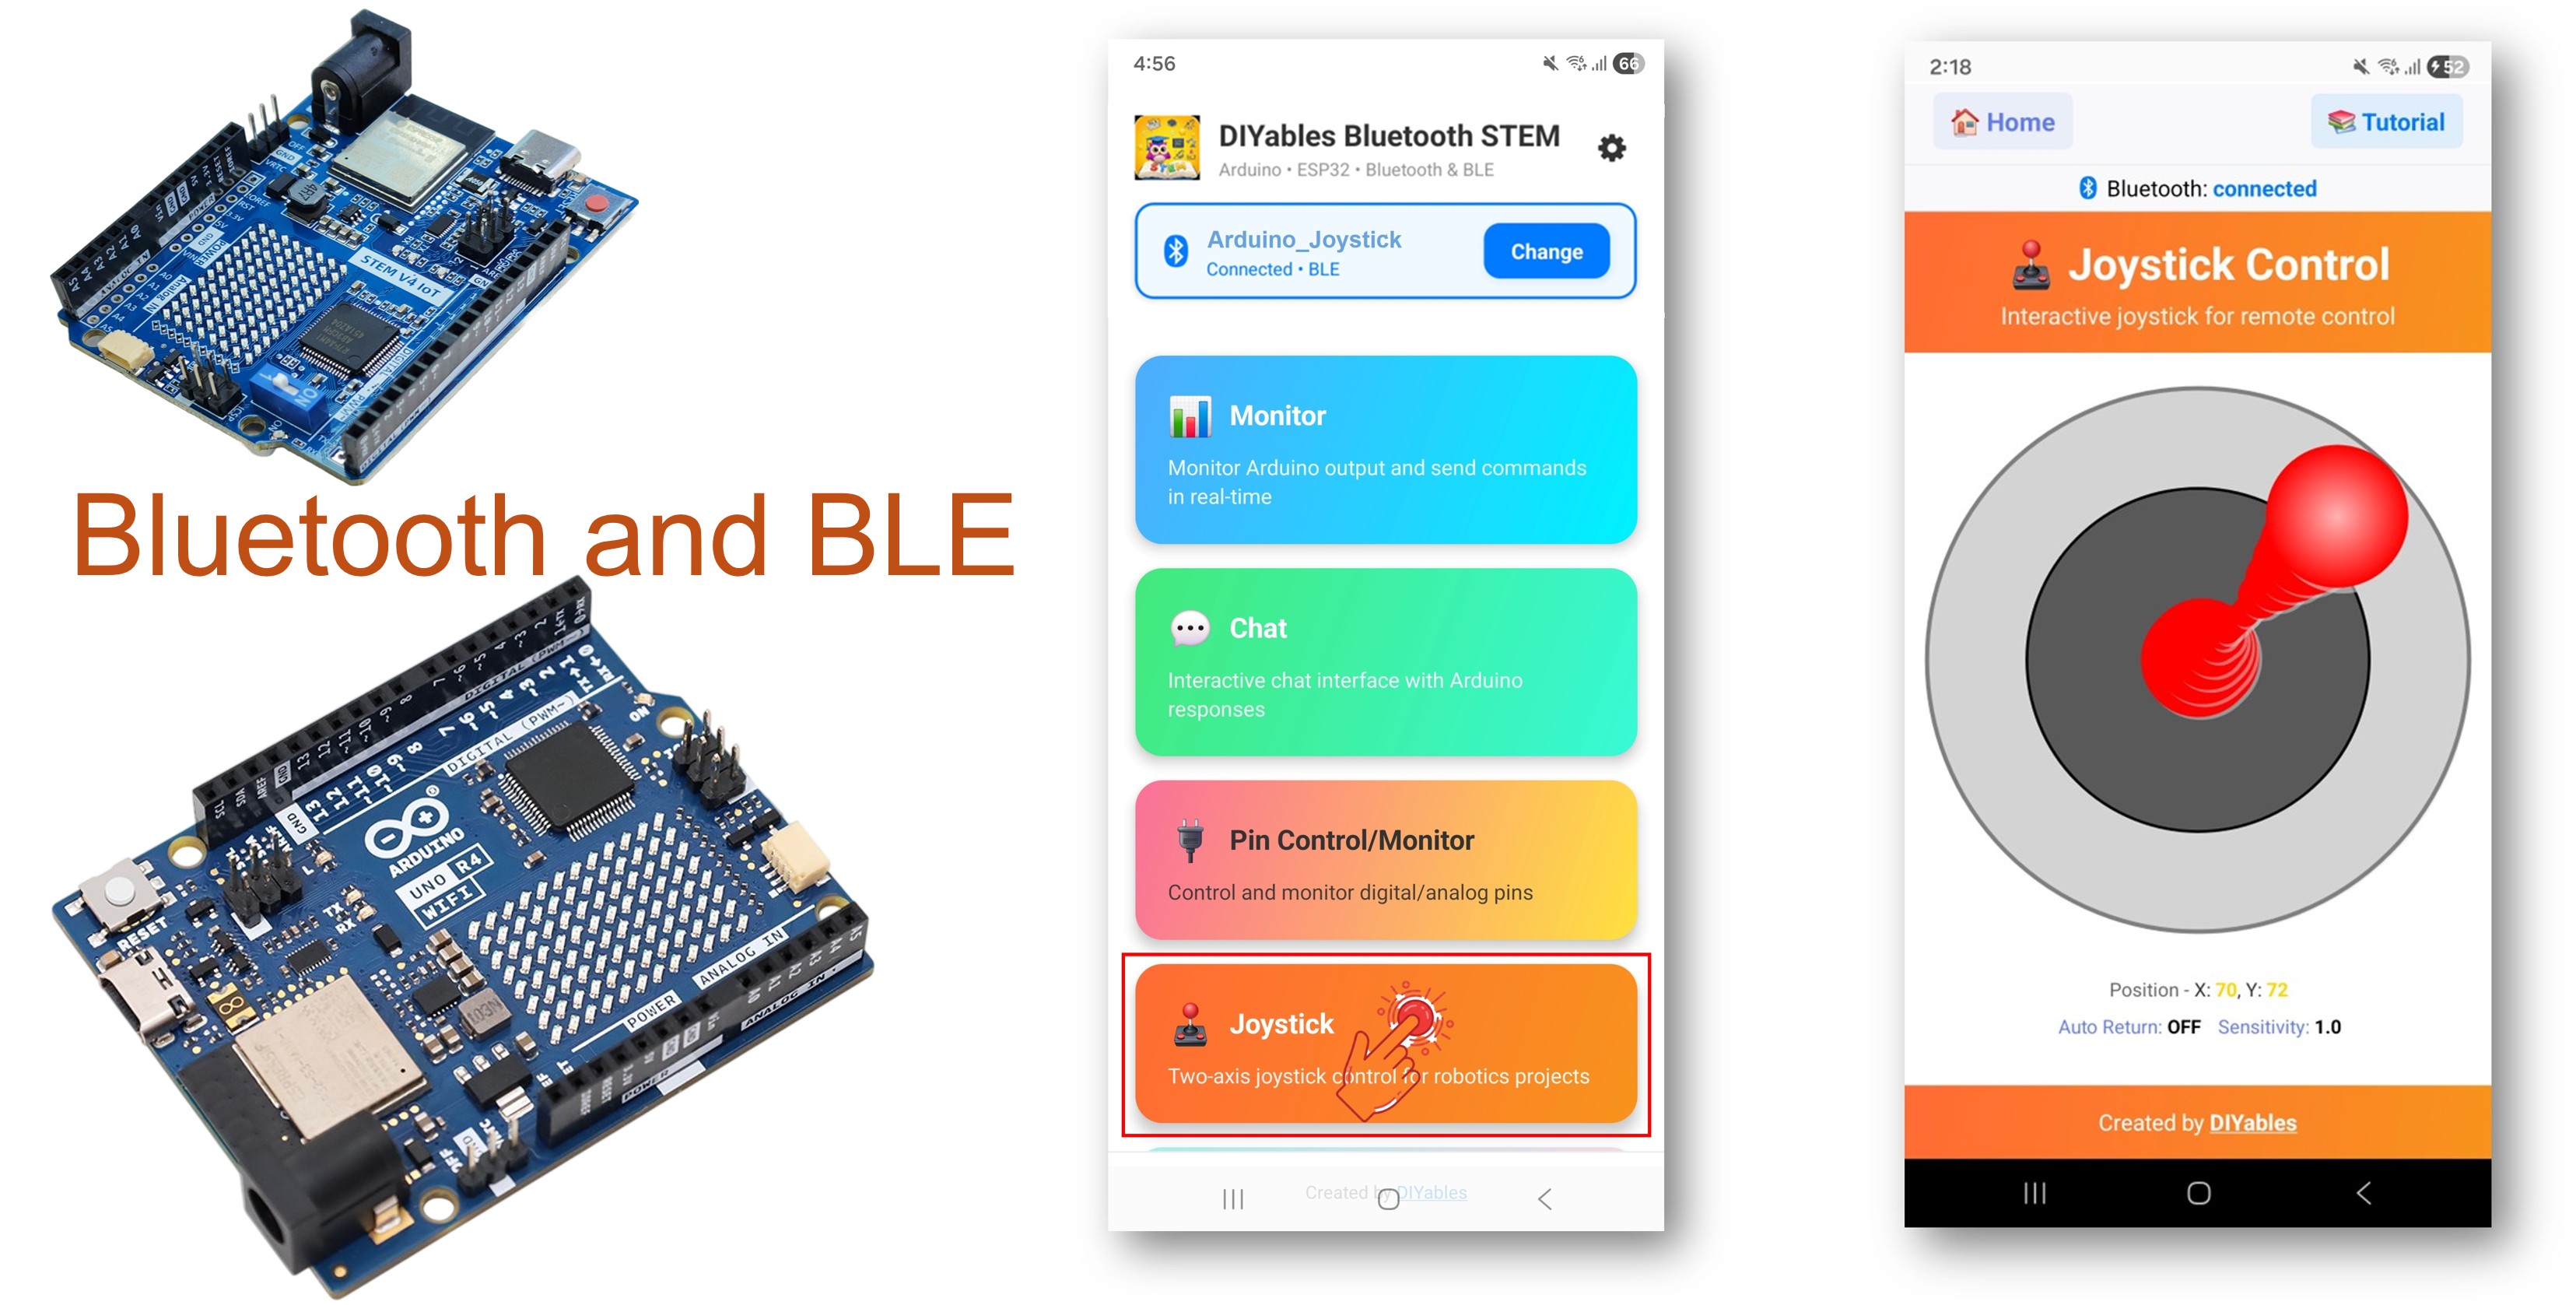
블루투스 조이스틱 예제는 DIYables 블루투스 STEM 앱을 통해 대화형 2D 조이스틱 제어 기능을 제공합니다. BLE(Bluetooth Low Energy) 를 사용하는 Arduino UNO R4 WiFi 전용으로 설계되어 방향 제어를 위한 실시간 X/Y 좌표(-100~+100)를 수신합니다. 로봇 내비게이션, 팬-틸트 서보, 모터 제어, 게임 컨트롤러에 적합합니다.
참고: Arduino UNO R4 WiFi는 BLE(Bluetooth Low Energy)만 지원합니다. 클래식 블루투스는 지원하지 않습니다. DIYables 블루투스 앱은 Android에서 BLE와 클래식 블루투스를 모두 지원하고, iOS에서는 BLE를 지원합니다. 이 보드는 BLE를 사용하므로 앱은 Android와 iOS 모두에서 작동합니다.
기능
- 2D 제어: X 및 Y 축, 범위 -100~+100
- 구성 가능한 감도: 업데이트를 트리거하는 최소 이동 임계값
- 자동 복귀 옵션: 손을 뗐을 때 조이스틱이 자동으로 중앙으로 돌아옴
- 실시간 값: 드래그하는 동안 연속적인 위치 업데이트
- Android 및 iOS에서 작동: BLE는 두 플랫폼 모두에서 지원
- 페어링 불필요: BLE는 수동 페어링 없이 자동 연결
- 저전력: BLE는 클래식 블루투스보다 전력 소비가 적음
필요한 하드웨어
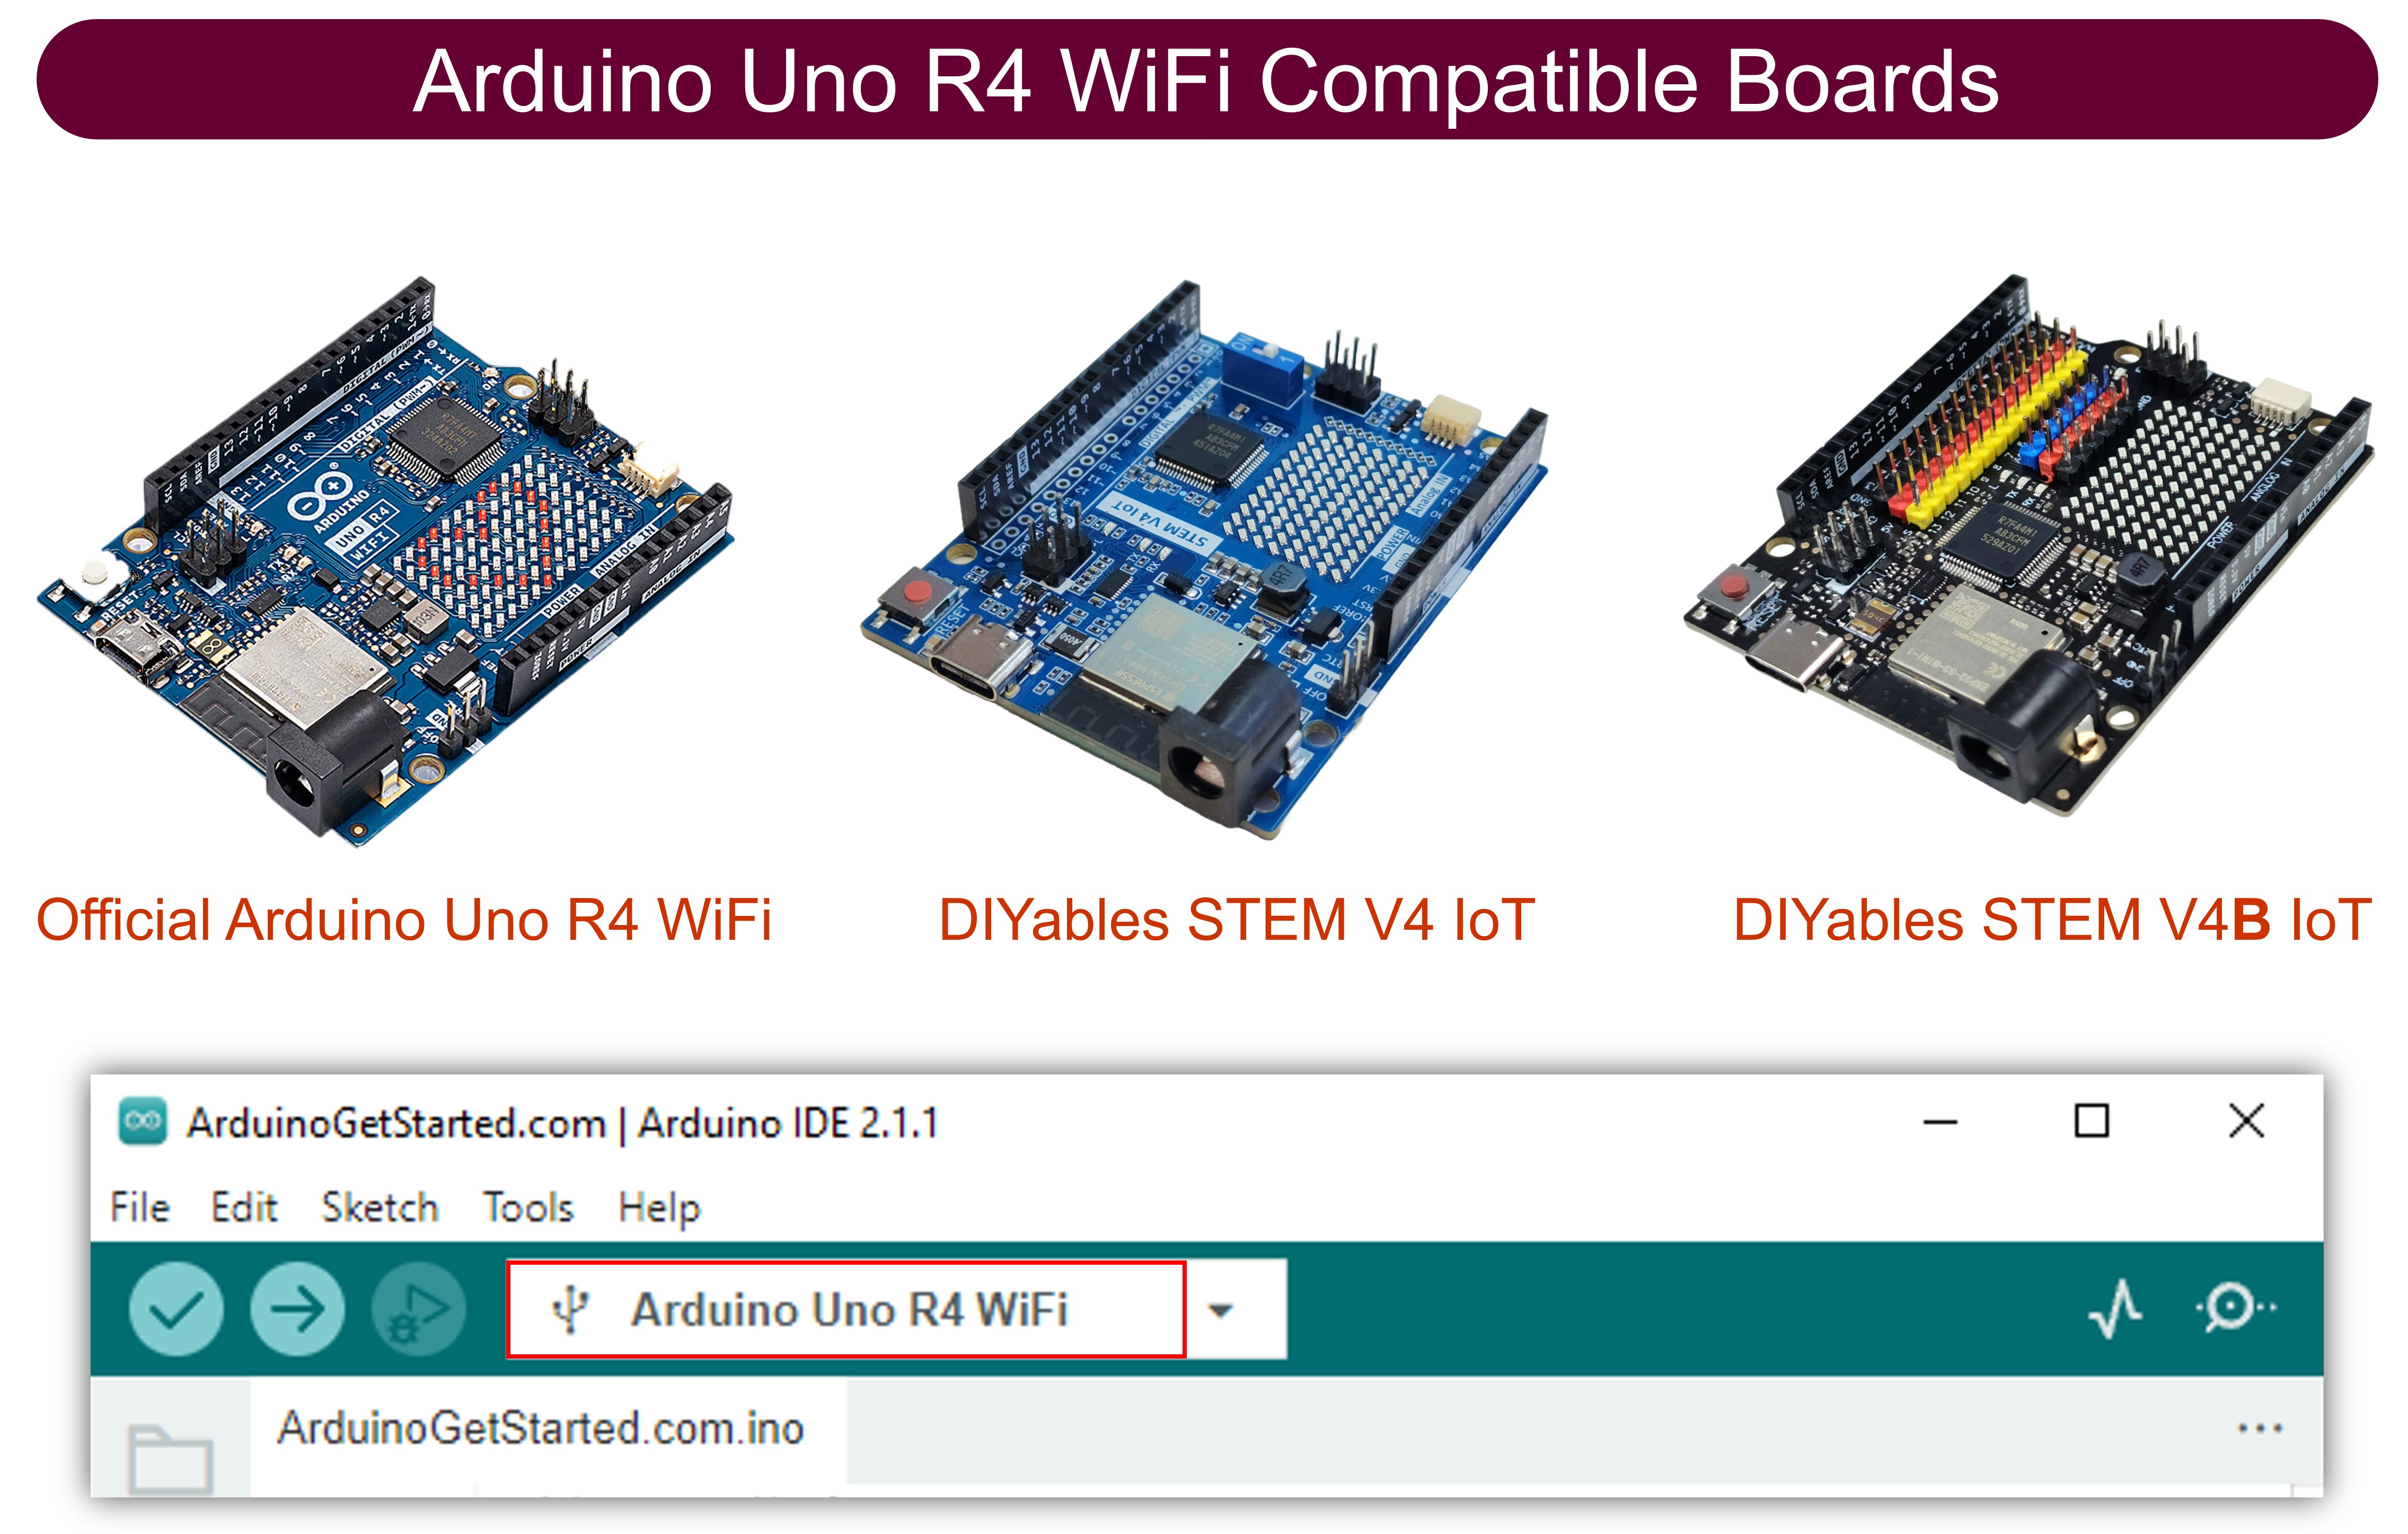
| 1 | × | 아두이노 우노 R4 와이파이 | 쿠팡 | 아마존 | |
| 1 | × | (또는) DIYables STEM V4 IoT | 쿠팡 | 아마존 | |
| 1 | × | USB 케이블 타입-A to 타입-C (USB-A PC용) | 쿠팡 | 아마존 | |
| 1 | × | USB 케이블 타입-C to 타입-C (USB-C PC용) | 아마존 | |
| 1 | × | 브레드보드 | 쿠팡 | 아마존 | |
| 1 | × | 점퍼케이블 | 쿠팡 | 아마존 | |
| 1 | × | (추천) 아두이노 우노 R4용 스크루 터미널 블록 쉴드 | 쿠팡 | 아마존 | |
| 1 | × | (추천) Sensors/Servo Expansion Shield for Arduino UNO R4 | 쿠팡 | 아마존 | |
| 1 | × | (추천) 아두이노 우노 R4용 브레드보드 쉴드 | 쿠팡 | 아마존 | |
| 1 | × | (추천) 아두이노 우노 R4용 케이스 | 쿠팡 | 아마존 | |
| 1 | × | (추천) 아두이노 우노 R4용 전원 분배기 | 쿠팡 | 아마존 | |
| 1 | × | (추천) 아두이노 우노용 프로토타이핑 베이스 플레이트 & 브레드보드 키트 | 아마존 |
Arduino UNO R4 WiFi 코드
빠른 단계
다음 단계를 순서대로 따라하세요:
- Arduino UNO R4 WiFi를 처음 사용하는 경우 아두이노 우노 R4 - 소프트웨어 설치를 참조하세요.
- USB 케이블을 사용하여 Arduino UNO R4 WiFi 보드를 컴퓨터에 연결합니다.
- 컴퓨터에서 Arduino IDE를 실행합니다.
- Arduino UNO R4 WiFi 보드와 적절한 COM 포트를 선택합니다.
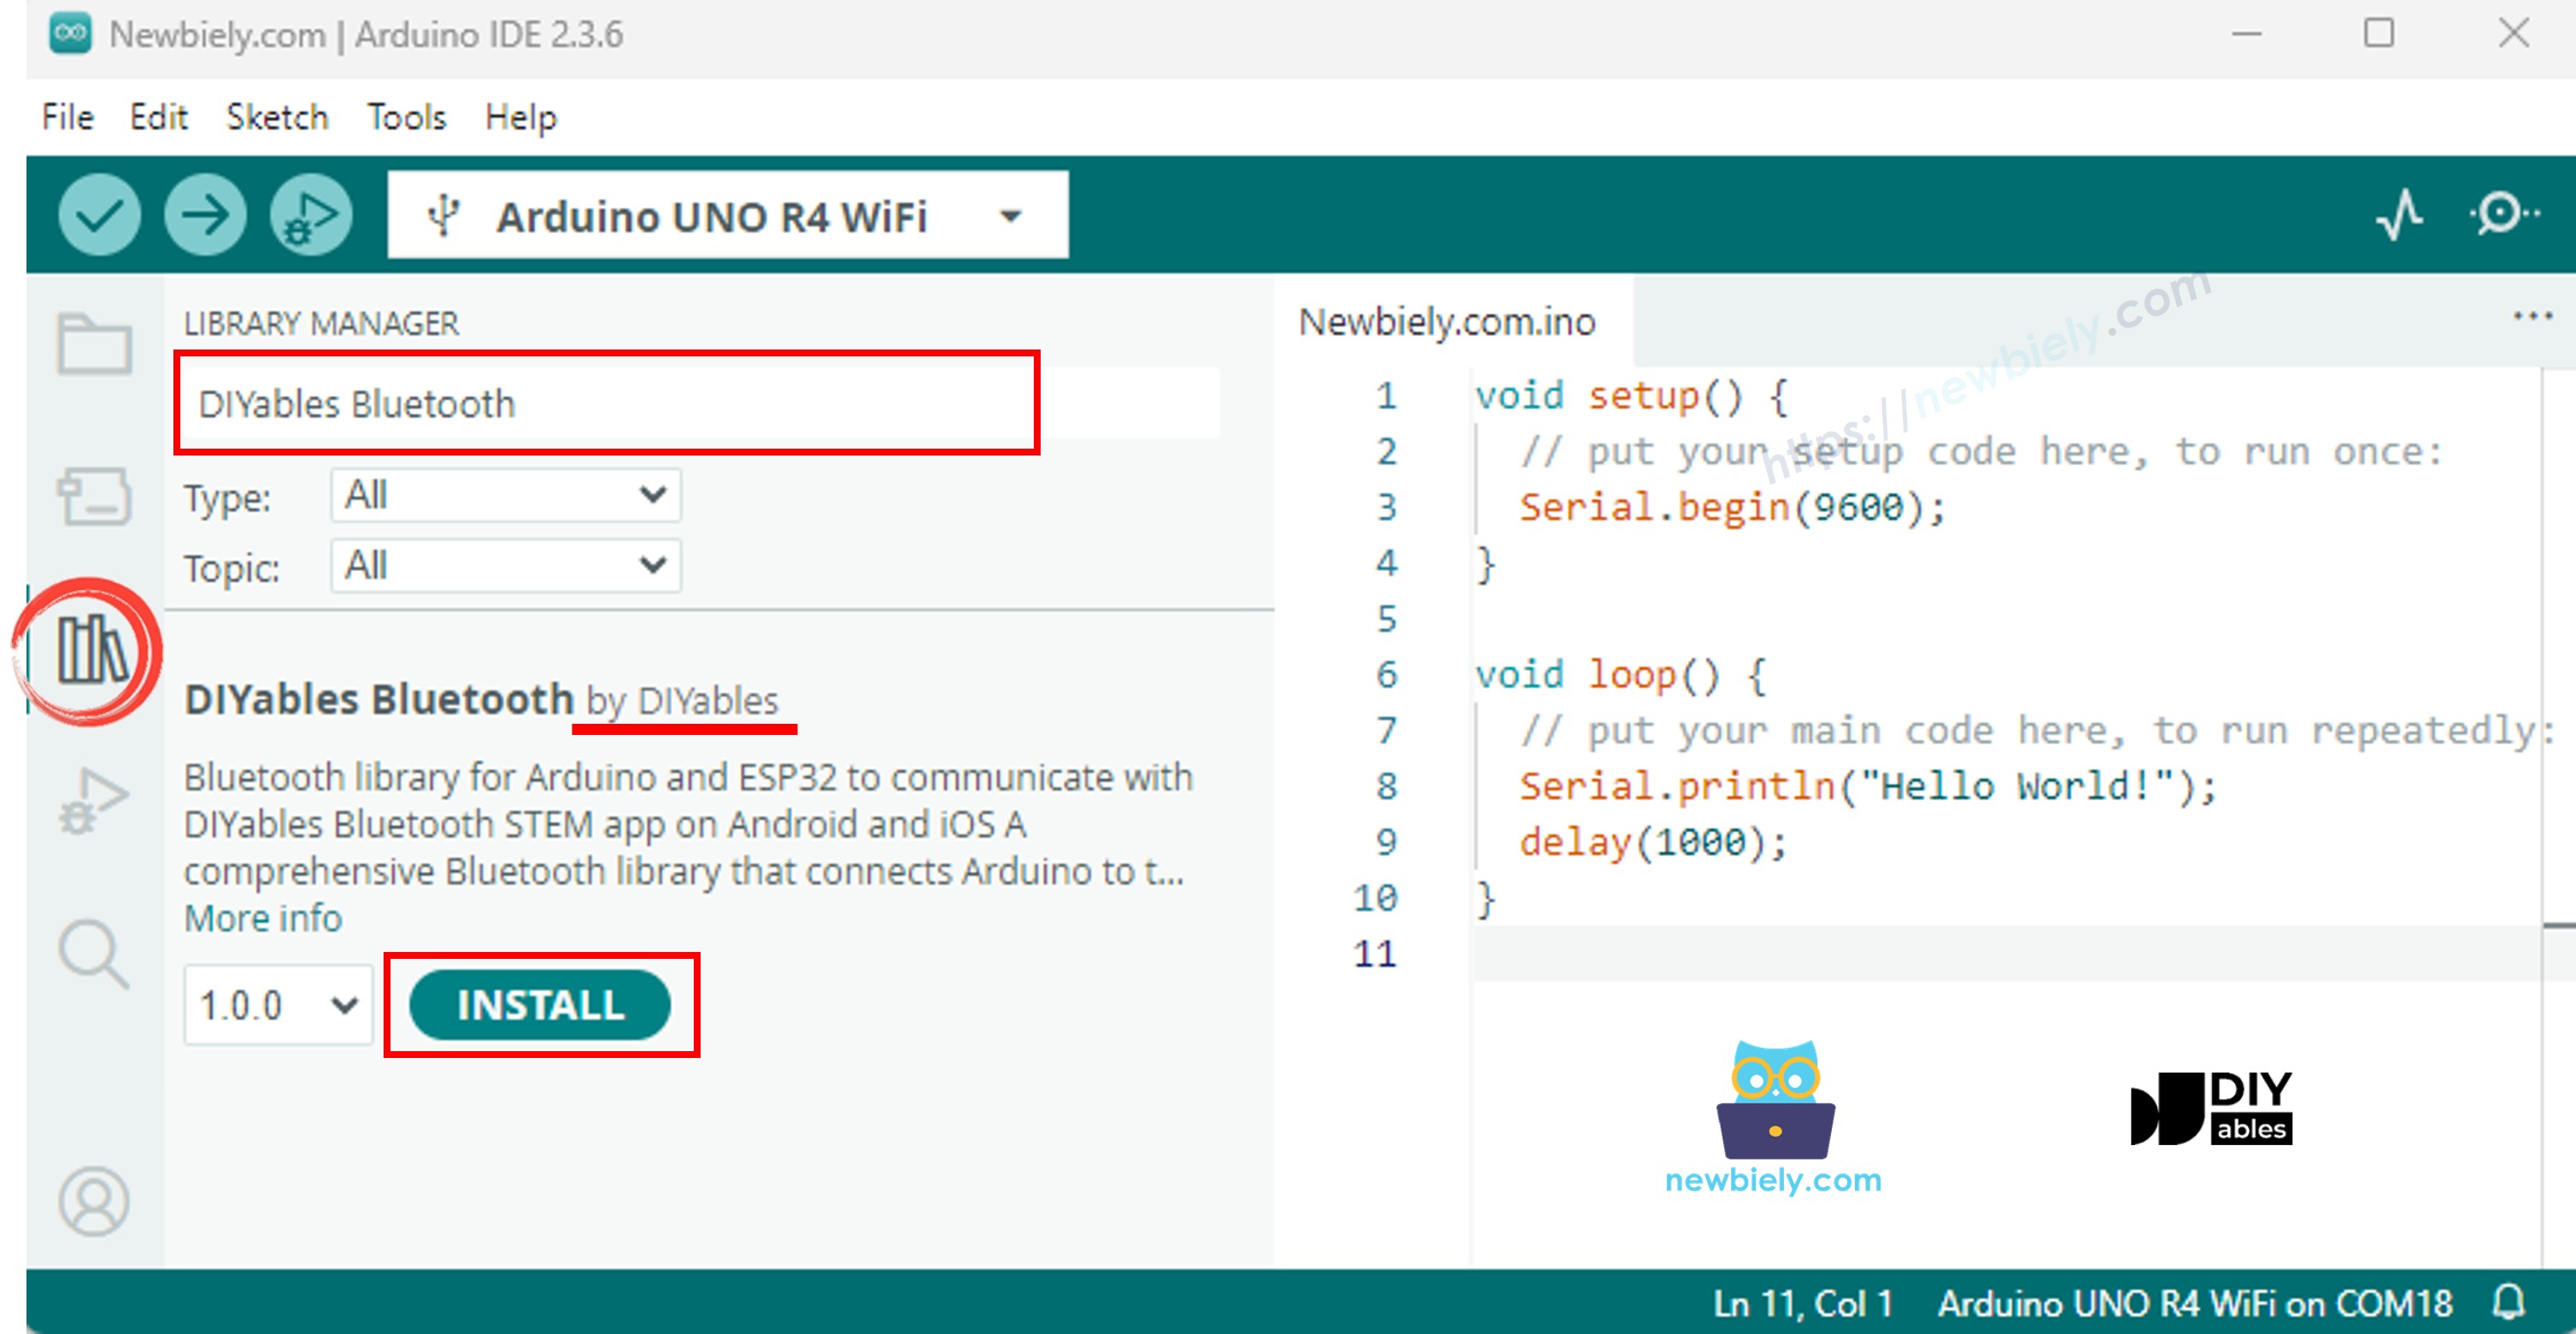
- Arduino IDE 왼쪽 바에서 Libraries 아이콘으로 이동합니다.
- "DIYables Bluetooth"를 검색한 다음 DIYables의 DIYables Bluetooth 라이브러리를 찾습니다.
- Install 버튼을 클릭하여 라이브러리를 설치합니다.
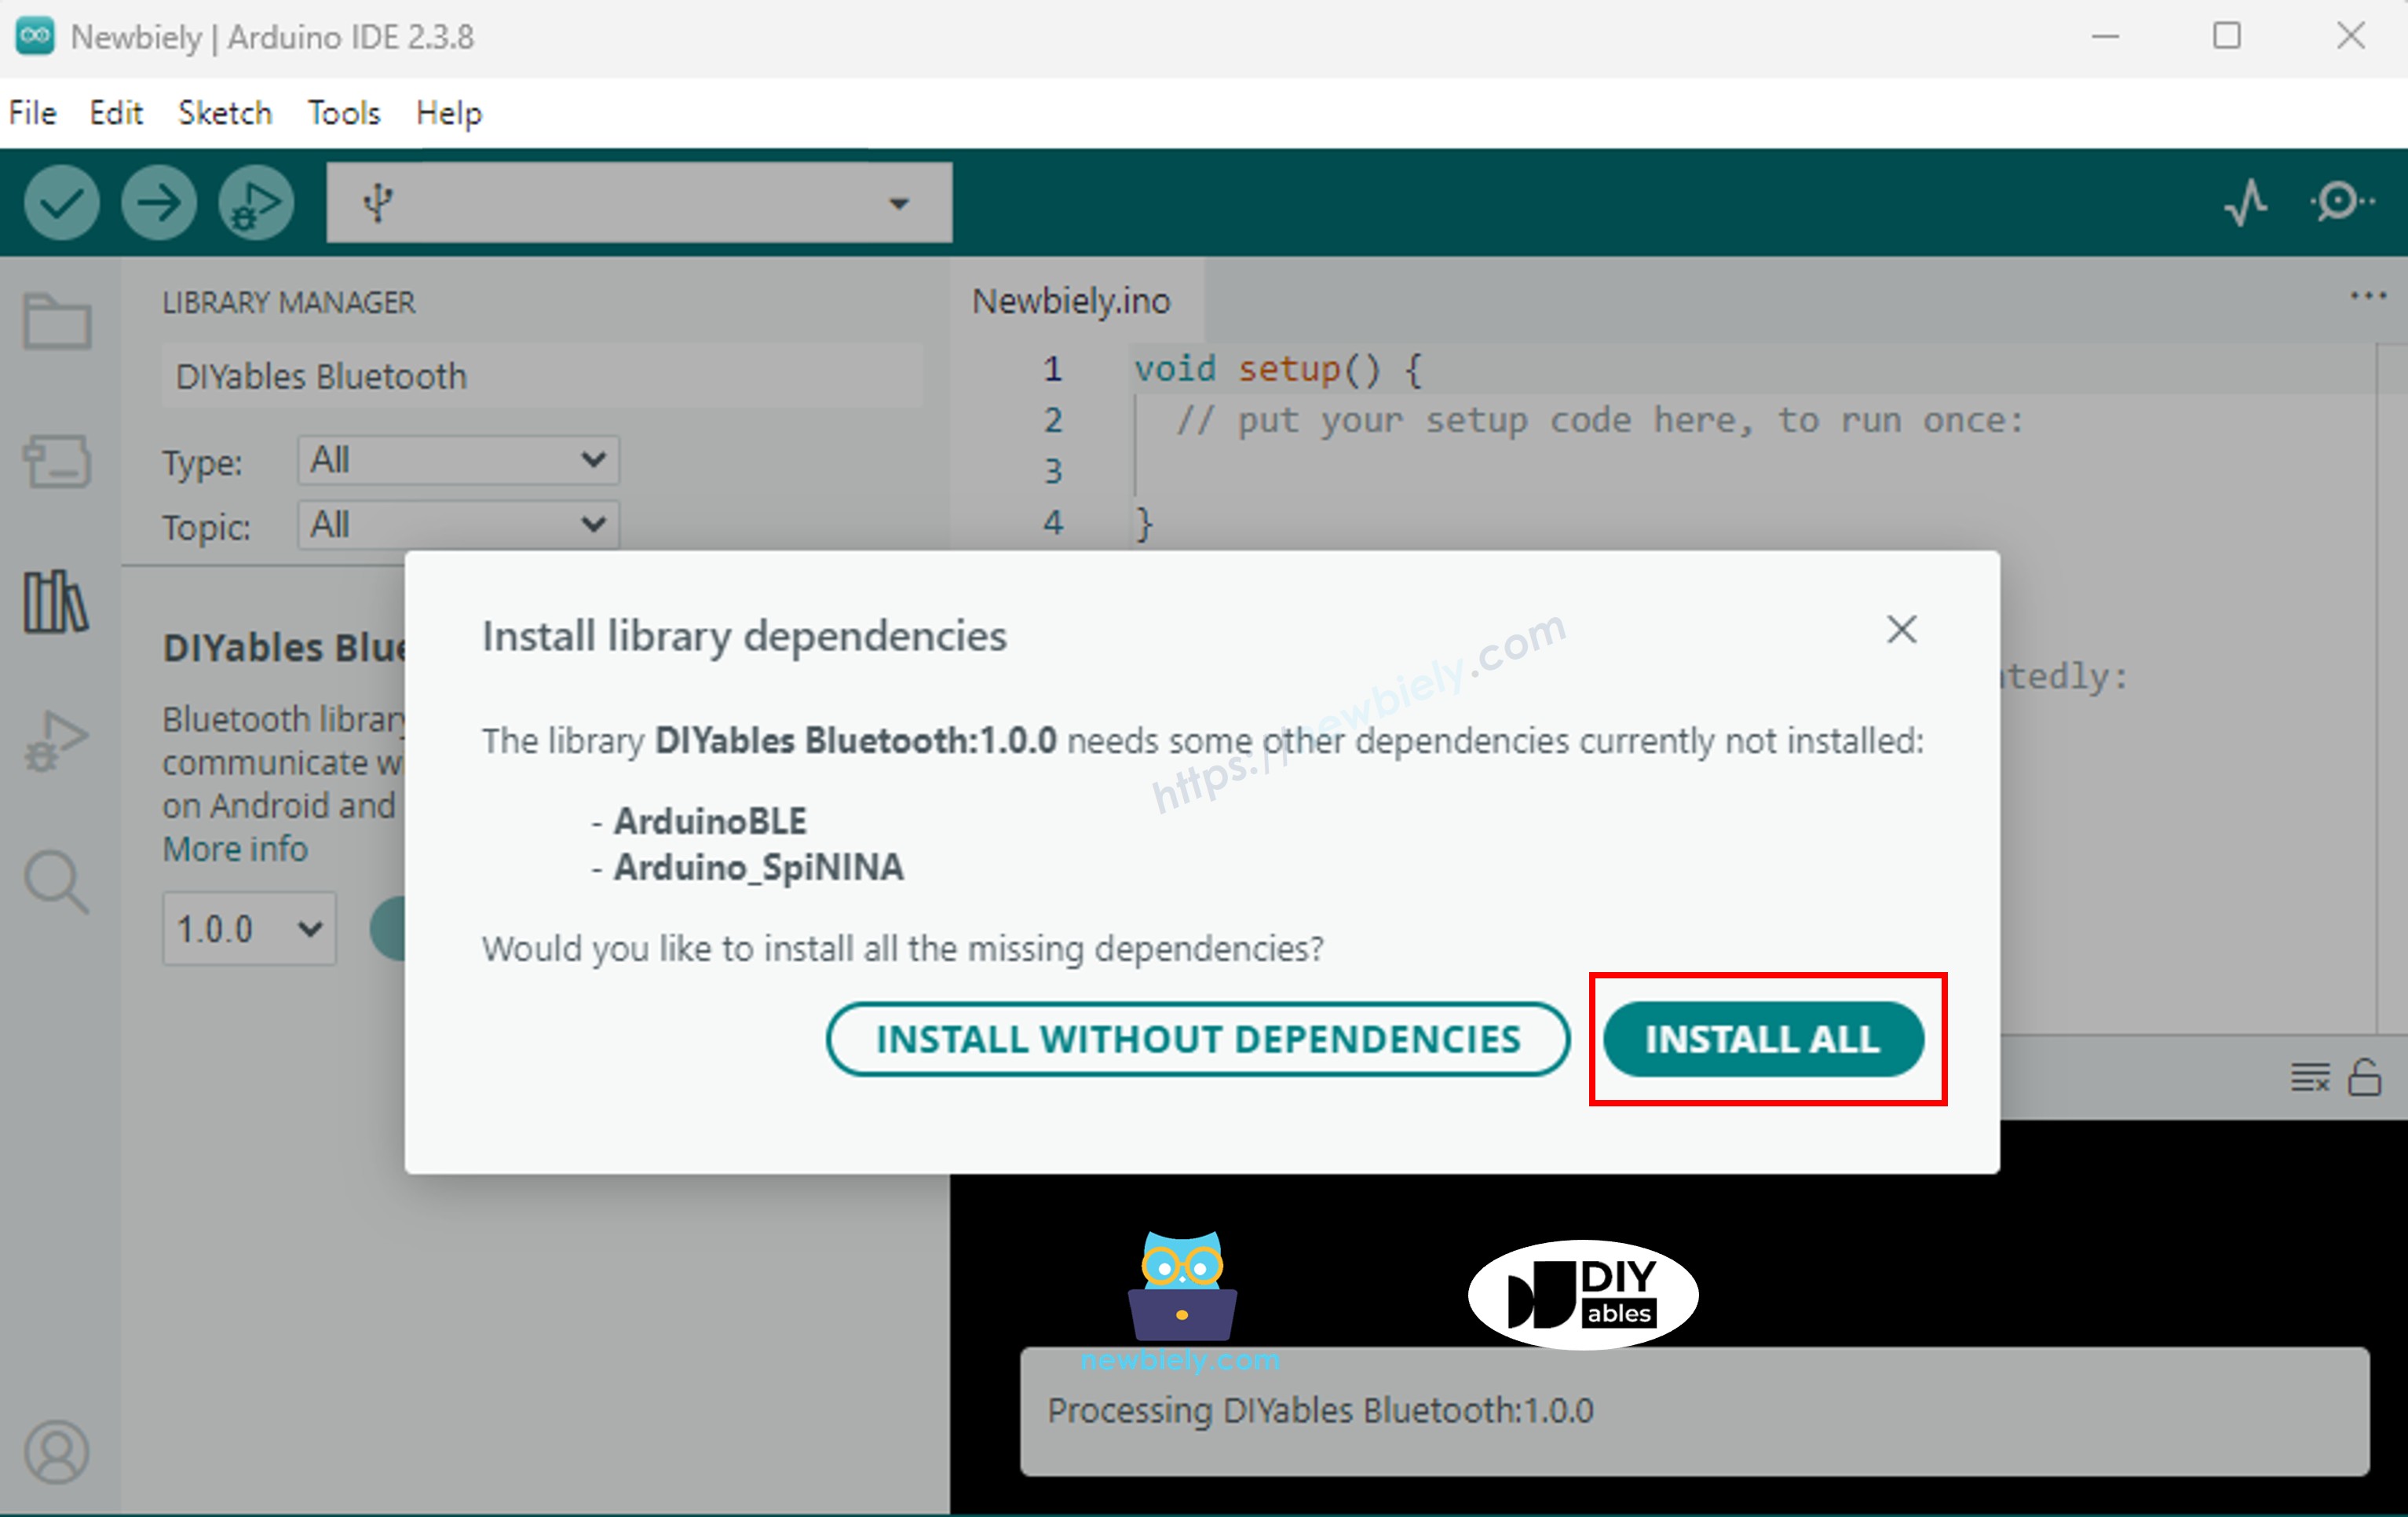
- 다른 라이브러리 종속성 설치를 요청받습니다.
- Install All 버튼을 클릭하여 모든 라이브러리 종속성을 설치합니다.
BLE 코드
- Arduino IDE에서 File Examples DIYables Bluetooth ArduinoBLE_Joystick 예제로 이동하거나, 위의 코드를 복사하여 Arduino IDE 편집기에 붙여 넣습니다.
- Arduino IDE에서 Upload 버튼을 클릭하여 코드를 Arduino UNO R4 WiFi에 업로드합니다.
- 시리얼 모니터를 엽니다.
- 시리얼 모니터에서 결과를 확인합니다. 아래와 같이 표시됩니다:
모바일 앱
참고: DIYables 블루투스 앱은 Android에서 BLE와 클래식 블루투스를 모두 지원하고, iOS에서는 BLE를 지원합니다. Arduino UNO R4 WiFi는 BLE를 사용하므로 앱은 Android와 iOS 모두에서 작동합니다. BLE에는 수동 페어링이 필요 없으며 스캔하고 연결하기만 하면 됩니다.
- DIYables 블루투스 앱을 엽니다.
- 처음 앱을 열면 권한을 요청합니다. 다음을 허용해 주세요:
- 주변 기기(Nearby Devices) 권한(Android 12+) / 블루투스 권한(iOS) - 블루투스 기기를 스캔하고 연결하는 데 필요합니다.
- 위치(Location) 권한(Android 11 이하만 해당) - 구형 Android 버전에서 BLE 기기를 스캔하는 데 필요합니다.
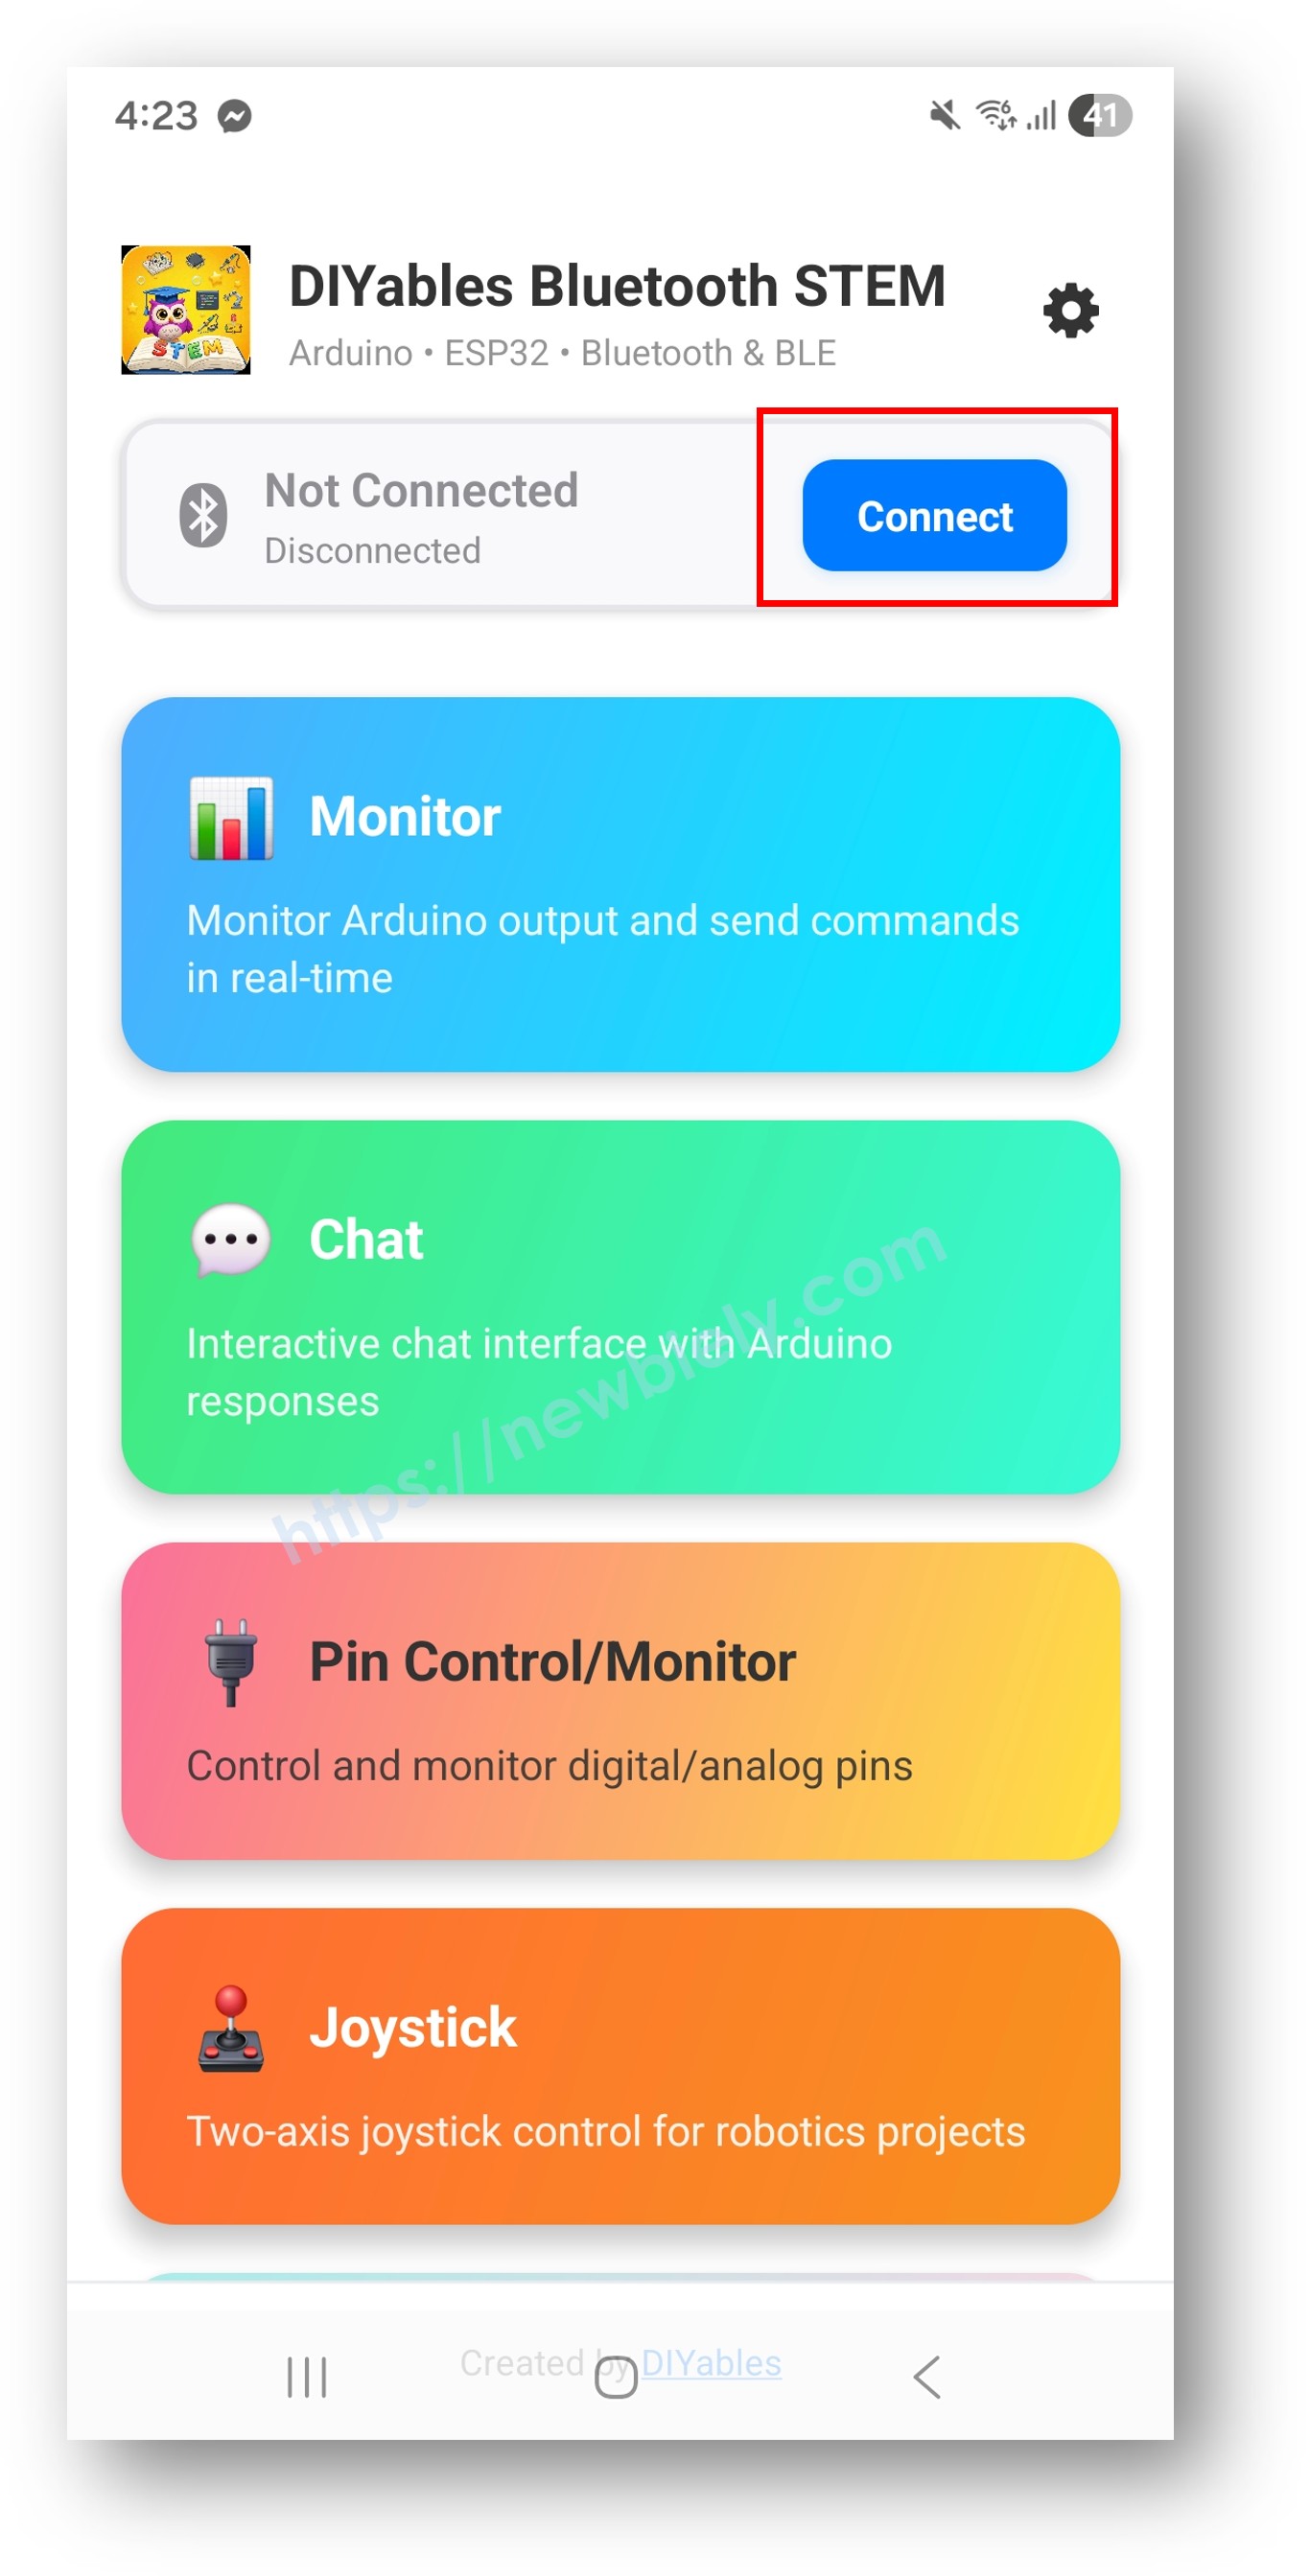
- 휴대폰에서 블루투스가 켜져 있는지 확인합니다.
- 홈 화면에서 Connect 버튼을 탭합니다. 앱이 BLE 기기를 스캔합니다.
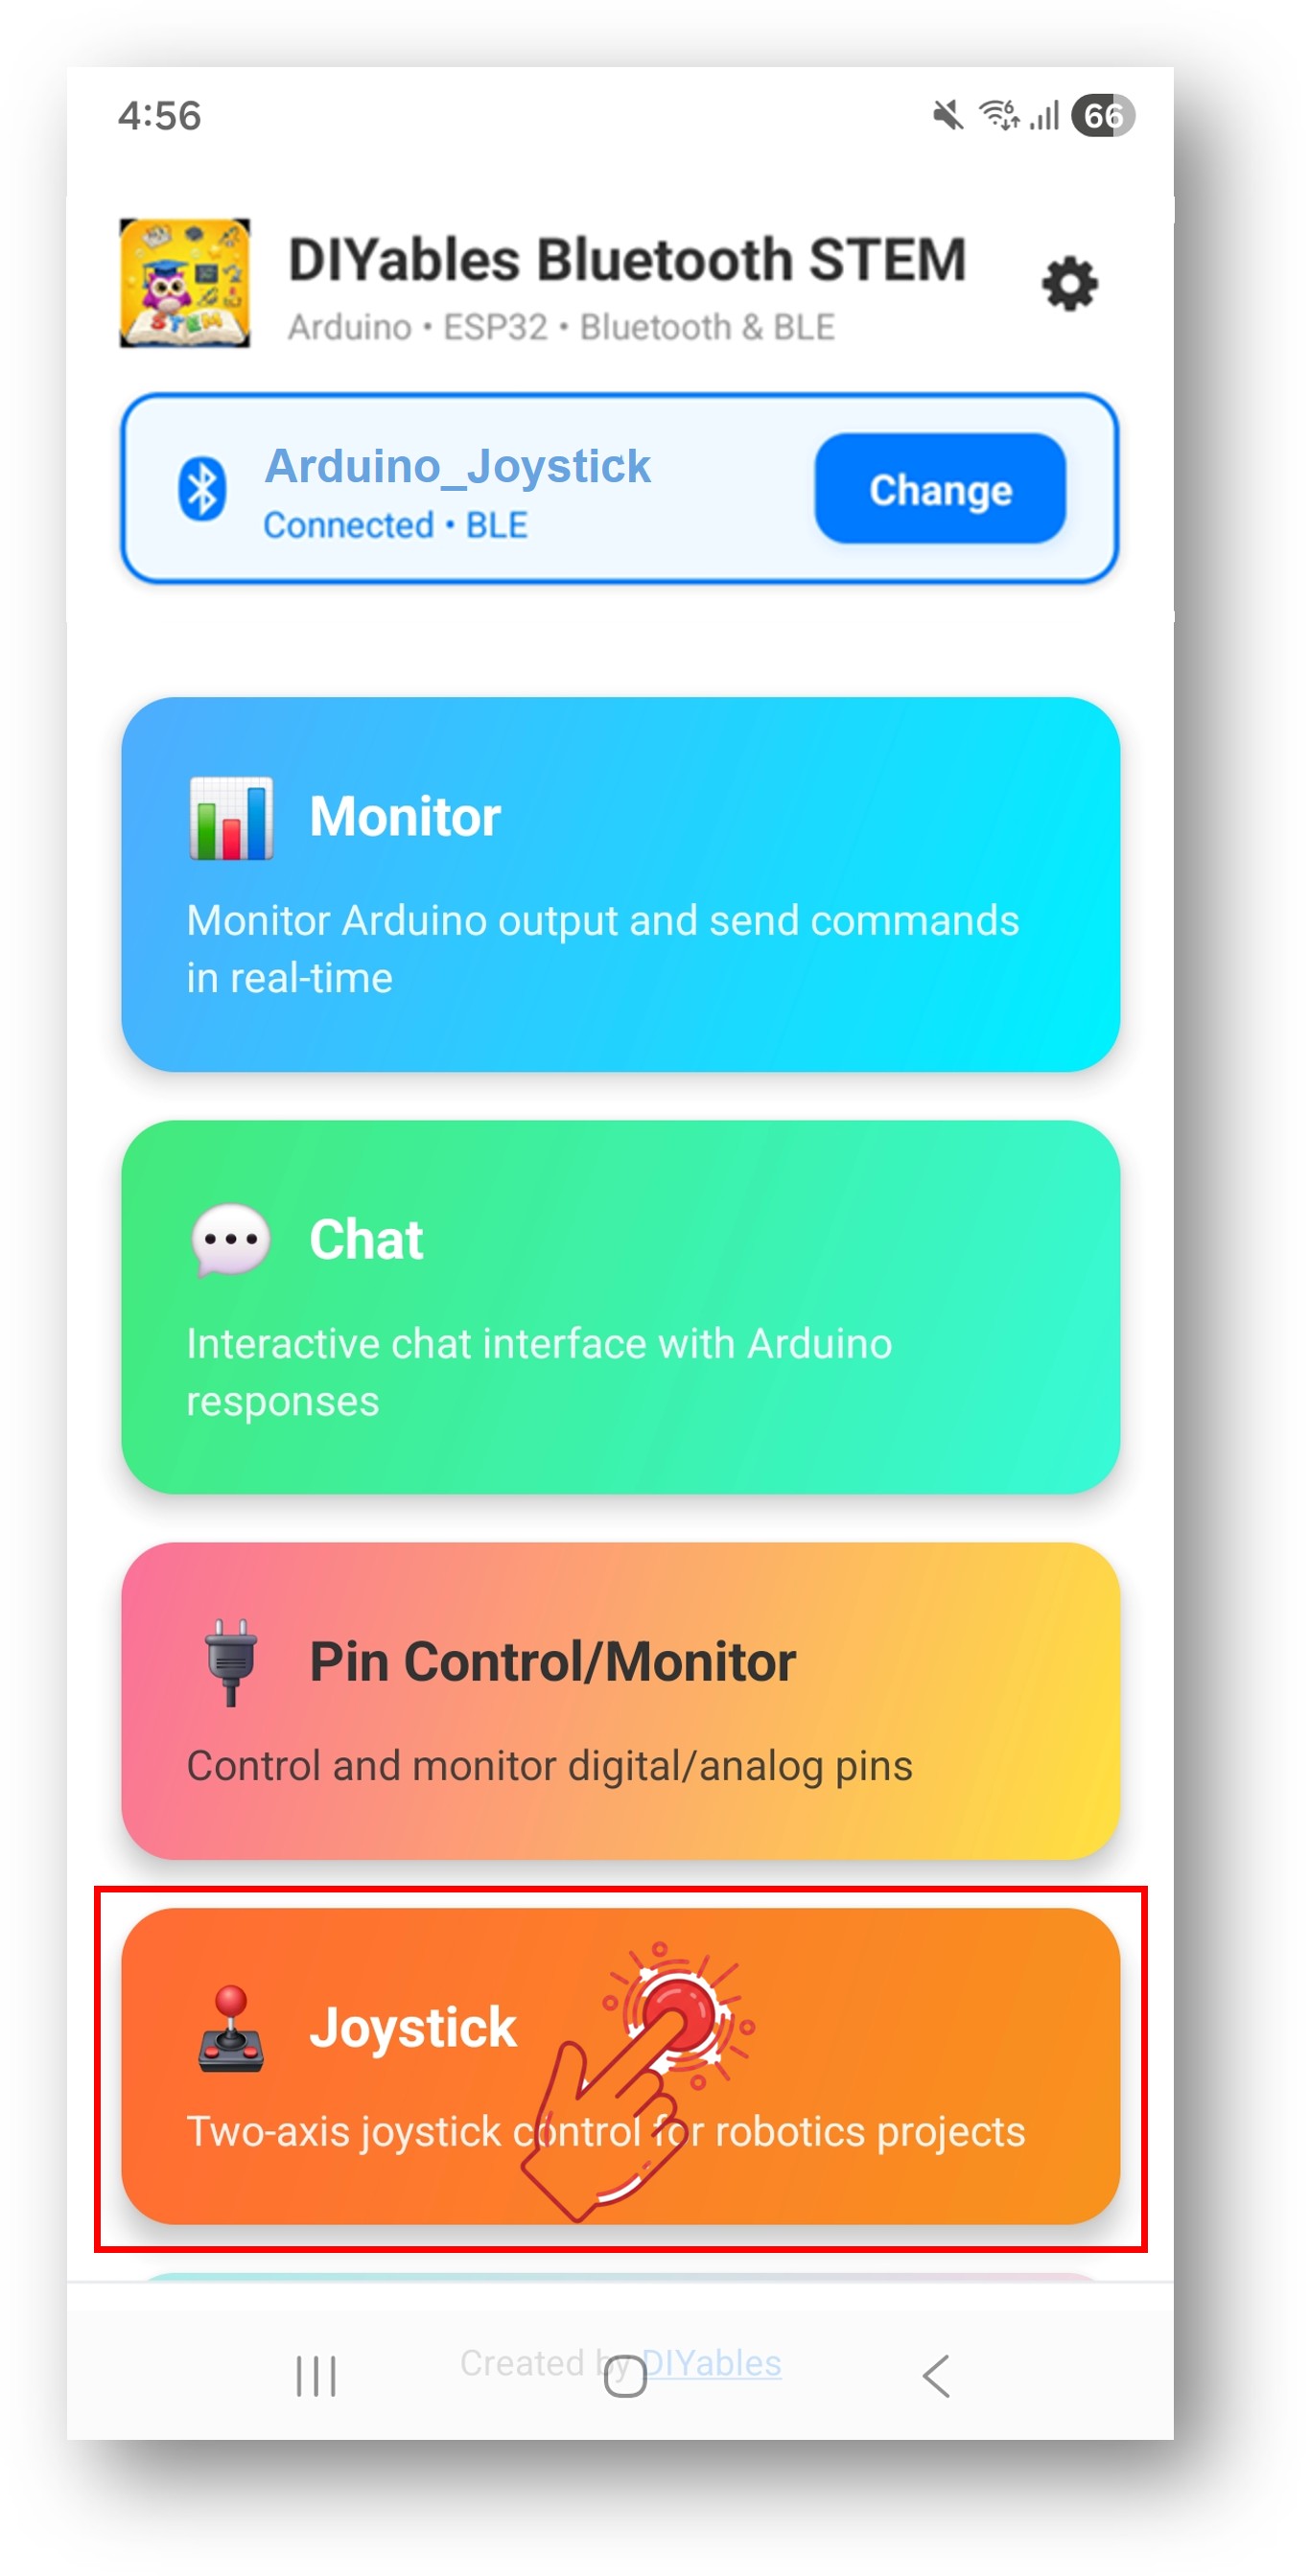
- 스캔 결과에서 "Arduino_Joystick"을 찾아 탭하여 연결합니다.
- 연결되면 앱이 자동으로 홈 화면으로 돌아갑니다. 앱 메뉴에서 조이스틱 앱을 선택합니다.
참고: 홈 화면의 설정 아이콘을 탭하면 앱을 표시하거나 숨길 수 있습니다. 자세한 내용은 DIYables 블루투스 앱 사용 설명서를 참조하세요.
- 조이스틱을 임의의 방향으로 드래그합니다.
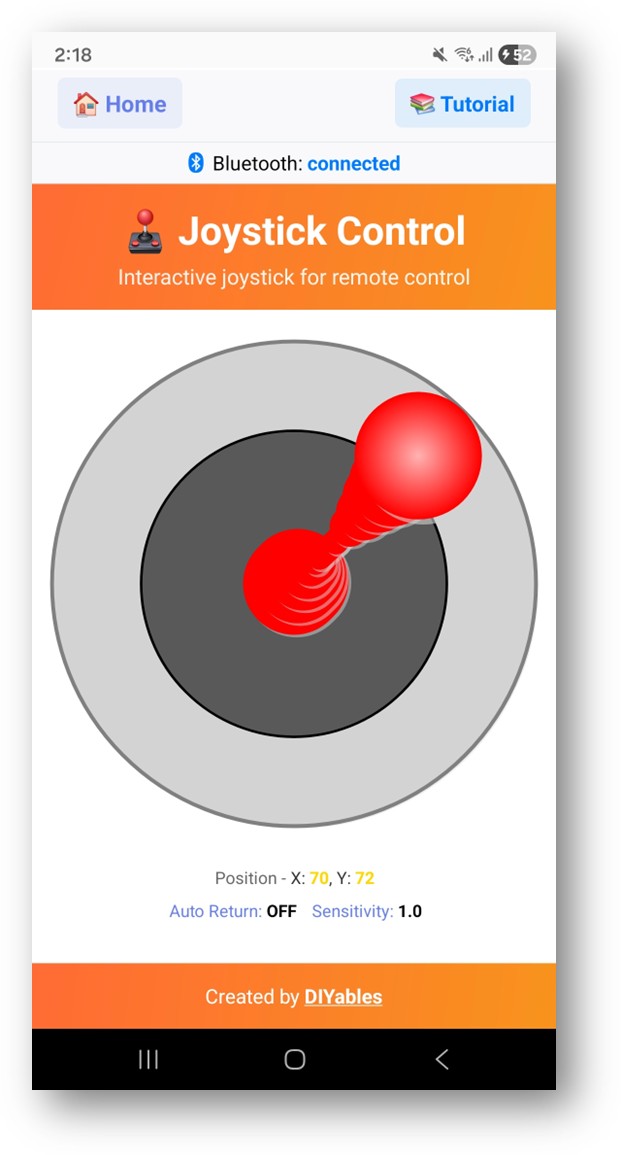
이제 Arduino IDE의 시리얼 모니터를 다시 확인하세요. 다음과 같이 표시됩니다:
창의적인 커스터마이징 - 프로젝트에 맞게 코드 적용하기
조이스틱 값 처리
조이스틱 설정 구성
설정 요청 처리
프로그래밍 예제
차동 구동 로봇
팬-틸트 서보
데드존이 있는 방향 제어
문제 해결
일반적인 문제
1. 앱에서 기기를 찾을 수 없음
- Arduino UNO R4 WiFi가 전원이 켜져 있고 스케치가 업로드되어 있는지 확인하세요.
- 휴대폰의 블루투스가 활성화되어 있는지 확인하세요.
- Android 11 이하에서는 위치 서비스도 활성화하세요.
2. 조이스틱이 반응하지 않음
- 앱에서 블루투스 연결 상태를 확인하세요.
- onJoystickValue 콜백이 올바르게 설정되어 있는지 확인하세요.
- 연결 메시지에 대한 시리얼 모니터를 확인하세요.
3. 움직임이 느리게 느껴짐
- 더 자주 업데이트되도록 감도 값을 낮추세요.
- bluetoothServer.loop()가 긴 딜레이 없이 호출되는지 확인하세요.
4. 값이 급변하거나 일관성이 없음
- 작은 움직임에 데드존 필터를 추가하세요.
- 감도 설정을 확인하세요.
5. 연결이 자주 끊김
- Arduino와 더 가까이 이동하세요(거리 줄이기).
- 안정적인 USB 전원 공급을 확인하세요.
6. 업로드 실패 또는 보드를 인식하지 못함
- 보드 관리자를 통해 최신 Arduino UNO R4 보드 패키지를 설치하세요.
- 다른 USB 케이블이나 포트를 사용해 보세요.
프로젝트 아이디어
- 무선 로봇 컨트롤러
- 카메라 팬-틸트 마운트
- 로봇 팔 2축 제어
- LED 매트릭스 위치 컨트롤러
- Arduino 게임용 게임 컨트롤러
다음 단계
블루투스 조이스틱 예제를 마스터한 후 다음을 시도해 보세요:
- 블루투스 슬라이더 - 선형 값 제어용
- 블루투스 로테이터 - 각도 제어용
- 블루투스 모니터 - 상태 피드백용
- 다중 블루투스 앱 - 조이스틱과 다른 제어 결합


