아두이노 우노 R4 WiFi 블루투스 RTC 예제 BLE를 통한 실시간 시계 동기화 튜토리얼
개요
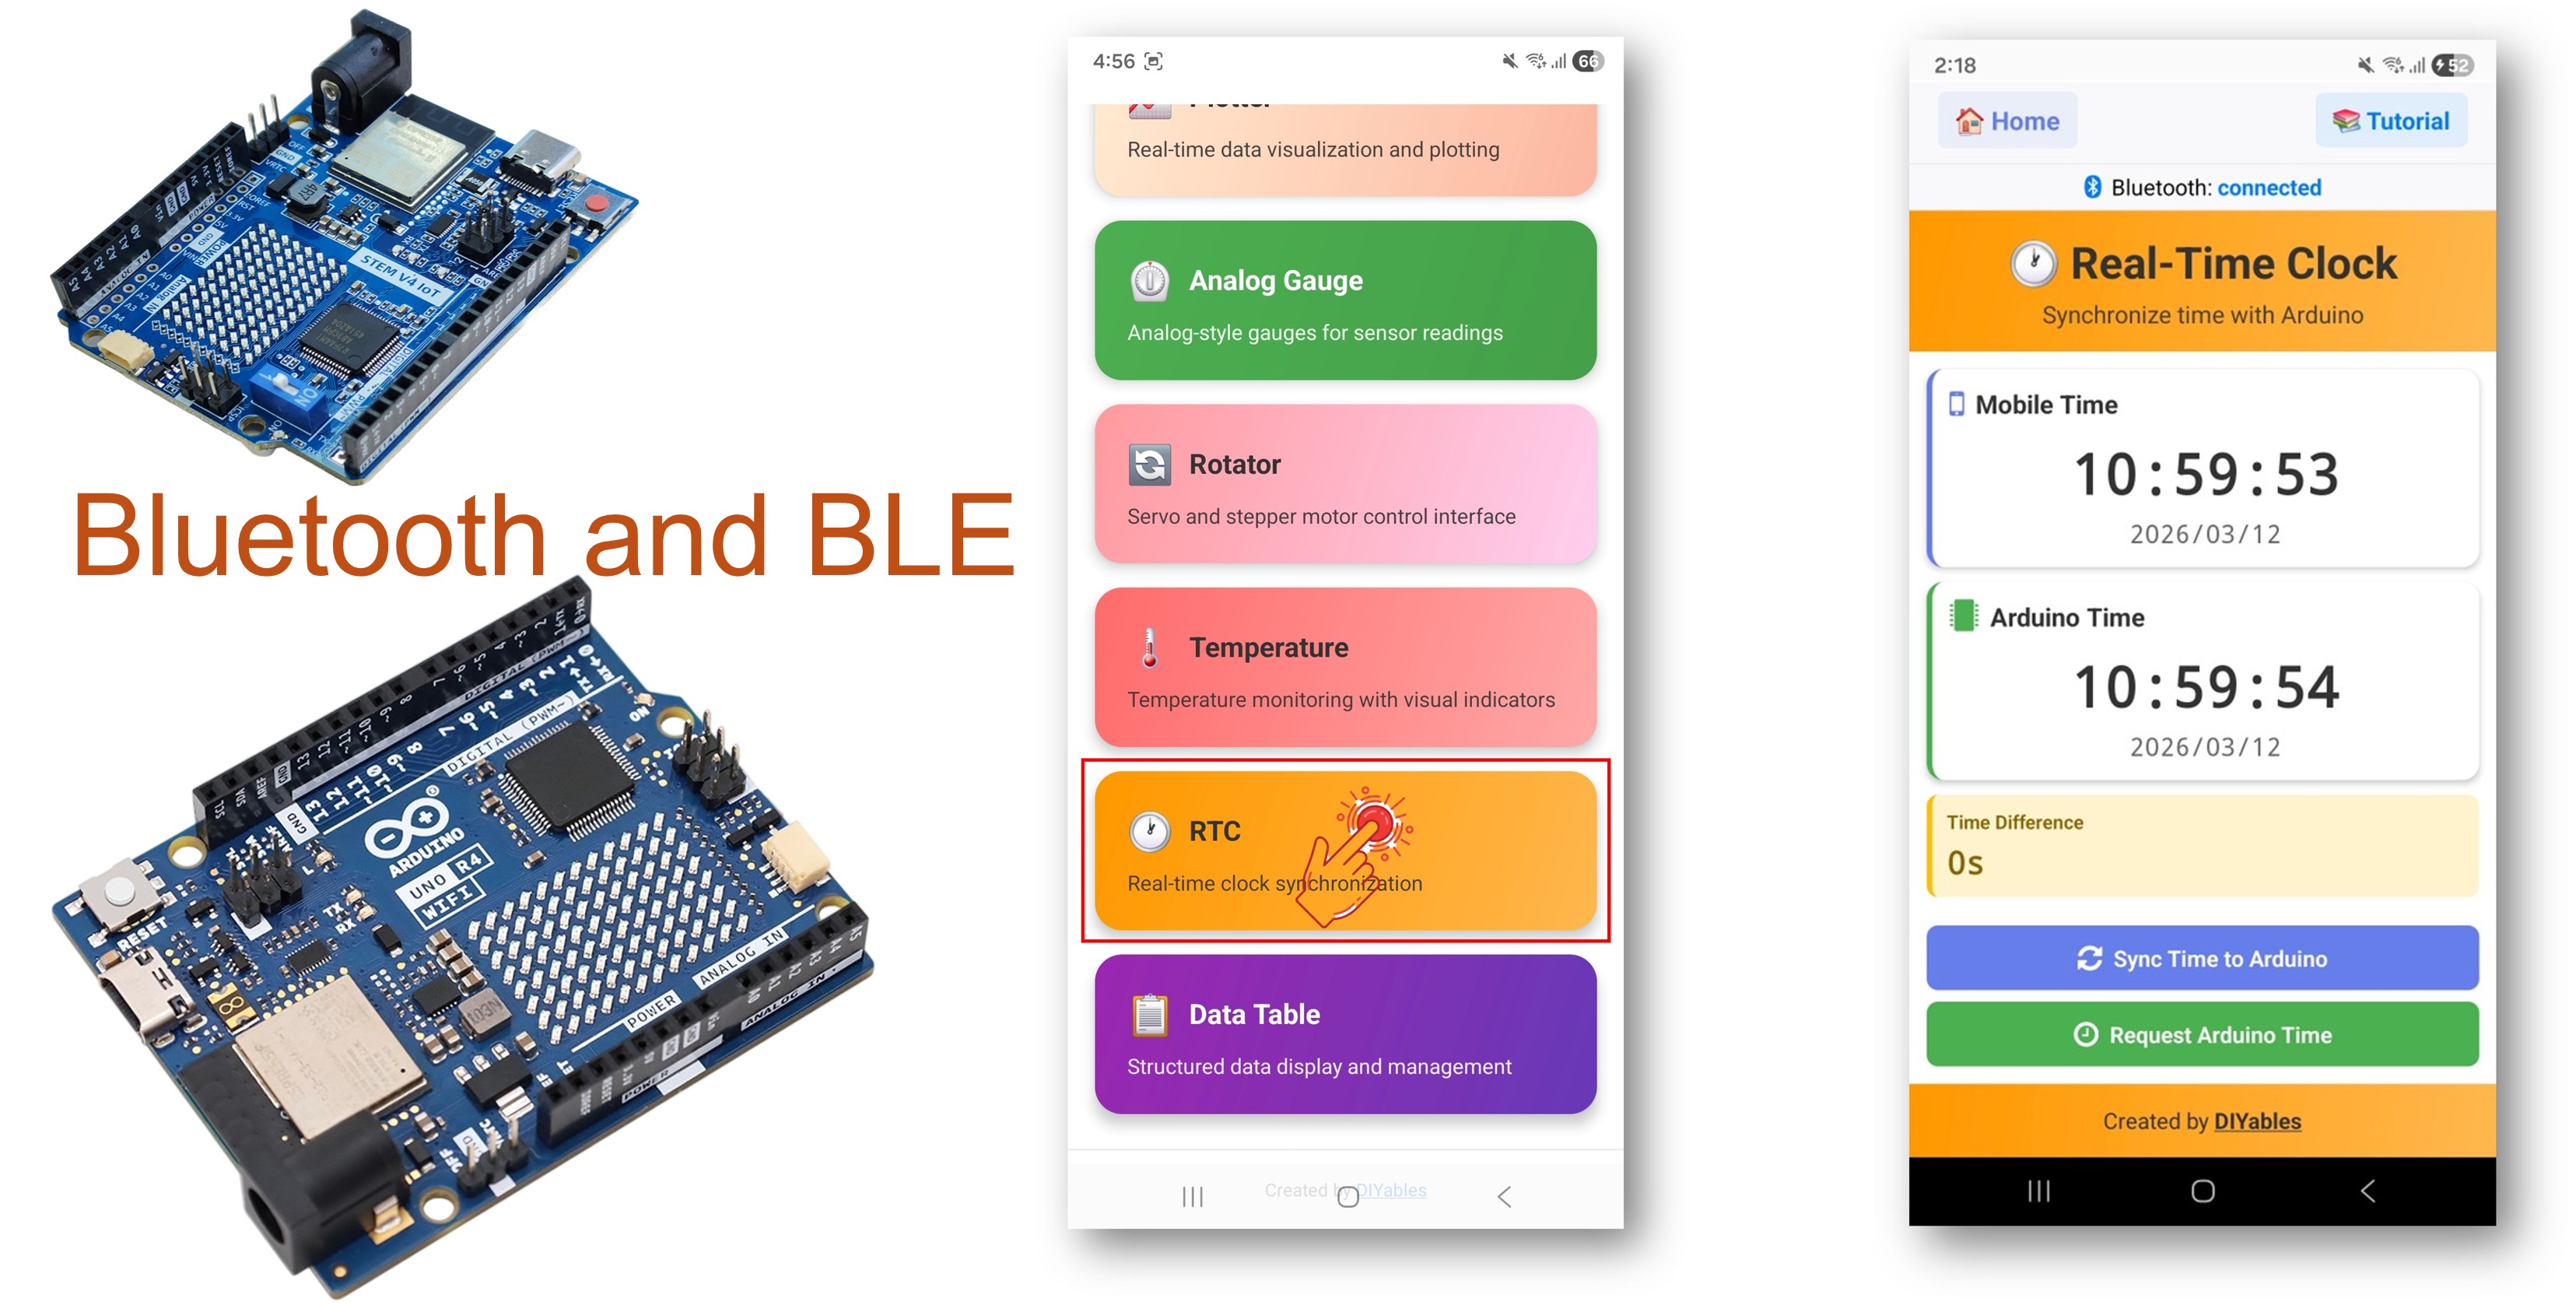
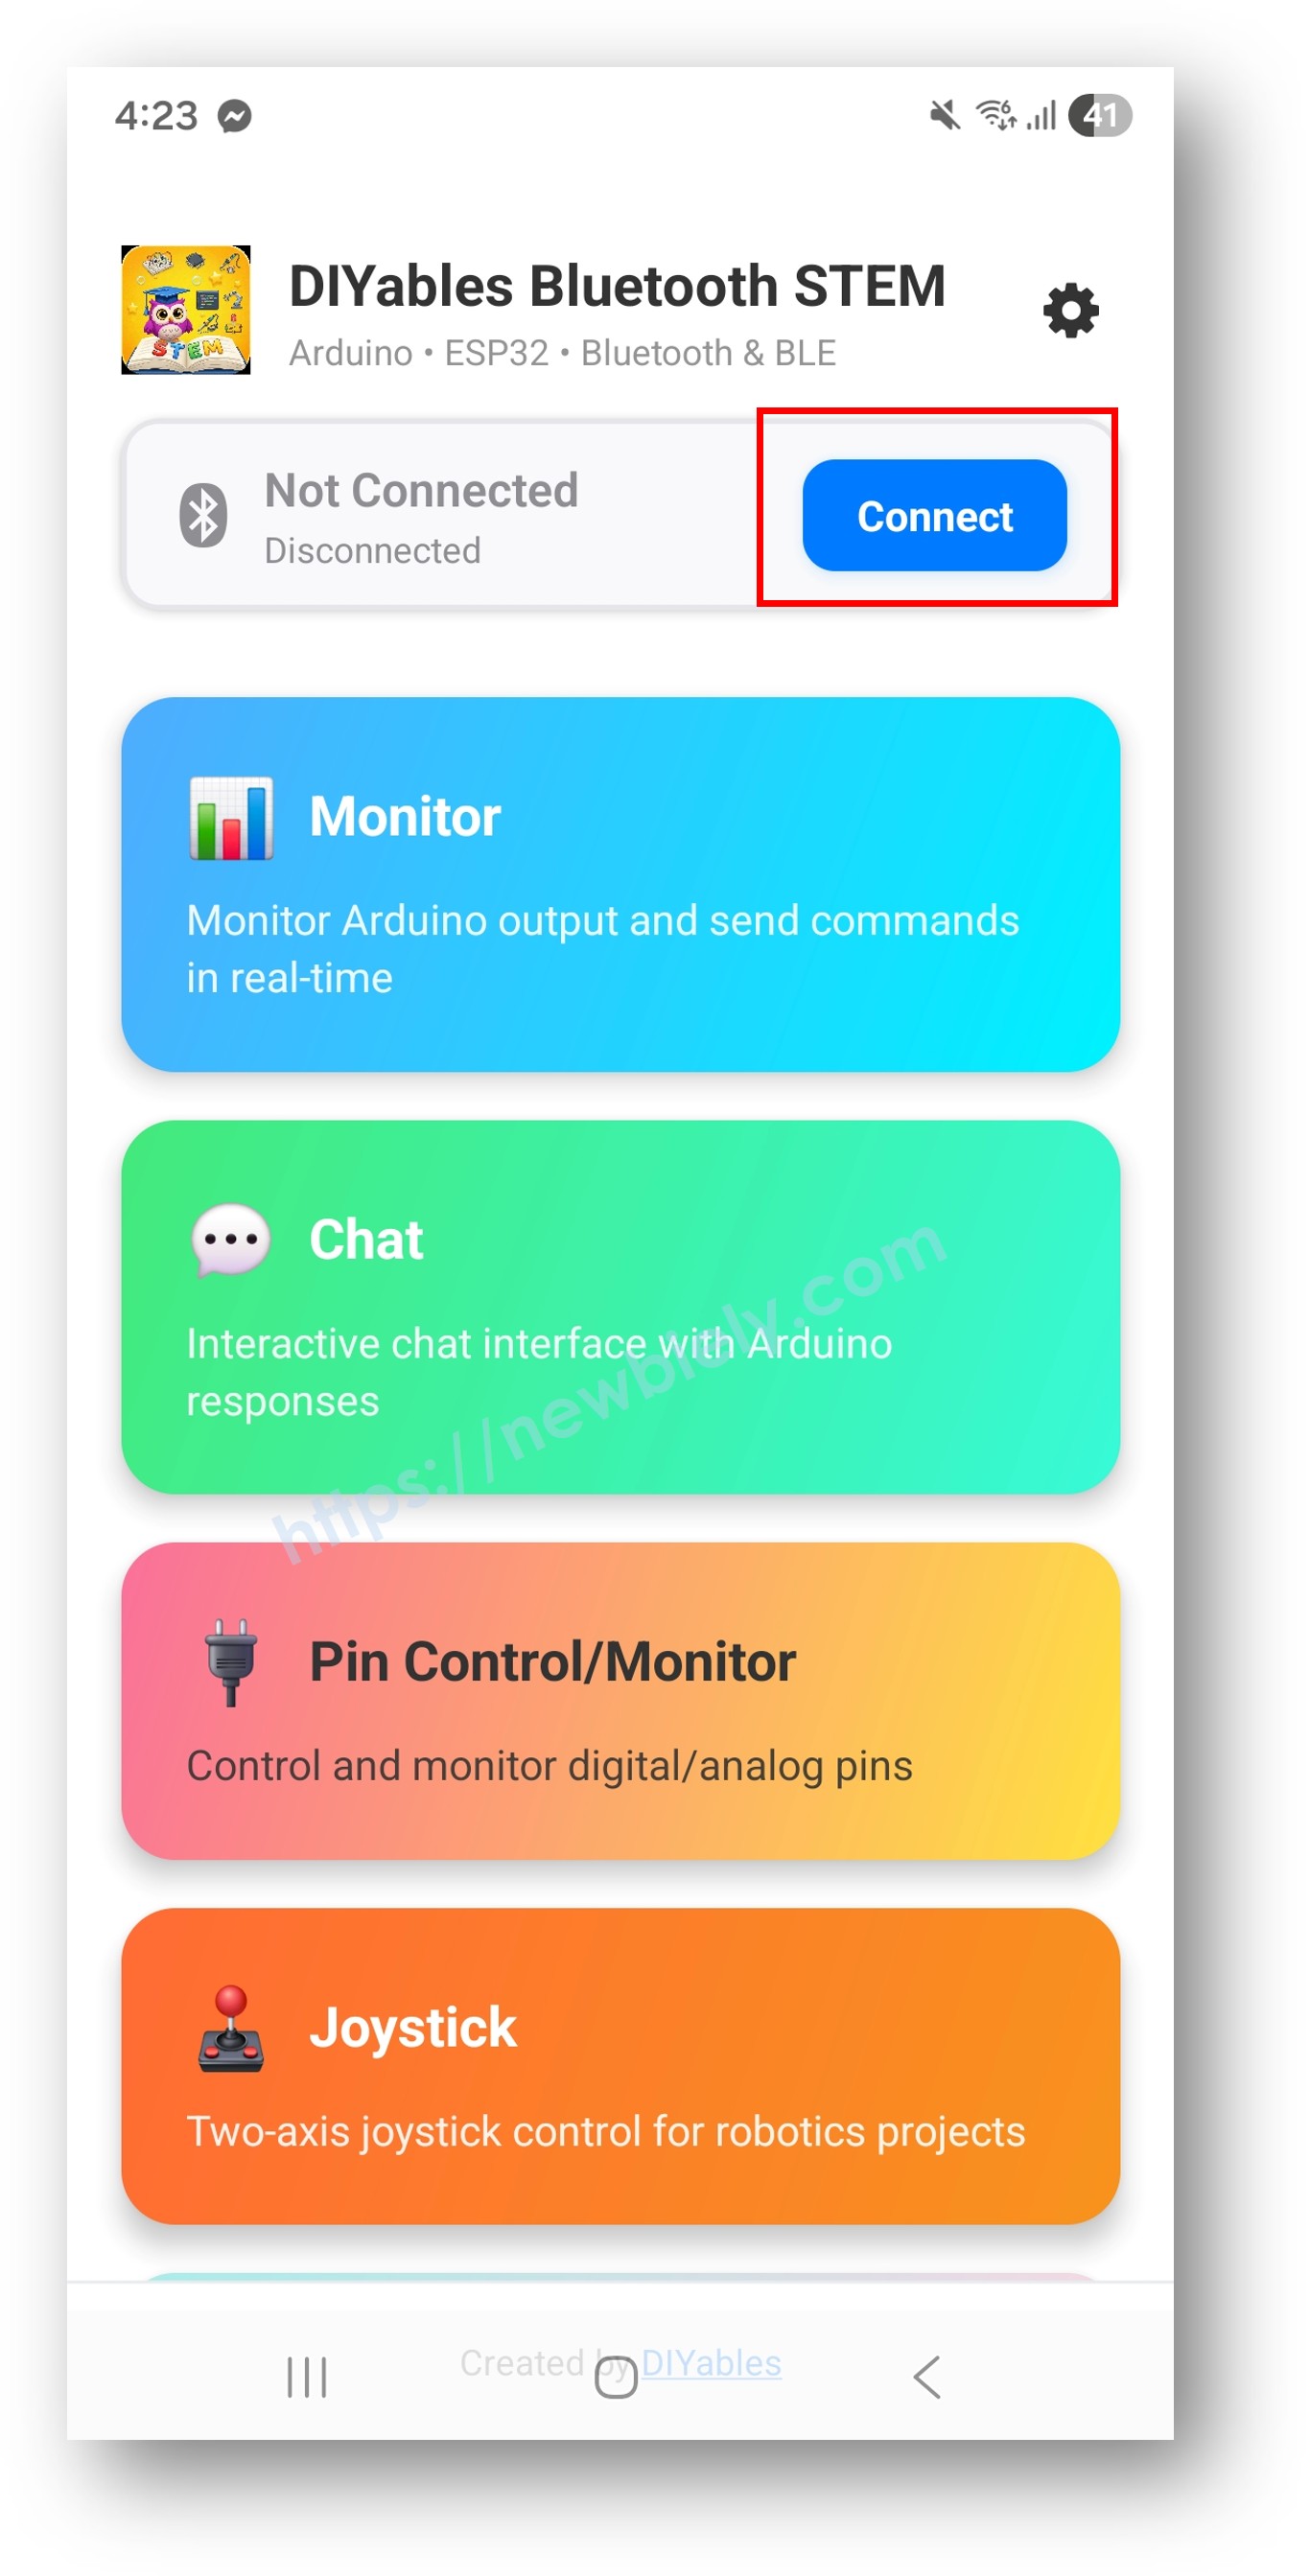
블루투스 RTC 예제는 DIYables 블루투스 STEM 앱을 통해 실시간 시계 동기화 기능을 제공합니다. BLE(Bluetooth Low Energy) 를 사용하는 Arduino UNO R4 WiFi 전용으로 설계되어 보드의 내장 하드웨어 RTC를 스마트폰 시계와 동기화하고 시간을 표시합니다. Arduino UNO R4 WiFi에는 내장 RTC 모듈이 있어 외부 RTC 하드웨어 없이도 시간 관리 프로젝트에 이상적입니다. 시계, 타임스탬프가 있는 데이터 로깅, 예약된 자동화, 시간 기반 프로젝트에 적합합니다.
참고: Arduino UNO R4 WiFi는 BLE(Bluetooth Low Energy)만 지원합니다. 클래식 블루투스는 지원하지 않습니다. DIYables 블루투스 앱은 Android에서 BLE와 클래식 블루투스를 모두 지원하고, iOS에서는 BLE를 지원합니다. 이 보드는 BLE를 사용하므로 앱은 Android와 iOS 모두에서 작동합니다.
기능
내장 하드웨어 RTC: Arduino UNO R4 WiFi의 온보드 RTC 사용 - 외부 모듈 불필요
스마트폰 시간 동기화: Unix 타임스탬프 또는 로컬 시간 구성 요소를 통해 스마트폰에서 시간 동기화
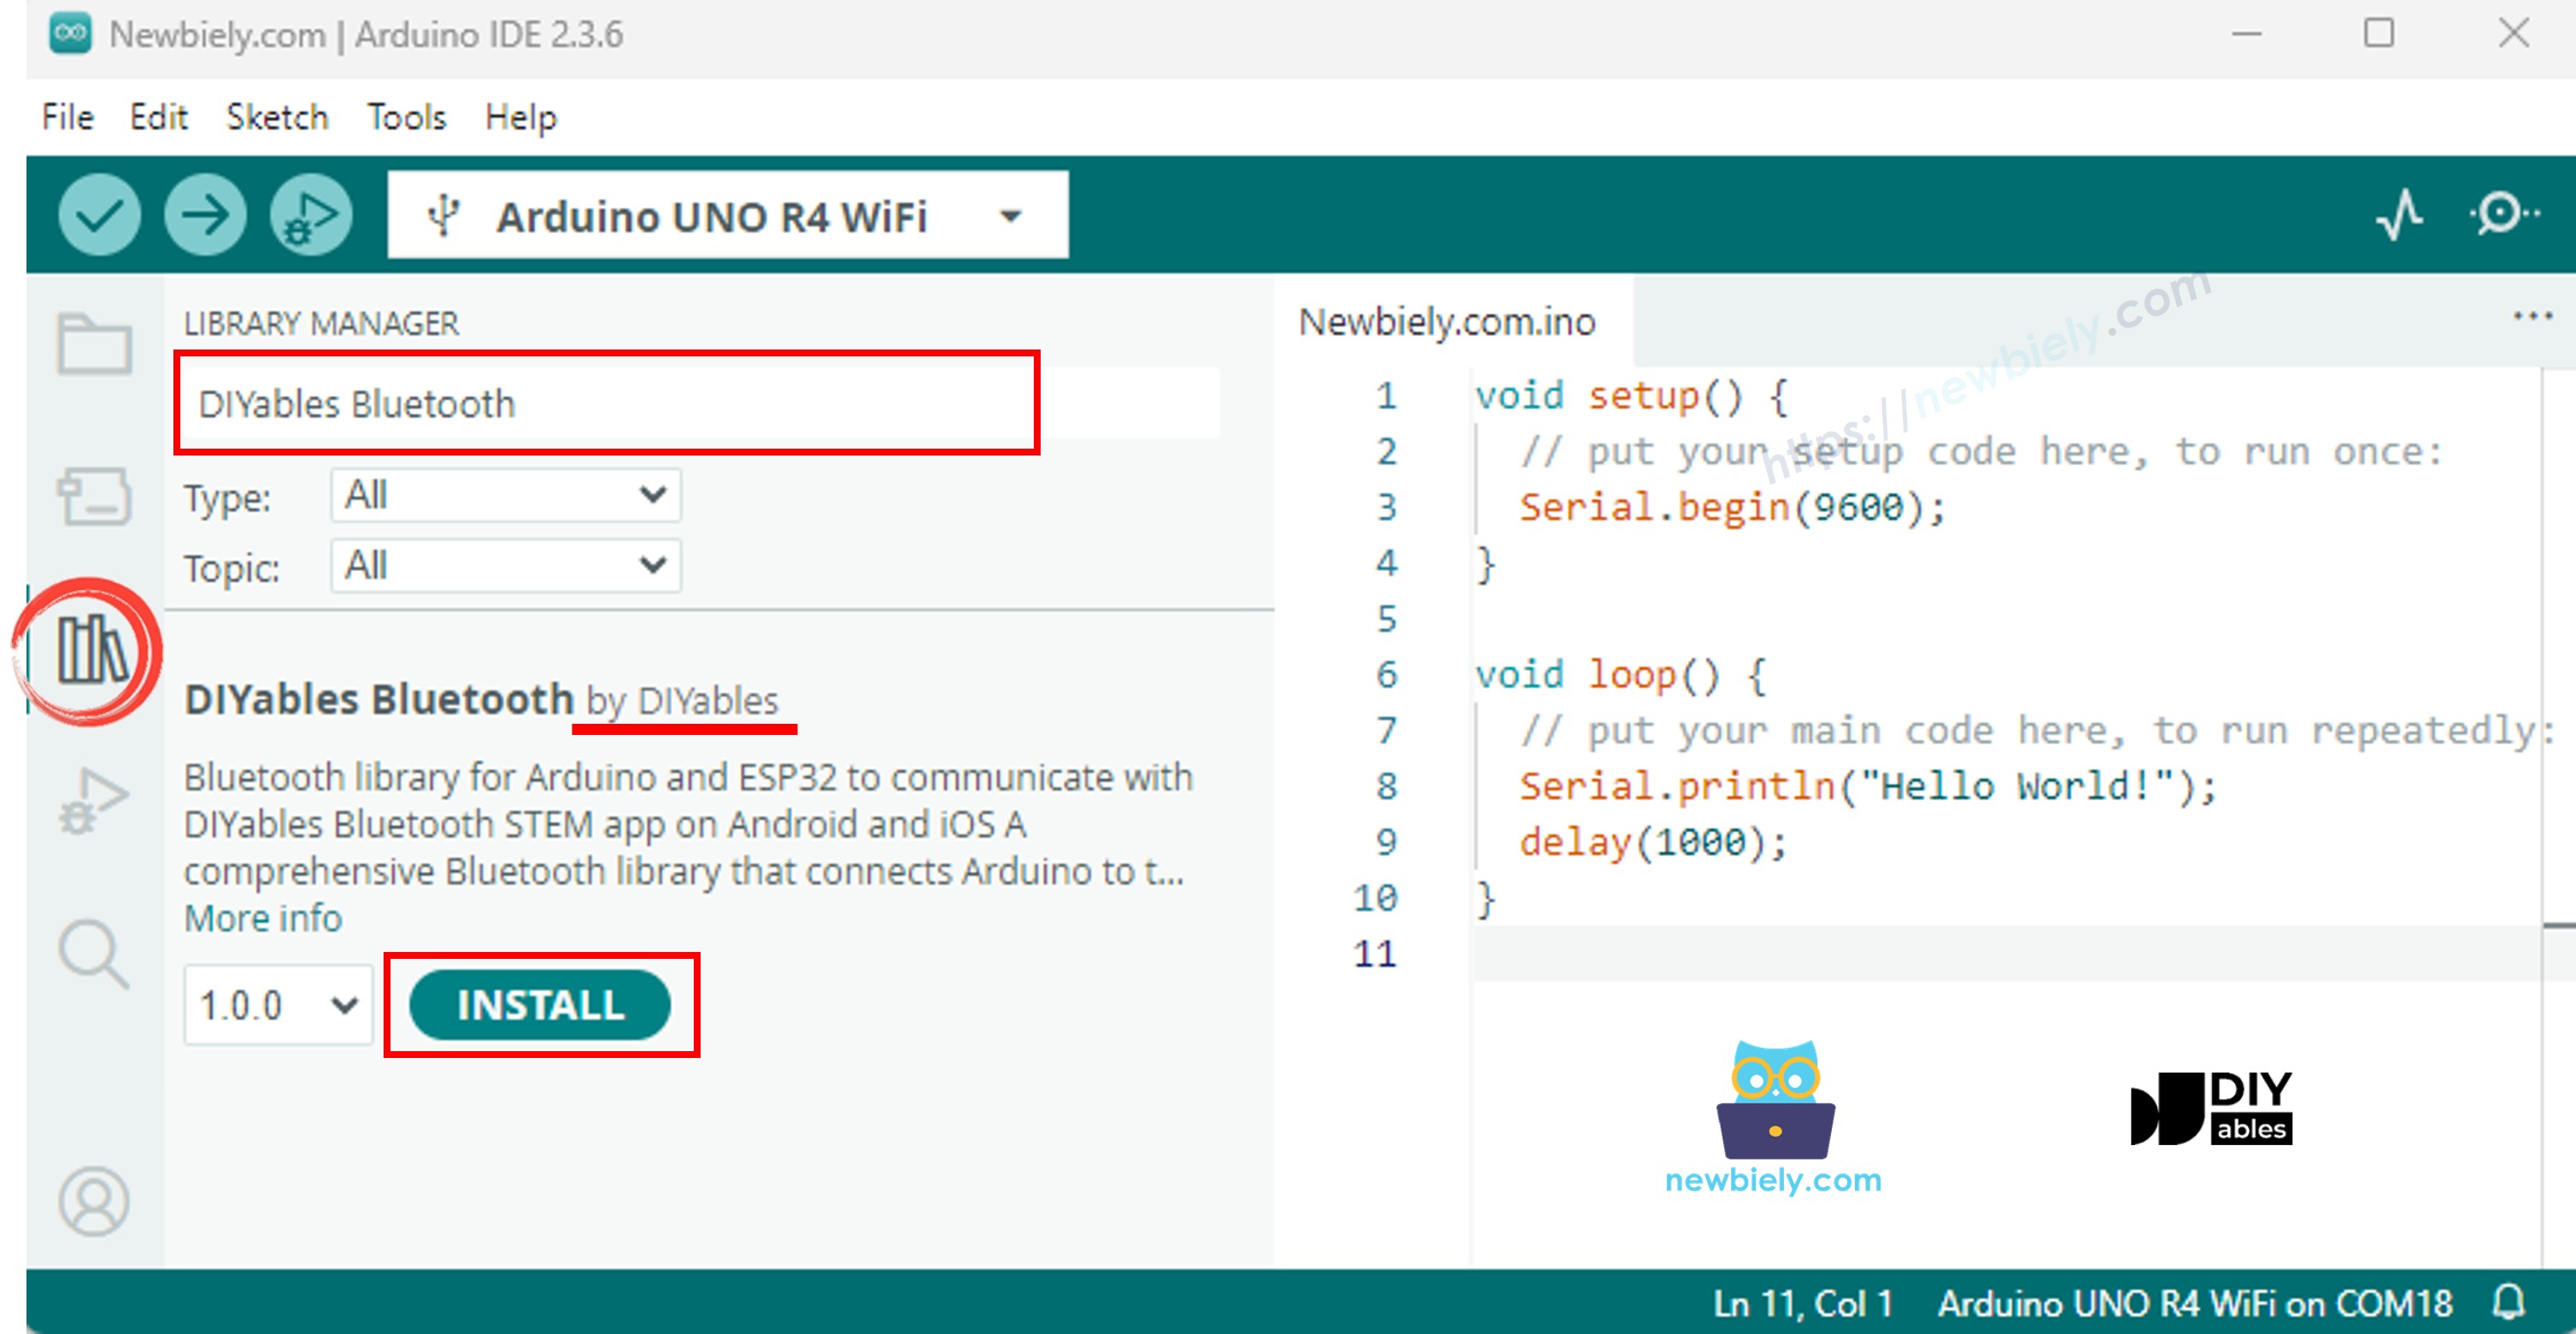
"DIYables Bluetooth"를 검색한 다음 DIYables의 DIYables Bluetooth 라이브러리를 찾습니다.
Install 버튼을 클릭하여 라이브러리를 설치합니다.
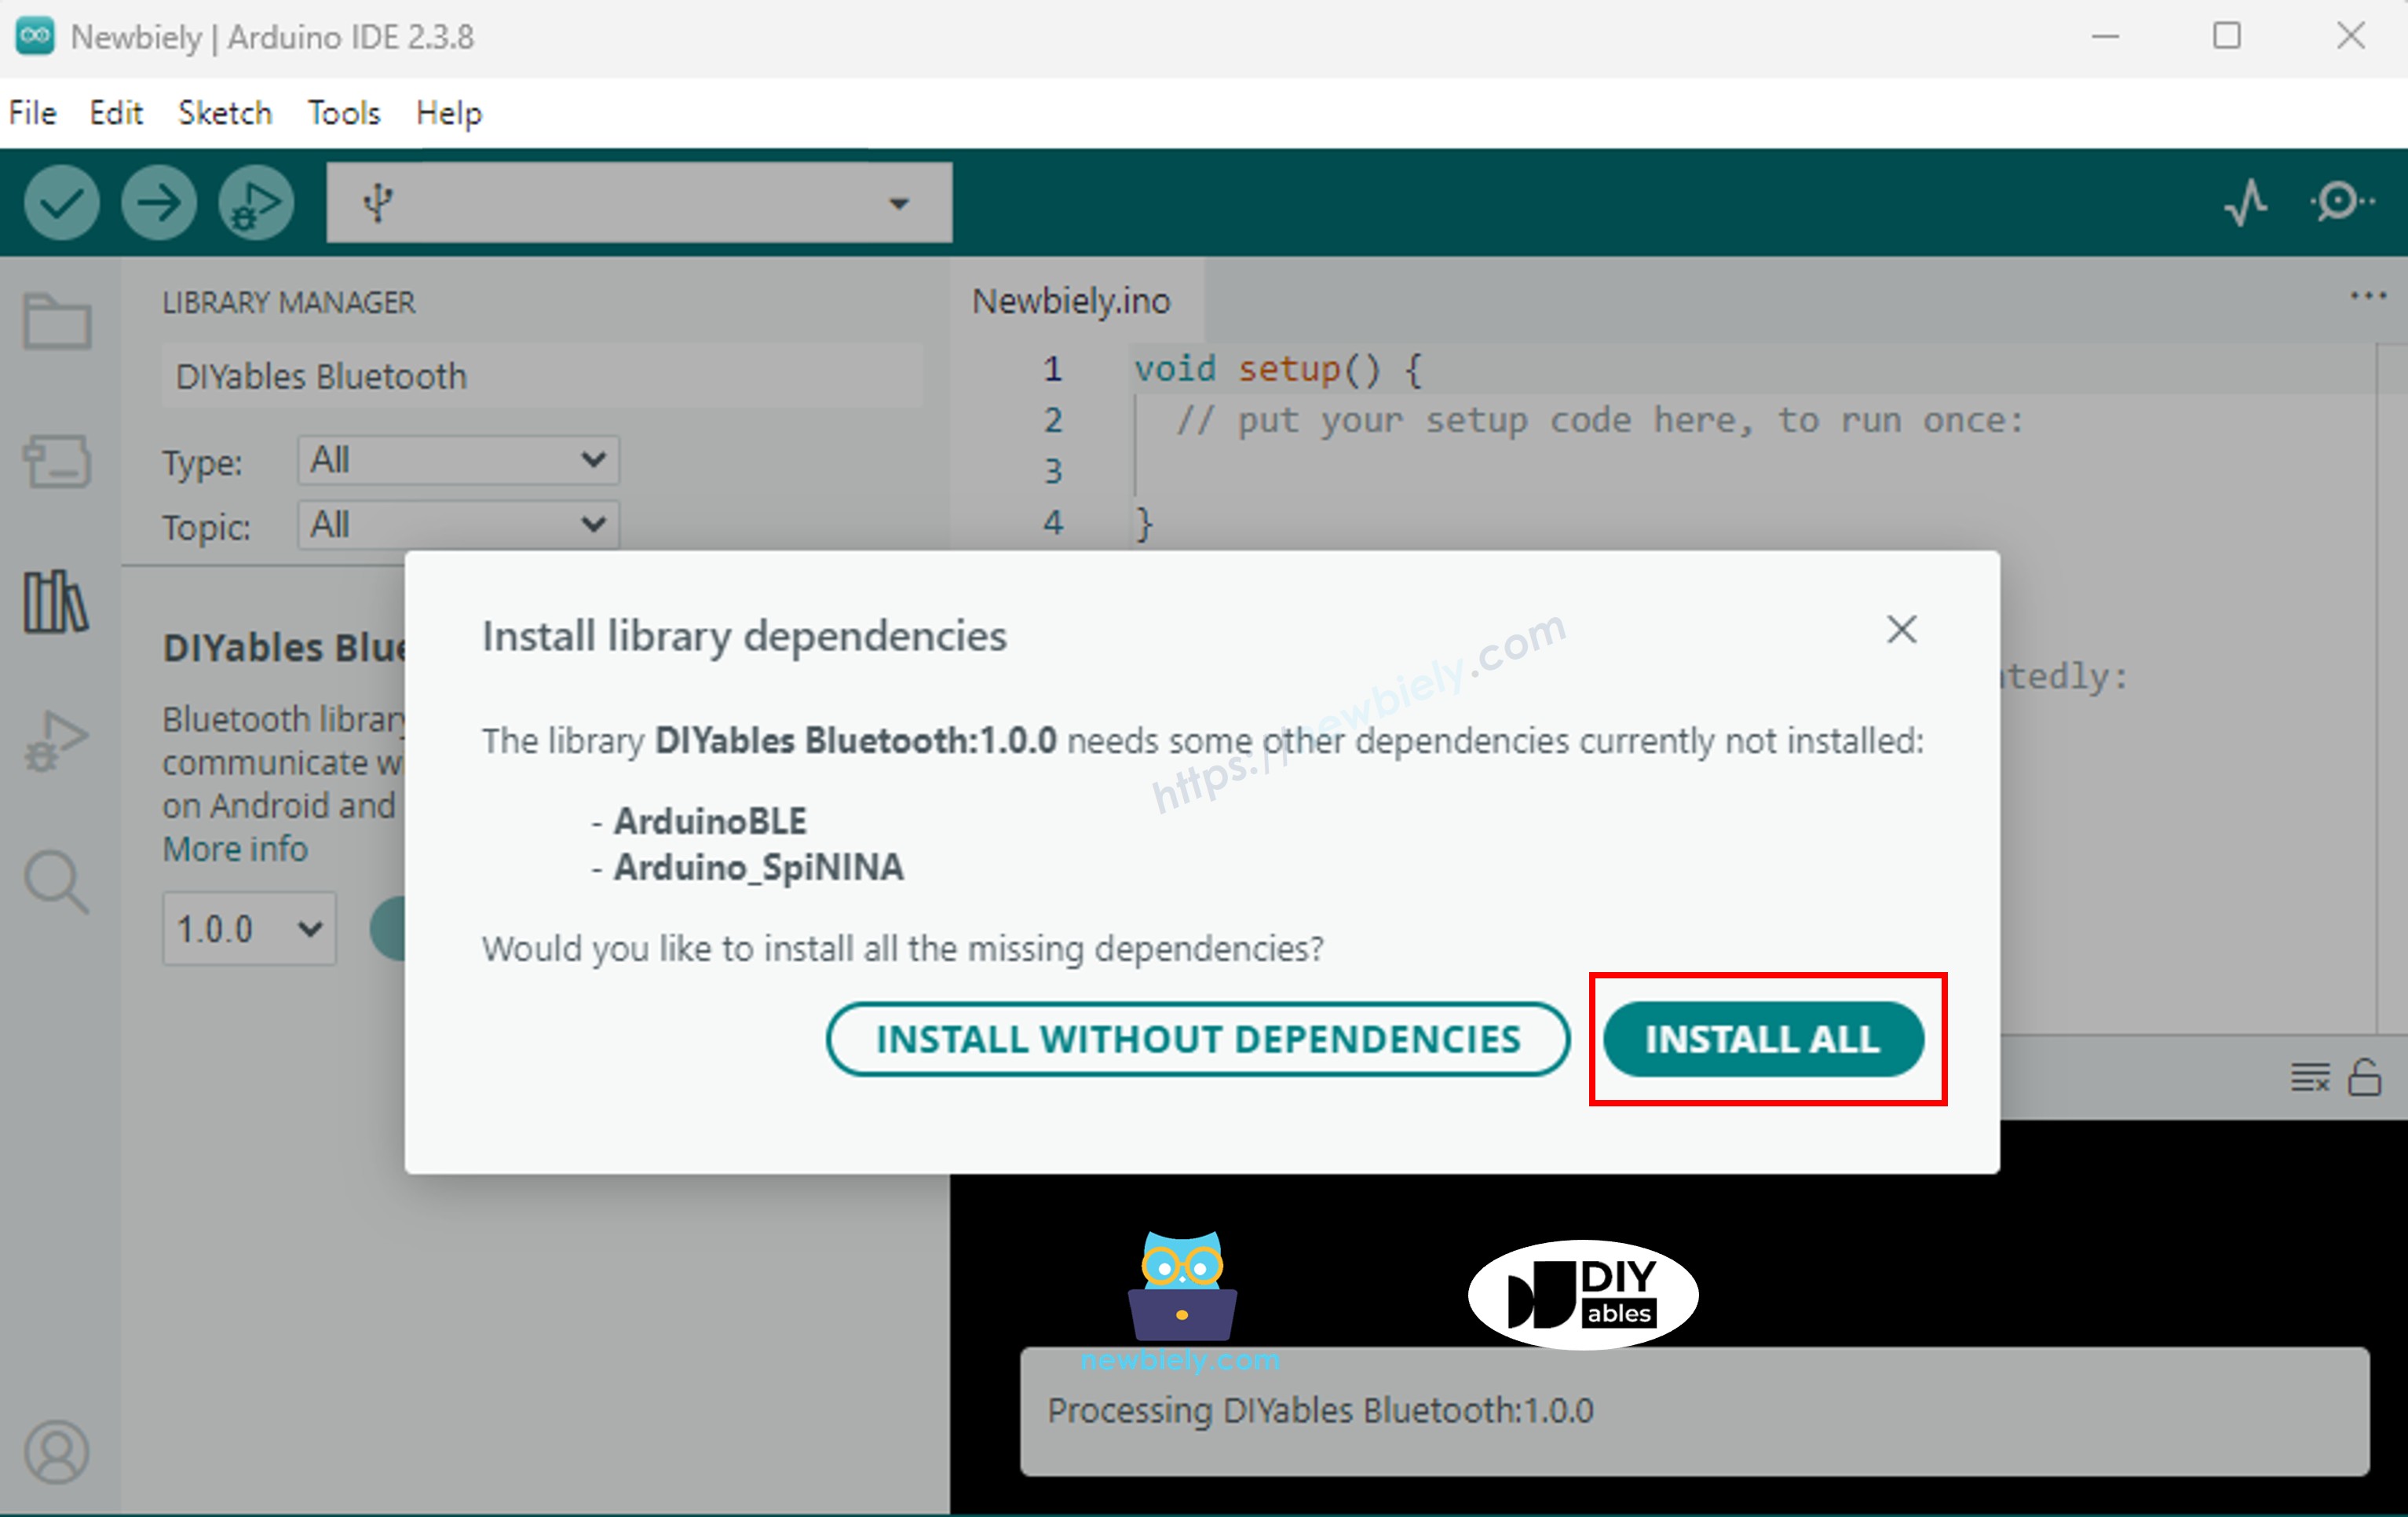
다른 라이브러리 종속성 설치를 요청받습니다.
Install All 버튼을 클릭하여 모든 라이브러리 종속성을 설치합니다.
BLE 코드
Arduino IDE에서 File Examples DIYables Bluetooth ArduinoBLE_RTC 예제로 이동하거나, 위의 코드를 복사하여 Arduino IDE 편집기에 붙여 넣습니다.
/* * DIYables Bluetooth Library - Bluetooth RTC Example * Works with DIYables Bluetooth STEM app on Android and iOS * * This example demonstrates the Bluetooth RTC (Real-Time Clock) feature: * - Real-time clock display for both Arduino and mobile app * - One-click time synchronization from mobile app to Arduino * - Hardware RTC integration for persistent timekeeping * - Visual time difference monitoring * * Compatible Boards: * - Arduino UNO R4 WiFi (with built-in RTC) * Note: This example requires a board with hardware RTC. * Other BLE boards can be used with an external RTC module (e.g., DS3231). * * Setup: * 1. Upload the sketch to your Arduino * 2. Open Serial Monitor to see connection status * 3. Use DIYables Bluetooth App to connect and sync time * * Tutorial: https://diyables.io/bluetooth-app * Author: DIYables */#include <DIYables_BluetoothServer.h>#include <DIYables_BluetoothRTC.h>#include <platforms/DIYables_ArduinoBLE.h>#include"RTC.h"// BLE Configurationconst char* DEVICE_NAME = "Arduino_RTC";const char* SERVICE_UUID = "19B10000-E8F2-537E-4F6C-D104768A1214";const char* TX_UUID = "19B10001-E8F2-537E-4F6C-D104768A1214";const char* RX_UUID = "19B10002-E8F2-537E-4F6C-D104768A1214";// Create Bluetooth instancesDIYables_ArduinoBLE bluetooth(DEVICE_NAME, SERVICE_UUID, TX_UUID, RX_UUID);DIYables_BluetoothServer bluetoothServer(bluetooth);// Create RTC app instanceDIYables_BluetoothRTC bluetoothRTC;voidsetup() {Serial.begin(9600);delay(1000);Serial.println("DIYables Bluetooth - RTC Example");// Initialize RTC RTC.begin();// Check if RTC is running and set initial time if needed RTCTime savedTime; RTC.getTime(savedTime);if (!RTC.isRunning() || savedTime.getYear() == 2000) {Serial.println("RTC is NOT running, setting initial time...");// Set a default time - you can modify this to match current time RTCTime startTime(28, Month::AUGUST, 2025, 12, 0, 0, DayOfWeek::THURSDAY, SaveLight::SAVING_TIME_ACTIVE); RTC.setTime(startTime);Serial.println("RTC initialized with default time"); } else {Serial.println("RTC is already running"); }// Print initial RTC time RTCTime initialTime; RTC.getTime(initialTime);Serial.print("Initial RTC Time: ");Serial.print(initialTime.getYear());Serial.print("/");Serial.print(Month2int(initialTime.getMonth()));Serial.print("/");Serial.print(initialTime.getDayOfMonth());Serial.print(" - ");if (initialTime.getHour() < 10) Serial.print("0");Serial.print(initialTime.getHour());Serial.print(":");if (initialTime.getMinutes() < 10) Serial.print("0");Serial.print(initialTime.getMinutes());Serial.print(":");if (initialTime.getSeconds() < 10) Serial.print("0");Serial.print(initialTime.getSeconds());Serial.println();// Initialize Bluetooth server with platform-specific implementation bluetoothServer.begin();// Add RTC app to server bluetoothServer.addApp(&bluetoothRTC);// Set up connection event callbacks bluetoothServer.setOnConnected([]() {Serial.println("Bluetooth connected!");// Send current time to app on connection sendCurrentTimeToApp(); }); bluetoothServer.setOnDisconnected([]() {Serial.println("Bluetooth disconnected!"); });// Set callback for time sync from mobile app (Unix timestamp) bluetoothRTC.onTimeSync(onTimeSyncReceived);// Set callback for local time sync from mobile app (date/time components) bluetoothRTC.onLocalTimeSync(onLocalTimeSyncReceived);// Set callback for time request from mobile app bluetoothRTC.onTimeRequest(onTimeRequested);Serial.println("Waiting for Bluetooth connection...");Serial.println("Connect via app to sync time");}voidloop() {// Handle Bluetooth server communications bluetoothServer.loop();// Send current time to mobile app and print to Serial every 1 secondstaticunsignedlong lastUpdate = 0;if (millis() - lastUpdate >= 1000) { lastUpdate = millis();// Get current RTC time RTCTime currentTime; RTC.getTime(currentTime);// Send time to mobile app in human readable format bluetoothRTC.sendTime(currentTime.getYear(), Month2int(currentTime.getMonth()), currentTime.getDayOfMonth(), currentTime.getHour(), currentTime.getMinutes(), currentTime.getSeconds());// Print time to Serial MonitorSerial.print("RTC Time: ");Serial.print(currentTime.getYear());Serial.print("/");Serial.print(Month2int(currentTime.getMonth()));Serial.print("/");Serial.print(currentTime.getDayOfMonth());Serial.print(" - ");if (currentTime.getHour() < 10) Serial.print("0");Serial.print(currentTime.getHour());Serial.print(":");if (currentTime.getMinutes() < 10) Serial.print("0");Serial.print(currentTime.getMinutes());Serial.print(":");if (currentTime.getSeconds() < 10) Serial.print("0");Serial.print(currentTime.getSeconds());Serial.println(); }delay(10);}// Callback function called when mobile app sends time sync commandvoid onTimeSyncReceived(unsignedlong unixTimestamp) {Serial.print("Time sync received (Unix): ");Serial.println(unixTimestamp);// Convert Unix timestamp to RTCTime RTCTime newTime; newTime.setUnixTime(unixTimestamp);// Set RTC time RTC.setTime(newTime);Serial.println("Arduino RTC synchronized from Unix timestamp!");}// Callback function called when mobile app sends local time sync with componentsvoid onLocalTimeSyncReceived(intyear, intmonth, intday, inthour, intminute, intsecond) {Serial.print("Local time sync received: ");Serial.print(year);Serial.print("/");Serial.print(month);Serial.print("/");Serial.print(day);Serial.print(" ");Serial.print(hour);Serial.print(":");Serial.print(minute);Serial.print(":");Serial.println(second);// Create RTCTime from components (local time)// Convert month integer to Month enum Month monthEnum;switch(month) {case 1: monthEnum = Month::JANUARY; break;case 2: monthEnum = Month::FEBRUARY; break;case 3: monthEnum = Month::MARCH; break;case 4: monthEnum = Month::APRIL; break;case 5: monthEnum = Month::MAY; break;case 6: monthEnum = Month::JUNE; break;case 7: monthEnum = Month::JULY; break;case 8: monthEnum = Month::AUGUST; break;case 9: monthEnum = Month::SEPTEMBER; break;case 10: monthEnum = Month::OCTOBER; break;case 11: monthEnum = Month::NOVEMBER; break;case 12: monthEnum = Month::DECEMBER; break;default: monthEnum = Month::JANUARY; break; } RTCTime newTime(day, monthEnum, year, hour, minute, second, DayOfWeek::MONDAY, SaveLight::SAVING_TIME_ACTIVE);// Set RTC time RTC.setTime(newTime);Serial.println("Arduino RTC synchronized from local time components!");}// Callback function called when mobile app requests current Arduino timevoid onTimeRequested() {Serial.println("Time requested by app"); sendCurrentTimeToApp();}// Helper function to send current time to mobile appvoid sendCurrentTimeToApp() {// Get current RTC time and send to app in human readable format RTCTime currentTime; RTC.getTime(currentTime); bluetoothRTC.sendTime(currentTime.getYear(), Month2int(currentTime.getMonth()), currentTime.getDayOfMonth(), currentTime.getHour(), currentTime.getMinutes(), currentTime.getSeconds());}
Arduino IDE에서 Upload 버튼을 클릭하여 코드를 Arduino UNO R4 WiFi에 업로드합니다.
시리얼 모니터를 엽니다.
시리얼 모니터에서 결과를 확인합니다. 아래와 같이 표시됩니다:
Newbiely | Arduino IDE 2.3.8
──
☐
✕
File
Edit
Sketch
Tools
Help
Arduino Uno R4 WiFi
Newbiely.ino
···
8Serial.println("Hello World!");
Output
Serial Monitor
Message (Enter to send message to 'Arduino Uno R4 WiFi' on 'COM15')
New Line
9600 baud
DIYables Bluetooth - RTC Example
Waiting for Bluetooth connection...
RTC not running or year is 2000, waiting for time sync...
Message (Enter to send message to 'Arduino Uno R4 WiFi' on 'COM15')
New Line
9600 baud
Bluetooth connected!
Time sync received (unix): 1719849600
RTC set to: 2025/07/01 12:00:00
Current time: 2025/07/01 12:00:01
Current time: 2025/07/01 12:00:02
Ln 11, Col 1
Arduino Uno R4 WiFi on COM15
2
창의적인 커스터마이징 - 프로젝트에 맞게 코드 적용하기
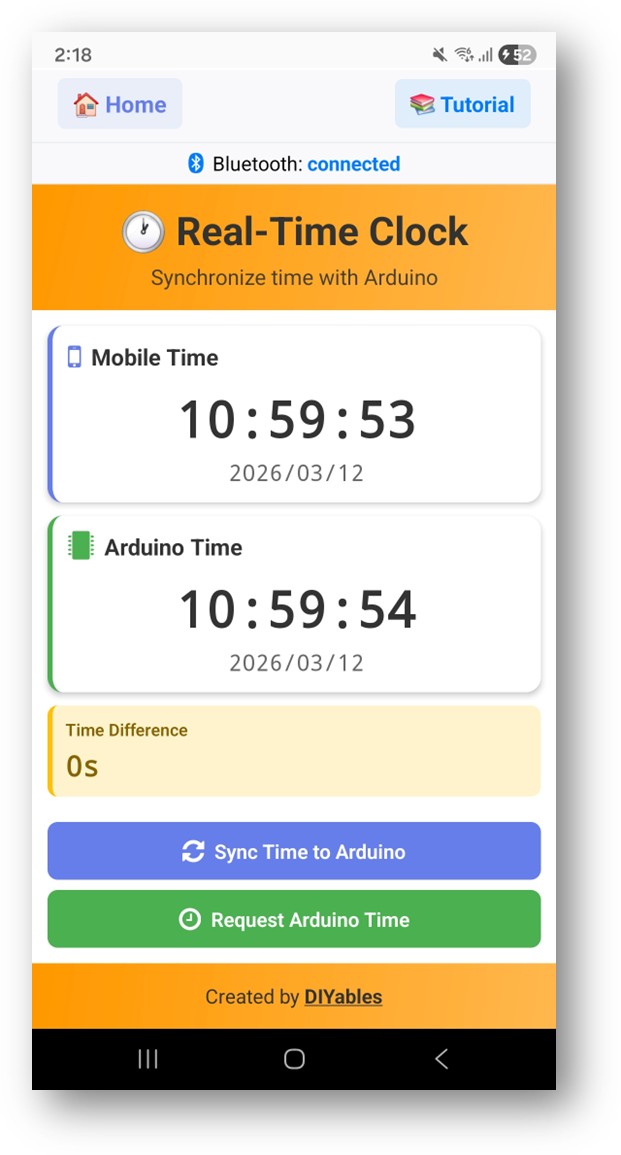
시간 동기화 방법
앱은 두 가지 방법으로 Arduino에 시간을 동기화할 수 있습니다:
// Method 1: Unix timestamp syncbluetoothRTC.onTimeSync([](unsignedlong unixTime) {// Convert Unix timestamp and set RTCSerial.print("Unix time: ");Serial.println(unixTime);});// Method 2: Local time components syncbluetoothRTC.onLocalTimeSync([](intyear, intmonth, intday, inthour, intminute, intsecond) {// Set RTC directly with componentsSerial.print("Local time: ");Serial.print(year);Serial.print("/");Serial.print(month);Serial.print("/");Serial.println(day);});
앱으로 시간 전송
// Send current time to the appbluetoothRTC.sendTime(year, month, day, hour, minute, second);
시간 요청 처리
bluetoothRTC.onTimeRequest([]() {// App is requesting the current time// Read RTC and send time back RTCTime currentTime; RTC.getTime(currentTime); bluetoothRTC.sendTime( currentTime.getYear(), Month2int(currentTime.getMonth()), currentTime.getDayOfMonth(), currentTime.getHour(), currentTime.getMinutes(), currentTime.getSeconds() );});
내장 RTC 사용
Arduino UNO R4 WiFi의 내장 RTC는 RTC.h 라이브러리를 통해 접근합니다:
#include"RTC.h"voidsetup() { RTC.begin(); // Initialize the hardware RTC}// Set time on the RTCRTCTime timeToSet;timeToSet.setYear(2025);timeToSet.setMonth(Month::JULY);timeToSet.setDayOfMonth(1);timeToSet.setHour(12);timeToSet.setMinute(0);timeToSet.setSecond(0);RTC.setTime(timeToSet);// Read time from the RTCRTCTime currentTime;RTC.getTime(currentTime);intyear = currentTime.getYear();intmonth = Month2int(currentTime.getMonth());intday = currentTime.getDayOfMonth();inthour = currentTime.getHour();intminute = currentTime.getMinutes();intsecond = currentTime.getSeconds();