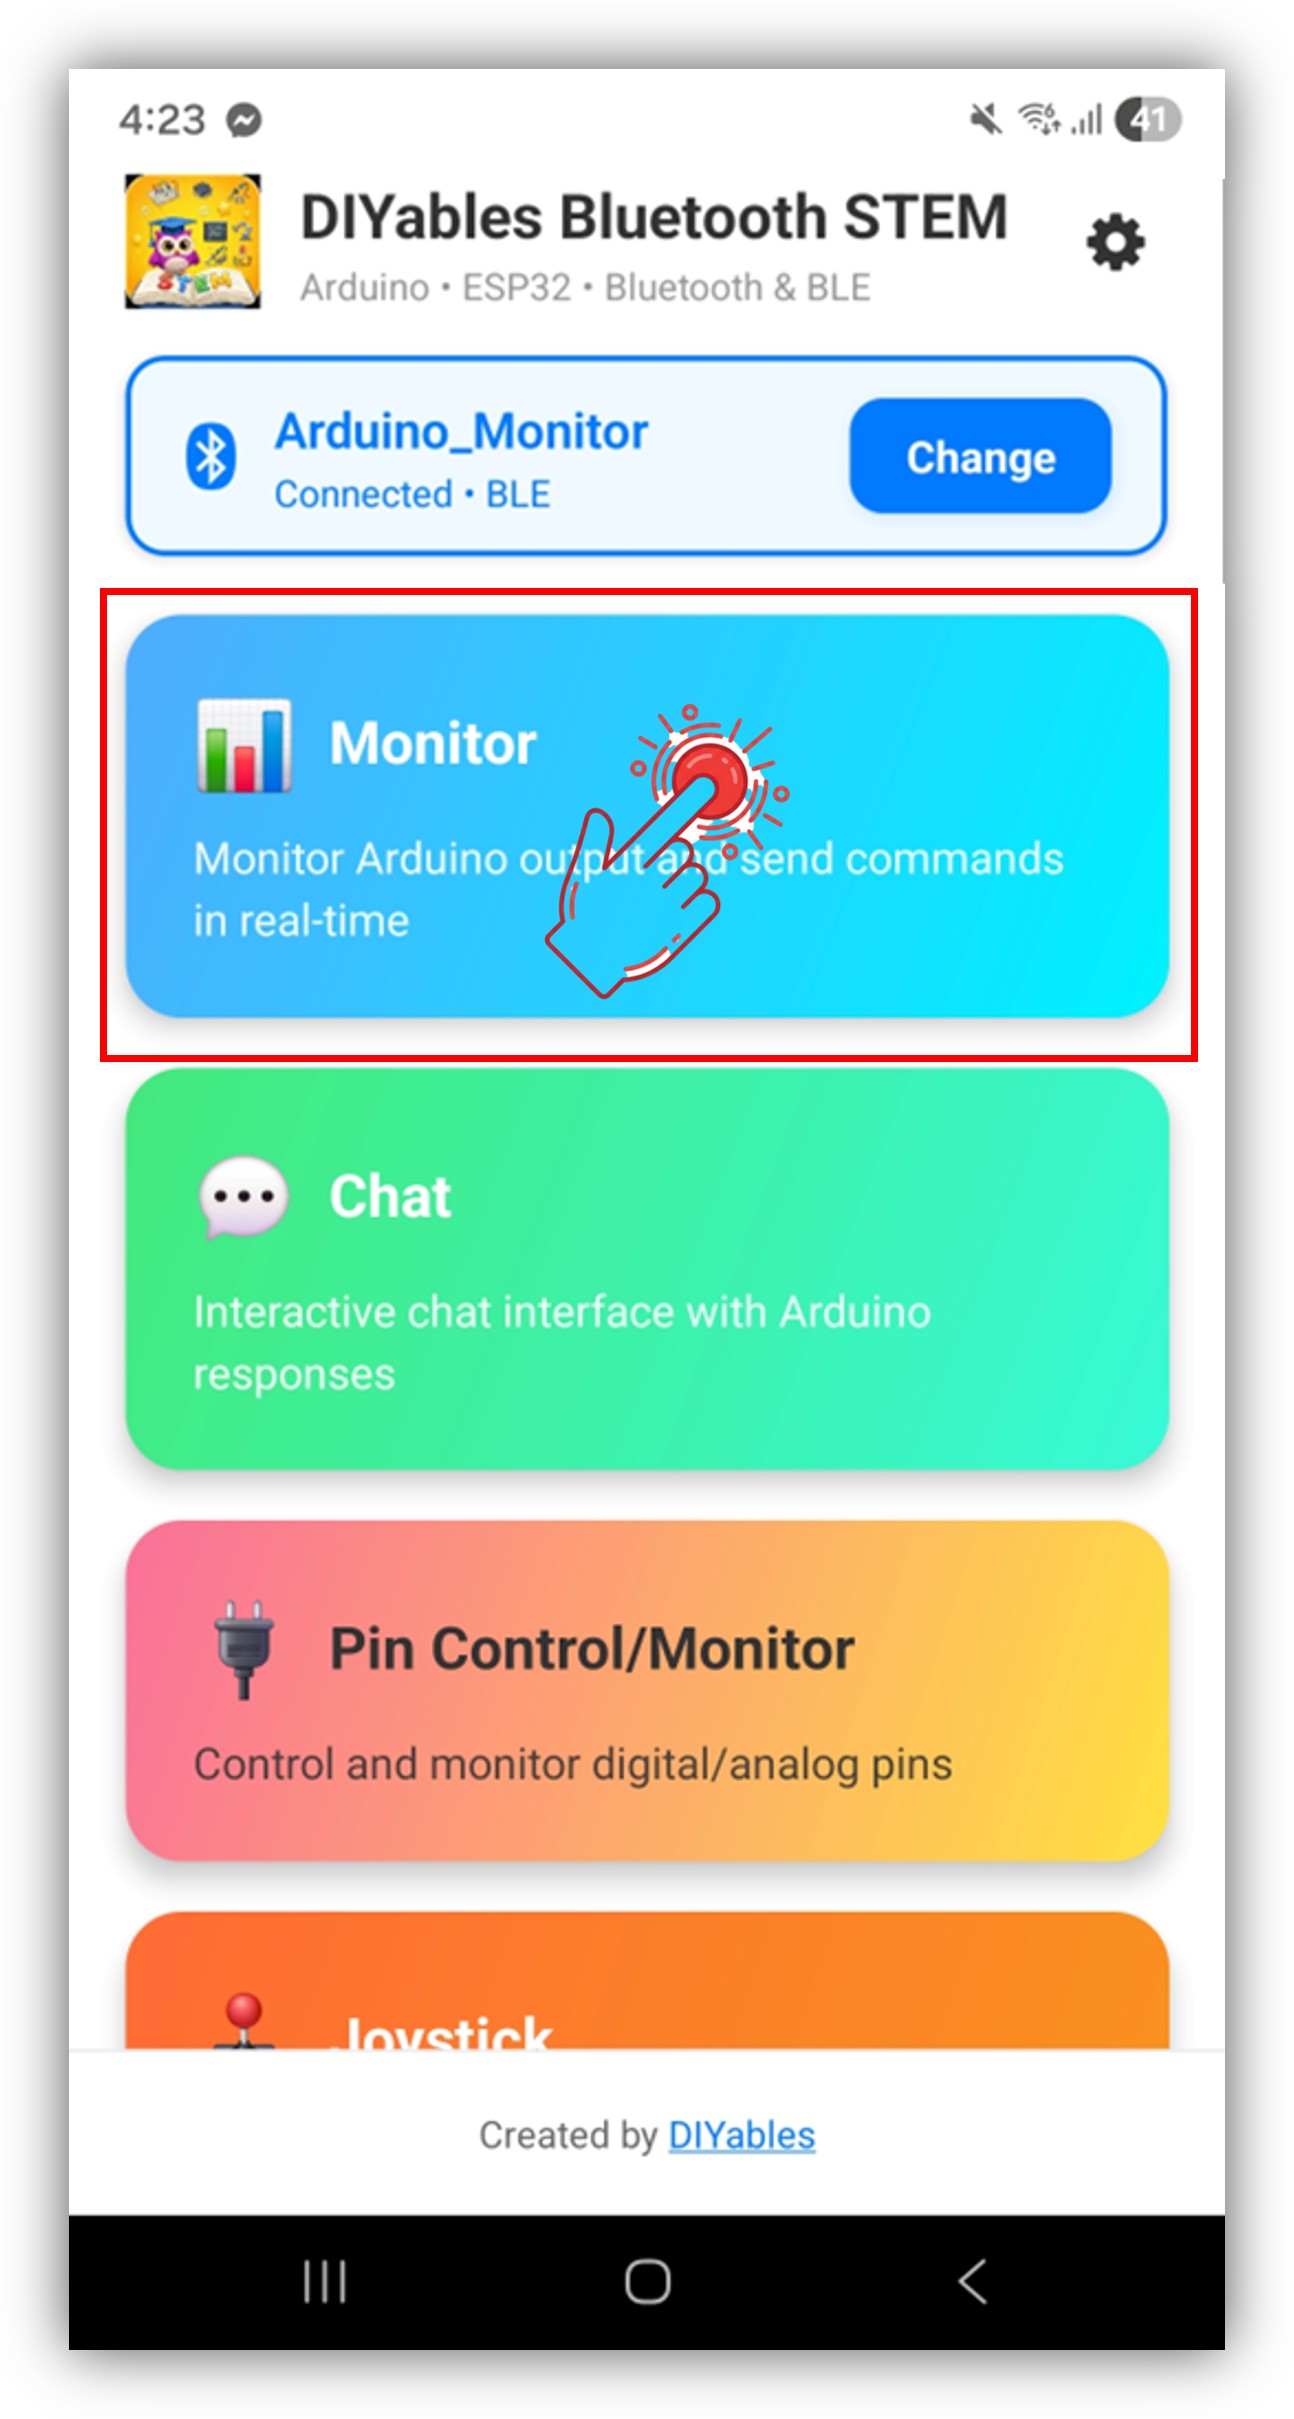
아두이노 나노 ESP32 블루투스 모니터 예제 BLE를 통한 무선 시리얼 모니터 튜토리얼
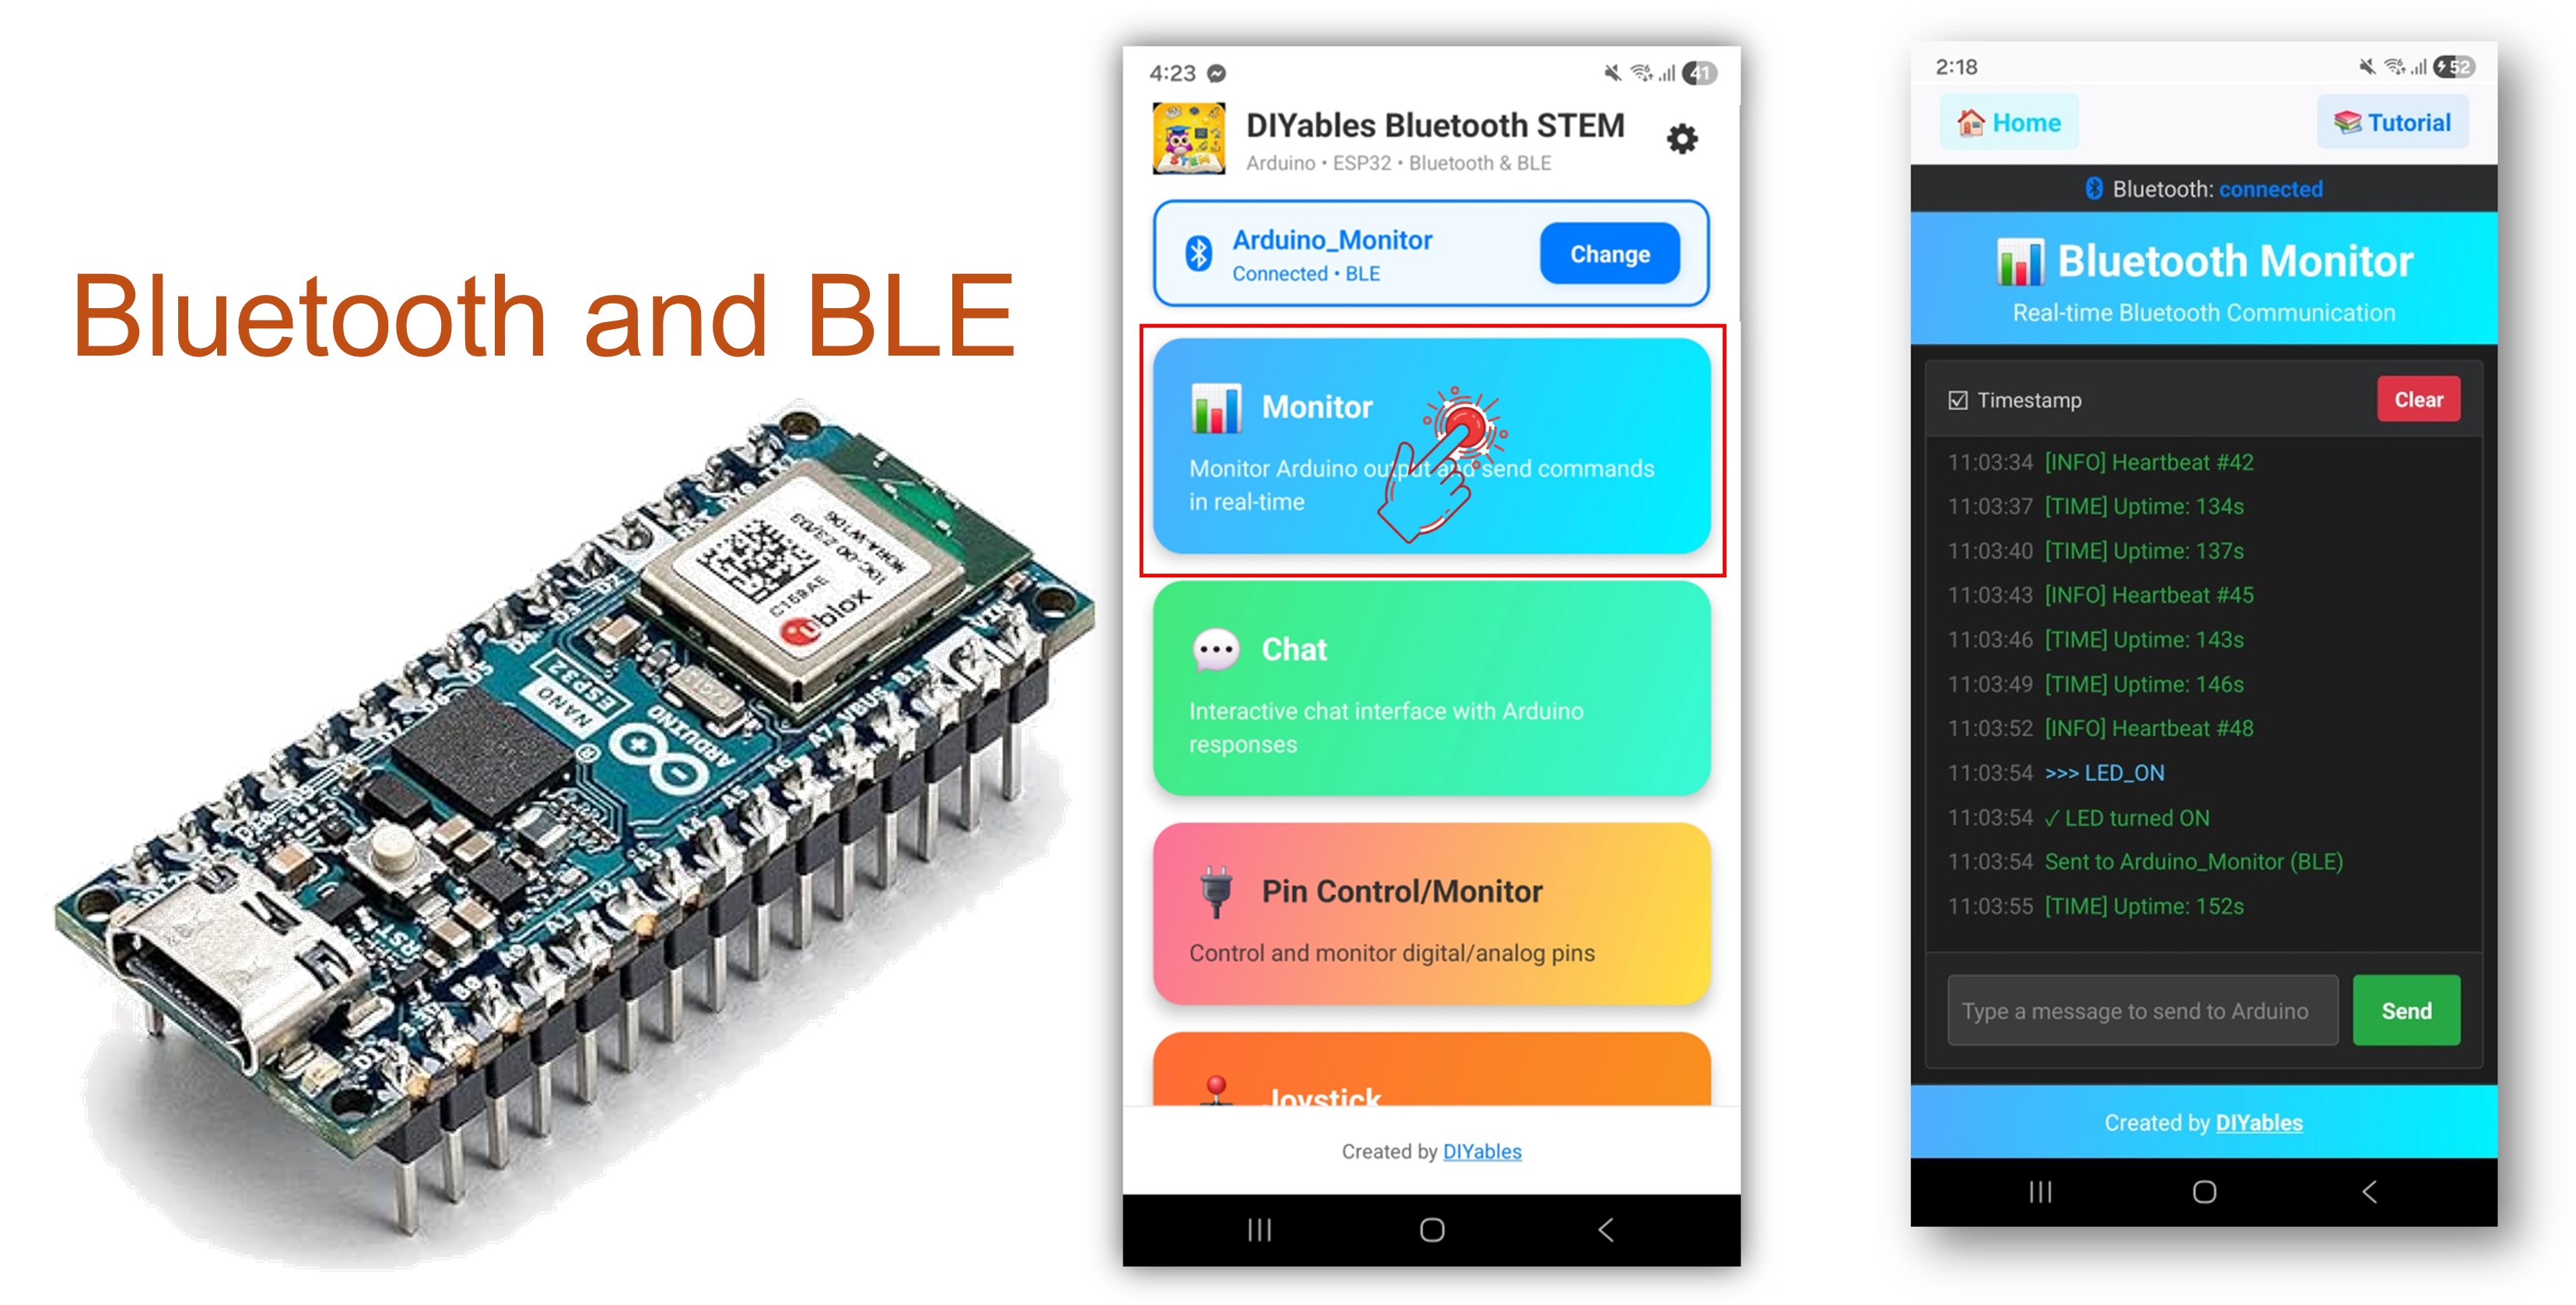
이 예제는 DIYables Bluetooth STEM 앱을 통한 BLE(블루투스 로우 에너지) 를 사용하여 Arduino Nano ESP32에 무선 시리얼 모니터를 구현합니다. 실시간 상태 메시지, 디버그 출력, 센서 데이터를 스마트폰으로 무선 스트리밍하고, 앱에서 텍스트 명령을 수신하세요. 무선 디버깅, 원격 모니터링, 시스템 로깅에 적합합니다.
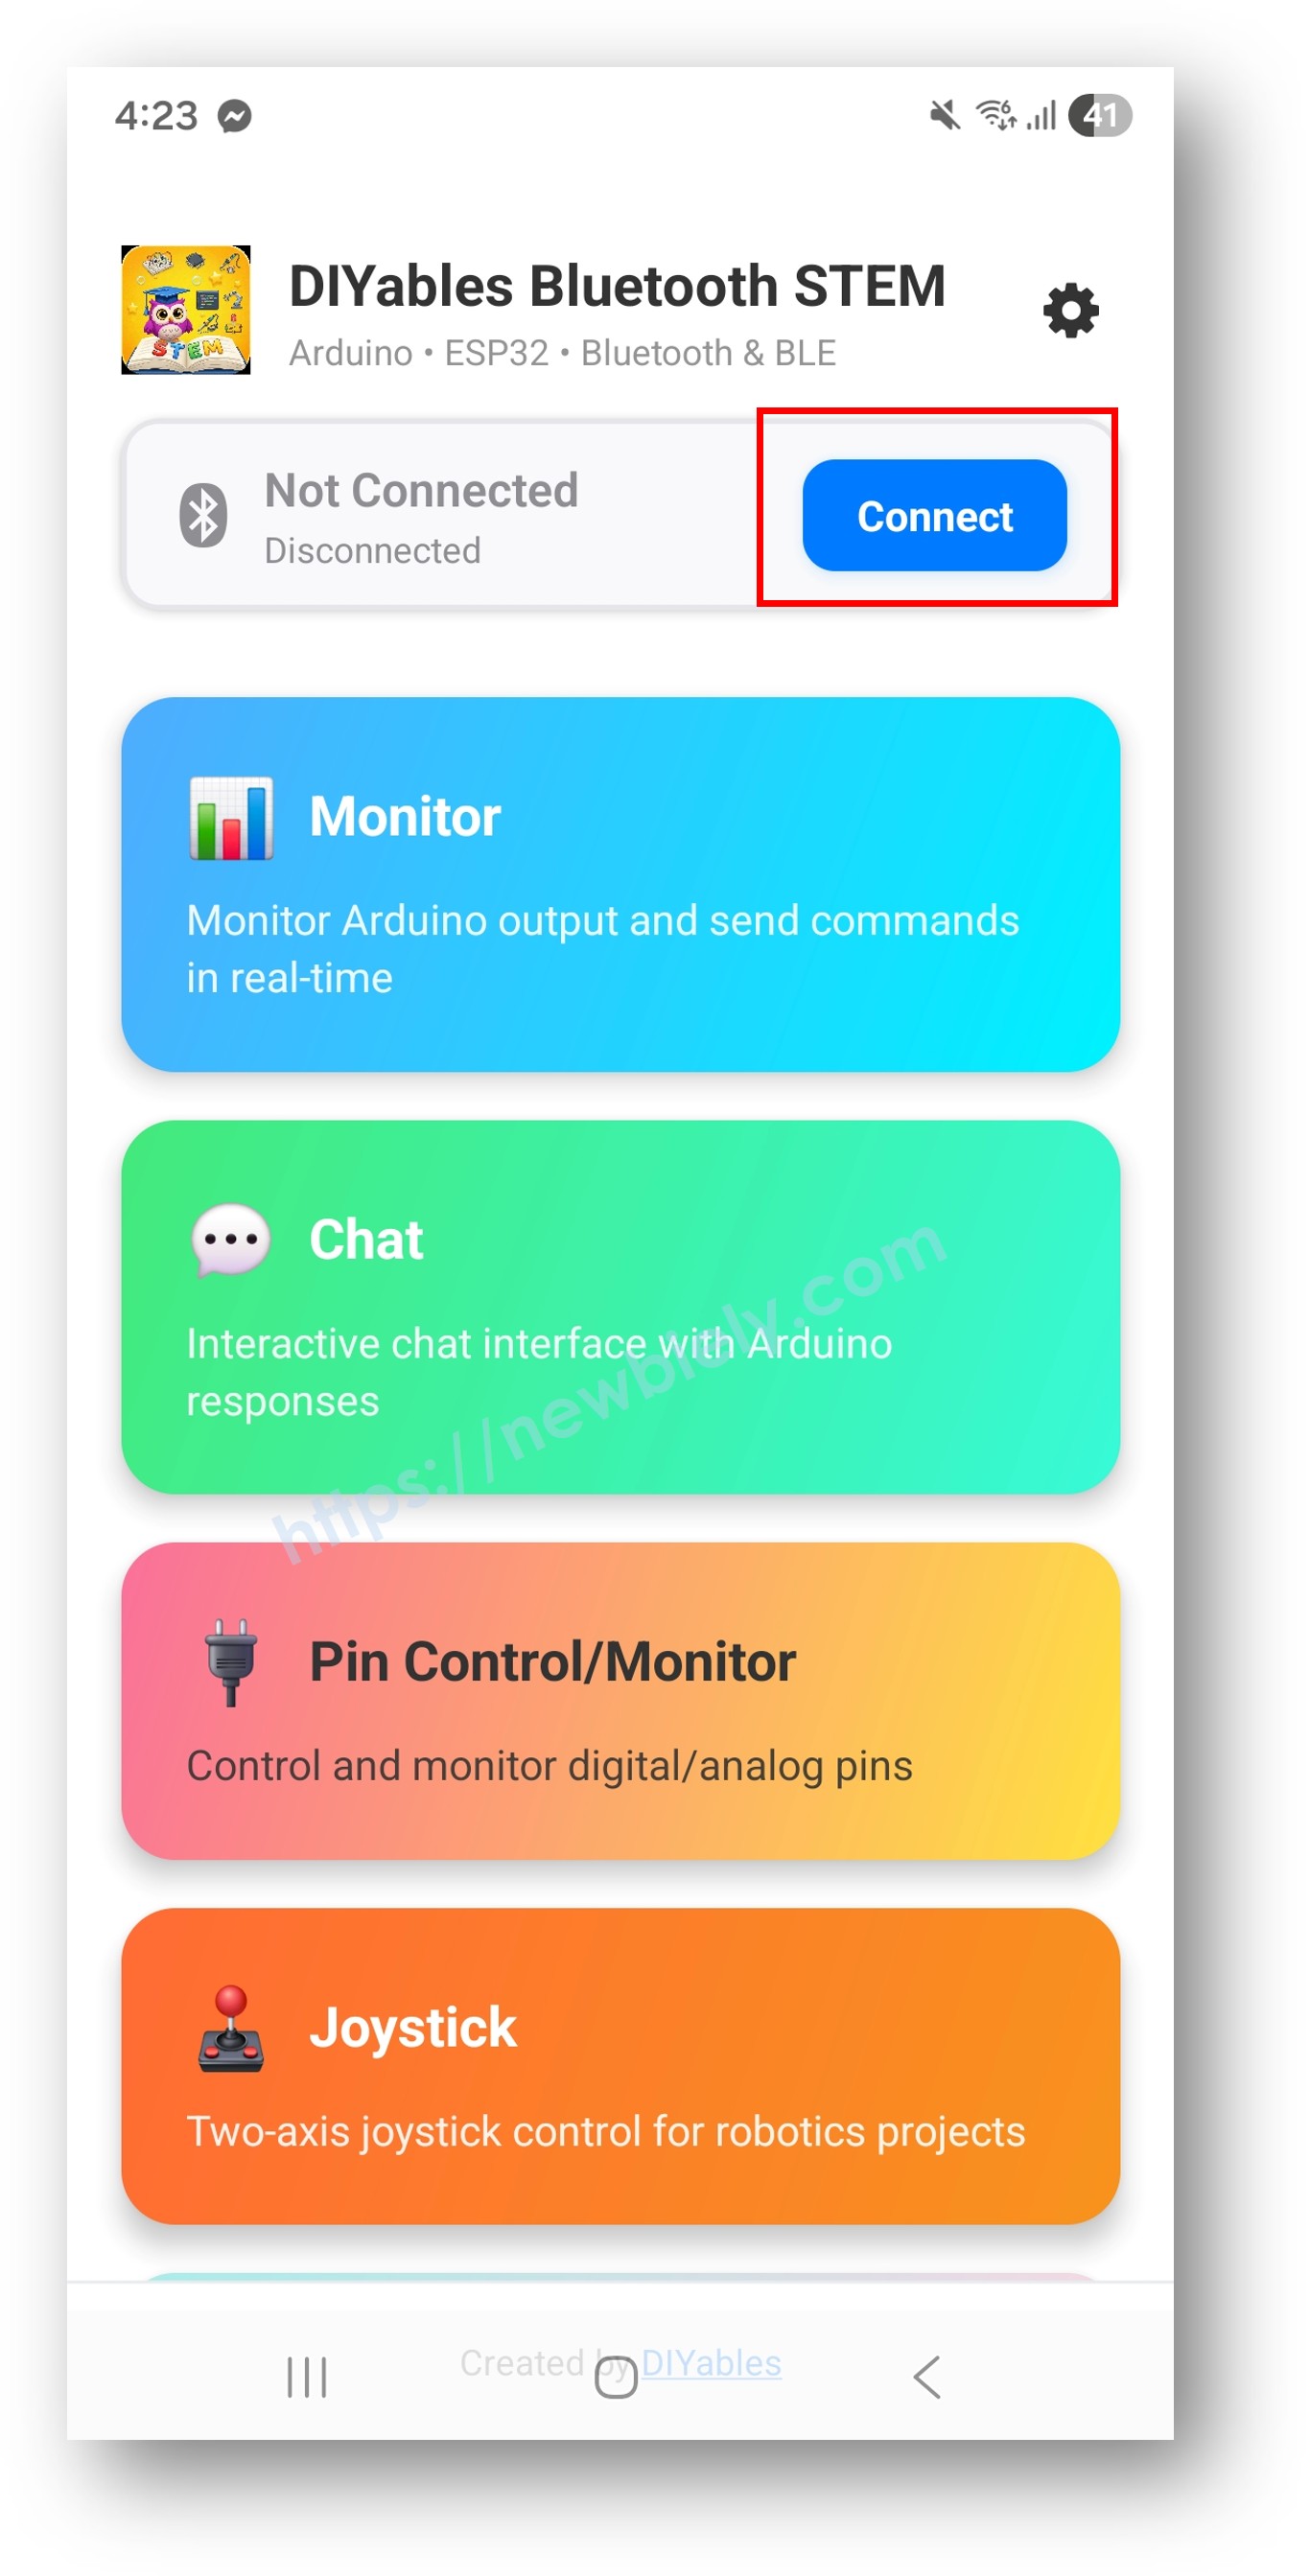
참고: Arduino Nano ESP32는 BLE만 지원하며 클래식 블루투스는 지원하지 않습니다. DIYables 블루투스 앱은 BLE를 통해 Android와 iOS 모두 에서 작동합니다.
무선 시리얼 모니터 : 스마트폰으로 텍스트 메시지 스트리밍
양방향 통신 : 앱에서 아두이노로 명령 전송
실시간 스트리밍 : 유선 시리얼 모니터와 유사한 연속 출력
명령 처리 : 앱에서 수신한 텍스트 명령 처리
Android 및 iOS 지원 : BLE는 두 플랫폼 모두 호환
페어링 불필요 : BLE는 수동 페어링 없이 연결
저전력 : BLE는 클래식 블루투스보다 적은 전력 소비
1 × 아두이노 나노 ESP32 쿠팡 | 아마존 1 × USB 케이블 타입-A to 타입-C (USB-A PC용) 쿠팡 | 아마존 1 × USB 케이블 타입-C to 타입-C (USB-C PC용) 아마존 1 × (추천 ) 아두이노 나노용 스크루 터미널 확장 보드 쿠팡 | 아마존 1 × (추천 ) 아두이노 나노용 브레이크아웃 확장 보드 쿠팡 | 아마존 1 × (추천 ) 아두이노 나노 ESP32용 전원 분배기 쿠팡 | 아마존
공개: 이 포스팅 에 제공된 일부 링크는 아마존 제휴 링크입니다. 이 포스팅은 쿠팡 파트너스 활동의 일환으로, 이에 따른 일정액의 수수료를 제공받습니다.
USB로 Arduino Nano ESP32를 컴퓨터에 연결하세요.
Arduino IDE를 열어주세요.
Arduino Nano ESP32 보드와 올바른 COM 포트를 선택하세요.
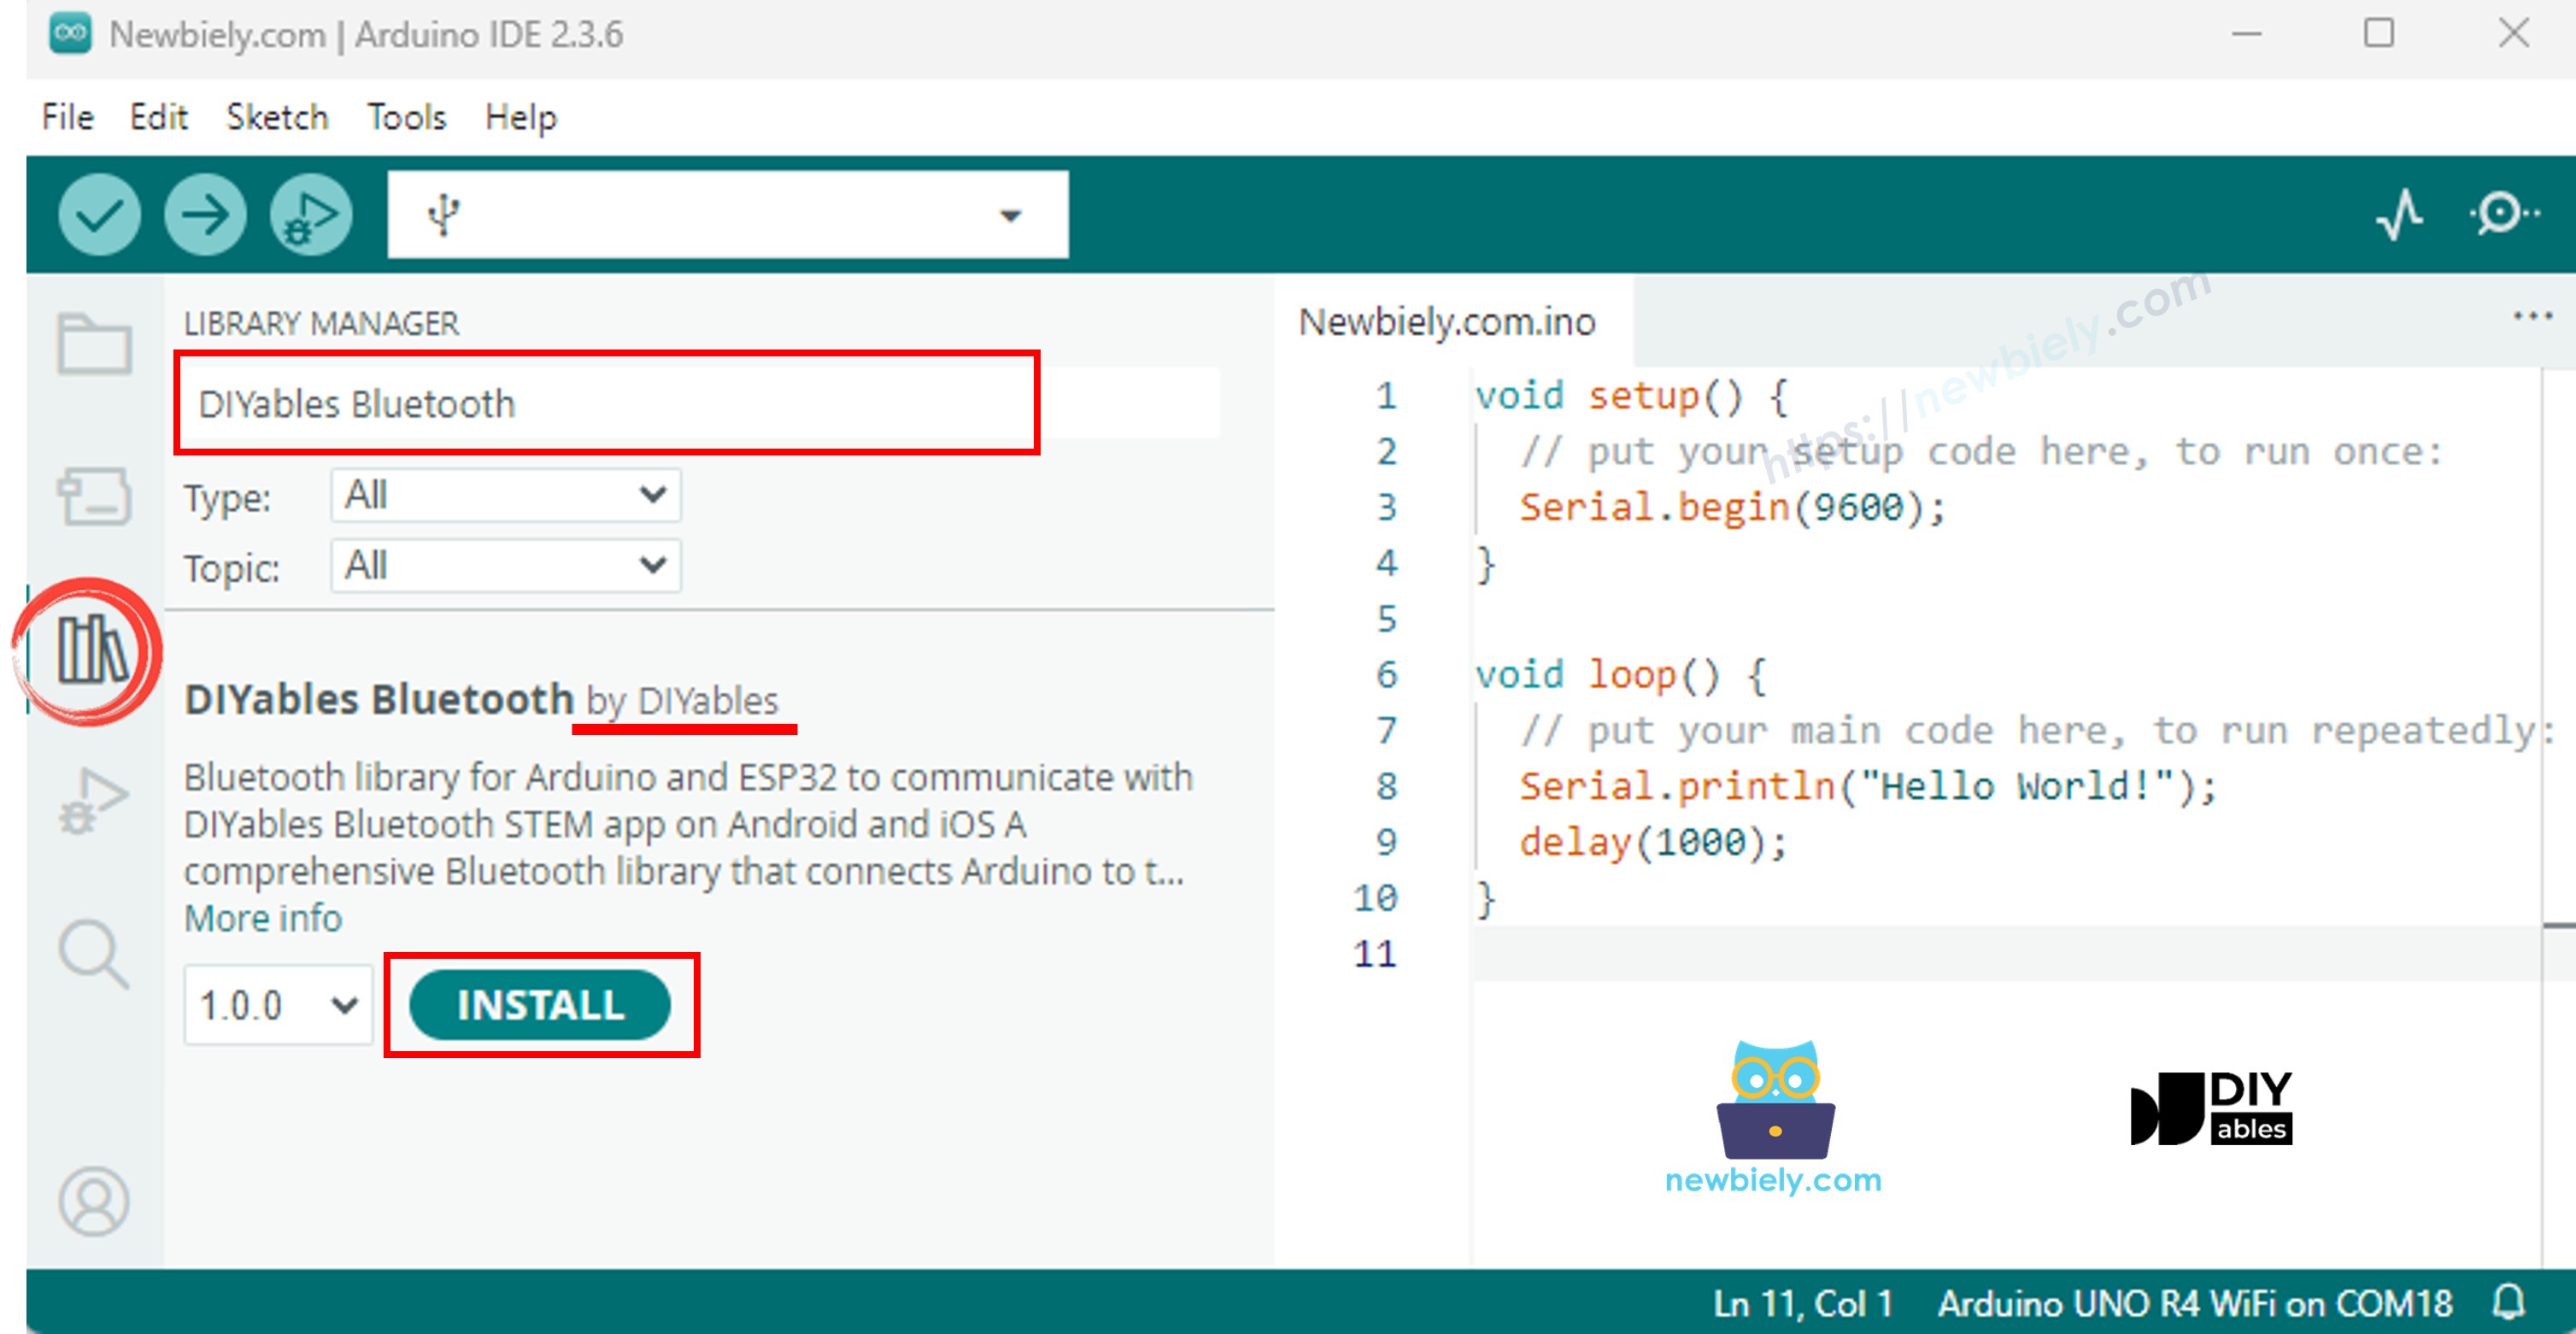
왼쪽 사이드바에서 라이브러리 아이콘을 클릭하세요.
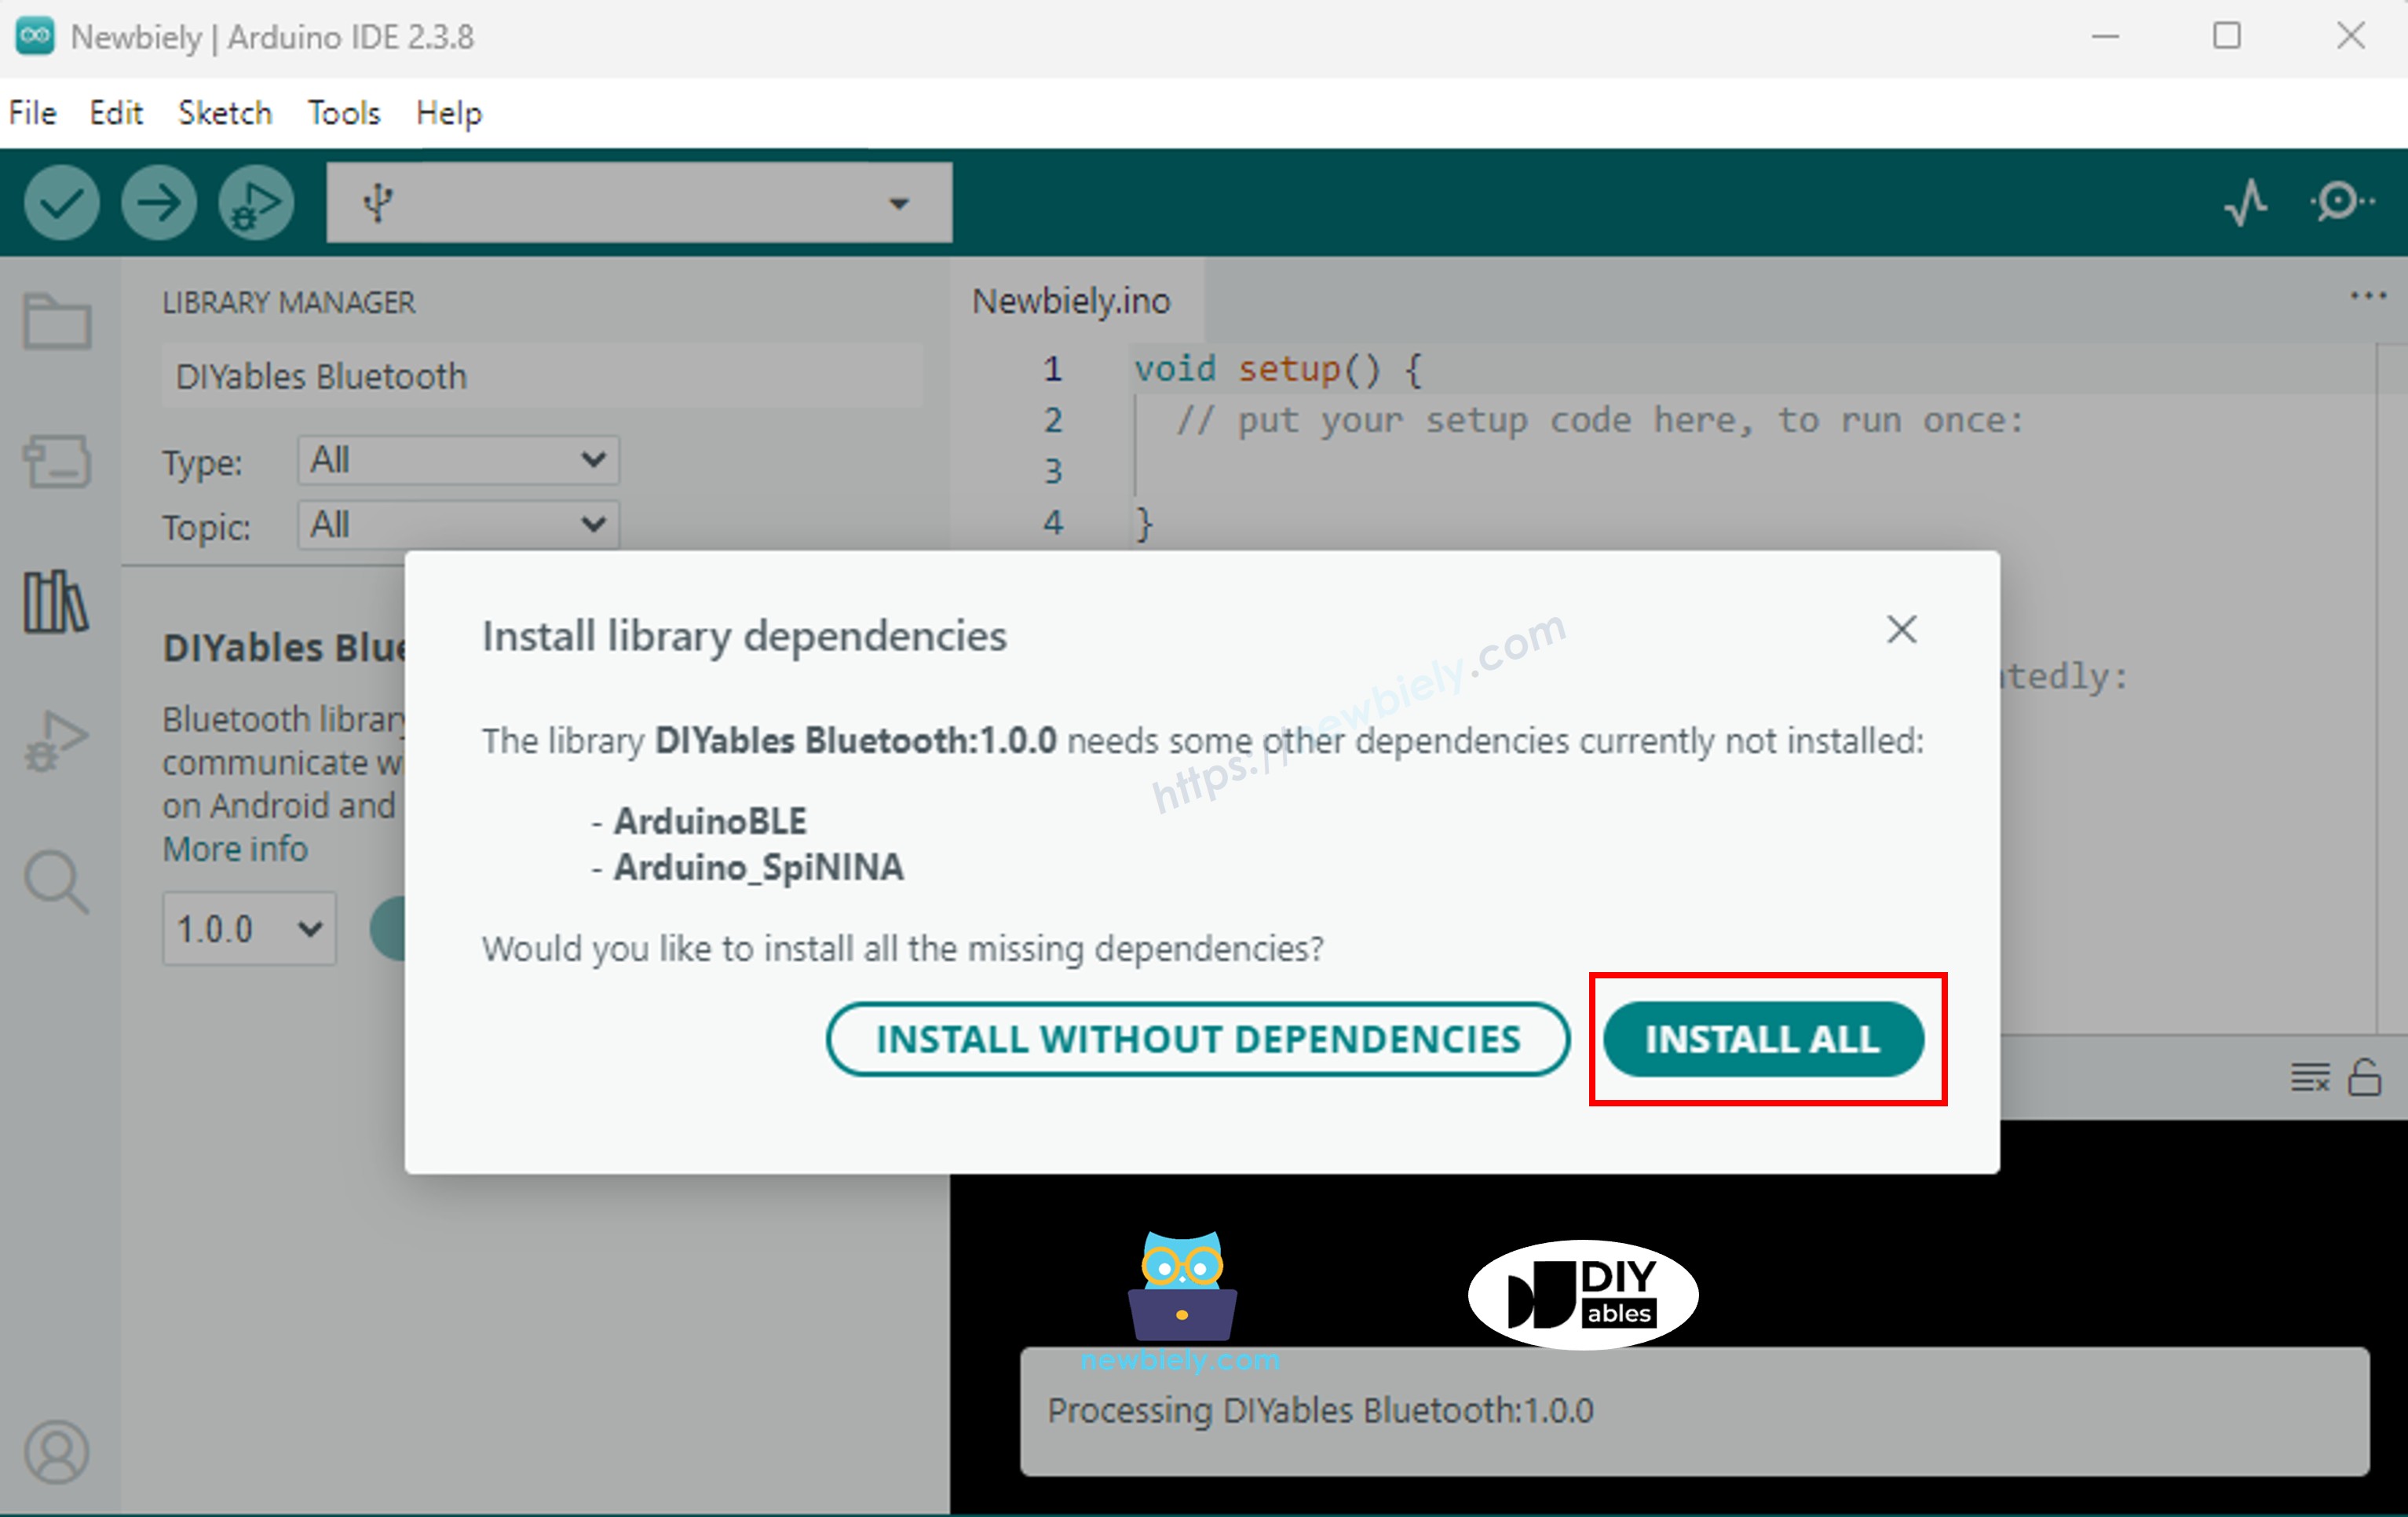
"DIYables Bluetooth" 를 검색하고 DIYables의 DIYables Bluetooth 라이브러리를 선택하세요.
설치 를 클릭하세요.
#include <DIYables_BluetoothServer .h>
#include <DIYables_BluetoothMonitor .h>
#include <platforms/DIYables_Esp32BLE.h>
const char* DEVICE_NAME = "ESP32BLE_Monitor" ;const char* SERVICE_UUID = "19B10000-E8F2-537E-4F6C-D104768A1214" ;const char* TX_UUID = "19B10001-E8F2-537E-4F6C-D104768A1214" ;const char* RX_UUID = "19B10002-E8F2-537E-4F6C-D104768A1214" ;DIYables_Esp32BLE bluetooth(DEVICE_NAME, SERVICE_UUID, TX_UUID, RX_UUID);DIYables_BluetoothServer bluetoothServer(bluetooth);DIYables_BluetoothMonitor bluetoothMonitor;unsigned long lastUpdate = 0;const unsigned long UPDATE_INTERVAL = 3000;int messageCount = 0;bool ledState = false ;void setup () { Serial .begin (115200);
delay (1000);
Serial .println ("DIYables Bluetooth - ESP32 BLE Monitor Example" );
pinMode (2, OUTPUT );
digitalWrite (2, LOW );
bluetoothServer.begin ();
bluetoothServer.addApp (&bluetoothMonitor);
bluetoothServer.setOnConnected ([]() {
Serial .println ("Bluetooth connected!" );
bluetoothMonitor.send ("=== ESP32 BLE Monitor Connected ===" );
bluetoothMonitor.send ("System Ready" );
bluetoothMonitor.send ("Type HELP for available commands" );
bluetoothMonitor.send ("" );
});
bluetoothServer.setOnDisconnected ([]() {
Serial .println ("Bluetooth disconnected!" );
});
bluetoothMonitor.onMonitorMessage ([](const String& message) {
Serial .print ("Received command: " );
Serial .println (message);
handleCommand(message);
});
Serial .println ("Waiting for Bluetooth connection..." );
}
void handleCommand(const String& cmd) { if (cmd == "HELP" ) {
bluetoothMonitor.send ("Available Commands:" );
bluetoothMonitor.send (" LED_ON - Turn LED on" );
bluetoothMonitor.send (" LED_OFF - Turn LED off" );
bluetoothMonitor.send (" STATUS - Show system status" );
bluetoothMonitor.send (" HEAP - Show free heap memory" );
bluetoothMonitor.send (" HELP - Show this help" );
}
else if (cmd == "LED_ON" ) {
digitalWrite (2, HIGH );
ledState = true ;
bluetoothMonitor.send ("LED turned ON" );
}
else if (cmd == "LED_OFF" ) {
digitalWrite (2, LOW );
ledState = false ;
bluetoothMonitor.send ("LED turned OFF" );
}
else if (cmd == "STATUS" ) {
showStatus();
}
else if (cmd == "HEAP" ) {
bluetoothMonitor.send ("Free heap: " + String (ESP.getFreeHeap()) + " bytes" );
}
else {
bluetoothMonitor.send ("Unknown command: " + cmd);
bluetoothMonitor.send ("Type HELP for available commands" );
}
}
void showStatus() { bluetoothMonitor.send ("=== System Status ===" );
bluetoothMonitor.send ("LED State: " + String (ledState ? "ON" : "OFF" ));
unsigned long uptime = millis () / 1000;
bluetoothMonitor.send ("Uptime: " + String (uptime / 3600) + "h " + String ((uptime % 3600) / 60) + "m " + String (uptime % 60) + "s" );
bluetoothMonitor.send ("Free Heap: " + String (ESP.getFreeHeap()) + " bytes" );
bluetoothMonitor.send ("Messages Sent: " + String (messageCount));
bluetoothMonitor.send ("====================" );
}
void sendPeriodicUpdate() { messageCount++;
if (messageCount % 3 == 0) {
bluetoothMonitor.send ("[INFO] Heartbeat #" + String (messageCount));
}
else if (messageCount % 5 == 0) {
bluetoothMonitor.send ("[HEAP] Free: " + String (ESP.getFreeHeap()) + " bytes" );
}
else {
bluetoothMonitor.send ("[TIME] Uptime: " + String (millis () / 1000) + "s" );
}
Serial .print ("Sent update #" );
Serial .println (messageCount);
}
void loop () { bluetoothServer.loop ();
if (bluetooth.isConnected () && millis () - lastUpdate >= UPDATE_INTERVAL) {
lastUpdate = millis ();
sendPeriodicUpdate();
}
delay (10);
}
∞
Newbiely | Arduino IDE 2.3.8
8
Serial .println ("Hello World!" );
Message (Enter to send message to 'Arduino Nano ESP32' on 'COM15')
DIYables Bluetooth - Monitor Example
Waiting for Bluetooth connection...
Ln 11, Col 1
Arduino Nano ESP32 on COM15
2
참고: DIYables 블루투스 앱은 BLE를 통해 Android와 iOS 모두 에서 작동합니다. 수동 페어링이 필요 없습니다.
홈 화면의 설정 아이콘을 탭하여 앱을 표시하거나 숨길 수 있습니다. 자세한 내용은 DIYables 블루투스 앱 사용 설명서 를 참조하세요.
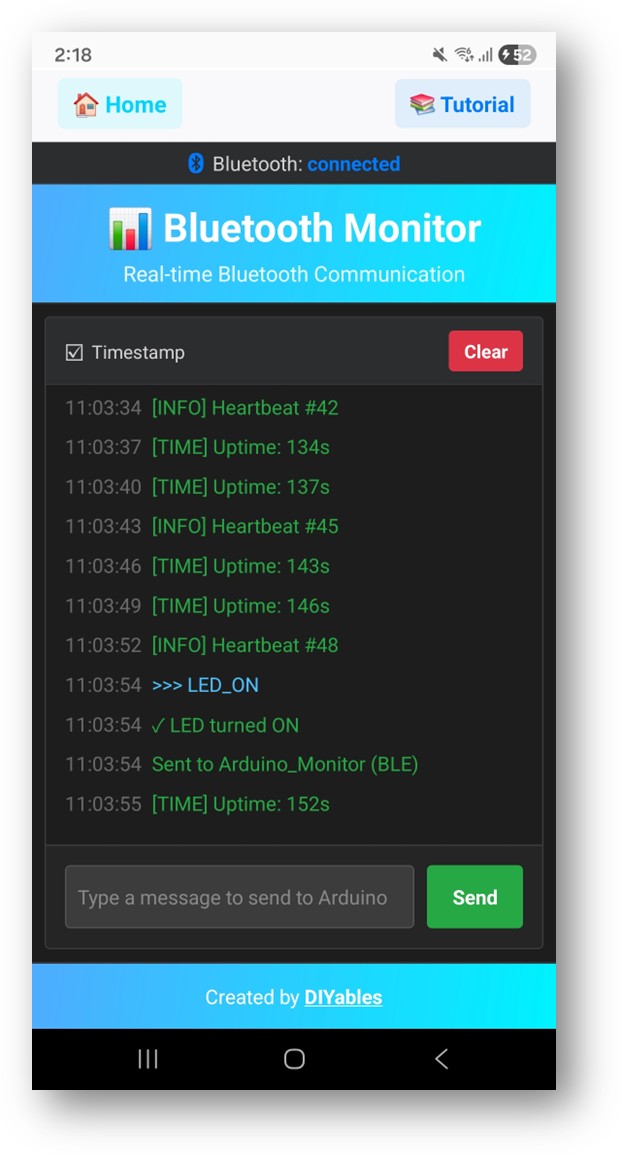
Arduino IDE의 시리얼 모니터를 다시 확인하면 다음과 같이 표시됩니다:
∞
Newbiely | Arduino IDE 2.3.8
8
Serial .println ("Hello World!" );
Message (Enter to send message to 'Arduino Nano ESP32' on 'COM15')
Bluetooth connected!
Sent update #1
Sent update #2
Sent update #3
Ln 11, Col 1
Arduino Nano ESP32 on COM15
2
bluetoothMonitor.send ("System started" );
bluetoothMonitor.send ("Temperature: " + String (temp, 1) + " °C" );
bluetoothMonitor.send ("[ERROR] Sensor disconnected!" );
모니터 앱에서 입력된 명령을 수신하고 처리하려면 onMonitorMessage ()
bluetoothMonitor.onMonitorMessage ([](const String& message) {
Serial .print ("Received: " );
Serial .println (message);
if (message == "HELP" ) {
bluetoothMonitor.send ("Commands: LED_ON, LED_OFF, STATUS, HELP" );
} else if (message == "LED_ON" ) {
digitalWrite (LED_BUILTIN , HIGH );
bluetoothMonitor.send ("LED turned ON" );
} else if (message == "LED_OFF" ) {
digitalWrite (LED_BUILTIN , LOW );
bluetoothMonitor.send ("LED turned OFF" );
} else if (message == "STATUS" ) {
bluetoothMonitor.send ("Uptime: " + String (millis () / 1000) + "s" );
bluetoothMonitor.send ("LED: " + String (digitalRead (LED_BUILTIN ) ? "ON" : "OFF" ));
} else {
bluetoothMonitor.send ("Unknown command: " + message);
}
});
각 명령에 대해 추가 else if RELAY_ON / RELAY_OFF 를 사용하거나 센서 읽기를 트리거하려면 READ 를 사용하세요.
void loop () { bluetoothServer.loop ();
static unsigned long lastUpdate = 0;
if (bluetooth.isConnected () && millis () - lastUpdate >= 3000) {
lastUpdate = millis ();
int light = analogRead (A0);
float voltage = analogRead (A1) * 5.0 / 1023.0;
bluetoothMonitor.send ("[SENSOR] Light: " + String (map (light, 0, 1023, 0, 100)) + "%" );
bluetoothMonitor.send ("[SENSOR] Voltage: " + String (voltage, 2) + "V" );
bluetoothMonitor.send ("[INFO] Uptime: " + String (millis () / 1000) + "s" );
}
delay (10);
}
const int BUTTON_PIN = 7;int lastButtonState = HIGH ;void loop () { bluetoothServer.loop ();
int buttonState = digitalRead (BUTTON_PIN);
if (buttonState != lastButtonState) {
lastButtonState = buttonState;
if (buttonState == LOW ) {
bluetoothMonitor.send ("[EVENT] Button pressed!" );
} else {
bluetoothMonitor.send ("[EVENT] Button released" );
}
}
delay (10);
}
1. 앱에서 기기가 보이지 않음
보드에 전원이 공급되고 스케치가 업로드되었는지 확인하세요
스마트폰에서 블루투스가 활성화되어 있는지 확인하세요
Android 11 이하에서는 위치 서비스도 활성화하세요
2. 앱에 메시지가 표시되지 않음
3. 메시지가 지연됨
4. 앱에서 보낸 명령이 수신되지 않음
5. 연결이 자주 끊김
아두이노와의 거리를 줄이세요
안정적인 USB 전원 공급을 확보하세요
6. 업로드 실패 또는 보드 인식 불가
무선 디버그 콘솔
센서 데이터 로거
시스템 상태 모니터
이벤트 알림 시스템
원격 명령 인터페이스
블루투스 모니터 예제를 완료한 후 다음을 살펴보세요:
블루투스 채팅 — 대화형 양방향 메시징
블루투스 테이블 — 구조화된 데이터 표시
블루투스 플로터 — 데이터 시각화
블루투스 다중 앱 — 모니터와 다른 앱 위젯 결합
추가 도움이 필요하시면:
API 레퍼런스 문서를 확인하세요
아두이노 커뮤니티 포럼