DIYables ESP32 WebApps 라이브러리를 사용한 아두이노 나노 ESP32 웹 로테이터
개요
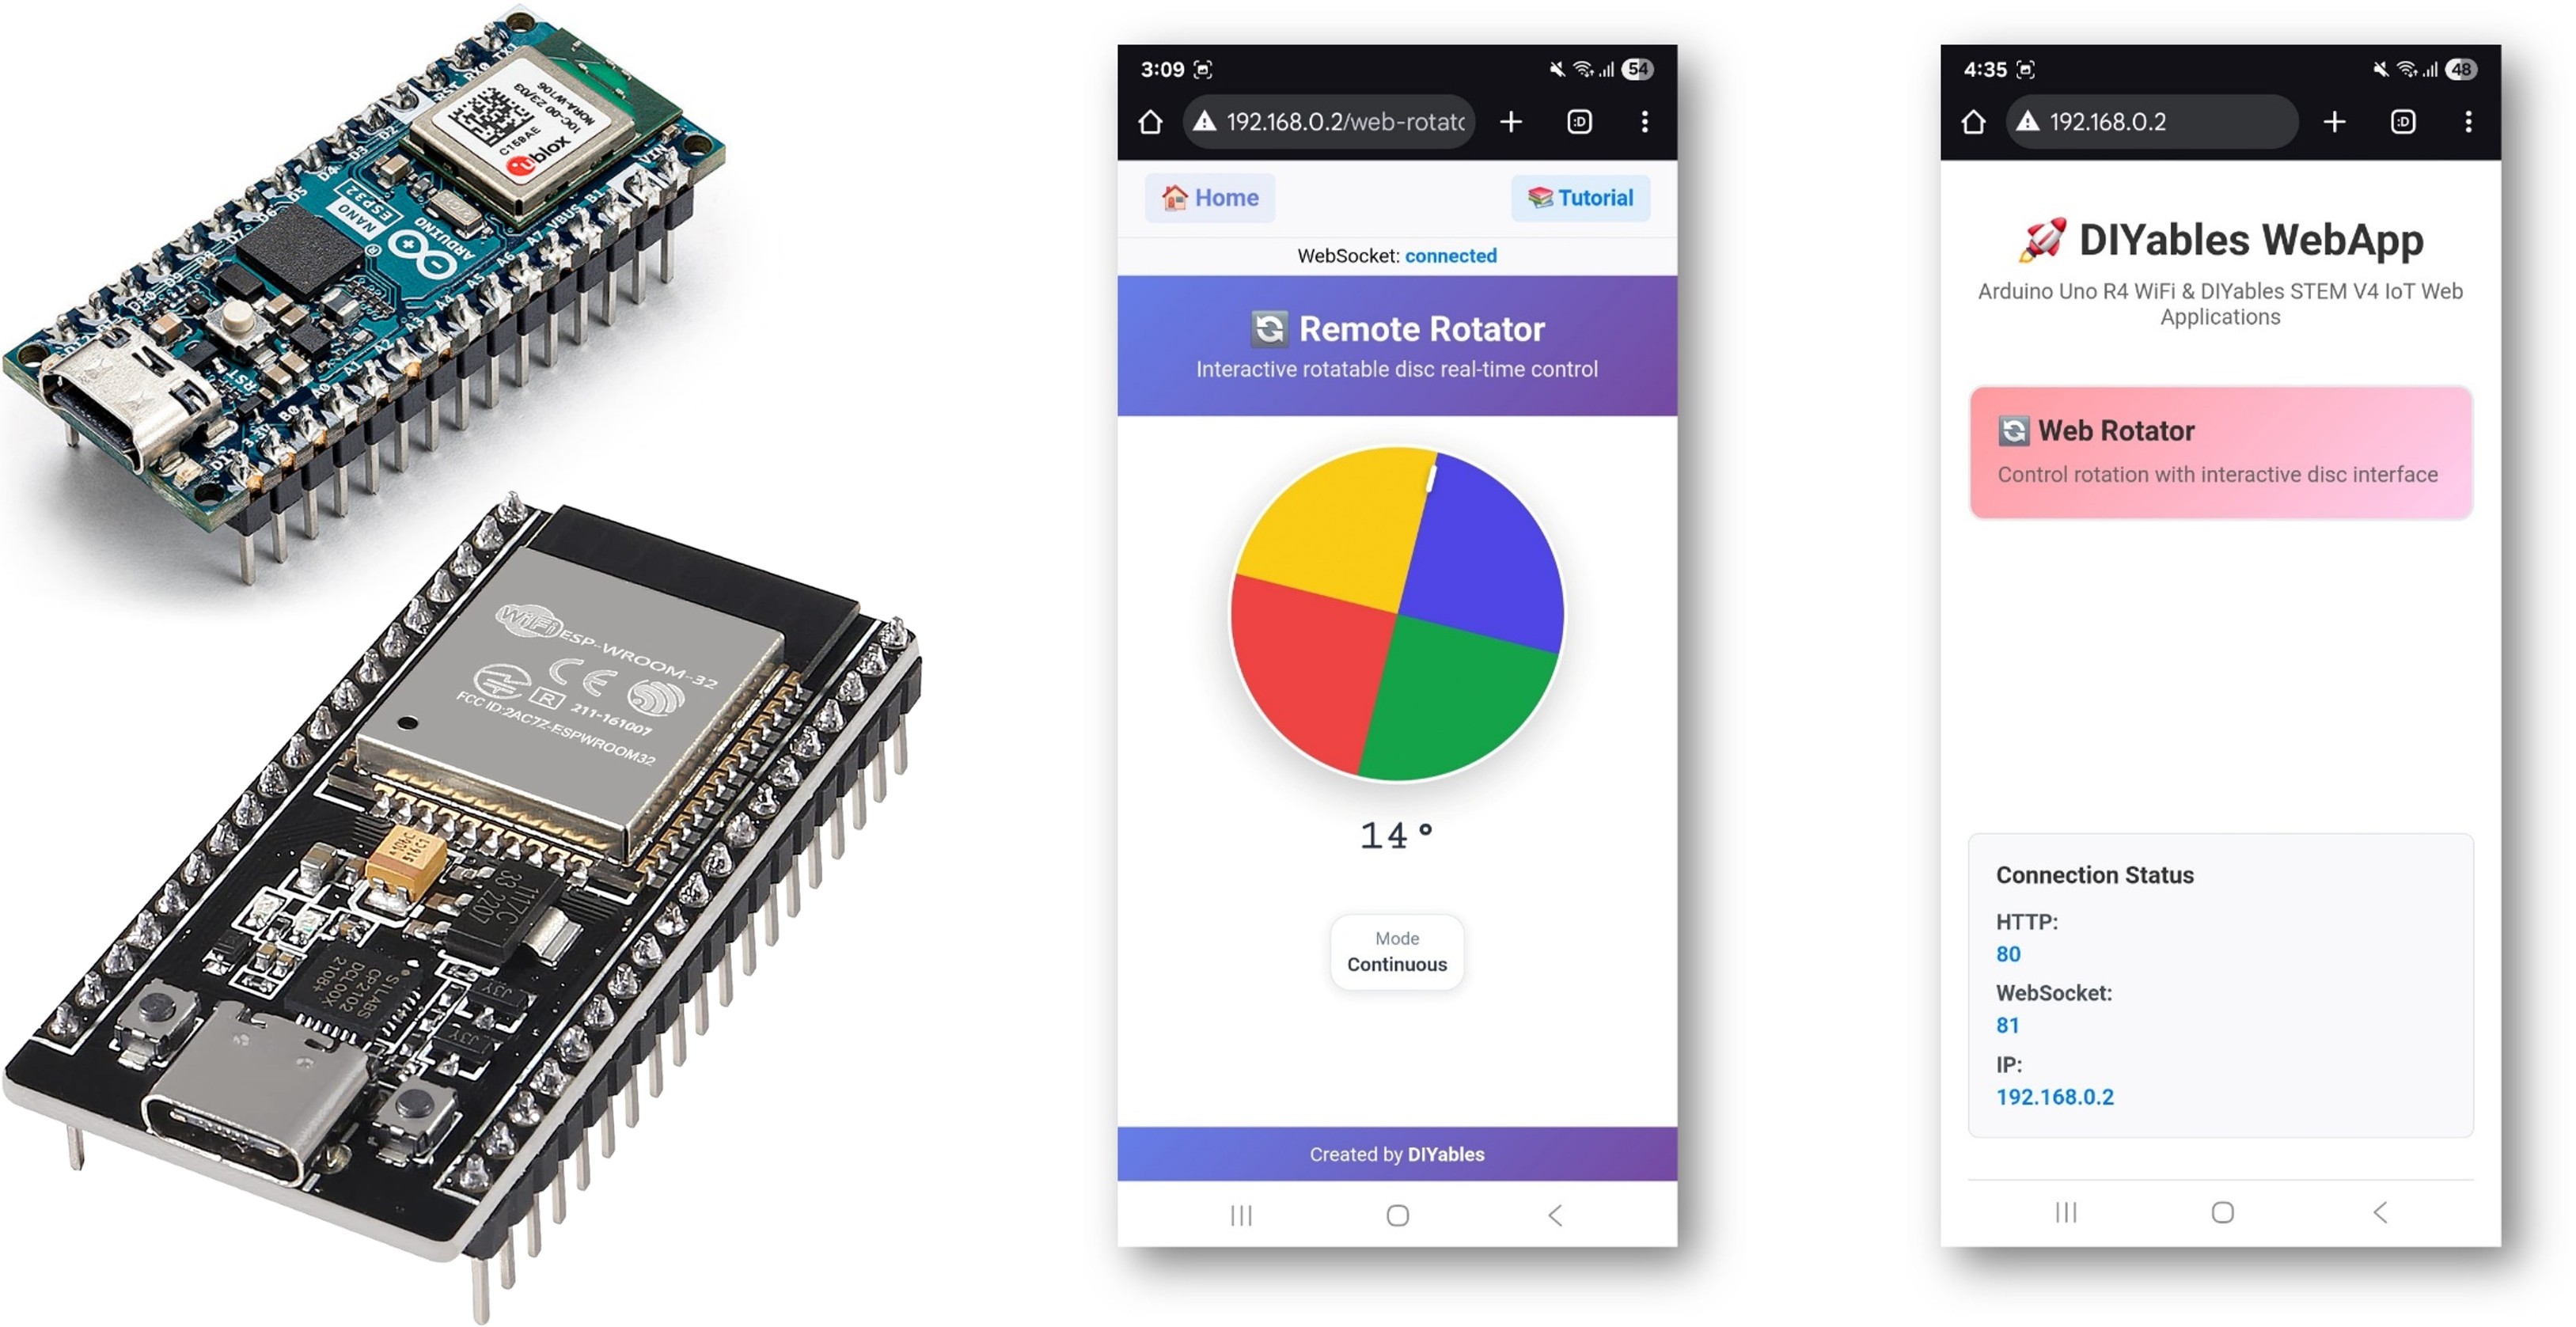
이 튜토리얼은 DIYables ESP32 WebApps 라이브러리의 DIYablesWebRotatorPage 클래스를 다룹니다. 브라우저 페이지는 현재 각도를 WebSocket을 통해 Arduino Nano ESP32에 보고하는 드래그 가능한 디스크를 렌더링합니다. 디스크는 연속(0~360°) 또는 제한 범위 모드로 작동합니다. 구성은 생성자에서 설정되며 연결 시 브라우저에 자동으로 전송됩니다.
서보 모터를 웹 로테이터 앱과 사용하는 방법을 보여주는 단계별 영상 튜토리얼:
이 튜토리얼에서 다루는 내용
- 연속 및 제한 회전 모드 중 선택하기
- 스케치 콜백에서 각도 값 수신하기
- 보고된 각도에서 서보 모터 구동하기
- 새로 연결된 브라우저에 현재 각도 제공하기
준비물
| 1 | × | 아두이노 나노 ESP32 | 쿠팡 | 아마존 | |
| 1 | × | USB 케이블 타입-A to 타입-C (USB-A PC용) | 쿠팡 | 아마존 | |
| 1 | × | USB 케이블 타입-C to 타입-C (USB-C PC용) | 아마존 | |
| 1 | × | Servo Motor (optional for testing) | 쿠팡 | 아마존 | |
| 1 | × | 브레드보드 | 쿠팡 | 아마존 | |
| 1 | × | 점퍼케이블 | 쿠팡 | 아마존 | |
| 1 | × | (추천) 아두이노 나노용 스크루 터미널 확장 보드 | 쿠팡 | 아마존 | |
| 1 | × | (추천) 아두이노 나노용 브레이크아웃 확장 보드 | 쿠팡 | 아마존 | |
| 1 | × | (추천) 아두이노 나노 ESP32용 전원 분배기 | 쿠팡 | 아마존 |
공개: 이 포스팅 에 제공된 일부 링크는 아마존 제휴 링크입니다. 이 포스팅은 쿠팡 파트너스 활동의 일환으로, 이에 따른 일정액의 수수료를 제공받습니다.
단계
다음 지침을 단계별로 따르세요:
- Arduino Nano ESP32가 처음이라면, 아두이노 나노 ESP32 - 소프트웨어 설치 튜토리얼을 참조하세요.
- USB 케이블을 사용하여 Arduino Nano ESP32 보드를 컴퓨터에 연결합니다.
- 컴퓨터에서 Arduino IDE를 실행합니다.
- 적절한 보드(예: Arduino Nano ESP32)와 COM 포트를 선택합니다.
- Arduino IDE 왼쪽 바의 Libraries 아이콘으로 이동합니다.
- "DIYables ESP32 WebApps"를 검색하여 DIYables의 DIYables ESP32 WebApps 라이브러리를 찾습니다
- Install 버튼을 클릭하여 라이브러리를 설치합니다.
- Search for DIYables ESP32 WebApps created by DIYables and click the Install button.
1
void setup() {
- 다른 라이브러리 의존성 설치 요청을 받게 됩니다
- Install All 버튼을 클릭하여 모든 라이브러리 의존성을 설치합니다.
- Arduino IDE에서 File Examples DIYables ESP32 WebApps WebRotator 예제로 이동하거나, 위의 코드를 복사하여 Arduino IDE 편집기에 붙여넣습니다
/*
* DIYables WebApp Library - Web Rotator Example
*
* This example demonstrates the Web Rotator application:
* - Interactive rotatable disc control
* - Two modes: Continuous rotation and Limited angle range
* - Real-time angle feedback with WebSocket communication
* - Touch and mouse support for desktop and mobile
*
* Features:
* - Configurable rotation modes (continuous or limited)
* - Beautiful conic gradient disc with visual indicator
* - Real-time angle display and feedback
* - WebSocket communication for live updates
* - Professional responsive UI design
*
* Hardware: ESP32 Boards
*
* Setup:
* 1. Update WiFi credentials below
* 2. Upload the sketch to your Arduino
* 3. Open Serial Monitor to see the IP address
* 4. Navigate to http://[esp32-ip]/web-rotator in your web browser
*/
#include <DIYables_ESP32_Platform.h>
#include <DIYablesWebApps.h>
// WiFi credentials - UPDATE THESE WITH YOUR NETWORK
const char WIFI_SSID[] = "YOUR_WIFI_SSID";
const char WIFI_PASSWORD[] = "YOUR_WIFI_PASSWORD";
// Create WebApp server and page instances
ESP32ServerFactory serverFactory;
DIYablesWebAppServer webAppsServer(serverFactory, 80, 81);
DIYablesHomePage homePage;
// Rotator configuration constants
const int ROTATOR_MODE = ROTATOR_MODE_CONTINUOUS; // Change to ROTATOR_MODE_LIMITED for limited rotation
const float MIN_ANGLE = 0.0; // Minimum angle for limited mode
const float MAX_ANGLE = 180.0; // Maximum angle for limited mode
// Create WebRotator page with configuration
//DIYablesWebRotatorPage webRotatorPage(ROTATOR_MODE_CONTINUOUS);
DIYablesWebRotatorPage webRotatorPage(ROTATOR_MODE_LIMITED, MIN_ANGLE, MAX_ANGLE);
// Variables for angle tracking
float currentAngle = 0.0;
void setup() {
Serial.begin(9600);
delay(1000);
// TODO: Initialize your hardware pins here
Serial.println("DIYables ESP32 WebApp - Web Rotator Example");
// Add pages to server
webAppsServer.addApp(&homePage);
webAppsServer.addApp(&webRotatorPage);
// Set 404 Not Found page (optional - for better user experience)
webAppsServer.setNotFoundPage(DIYablesNotFoundPage());
// Set callback functions for WebRotator
webRotatorPage.onRotatorAngleFromWeb(onRotatorAngleReceived);
// Start server
webAppsServer.begin(WIFI_SSID, WIFI_PASSWORD);
if (ROTATOR_MODE == ROTATOR_MODE_LIMITED) {
Serial.println("\nRotator Mode: Limited");
Serial.print("Angle Range: ");
Serial.print(MIN_ANGLE);
Serial.print("° to ");
Serial.print(MAX_ANGLE);
Serial.println("°");
} else {
Serial.println("\nRotator Mode: Continuous Rotation");
}
Serial.println("\nTurn the disc in your web browser to control the rotator!");
}
void loop() {
// Handle web server and WebSocket connections
webAppsServer.loop();
// Simulate rotator movement or control actual hardware here
// For demonstration, we'll just echo back the received angle
delay(10);
}
/**
* Callback function called when angle is received from web interface
* This is where you would control your actual rotator hardware
*/
void onRotatorAngleReceived(float angle) {
currentAngle = angle;
Serial.print("Rotator angle received: ");
Serial.print(angle, 1);
Serial.println("°");
// TODO: Add your rotator control code here
// Examples:
// - Control servo motor: servo.write(map(angle, 0, 360, 0, 180));
// - Control stepper motor: stepper.moveTo(angle * stepsPerDegree);
// - Control DC motor with encoder feedback
// - Send commands to external rotator controller
// Note: No echo back to avoid interfering with smooth web interface rotation
}
/**
* Example function to change rotator mode at runtime
* Call this function to switch between continuous and limited modes
*/
void setRotatorMode(int mode, float minAng = 0, float maxAng = 360) {
webRotatorPage.setRotatorMode(mode, minAng, maxAng);
Serial.print("Rotator mode changed to: ");
if (mode == ROTATOR_MODE_LIMITED) {
Serial.print("Limited (");
Serial.print(minAng);
Serial.print("° to ");
Serial.print(maxAng);
Serial.println("°)");
} else {
Serial.println("Continuous");
}
}
/**
* Example function to send angle updates to web interface
* Call this function when your rotator position changes
*/
void sendAngleUpdate(float angle) {
currentAngle = angle;
webRotatorPage.sendToWebRotator(angle);
Serial.print("Angle update sent to web: ");
Serial.print(angle, 1);
Serial.println("°");
}
- 스케치의 WiFi 자격 증명을 업데이트합니다:
const char WIFI_SSID[] = "YOUR_WIFI_NETWORK";
const char WIFI_PASSWORD[] = "YOUR_WIFI_PASSWORD";
- Arduino IDE의 Upload 버튼을 클릭하여 코드를 Arduino Nano ESP32에 업로드합니다
- 시리얼 모니터를 엽니다
- 시리얼 모니터 출력은 다음과 유사해야 합니다:
8
Serial.println("Hello World!");
Message (Enter to send message to 'Arduino Nano ESP32' on 'COM15')
New Line
9600 baud
DIYables WebApp - Web Rotator Example
INFO: Added app /
INFO: Added app /web-rotator
DIYables WebApp Library
Platform: Arduino Nano ESP32
Network connected!
IP address: 192.168.0.2
HTTP server started on port 80
Configuring WebSocket server callbacks...
WebSocket server started on port 81
WebSocket URL: ws://192.168.0.2:81
WebSocket server started on port 81
==========================================
DIYables WebApp Ready!
==========================================
Web Interface: http://192.168.0.2
WebSocket: ws://192.168.0.2:81
Available Applications:
Home Page: http://192.168.0.2/
Web Rotator: http://192.168.0.2/web-rotator
==========================================
- 아무것도 표시되지 않으면 보드의 리셋 버튼을 누르세요.
- 시리얼 모니터의 IP 주소를 동일한 네트워크의 브라우저에 입력합니다.
- 예: http://192.168.0.2
- 홈 페이지에 로테이터 애플리케이션 카드가 표시됩니다:
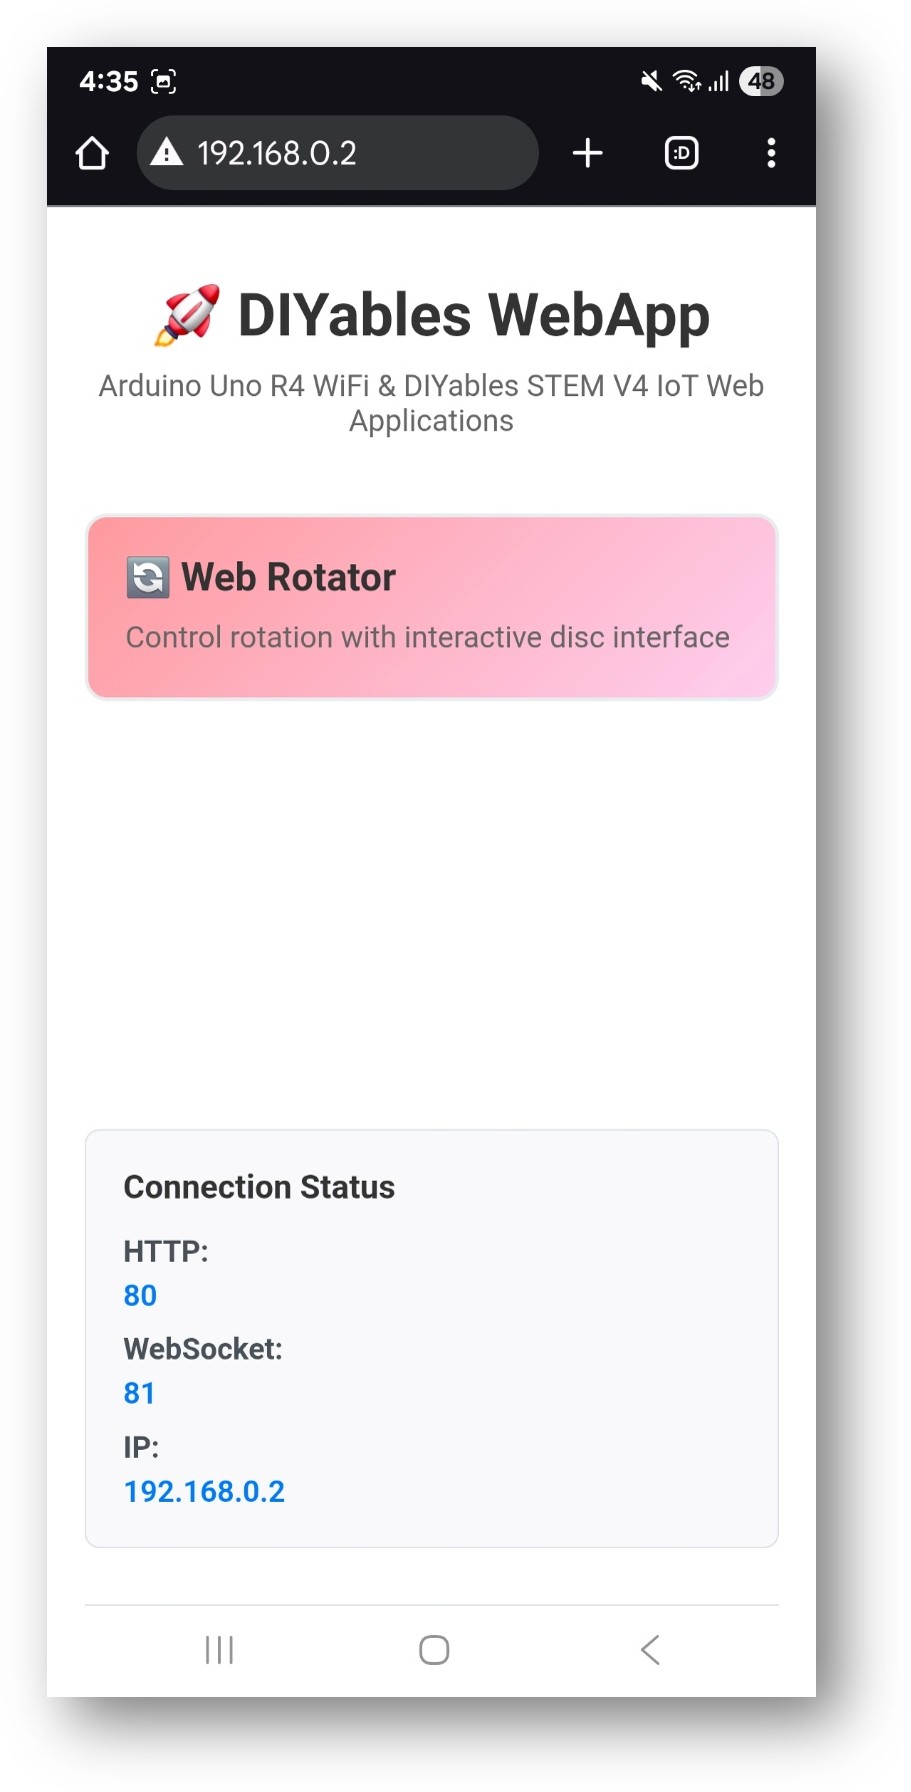
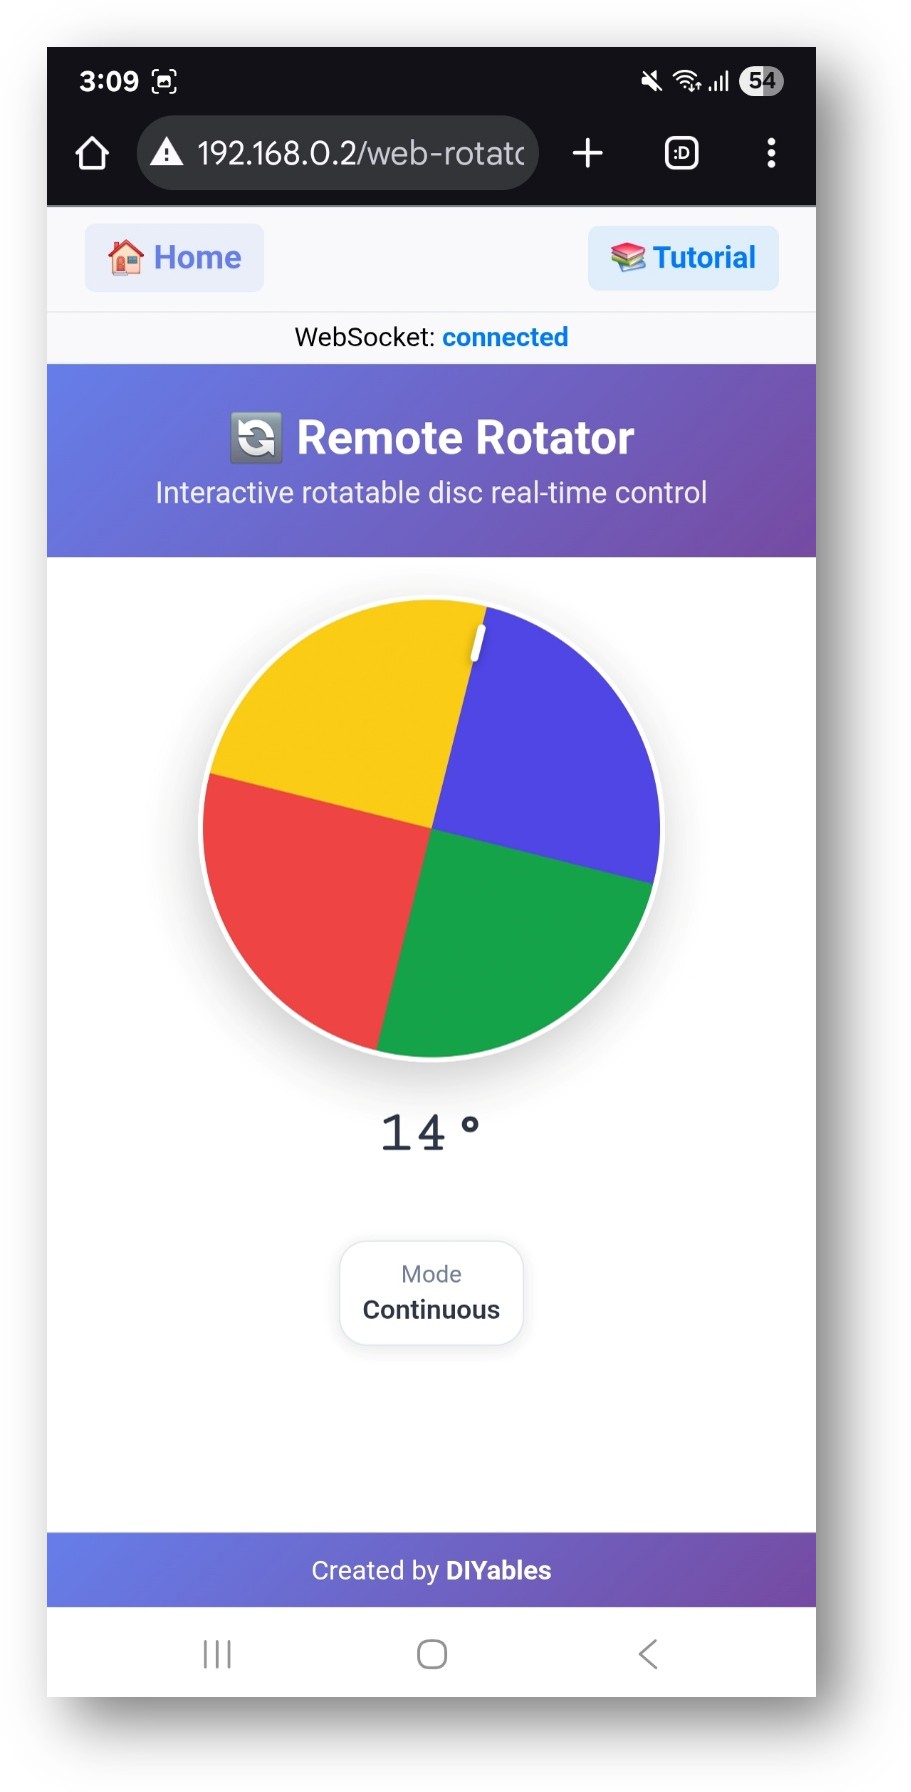
- 웹 로테이터 카드를 선택하여 디스크 제어 페이지를 엽니다:
- 페이지는 http://192.168.0.2/web-rotator에서 직접 접근할 수도 있습니다.
- 디스크를 드래그하고 시리얼 모니터에 보고되는 각도를 확인합니다.
회전 모드
연속 모드 (전체 0~360°)
DIYablesWebRotatorPage webRotatorPage(ROTATOR_MODE_CONTINUOUS);
제한 범위 모드
// Allows rotation between 0 and 180 degrees
DIYablesWebRotatorPage webRotatorPage(ROTATOR_MODE_LIMITED, 0.0, 180.0);
콜백
각도 업데이트 수신
사용자가 디스크를 회전시킬 때마다 호출됩니다:
webRotatorPage.onRotatorValueFromWeb([](float angle) {
currentAngle = angle;
Serial.println("Angle: " + String(angle));
// Apply to servo or stepper here
});
브라우저에 각도 제공하기
브라우저가 연결하여 현재 각도를 요청할 때 호출됩니다:
webRotatorPage.onRotatorValueToWeb([]() {
webRotatorPage.sendToWebRotator(currentAngle);
});
서보 모터 예제
브라우저 각도(0~180°)를 표준 서보에 매핑합니다:
#include <Servo.h>
Servo myServo;
void setup() {
myServo.attach(9);
// ... server and page setup ...
webRotatorPage.onRotatorValueFromWeb([](float angle) {
myServo.write((int)angle);
Serial.println("Servo angle: " + String((int)angle));
});
}
문제 해결
디스크 각도가 콜백을 트리거하지 않음
- webAppsServer.begin() 전에 onRotatorValueFromWeb이 등록되었는지 확인합니다
- 브라우저의 WebSocket 상태가 "connected"를 표시하는지 확인합니다
서보가 잘못된 위치로 이동함
- 각도 범위가 서보의 물리적 범위(일반적으로 0~180°)와 일치하는지 확인합니다
- 기계적 범위가 360° 미만인 경우 제한 범위 모드를 사용합니다
페이지에 접근할 수 없음
- 시리얼 모니터의 IP 주소를 확인합니다
- 보드와 브라우저 기기가 모두 동일한 2.4GHz 네트워크에 있는지 확인합니다


