DIYables ESP32 WebApps 라이브러리를 사용한 아두이노 나노 ESP32 웹 아날로그 게이지
개요
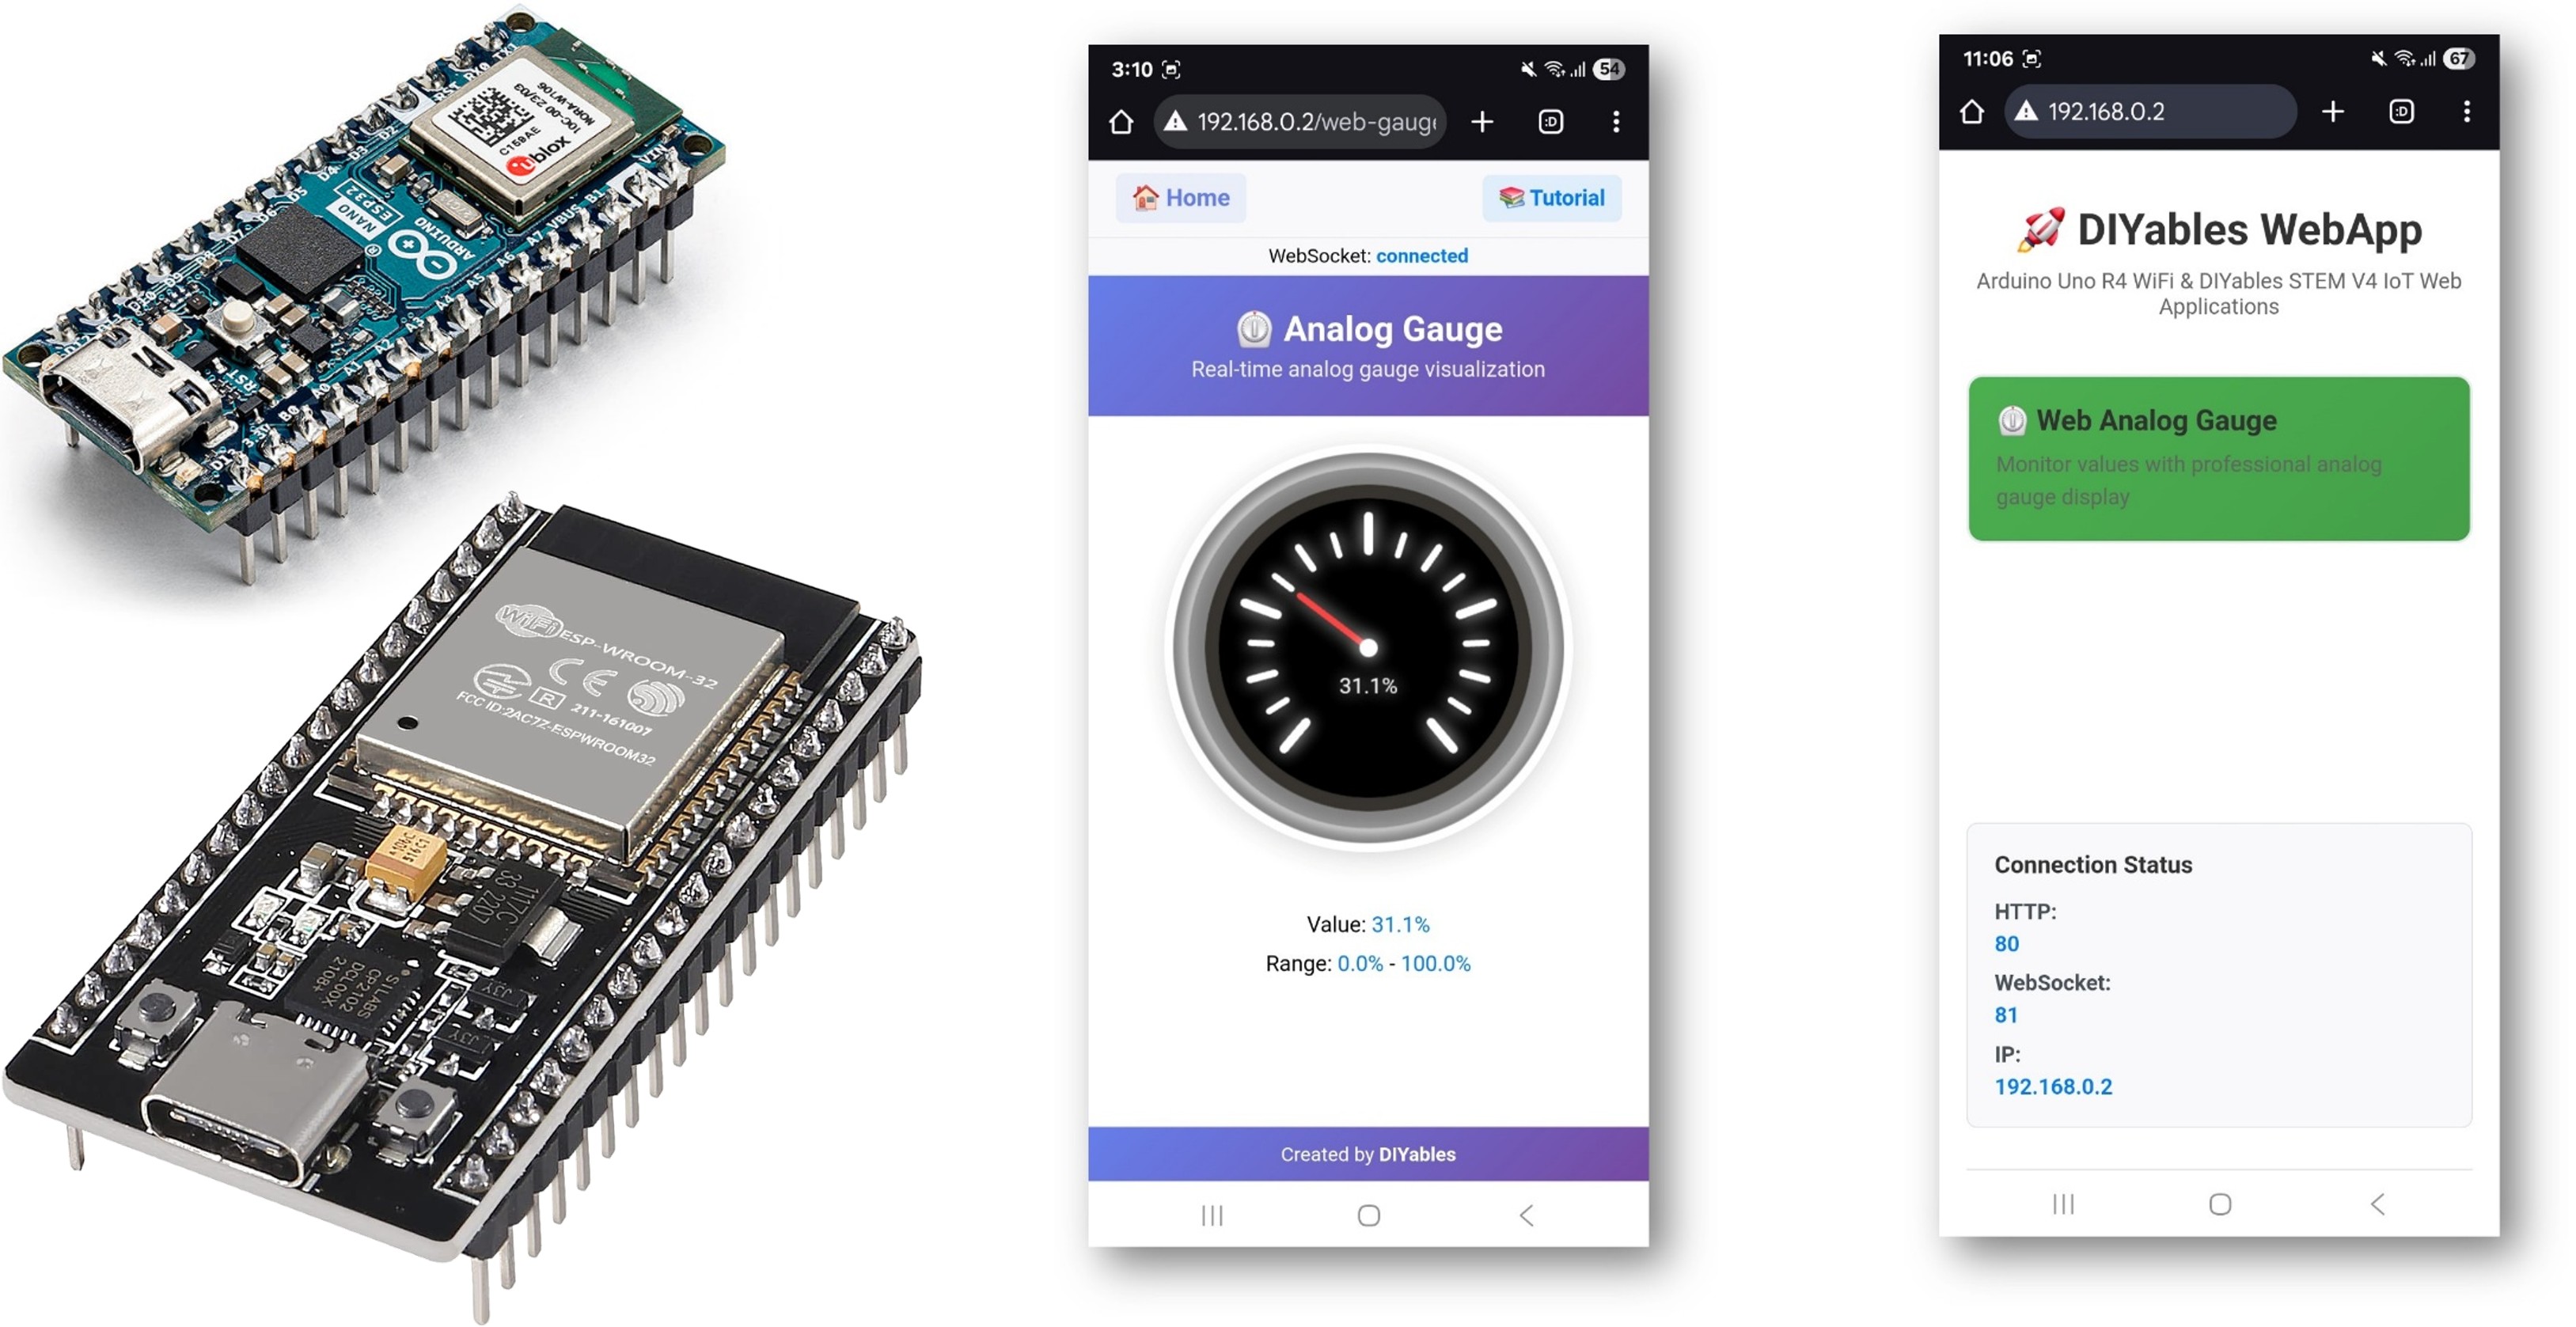
이 튜토리얼은 DIYables ESP32 WebApps 라이브러리의 DIYablesWebAnalogGaugePage 클래스를 다룹니다. 이 페이지는 브라우저에서 원형 게이지를 렌더링하고 WebSocket을 통해 Arduino Nano ESP32로부터 값 업데이트를 받습니다. 게이지 범위, 단위, 소수점 정밀도는 생성자에서 정의되며 브라우저가 이 구성을 자동으로 읽습니다.
포텐셔미터를 웹 아날로그 게이지 앱과 사용하는 방법을 보여주는 단계별 영상 튜토리얼:
이 튜토리얼에서 다루는 내용
- 사용자 정의 범위 및 단위 레이블로 게이지 페이지 구성하기
- 콜백을 사용하여 요청 시 센서 읽음값을 브라우저에 보내기
- 메인 루프에서 게이지 업데이트를 지속적으로 스트리밍하기
- 아날로그 입력 소스로 포텐셔미터 통합하기
준비물
| 1 | × | 아두이노 나노 ESP32 | 쿠팡 | 아마존 | |
| 1 | × | USB 케이블 타입-A to 타입-C (USB-A PC용) | 쿠팡 | 아마존 | |
| 1 | × | USB 케이블 타입-C to 타입-C (USB-C PC용) | 아마존 | |
| 1 | × | Potentiometer (optional for testing) | 쿠팡 | 아마존 | |
| 1 | × | 브레드보드 | 쿠팡 | 아마존 | |
| 1 | × | 점퍼케이블 | 쿠팡 | 아마존 | |
| 1 | × | (추천) 아두이노 나노용 스크루 터미널 확장 보드 | 쿠팡 | 아마존 | |
| 1 | × | (추천) 아두이노 나노용 브레이크아웃 확장 보드 | 쿠팡 | 아마존 | |
| 1 | × | (추천) 아두이노 나노 ESP32용 전원 분배기 | 쿠팡 | 아마존 |
공개: 이 포스팅 에 제공된 일부 링크는 아마존 제휴 링크입니다. 이 포스팅은 쿠팡 파트너스 활동의 일환으로, 이에 따른 일정액의 수수료를 제공받습니다.
단계
다음 지침을 단계별로 따르세요:
- Arduino Nano ESP32가 처음이라면, 아두이노 나노 ESP32 - 소프트웨어 설치 튜토리얼을 참조하세요.
- USB 케이블을 사용하여 Arduino Nano ESP32 보드를 컴퓨터에 연결합니다.
- 컴퓨터에서 Arduino IDE를 실행합니다.
- 적절한 보드(예: Arduino Nano ESP32)와 COM 포트를 선택합니다.
- Arduino IDE 왼쪽 바의 Libraries 아이콘으로 이동합니다.
- "DIYables ESP32 WebApps"를 검색하여 DIYables의 DIYables ESP32 WebApps 라이브러리를 찾습니다
- Install 버튼을 클릭하여 라이브러리를 설치합니다.
- Search for DIYables ESP32 WebApps created by DIYables and click the Install button.
1
void setup() {
- 다른 라이브러리 의존성 설치 요청을 받게 됩니다
- Install All 버튼을 클릭하여 모든 라이브러리 의존성을 설치합니다.
- Arduino IDE에서 File Examples DIYables ESP32 WebApps WebAnalogGauge 예제로 이동하거나, 위의 코드를 복사하여 Arduino IDE 편집기에 붙여넣습니다
/*
* DIYables WebApp Library - Web Analog Gauge Example
*
* This Serial.println("\nWebAnalogGauge is ready!");
Serial.print("IP Address: ");
Serial.println(webAppsServer.getLocalIP());
Serial.println("Open your web browser and navigate to:");
Serial.print("1. http://");
Serial.print(webAppsServer.getLocalIP());
Serial.println("/ (Home page)");
Serial.print("2. http://");
Serial.print(webAppsServer.getLocalIP());
Serial.println("/webanalogGauge (Analog Gauge)");
Serial.println("\nSimulating sensor data...");monstrates the Web Analog Gauge application:
* - Real-time analog gauge visualization
* - Simulated sensor data with smooth animation
* - WebSocket communication for live updates
* - Beautiful analog gauge with tick marks and smooth pointer movement
*
* Features:
* - Automatic gauge value simulation
* - Smooth animation between values
* - Range: 0° to 280° (customizable)
* - Real-time WebSocket updates
* - Professional analog gauge appearance
*
* Hardware: ESP32 Boards
*
* Setup:
* 1. Update WiFi credentials below
* 2. Upload the sketch to your Arduino
* 3. Open Serial Monitor to see the IP address
* 4. Navigate to http://[esp32-ip]/web-gauge in your web browser
*/
#include <DIYables_ESP32_Platform.h>
#include <DIYablesWebApps.h>
// WiFi credentials - UPDATE THESE WITH YOUR NETWORK
const char WIFI_SSID[] = "YOUR_WIFI_SSID";
const char WIFI_PASSWORD[] = "YOUR_WIFI_PASSWORD";
// Create WebApp server and page instances
ESP32ServerFactory serverFactory;
DIYablesWebAppServer webAppsServer(serverFactory, 80, 81);
DIYablesHomePage homePage;
// Gauge configuration constants
const float GAUGE_MIN_VALUE = 0.0;
const float GAUGE_MAX_VALUE = 100.0;
const String GAUGE_UNIT = "%";
DIYablesWebAnalogGaugePage webAnalogGaugePage(GAUGE_MIN_VALUE, GAUGE_MAX_VALUE, GAUGE_UNIT); // Range: 0-100%
// Other examples:
// DIYablesWebAnalogGaugePage webAnalogGaugePage(-50.0, 150.0, "°C"); // Temperature: -50°C to 150°C
// DIYablesWebAnalogGaugePage webAnalogGaugePage(0.0, 1023.0, ""); // Analog sensor: 0-1023 (no unit)
// DIYablesWebAnalogGaugePage webAnalogGaugePage(0.0, 5.0, "V"); // Voltage: 0-5V
// Simulation variables
unsigned long lastUpdateTime = 0;
const unsigned long UPDATE_INTERVAL = 500; // Update every 500ms (0.5 second)
const float STEP_SIZE = 1.0; // Step size for simulation
float currentGaugeValue = GAUGE_MIN_VALUE; // Start at minimum value
float step = STEP_SIZE; // Positive step means increasing, negative means decreasing
void setup() {
Serial.begin(9600);
delay(1000);
Serial.println("DIYables ESP32 WebApp - Web Analog Gauge Example");
// Add web applications to the server
webAppsServer.addApp(&homePage);
webAppsServer.addApp(&webAnalogGaugePage);
// Optional: Add 404 page for better user experience
webAppsServer.setNotFoundPage(DIYablesNotFoundPage());
// Start the WebApp server
if (!webAppsServer.begin(WIFI_SSID, WIFI_PASSWORD)) {
while (1) {
Serial.println("Failed to start WebApp server!");
delay(1000);
}
}
setupCallbacks();
}
void setupCallbacks() {
// Handle gauge value requests (when web page loads/reconnects)
webAnalogGaugePage.onGaugeValueRequest([]() {
webAnalogGaugePage.sendToWebAnalogGauge(currentGaugeValue);
Serial.println("Web client requested gauge value - Sent: " + String(currentGaugeValue, 1) + GAUGE_UNIT);
});
}
void loop() {
// Handle WebApp server communications
webAppsServer.loop();
// Update gauge with simulated sensor data
if (millis() - lastUpdateTime >= UPDATE_INTERVAL) {
lastUpdateTime = millis();
Serial.println("Updating gauge value..."); // Debug message
// Simple linear simulation: step changes direction at boundaries
currentGaugeValue += step;
// Change direction when reaching boundaries
if (currentGaugeValue >= GAUGE_MAX_VALUE || currentGaugeValue <= GAUGE_MIN_VALUE) {
step *= -1; // Reverse direction
}
// Ensure value stays within bounds (safety check)
if (currentGaugeValue < GAUGE_MIN_VALUE) currentGaugeValue = GAUGE_MIN_VALUE;
if (currentGaugeValue > GAUGE_MAX_VALUE) currentGaugeValue = GAUGE_MAX_VALUE;
// Send the new value to all connected web clients
webAnalogGaugePage.sendToWebAnalogGauge(currentGaugeValue);
// Print to serial for debugging
Serial.println("Gauge: " + String(currentGaugeValue, 1) + GAUGE_UNIT + " (" + (step > 0 ? "↑" : "↓") + ")");
}
delay(10);
}
- 스케치의 WiFi 자격 증명을 업데이트합니다:
const char WIFI_SSID[] = "YOUR_WIFI_NETWORK";
const char WIFI_PASSWORD[] = "YOUR_WIFI_PASSWORD";
- Arduino IDE의 Upload 버튼을 클릭하여 코드를 Arduino Nano ESP32에 업로드합니다
- 시리얼 모니터를 엽니다
- 시리얼 모니터 출력은 다음과 유사해야 합니다:
8
Serial.println("Hello World!");
Message (Enter to send message to 'Arduino Nano ESP32' on 'COM15')
New Line
9600 baud
DIYables WebApp - Web Analog Gauge Example
INFO: Added app /
INFO: Added app /web-gauge
DIYables WebApp Library
Platform: Arduino Nano ESP32
Network connected!
IP address: 192.168.0.2
HTTP server started on port 80
Configuring WebSocket server callbacks...
WebSocket server started on port 81
WebSocket URL: ws://192.168.0.2:81
WebSocket server started on port 81
==========================================
DIYables WebApp Ready!
==========================================
Web Interface: http://192.168.0.2
WebSocket: ws://192.168.0.2:81
Available Applications:
Home Page: http://192.168.0.2/
Web Analog Gauge: http://192.168.0.2/web-gauge
==========================================
- 아무것도 표시되지 않으면 보드의 리셋 버튼을 누르세요.
- 시리얼 모니터에 표시된 IP 주소를 동일한 네트워크의 기기 브라우저에 입력합니다.
- 예: http://192.168.0.2
- 홈 페이지에 게이지 애플리케이션 카드가 표시됩니다:
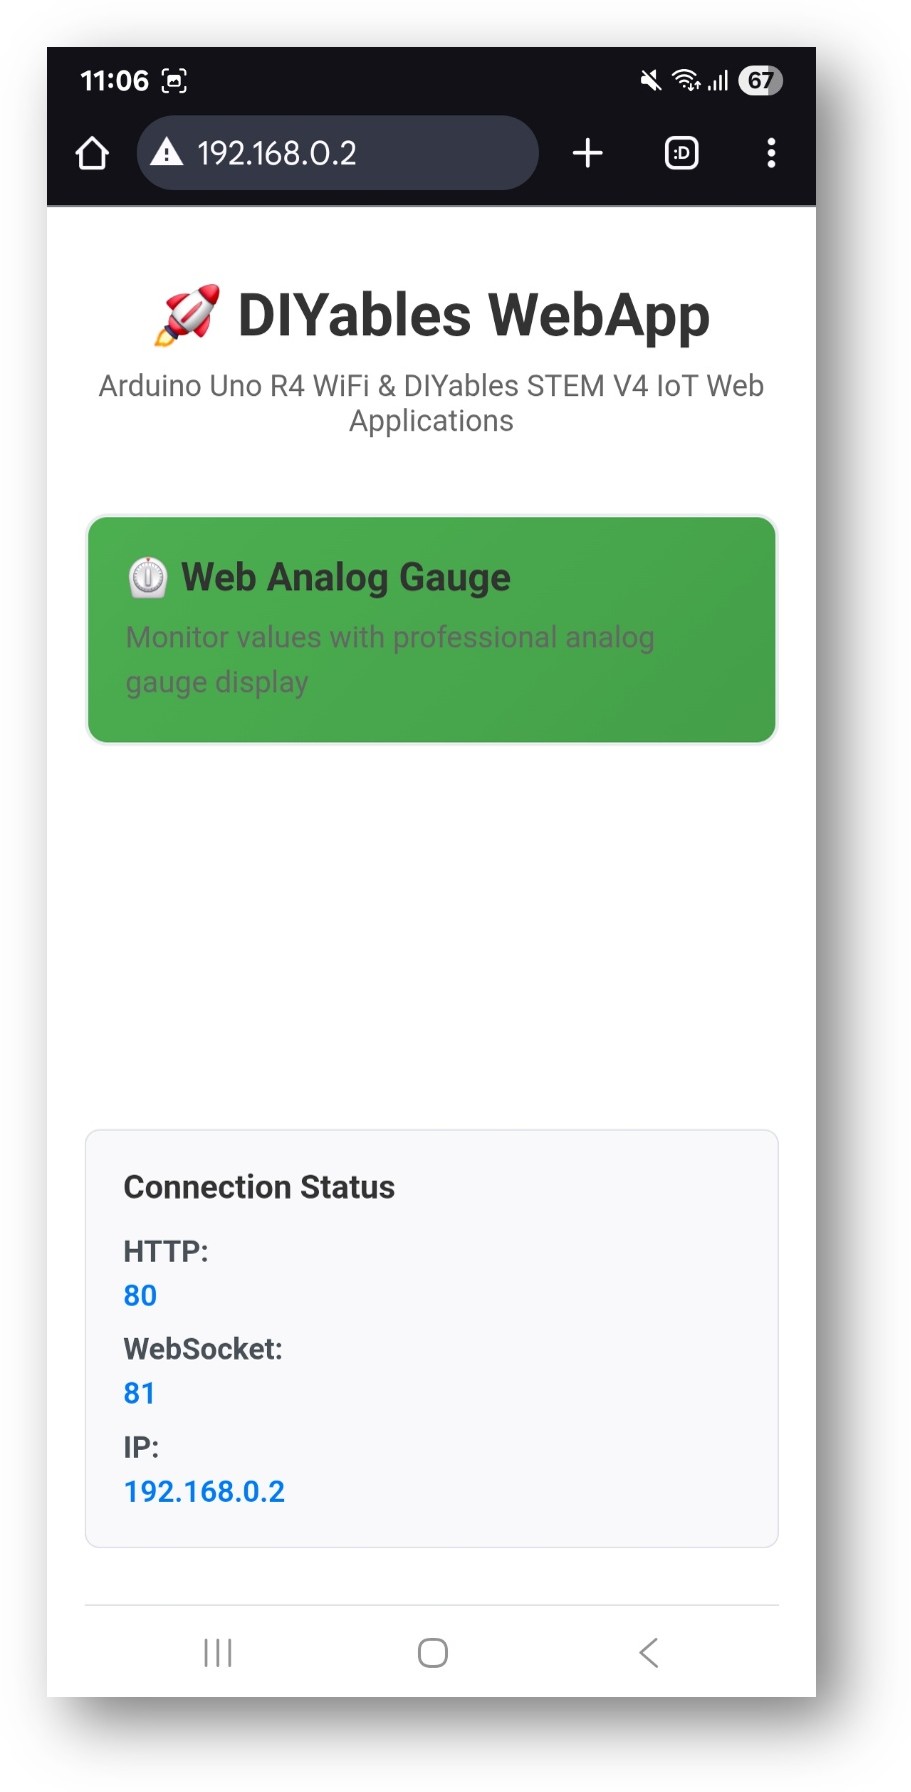
- 웹 아날로그 게이지 카드를 선택하여 게이지 페이지를 엽니다:
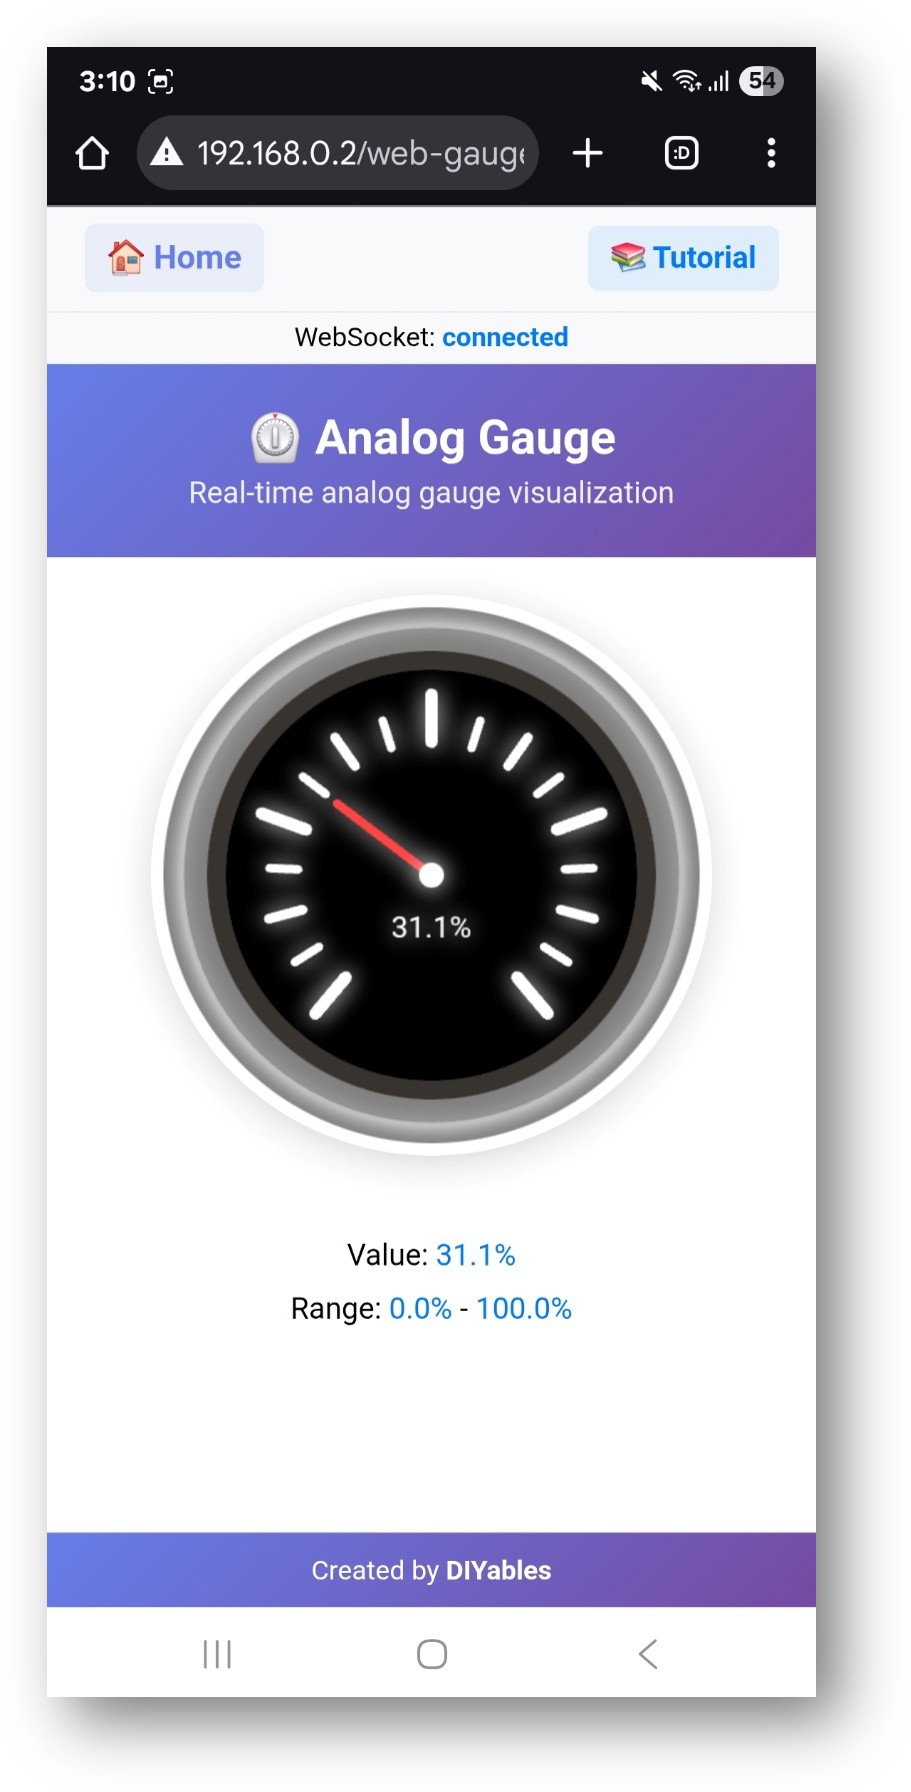
- 게이지는 http://192.168.0.2/web-gauge에서 직접 접근할 수도 있습니다.
게이지 구성
범위와 단위는 생성자에서 설정되며 연결 시 브라우저로 한 번 전송됩니다:
// Parameters: minimum, maximum, unit string
DIYablesWebAnalogGaugePage gaugePage(0.0, 100.0, "V");
값 요청 콜백은 브라우저가 연결하여 현재 읽음값을 요청할 때마다 호출됩니다:
gaugePage.onGaugeValueRequest(onGaugeValueRequested);
void onGaugeValueRequested() {
int raw = analogRead(A0);
float voltage = (raw / 1023.0) * 5.0;
gaugePage.sendGaugeValue(voltage);
}
연속 스트리밍(요청 시가 아닌)을 위해서는 원하는 간격으로 메인 루프에서 sendGaugeValue()를 호출합니다.
예제: 포텐셔미터 기반 게이지
라이브러리에는 바로 사용 가능한 포텐셔미터 예제가 포함되어 있습니다:
#include <DIYables_ESP32_Platform.h>
#include <DIYablesWebApps.h>
// WiFi credentials - UPDATE THESE WITH YOUR NETWORK
const char WIFI_SSID[] = "YOUR_WIFI_SSID";
const char WIFI_PASSWORD[] = "YOUR_WIFI_PASSWORD";
// Define pin
#define PIN_ANALOG 36
// Create WebApp server and page instances
ESP32ServerFactory serverFactory;
DIYablesWebAppServer webAppsServer(serverFactory, 80, 81);
DIYablesHomePage homePage;
// Gauge configuration constants
const float GAUGE_MIN_VALUE = 0.0;
const float GAUGE_MAX_VALUE = 100.0;
const String GAUGE_UNIT = "%";
DIYablesWebAnalogGaugePage webAnalogGaugePage(GAUGE_MIN_VALUE, GAUGE_MAX_VALUE, GAUGE_UNIT); // Range: 0-100%
// variables
unsigned long lastUpdateTime = 0;
const unsigned long UPDATE_INTERVAL = 500; // Update every 500ms (0.5 second)
const float STEP_SIZE = 1.0; // Step size for simulation
float currentGaugeValue = GAUGE_MIN_VALUE; // Start at minimum value
float step = STEP_SIZE; // Positive step means increasing, negative means decreasing
void setup() {
Serial.begin(9600);
delay(1000);
Serial.println("DIYables ESP32 WebApp - Web Analog Gauge Example");
// Add web applications to the server
webAppsServer.addApp(&homePage);
webAppsServer.addApp(&webAnalogGaugePage);
// Optional: Add 404 page for better user experience
webAppsServer.setNotFoundPage(DIYablesNotFoundPage());
// Start the WebApp server
if (!webAppsServer.begin(WIFI_SSID, WIFI_PASSWORD)) {
while (1) {
Serial.println("Failed to start WebApp server!");
delay(1000);
}
}
setupCallbacks();
}
void setupCallbacks() {
// Handle gauge value requests (when web page loads/reconnects)
webAnalogGaugePage.onGaugeValueRequest([]() {
webAnalogGaugePage.sendToWebAnalogGauge(currentGaugeValue);
Serial.println("Web client requested gauge value - Sent: " + String(currentGaugeValue, 1) + GAUGE_UNIT);
});
}
void loop() {
// Handle WebApp server communications
webAppsServer.loop();
// Update gauge with simulated sensor data
if (millis() - lastUpdateTime >= UPDATE_INTERVAL) {
lastUpdateTime = millis();
Serial.println("Updating gauge value..."); // Debug message
// Simple linear simulation: step changes direction at boundaries
//currentGaugeValue += step;
currentGaugeValue = analogRead(PIN_ANALOG);
currentGaugeValue = map(currentGaugeValue,0,4095,0,100);
// Change direction when reaching boundaries
if (currentGaugeValue >= GAUGE_MAX_VALUE || currentGaugeValue <= GAUGE_MIN_VALUE) {
step *= -1; // Reverse direction
}
// Ensure value stays within bounds (safety check)
if (currentGaugeValue < GAUGE_MIN_VALUE) currentGaugeValue = GAUGE_MIN_VALUE;
if (currentGaugeValue > GAUGE_MAX_VALUE) currentGaugeValue = GAUGE_MAX_VALUE;
// Send the new value to all connected web clients
webAnalogGaugePage.sendToWebAnalogGauge(currentGaugeValue);
// Print to serial for debugging
Serial.println("Gauge: " + String(currentGaugeValue, 1) + GAUGE_UNIT + " (" + (step > 0 ? "↑" : "↓") + ")");
}
delay(10);
}
일반적인 센서 유형
게이지는 알려진 범위에서 부동 소수점 값을 생성하는 모든 측정에 적합합니다:
- 전압 모니터링 (배터리, 전원 공급 장치)
- 보정된 센서의 온도 또는 습도
- 압력 변환기의 압력 읽음값
- LDR의 광 강도
- 엔지니어링 단위로 스케일링된 모든 아날로그 읽음값
문제 해결
게이지 바늘이 움직이지 않음
- webAppsServer.loop()가 loop()의 모든 반복에서 실행되는지 확인합니다
- WebSocket 연결 이벤트에 대해 시리얼 모니터를 확인합니다
- webAppsServer.begin() 전에 콜백이 할당되었는지 확인합니다
게이지에 잘못된 값이 표시됨
- 보드의 아날로그 기준 전압을 확인합니다
- 스케일링 공식이 원시 ADC 값을 구성된 범위에 올바르게 매핑하는지 확인합니다
- 콜백에 Serial.println(value)를 추가하여 전송 전 값을 검사합니다
페이지에 접근할 수 없음
- 시리얼 모니터의 IP 주소를 확인합니다
- 브라우저 기기가 보드와 동일한 2.4GHz 네트워크에 있는지 확인합니다
- 방화벽에서 포트 80이 차단되어 있지 않은지 확인합니다


