공개: 이 포스팅 에 제공된 일부 링크는 아마존 제휴 링크입니다. 이 포스팅은 쿠팡 파트너스 활동의 일환으로, 이에 따른 일정액의 수수료를 제공받습니다.
ESP32 및 웹 서버에 관하여
ESP32와 웹 서버(핀 배열, 작동 방식, 프로그래밍 포함)에 익숙하지 않다면, 다음 튜토리얼을 통해 배울 수 있습니다:
ESP32 - 웹 서버(BASE_URL/tutorials/esp32/esp32-web-server)
ESP32 코드 - 다중 페이지 웹 서버
아래는 여러 페이지를 가진 웹 서버를 생성하는 ESP32 코드의 전체입니다. 간단하게 유지하기 위해 각 페이지의 HTML 내용은 매우 단순하며 ESP32 코드에 바로 내장되어 있습니다. 다른 부분에서는 각 페이지의 HTML 내용을 별도의 파일로 분리하는 방법을 배우게 되어 코드를 더 정돈되고 관리하기 쉽게 만듭니다.
/* * 이 ESP32 코드는 newbiely.kr 에서 개발되었습니다 * 이 ESP32 코드는 어떠한 제한 없이 공개 사용을 위해 제공됩니다. * 상세한 지침 및 연결도에 대해서는 다음을 방문하세요: * https://newbiely.kr/tutorials/esp32/esp32-web-server-multiple-pages */#include <DIYables_ESP32_WebServer.h>#define LED_PIN 18 // ESP32 pin GPIO18 connected to LEDint LED_state = LOW;floatgetTemperature() {// YOUR SENSOR IMPLEMENTATION HERE// simulate the temperature valuefloat temp_x100 = random(0, 10000); // a ramdom value from 0 to 10000return temp_x100 / 100; // return the simulated temperature value from 0 to 100 in float}// WiFi credentialsconstchar WIFI_SSID[] = "YOUR_WIFI_SSID";constchar WIFI_PASSWORD[] = "YOUR_WIFI_PASSWORD";// Create web server instanceDIYables_ESP32_WebServer server;// Page handlersvoid handleHome(WiFiClient& client, const String& method, const String& request, const QueryParams& params, const String& jsonData) {Serial.println("Web Server: home page"); server.sendResponse(client, "This is the ESP32 home page");}void handleTemperature(WiFiClient& client, const String& method, const String& request, const QueryParams& params, const String& jsonData) {Serial.println("Web Server: temperature page");float temperature = getTemperature();String reponse = "Temperature: " + String(temperature); server.sendResponse(client, reponse.c_str());}void handleLed(WiFiClient& client, constString& method, constString& request, const QueryParams& params, constString& jsonData) {Serial.println("Web Server: LED page");// Check for the 'state' parameter in the query stringString state = "";for (int i = 0; i < params.count; i++) {if (String(params.params[i].key) == "state") { state = params.params[i].value;if (state == "on") { LED_state = HIGH; } elseif (state == "off") { LED_state = LOW; }// control LED heredigitalWrite(LED_PIN, LED_state);Serial.print(" => turning LED to ");Serial.print(state);Serial.println();break; } }String reponse = "LED state: " + String(LED_state); server.sendResponse(client, reponse.c_str());}void handleNotFound(WiFiClient& client, constString& method, constString& request, const QueryParams& params, constString& jsonData) {String response = "<!DOCTYPE html><html><head><meta charset=\"UTF-8\"><title>404 Not Found</title></head><body>"; response += "<h1>404 - Page Not Found</h1>"; response += "<p>Sorry, we couldn't find that page!</p>"; response += "<a href=\"/\">Return to Home</a></body></html>"; server.sendResponse(client, response.c_str());}voidsetup() {Serial.begin(9600);delay(1000);pinMode(LED_PIN, OUTPUT);Serial.println("ESP32 Web Server");// Configure routes server.addRoute("/", handleHome); server.addRoute("/temperature.html", handleTemperature); server.addRoute("/led.html", handleLed);// Set custom 404 handler server.setNotFoundHandler(handleNotFound);// Start web server with WiFi connection server.begin(WIFI_SSID, WIFI_PASSWORD);}voidloop() { server.handleClient();}
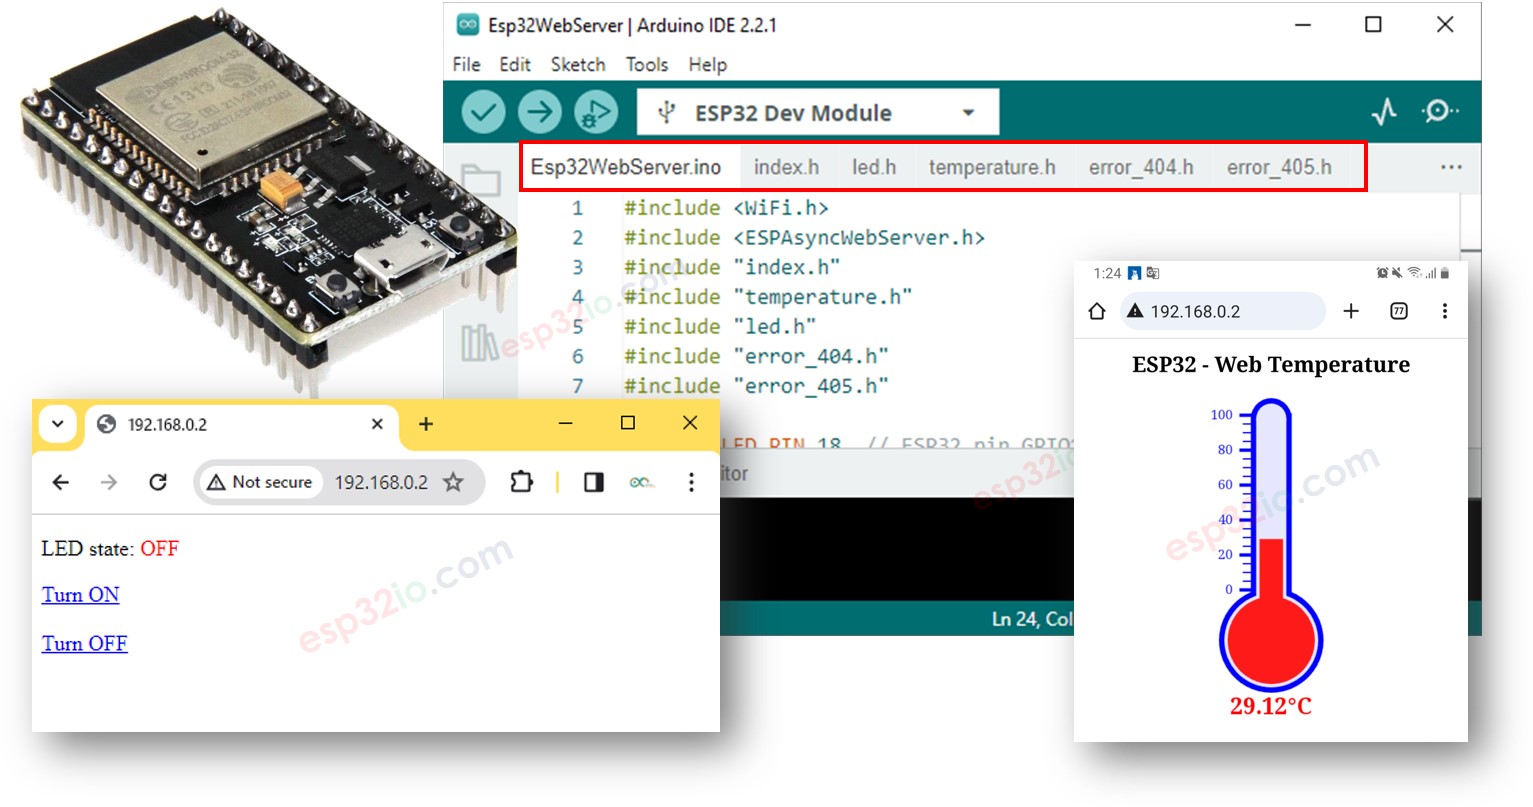
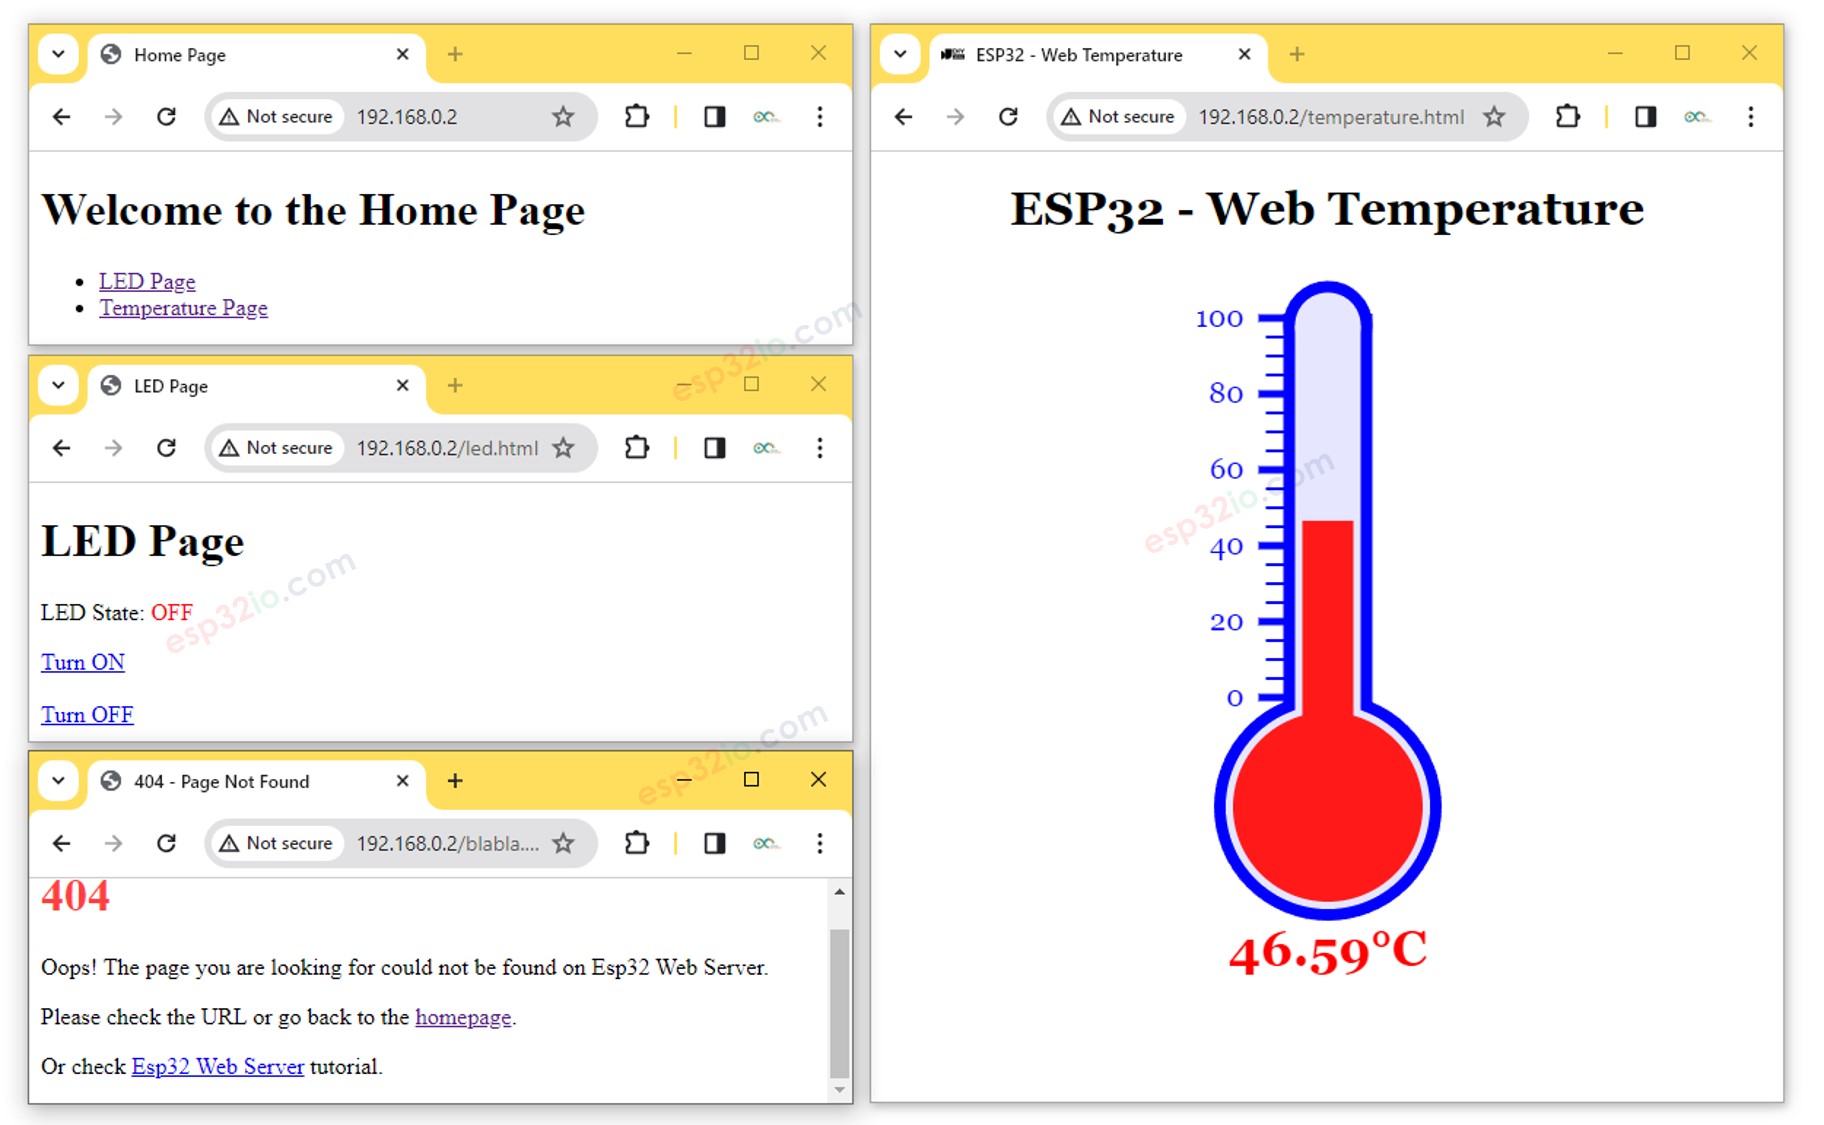
시리얼 모니터에서 받은 IP 주소로 192.168.0.2를 변경해야 한다는 점을 유의하시기 바랍니다.
다음 페이지들을 볼 수 있습니다: 홈 페이지, led 페이지, 온도 페이지 및 찾을 수 없는 페이지
시리얼 모니터에서 출력도 확인할 수 있습니다.
Newbiely | Arduino IDE 2.3.8
──
☐
✕
File
Edit
Sketch
Tools
Help
ESP32 Dev Module
Newbiely.ino
···
8Serial.println("Hello World!");
Output
Serial Monitor
Message (Enter to send message to 'ESP32 Dev Module' on 'COM15')
New Line
9600 baud
Connecting to WiFi...
Connected to WiFi
ESP32 Web Server's IP address: 192.168.0.2
ESP32 Web server started
Web Server: home page
Web Server: LED page
Web Server: LED page => turning LED to on
Web Server: LED page => turning LED to off
Web Server: temperature page
Web Server: Not Found
Ln 11, Col 1
ESP32 Dev Module on COM15
2
이전 코드에는 각 페이지마다 매우 간단한 HTML 콘텐츠가 있습니다. 하지만 많은 HTML로 멋진 인터페이스를 만들고 싶다면, 코드가 커지고 지저분해질 수 있습니다. 이를 간단하게 하기 위해, HTML을 ESP32 코드로부터 분리하는 방법을 배우게 될 것입니다. 이를 통해 HTML을 별도의 파일에 유지하여 관리하고 작업하기가 더 쉬워집니다.
ESP32 코드 - 여러 페이지 웹 서버 완성
아두이노 IDE를 엽니다.
새 스케치를 만들고 이름을 지정하세요. 예를 들어, ESP32WebServer.ino.
제공된 코드를 복사하여 해당 파일에 붙여넣습니다.
/* * 이 ESP32 코드는 newbiely.kr 에서 개발되었습니다 * 이 ESP32 코드는 어떠한 제한 없이 공개 사용을 위해 제공됩니다. * 상세한 지침 및 연결도에 대해서는 다음을 방문하세요: * https://newbiely.kr/tutorials/esp32/esp32-web-server-multiple-pages */#include <DIYables_ESP32_WebServer.h>#include"index.h"#include"temperature.h"#include"led.h"#include"error_404.h"#define LED_PIN 18 // ESP32 pin GPIO18 connected to LEDint LED_state = LOW;floatgetTemperature() {// YOUR SENSOR IMPLEMENTATION HERE// simulate the temperature valuefloat temp_x100 = random(0, 10000); // a ramdom value from 0 to 10000return temp_x100 / 100; // return the simulated temperature value from 0 to 100 in float}// WiFi credentialsconstchar WIFI_SSID[] = "YOUR_WIFI_SSID";constchar WIFI_PASSWORD[] = "YOUR_WIFI_PASSWORD";// Create web server instanceDIYables_ESP32_WebServer server;// Page handlersvoid handleHome(WiFiClient& client, const String& method, const String& request, const QueryParams& params, const String& jsonData) {Serial.println("Web Server: home page"); server.sendResponse(client, HTML_CONTENT_HOME);}void handleTemperature(WiFiClient& client, const String& method, const String& request, const QueryParams& params, const String& jsonData) {Serial.println("Web Server: temperature page");float temperature = getTemperature();String html = HTML_CONTENT_TEMPERATURE; // Use the HTML content from the temperature.h file html.replace("%TEMPERATURE_VALUE%", String(temperature)); // update the temperature value server.sendResponse(client, html.c_str());}void handleLed(WiFiClient& client, const String& method, const String& request, const QueryParams& params, const String& jsonData) {Serial.println("Web Server: LED page");// Check for the 'state' parameter in the query stringString state = "";for (int i = 0; i < params.count; i++) {if (String(params.params[i].key) == "state") { state = params.params[i].value;if (state == "on") { LED_state = HIGH; } elseif (state == "off") { LED_state = LOW; }// control LED heredigitalWrite(LED_PIN, LED_state);Serial.print(" => turning LED to ");Serial.print(state);Serial.println();break; } }String html = HTML_CONTENT_LED; // Use the HTML content from the led.h file html.replace("%LED_STATE%", LED_state ? "ON" : "OFF"); // update the LED state server.sendResponse(client, html.c_str());}void handleNotFound(WiFiClient& client, const String& method, const String& request, const QueryParams& params, const String& jsonData) {// Handle 404 Not Found errorSerial.println("Web Server: Not Found");// Use the HTML content from the error_404.h file server.sendResponse(client, HTML_CONTENT_404);}voidsetup() {Serial.begin(9600);delay(1000);pinMode(LED_PIN, OUTPUT);Serial.println("ESP32 Web Server");// Configure routes server.addRoute("/", handleHome); server.addRoute("/temperature.html", handleTemperature); server.addRoute("/led.html", handleLed);// Set custom 404 handler server.setNotFoundHandler(handleNotFound);// Start web server with WiFi connection server.begin(WIFI_SSID, WIFI_PASSWORD);}voidloop() { server.handleClient();}
코드에서 WiFi 정보(SSID와 비밀번호)를 여러분 것으로 바꾸세요.
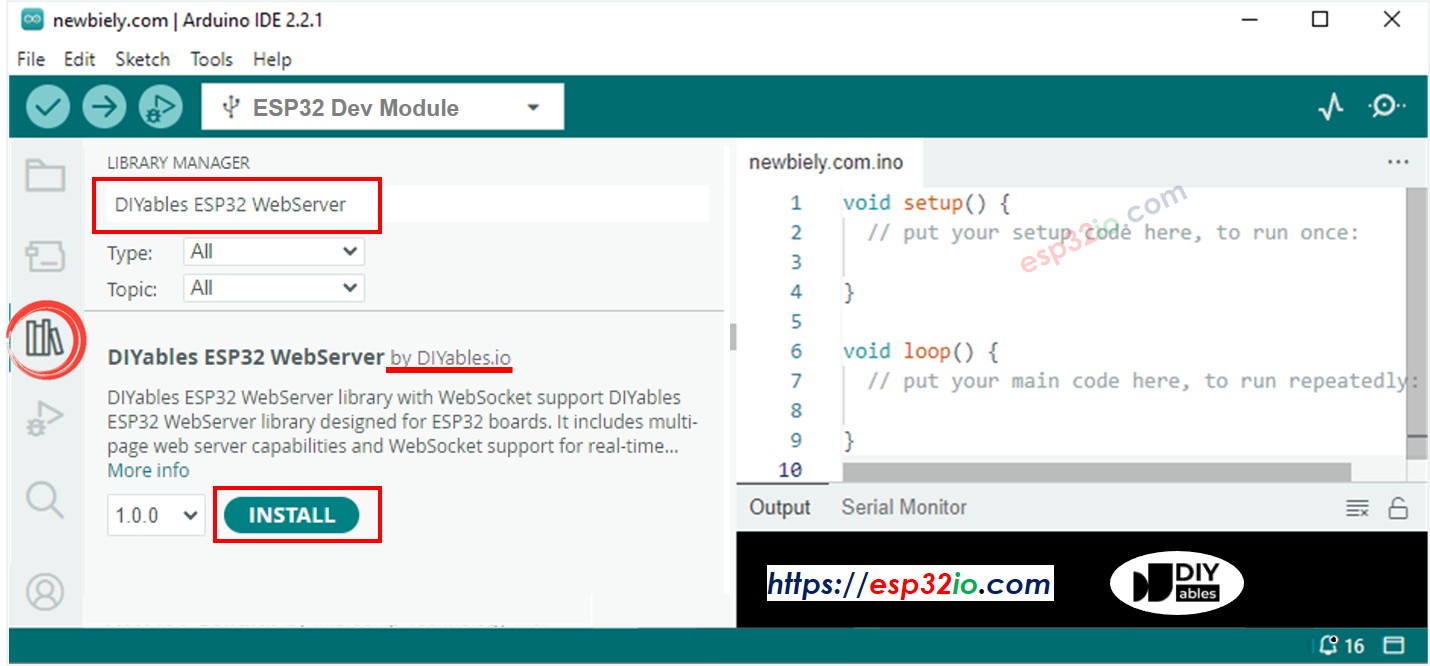
Arduino IDE에서 index.h 파일을 다음과 같이 생성하세요:
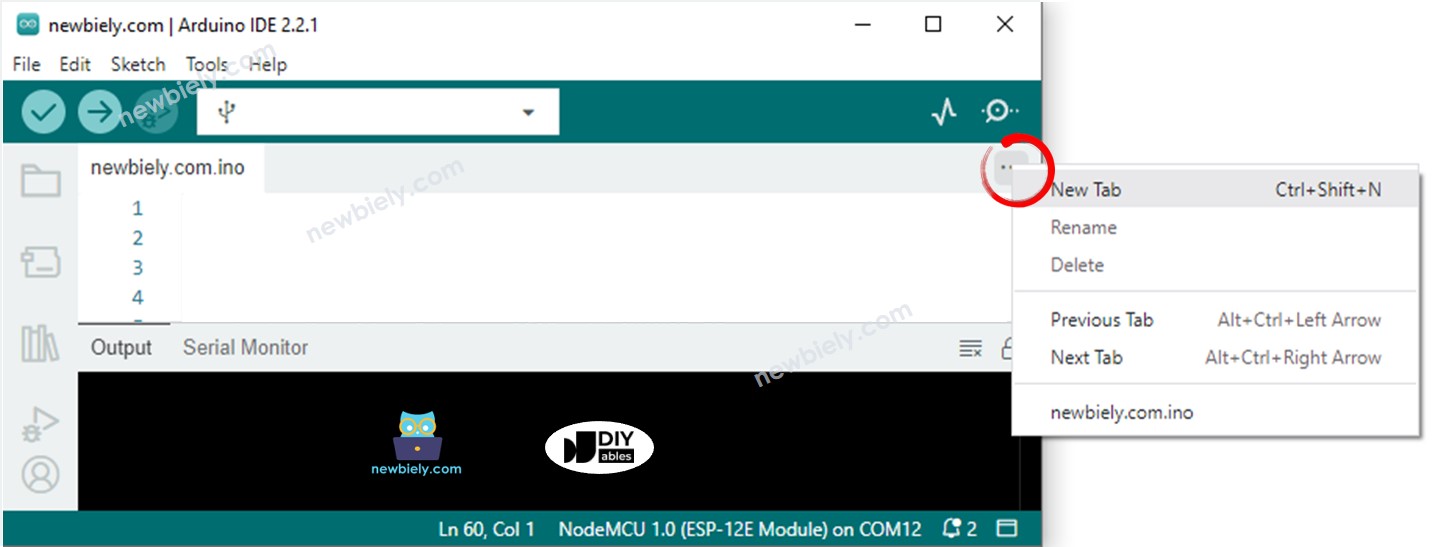
직렬 모니터 아이콘 바로 아래에 있는 버튼을 클릭한 다음 새 탭을 선택하거나, Ctrl+Shift+N 키를 사용하세요.
파일 이름에 index.h를 입력하고 OK 버튼을 클릭하세요.
아래 코드를 복사하여 index.h 파일에 붙여넣으세요.
/* * 이 ESP32 코드는 newbiely.kr 에서 개발되었습니다 * 이 ESP32 코드는 어떠한 제한 없이 공개 사용을 위해 제공됩니다. * 상세한 지침 및 연결도에 대해서는 다음을 방문하세요: * https://newbiely.kr/tutorials/esp32/esp32-web-server-multiple-pages */constchar *HTML_CONTENT_HOME = R"=====(<!DOCTYPE html><html lang="en"><head> <meta charset="UTF-8"> <meta name="viewport" content="width=device-width, initial-scale=1.0"> <link rel="icon" href="data:,"> <title>Home Page</title></head><body> <h1>Welcome to the Home Page</h1> <ul> <li><a href="/led.html">LED Page</a></li> <li><a href="/temperature.html">Temperature Page</a></li> </ul></body></html>)=====";
마찬가지로, 다음 내용으로 Arduino IDE에서 led.h 파일을 생성하세요.
/* * 이 ESP32 코드는 newbiely.kr 에서 개발되었습니다 * 이 ESP32 코드는 어떠한 제한 없이 공개 사용을 위해 제공됩니다. * 상세한 지침 및 연결도에 대해서는 다음을 방문하세요: * https://newbiely.kr/tutorials/esp32/esp32-web-server-multiple-pages */constchar *HTML_CONTENT_LED = R"=====(<!DOCTYPE html><html lang="en"><head> <meta charset="UTF-8"> <meta name="viewport" content="width=device-width, initial-scale=1.0"> <link rel="icon" href="data:,"> <title>LED Page</title></head><body> <h1>LED Page</h1> <p>LED State: <span style="color: red;">%LED_STATE%</span></p> <a href='/led.html?state=on'>Turn ON</a> <br><br> <a href='/led.html?state=off'>Turn OFF</a></body></html>)=====";
마찬가지로, 다음 내용을 포함하여 temperature.h 파일을 Arduino IDE에서 생성하세요.
/* * 이 ESP32 코드는 newbiely.kr 에서 개발되었습니다 * 이 ESP32 코드는 어떠한 제한 없이 공개 사용을 위해 제공됩니다. * 상세한 지침 및 연결도에 대해서는 다음을 방문하세요: * https://newbiely.kr/tutorials/esp32/esp32-web-server-multiple-pages */constchar *HTML_CONTENT_TEMPERATURE = R"=====(<!DOCTYPE html><html><head><title>ESP32 - Web Temperature</title><meta name="viewport" content="width=device-width, initial-scale=0.7, maximum-scale=0.7"><meta charset="utf-8"><link rel="icon" href="https://diyables.io/images/page/diyables.svg"><style>body { font-family: "Georgia"; text-align: center; font-size: width/2pt;}h1 { font-weight: bold; font-size: width/2pt;}h2 { font-weight: bold; font-size: width/2pt;}button { font-weight: bold; font-size: width/2pt;}</style><script>var cvs_width = 200, cvs_height = 450;function init() { var canvas = document.getElementById("cvs"); canvas.width = cvs_width; canvas.height = cvs_height + 50; var ctx = canvas.getContext("2d"); ctx.translate(cvs_width/2, cvs_height - 80); update_view(%TEMPERATURE_VALUE%);}function update_view(temp) { var canvas = document.getElementById("cvs"); var ctx = canvas.getContext("2d"); var radius = 70; var offset = 5; var width = 45; var height = 330; ctx.clearRect(-cvs_width/2, -350, cvs_width, cvs_height); ctx.strokeStyle="blue"; ctx.fillStyle="blue";//5-step Degree var x = -width/2; ctx.lineWidth=2;for (var i = 0; i <= 100; i+=5) { var y = -(height - radius)*i/100 - radius - 5; ctx.beginPath(); ctx.lineTo(x, y); ctx.lineTo(x - 20, y); ctx.stroke(); }//20-step Degree ctx.lineWidth=5;for (var i = 0; i <= 100; i+=20) { var y = -(height - radius)*i/100 - radius - 5; ctx.beginPath(); ctx.lineTo(x, y); ctx.lineTo(x - 25, y); ctx.stroke(); ctx.font="20px Georgia"; ctx.textBaseline="middle"; ctx.textAlign="right"; ctx.fillText(i.toString(), x - 35, y); }// shape ctx.lineWidth=16; ctx.beginPath(); ctx.arc(0, 0, radius, 0, 2 * Math.PI); ctx.stroke(); ctx.beginPath(); ctx.rect(-width/2, -height, width, height); ctx.stroke(); ctx.beginPath(); ctx.arc(0, -height, width/2, 0, 2 * Math.PI); ctx.stroke(); ctx.fillStyle="#e6e6ff"; ctx.beginPath(); ctx.arc(0, 0, radius, 0, 2 * Math.PI); ctx.fill(); ctx.beginPath(); ctx.rect(-width/2, -height, width, height); ctx.fill(); ctx.beginPath(); ctx.arc(0, -height, width/2, 0, 2 * Math.PI); ctx.fill(); ctx.fillStyle="#ff1a1a"; ctx.beginPath(); ctx.arc(0, 0, radius - offset, 0, 2 * Math.PI); ctx.fill(); temp = Math.round(temp * 100) / 100; var y = (height - radius)*temp/100.0 + radius + 5; ctx.beginPath(); ctx.rect(-width/2 + offset, -y, width - 2*offset, y); ctx.fill(); ctx.fillStyle="red"; ctx.font="bold 34px Georgia"; ctx.textBaseline="middle"; ctx.textAlign="center"; ctx.fillText(temp.toString() + "°C", 0, 100);}window.onload = init;</script></head><body><h1>ESP32 - Web Temperature</h1><canvas id="cvs"></canvas></body></html>)=====";
마찬가지로, error_404.h 파일을 다음 내용으로 Arduino IDE에 생성하십시오.
/* * 이 ESP32 코드는 newbiely.kr 에서 개발되었습니다 * 이 ESP32 코드는 어떠한 제한 없이 공개 사용을 위해 제공됩니다. * 상세한 지침 및 연결도에 대해서는 다음을 방문하세요: * https://newbiely.kr/tutorials/esp32/esp32-web-server-multiple-pages */constchar *HTML_CONTENT_404 = R"=====(<!DOCTYPE html><html lang="en"><head> <meta charset="UTF-8"> <meta name="viewport" content="width=device-width, initial-scale=1.0"> <link rel="icon" href="data:,"> <title>404 - Page Not Found</title> <style> h1 {color: #ff4040;} </style></head><body> <h1>404</h1> <p>Oops! The page you are looking for could not be found on Esp32 Web Server.</p> <p>Please check the URL or go back to the <a href="/">homepage</a>.</p> <p>Or check <a href="https://esp32io.com/tutorials/esp32-web-server-multiple-pages"> Esp32 Web Server</a> tutorial.</p></body></html>)=====";
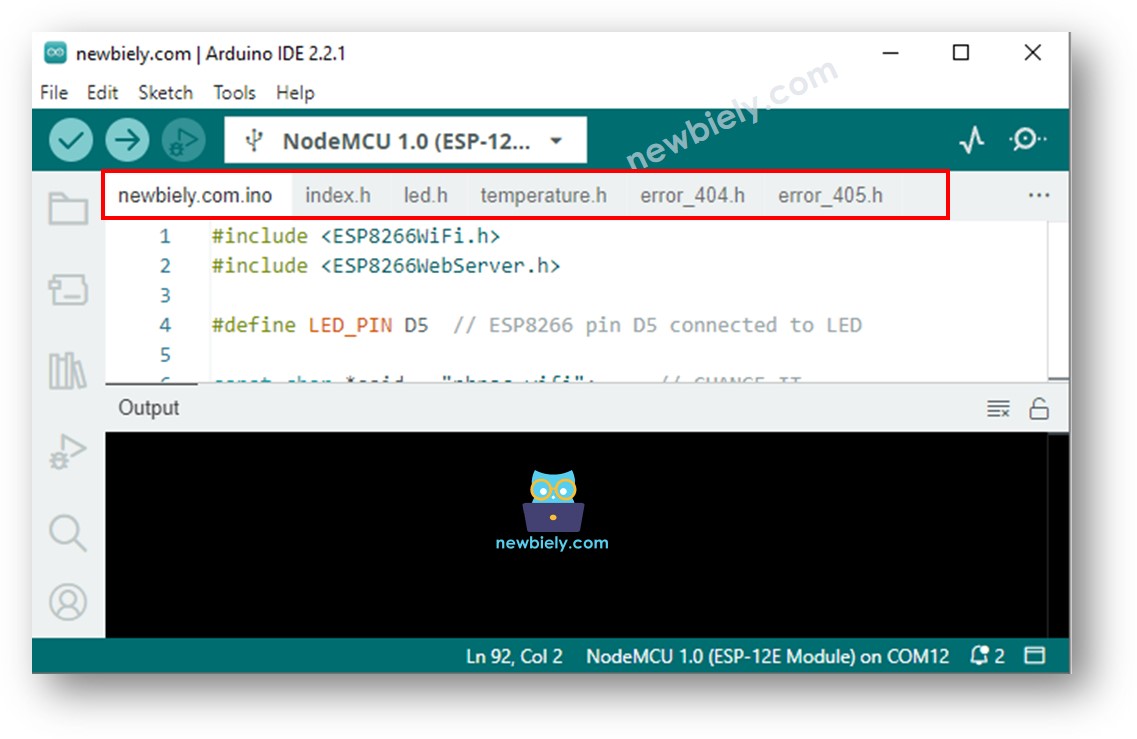
아두이노 IDE에 다음과 같이 여러 파일이 있습니다:
아두이노 IDE에서 Upload 버튼을 클릭하여 ESP32에 코드를 업로드하세요.
이전과 같이 웹 브라우저를 통해 ESP32 보드의 웹 페이지에 차례로 접속하세요. 아래와 같은 모든 웹 페이지를 보게 될 것입니다: