아두이노 안녕 세상
준비물
| 1 | × | 아두이노 우노 R3 | 쿠팡 | 아마존 | |
| 1 | × | USB 2.0 타입 A-to-B 케이블 (USB-A PC용) | 쿠팡 | 아마존 | |
| 1 | × | USB 2.0 타입 C-to-B 케이블 (USB-C PC용) | 아마존 | |
| 1 | × | (추천) 아두이노 우노용 스크루 터미널 블록 쉴드 | 쿠팡 | 아마존 | |
| 1 | × | (추천) Sensors/Servo Expansion Shield for Arduino Uno | 쿠팡 | 아마존 | |
| 1 | × | (추천) 아두이노 우노용 브레드보드 쉴드 | 쿠팡 | 아마존 | |
| 1 | × | (추천) 아두이노 우노용 케이스 | 쿠팡 | 아마존 | |
| 1 | × | (추천) 아두이노 우노용 프로토타이핑 베이스 플레이트 & 브레드보드 키트 | 아마존 |
공개: 이 포스팅 에 제공된 일부 링크는 아마존 제휴 링크입니다. 이 포스팅은 쿠팡 파트너스 활동의 일환으로, 이에 따른 일정액의 수수료를 제공받습니다.
빠른 단계들
- 아두이노를 PC에 USB 케이블을 통해 연결하십시오.
- 아두이노 IDE를 엽니다.
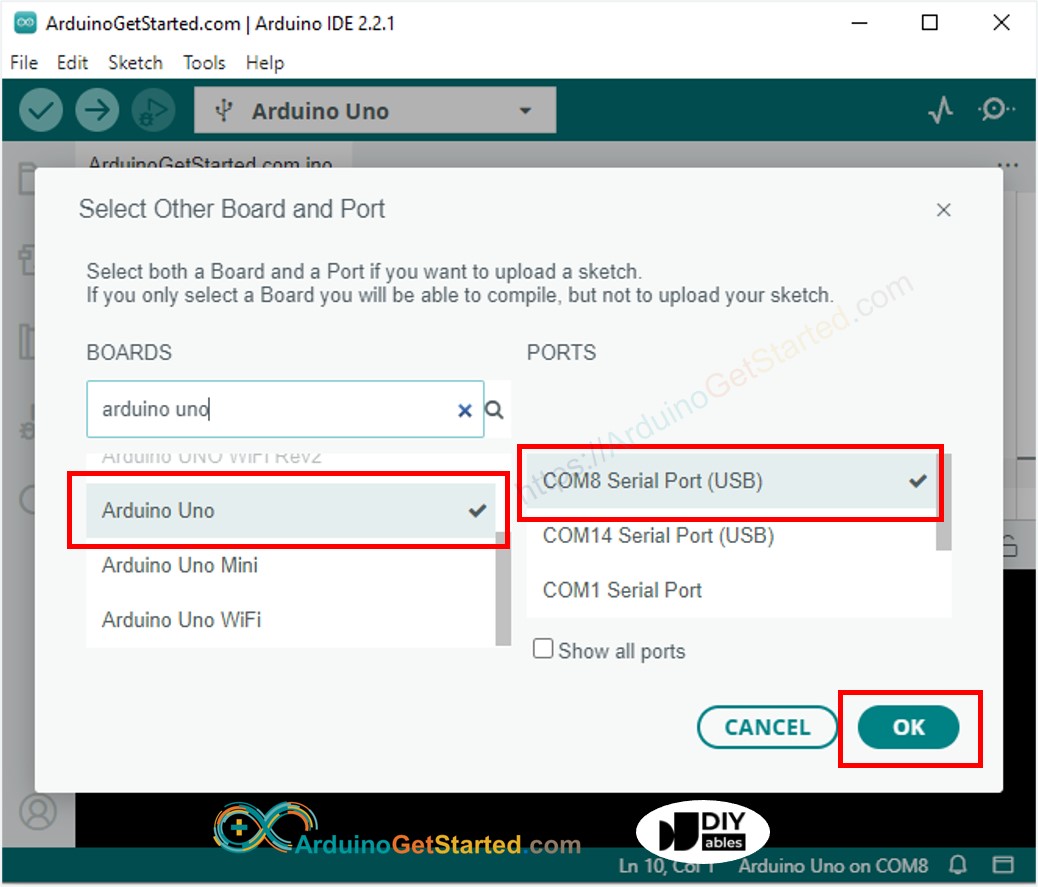
- 아두이노 보드를 선택하십시오.

아두이노 시리얼 포트 선택 (번호는 다를 수 있음)
다음 코드를 입력하세요
cpp
void setup() {
// 여기에 설정 코드를 넣으세요, 한 번만 실행됩니다:
Serial.begin(9600);
}
void loop() {
// 여기에 주요 코드를 넣으세요, 반복적으로 실행됩니다:
Serial.println("Hello World!");
delay(1000);
}
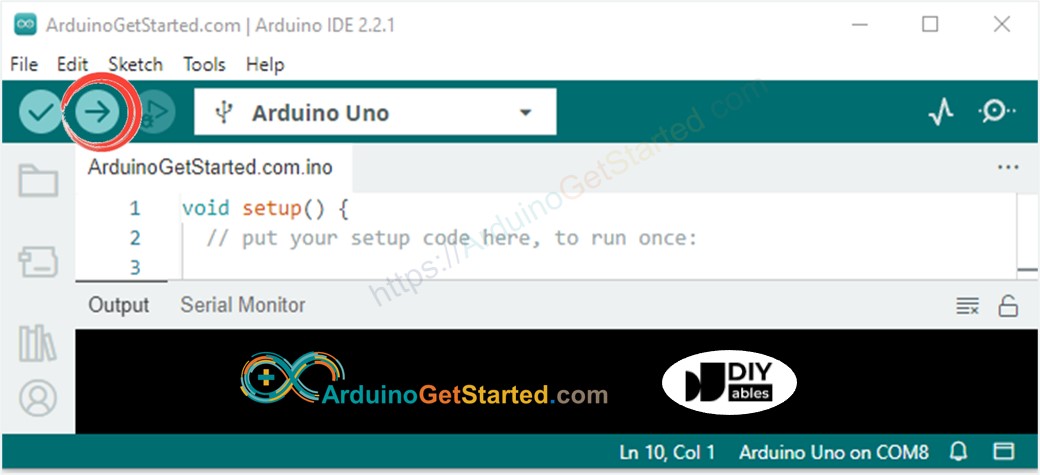
아두이노 IDE에서 아두이노로 코드를 업로드하려면 Upload 버튼을 클릭하세요.
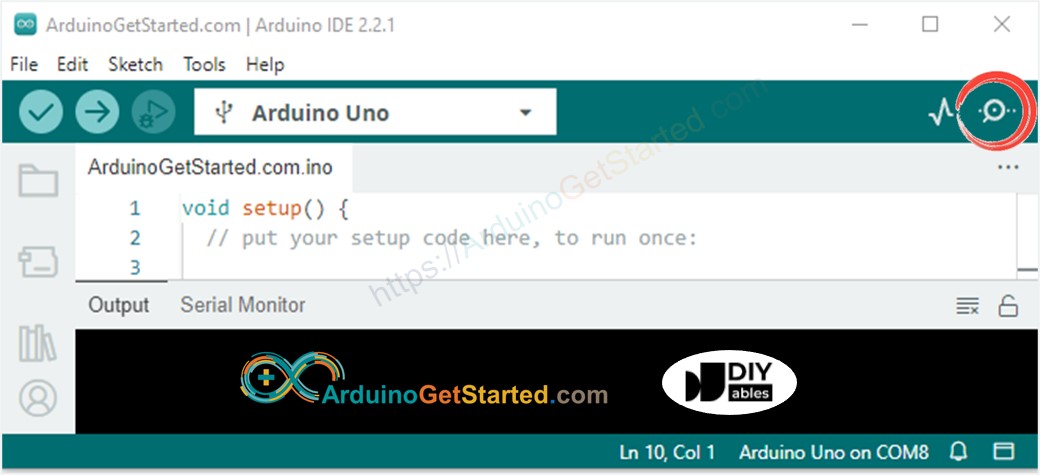
시리얼 모니터 아이콘을 클릭하여 시리얼 모니터를 엽니다.
- 시리얼 모니터에서 결과를 확인하세요:
8
Serial.println("Hello World!");
Message (Enter to send message to 'Arduino Uno' on 'COM15')
New Line
9600 baud
Hello World!
Hello World!
Hello World!
아두이노 코드 수정하기
- “Hello World!”를 예를 들어, “Arduino 시작하기”와 같은 다른 텍스트로 바꾸세요.
- 코드를 Arduino에 업로드하세요
- 시리얼 모니터에서 결과를 확인하세요
8
Serial.println("Hello World!");
Message (Enter to send message to 'Arduino Uno' on 'COM15')
New Line
9600 baud
Arduino Get Started
동영상
비디오 제작은 시간이 많이 걸리는 작업입니다. 비디오 튜토리얼이 학습에 도움이 되었다면, YouTube 채널 을 구독하여 알려 주시기 바랍니다. 비디오에 대한 높은 수요가 있다면, 비디오를 만들기 위해 노력하겠습니다.


